Essential Digital Design Basics for Handmade Creators: Tips to Elevate Your Craft Brand
yassy
Crafters!

Hello everyone, it's Yassy from Crafters! (・∀・)
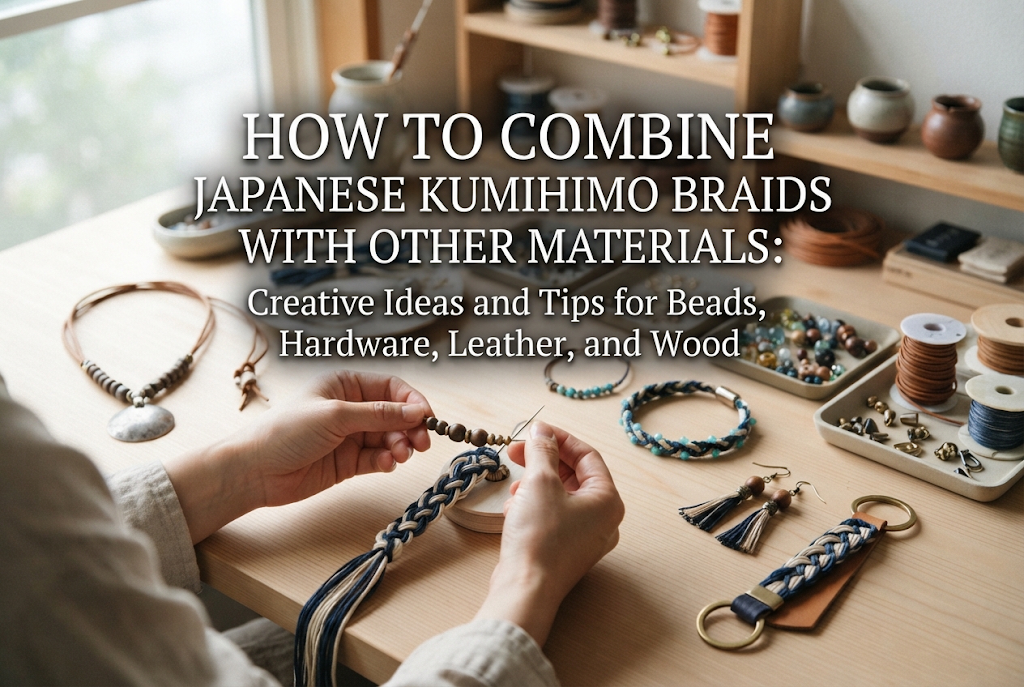
Kumihimo is a traditional Japanese craft celebrated for its beautiful woven cords. While it is deeply rooted in history—often seen as obi cords for kimono—combining Kumihimo with modern materials like beads, metal hardware, leather, and wood can transform it into stylish, practical everyday items. From casual bracelets and necklaces to bag charms and keychains, incorporating mixed media opens up a whole new world of creative possibilities.
However, many crafters run into common stumbling blocks: "How do I choose beads that fit the thread?" "My end caps keep slipping off!" or "Combining leather and wood makes my braid look bulky and awkward." Working with mixed materials requires a good understanding of each component's unique characteristics, strength, and attachment methods.
In this guide, I'll walk you through step-by-step techniques, essential precautions, and my own tried-and-tested tips for seamlessly combining various materials with Japanese Kumihimo. Let's elevate your braided cords into modern, professional-grade accessories!
Combining Kumihimo with beads is hugely popular worldwide under the name "KUMIHIMO with BEADS." Unlike working with thread alone, adding beads provides a sparkling brilliance and rich texture. There are two main approaches: pre-stringing beads onto the thread before braiding, and stitching or sliding beads on after the braid is complete.
The most seamless and elegant finish is achieved by stringing all required beads onto your Kumihimo threads before you start braiding on a Kumihimo disk or marudai. As you execute each move, you drop one bead into the central braid point before crossing the threads.
The single biggest mistake beginners make here is miscalculating the relationship between the bead hole size and the thread thickness. Standard seed beads will not slide over bundled embroidery floss or silk thread easily. To solve this, apply a small drop of anti-fraying liquid or fray checker to the tip of the thread to harden it like a needle, or use a flexible big-eye needle to string your beads.
If pre-stringing sounds too complex to calculate in advance, you can easily attach beads to a completed cord. You can either sew beads onto the surface using a needle and thread or slide large-hole beads (like rondelles or metal spacer beads) directly over the braid.
If you want to position a large-hole bead in the center as an accent, choose a bead with an inner diameter slightly smaller than the thickness of your braid. Gently stretch the braid to compress its diameter, slide the bead into place, and release. The natural expansion of the braid relaxing back to its original thickness will create friction that holds the bead securely without extra fasteners.
When converting Kumihimo cords into wearable jewelry or keychains, handling the raw ends and attaching clasps is an unavoidable step. No matter how perfectly you braid, sloppy end treatments or crooked hardware will instantly make a piece look amateurish.
The standard hardware for finishing round Kumihimo ends is a barrel-shaped end cap (known as katsura in Japanese craft terminology). The golden rule when selecting an end cap is to choose an inner diameter that is 0.5 mm to 1.0 mm smaller than the diameter of your braid. If there is a gap inside the cap, the adhesive bond strength drops significantly.
Here is the foolproof process for securing end caps:
Important Note on Glue: Standard cyanoacrylate super glues are brittle under impact and cause a chemical reaction that turns thread white and stiff ("blooming"). For jewelry, always use a flexible 2-part epoxy resin or an elastic polyurethane adhesive designed for crafts.
For flat Kumihimo braids—such as those made with Hira-Genji or Takadai techniques—ribbon crimp ends (often called waniguchi or alligator clamps in Japan) with serrated teeth are ideal. To attach them, apply a small dab of fabric glue inside the crimp, place a protective cloth over the metal, and press closed evenly using flat-nose pliers. Wrapping tape around your pliers or using a cloth buffer prevents scratching or stripping the metal plating.
The intricate woven patterns of Kumihimo contrast beautifully with the smooth, substantial texture of genuine or synthetic leather. This combination tones down the traditional look, resulting in chic, unisex items like bracelets, camera straps, and key rings.
When braiding hollow round structure cords (such as Yatsu-se-gumi or Edo-gumi), you can feed a 1.5 mm to 2.0 mm round leather cord through the center as a core (shin). This gives soft silk or polyester threads adequate structure and body, preventing the finished cord from bending awkwardly or collapsing.
Using genuine leather as a core allows the strap to soften and conform over time while maintaining internal durability, combining the flexibility of Kumihimo with long-lasting strength.
Another stylish technique is cutting thick vegetable-tanned leather into small tabs, punching holes with a leather hole punch, and attaching them to the ends of a Kumihimo cord using metal rivets (kashime). This creates a warm, natural aesthetic reminiscent of Scandinavian design.
When joining leather and Kumihimo, always account for both the leather thickness and how much the Kumihimo cord compresses. Select a rivet post length accordingly; if the post is too long, the rivet will bend sideways when set, and if it's too short, it won't grip the fibers firmly, causing the braid to pull out.
Pairing wood beads or specialized timber components with Kumihimo creates a soft, organic harmony unique to natural materials. Matte wood, unfinished birch, and rich walnut match exceptionally well with traditional Japanese dye shades like deep indigo (ai-iro), ancient purple (kodai-murasaki), and mustard yellow (karashi-iro).
While wood parts are lighter than metal, they tend to be larger. When designing bracelets or necklaces, placing large wooden beads on only one side can cause the piece to rotate downward when worn. Strive for symmetrical balance, or combine wood beads with decorative Kumihimo knots (such as Awaji or Yoshisho knots) to balance the visual weight.
Additionally, mass-produced wooden beads often have rough splinters or wood dust inside their drill holes. If you force fine silk or rayon Kumihimo cords through an uncleaned hole, the delicate fibers will catch and fray immediately. Before threading, use a small round file or a piece of bent wire to smooth out burrs inside the bead hole.
When combining materials with different physical properties, most issues stem from varying elasticity, friction, or adhesive failure. Keep these three points in mind before starting your project:
Kumihimo cords naturally stretch longitudinally and narrow in width when pulled or handled. If you attach end caps immediately after braiding, the cord will settle and thin out during normal use, leaving a gap inside the cap and causing the glue bond to fail.
Always smooth and gently tug the length of your braid to settle the stitches before measuring, cutting, and attaching hardware.
A frequent beginner mistake is using standard instant super glue on metal hardware and fabric braids. As super glue cures with moisture in the air, it releases vapors that leave a hard, white residue on surrounding fibers ("blooming"). Once light-colored thread turns white and rigid, it cannot be repaired.
Use rubber-based craft glues or flexible epoxy adhesives. Their ability to absorb shock ensures that your hardware stays attached over long-term wear.
Raw brass or copper findings can oxidize over time, producing a green patina (verdigris). If unplated brass rests directly against light-colored Kumihimo threads for an extended period, the metal can transfer dark stains onto the cord.
When working with light-colored threads, opt for rhodium-plated, nickel-free, or surgical stainless steel findings to prevent discoloration.
My personal favorite practical combination is an elegant double-wrap bracelet made with Silk Kumihimo × Natural Gemstone Beads × Brass Hardware.
Braid a thin 40 cm cord using a 4-strand round braid (Yotsu-gumi) or a spiral braid (Kongo-gumi). In the center section, connect 8 mm gemstone beads (like onyx or tiger's eye) using wire-wrapped loops. Add a small brass toggle clasp (mantel) at the ends. Wrapped twice around the wrist, it yields a sophisticated design that looks like it came from a boutique rather than feeling overly traditional.
Another top recommendation is a smartphone shoulder strap using a Flat Kumihimo Braid × Vegetable-Tanned Leather × Antique Gold Swivel Snaps. Use a soft, flat Kumihimo braid for the shoulder section to keep it comfortable against the skin, and attach sturdy leather tabs with swivel snaps at the ends where it connects to the phone case. The flexibility of the braid paired with the durability of leather offers the ultimate balance of utility and style!
Kumihimo is a beautiful traditional craft created by the deliberate crossing of individual threads. By introducing complementary materials—the shimmer of beads, the crisp edge of hardware, the warmth of leather, and the earthy comfort of wood—your creative avenues become truly endless.
Attaching hardware or sizing bead holes might feel tricky at first, but once you master material compatibility and proper attachment techniques, you can easily produce professional-quality pieces. Take a look inside your craft stash and ask yourself, "What would happen if I paired this charm with that thread?" Have fun exploring your own unique mixed-media creations!
If you enjoyed this guide, please share it with your fellow crafters on social media or messaging apps—it truly means the world to me!
Until next time, happy crafting! This was Yassy from Crafters!






For example, if you are looking for articles about mizuhiki, try searching for "mizuhiki"; if you are interested in tools, try keywords like "nippers" or "pliers."
