Complete Leather Care Guide: How to Prevent Mold, Cracking, and Losing Shape for a Lifetime of Use
yassy
Crafters!

Hello, everyone! It's Yassy from Crafters! (・∀・)
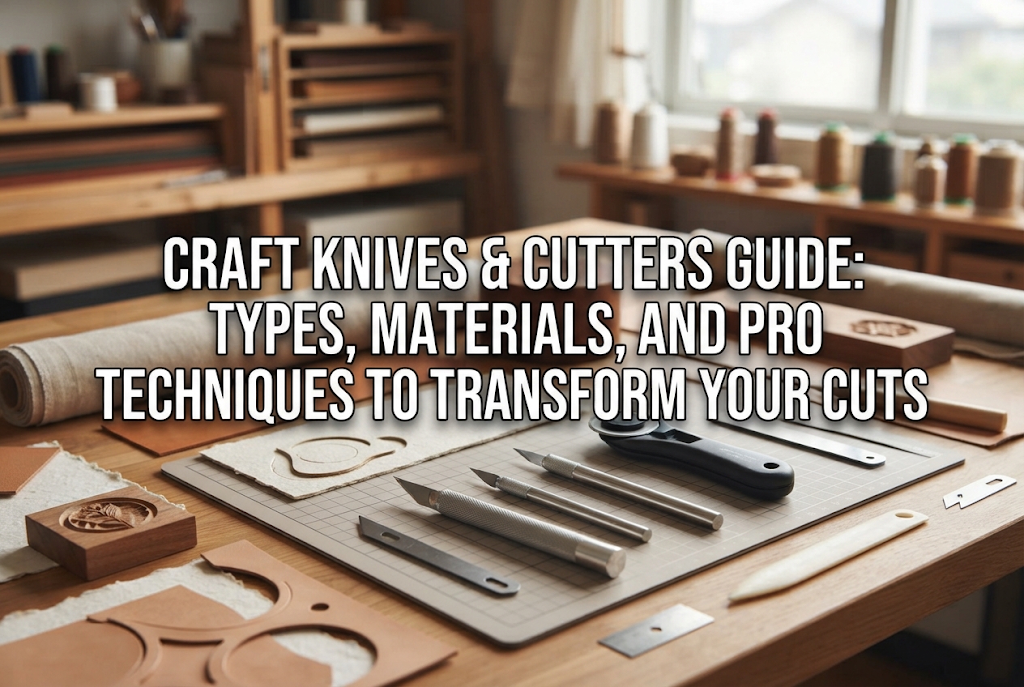
For all of you who enjoy crafting and handmade making: do you pay close attention to the utility knives and cutters you use? Whether it's paper, fabric, leather, shrink plastic, or chipboard, handmade projects constantly require cutting tasks. Yet, surprisingly many makers simply reach for whatever standard office utility knife happens to be lying around the house.
Let me be clear: simply changing the type of cutter and blade you use will dramatically elevate the quality of your finished work. Frayed cut edges, distorted curves, and hand fatigue that halts your progress are rarely caused by a lack of skill. Most often, they stem from choosing the wrong tool.
I personally love making, admiring, and buying handmade crafts, and I have created countless pieces over the years. Through that experience, I realized an absolute truth: the precision of your cut dictates the overall finish and polish of the entire project.
In this guide, I will share my full knowledge and hands-on experience, covering the types of cutters used in crafting, how to choose the right one for each material, and common beginner pitfalls with effective solutions. By the time you finish reading, you'll know precisely which tool you need and feel fully confident in making your choice. Let's elevate your craft work with the right cutting tools!
First, it is important to understand the fundamental difference between standard household utility knives and cutters built specifically for crafting. Everyday office cutters are designed for broad utility tasks, such as opening envelopes or slicing shipping tape on cardboard boxes. In contrast, craft cutters are engineered specifically for fine precision, clean cross-sections, and minimal stress on the material.
In crafting, blade sharpness and geometry directly affect your final results. When you cut with a dull or unsuitable blade, you aren't actually slicing the material—you are crushing and tearing it. This leads to frayed edges and crooked angles, giving the assembled piece a rough, cheap look no matter how carefully you put it together.
Choosing the right cutter designed for your craft offers distinct advantages:
Beginners often think, "I'll upgrade my tools once I get better," but that is a major misconception. Beginners are precisely the ones who benefit most from proper tools. With the right blade, you can achieve clean, professional-looking cut lines right from the start.
In craft making, cutters serve specific, well-defined roles. Understanding their unique features, best-suited materials, and structural differences will help you pick the right tool for the job. Here are seven fundamental cutter types worth knowing.
While it resembles a standard snap-off utility knife, the blade tip angle is completely different. Conventional utility blades feature an angle between 45 and 60 degrees, whereas precision craft knives use an acute 30-degree blade.
Because the tip is long and pointed, it offers an unobstructed line of sight, making it ideal for micro-cuts and intricate trimming. It is an absolute staple for papercraft, kirie (Japanese paper cutting), and detailed sticker making. Be sure to pick a model with a rigid, high-precision metal body that prevents blade play.
This cutter is held like a pen or pencil. A small, specialized blade is mounted into the tip of a cylindrical handle, allowing micro-movements of your fingers to translate directly to the cut point.
The standout advantage of a design knife is its ability to carve out curves. You can rotate your wrist smoothly while guiding the blade, making it unmatched for cutouts of intricate graphics and complex patterns. You can easily swap in various replacement blades depending on the task, from 30-degree and 45-degree tips to ultra-fine gouge blades.
Operating similarly to a pizza wheel, this tool cuts materials by rolling a circular blade across the surface. It is primarily used for fabric, felt, leather, and thin film.
Cutting fabric with a conventional utility knife pulls and distorts the fibers, resulting in crooked, frayed edges. A rotary cutter, however, applies downward pressure as it rolls, delivering a crisp, clean cut without dragging the cloth. It is an indispensable item for sewing, patchwork, and soft-craft projects.
Operating like a drafting compass, this tool anchors a center pivot point and rotates around it to cut clean circles out of paper, thin plastic sheets, and craft films.
Cutting a neat circle with scissors or freehand blades is notoriously difficult, but a circle cutter lets you slice out true circles in seconds, from small coin sizes to wide diameters. It is essential for making pinback badges, rosettes, and circular paper embellishments.
This dedicated tool is designed for cutting rigid plastics such as acrylic sheets, shrink plastic, and PVC. The blade features a hook-shaped tooth designed to scrape away material and create a groove, rather than slicing through in a single motion.
Trying to force a regular utility blade through rigid plastic often leads to slippage, cracked workpieces, or injuries. By scoring a groove about halfway through the sheet's thickness with an acrylic cutter, you can snap the material cleanly along the line for a sharp, flawless edge. It is indispensable for shrink-plastic jewelry and acrylic goods.
Rather than using mechanical friction, this electric tool uses heat to slice cleanly through expanded polystyrene (Styrofoam) and foam board. An electric current heats a thin wire, allowing it to glide through foam effortlessly.
Cutting foam with a standard blade typically generates piles of messy crumbs and leaves jagged edges. A hot wire cutter produces virtually no debris and creates smooth cut surfaces. It shines when building architectural models, dioramas, dollhouse foundations, and large decorations.
This sturdy cutter is built for dense leather, thick bookbinding board (such as greyboard for cartonnage), and wood sheets. It typically utilizes heavy blades 18mm or wider with reinforced blade thickness.
Using a thin blade on dense stock causes the metal to flex, leading to slanted cuts or the risk of the blade snapping. To drive a clean, straight line through stubborn materials, you need a substantial cutter featuring a solid metal guide frame and a firm locking mechanism.
Handmade crafts involve a wide range of materials. Using a mismatched cutter will not only ruin your material, but it will also introduce unnecessary frustration. Here is how to pair your material with the right cutter:
Recommended Cutters: 30-Degree Precision Craft Knife, Design KnifeWhile paper may seem easy to cut, it consists of bonded fibers that quickly expose any dullness in a blade. For straight-line box assemblies and card scoring, a 30-degree precision cutter works best. For intricate silhouettes and curvaceous papercraft, a pen-style design knife is your best choice.
Recommended Cutter: Rotary Cutter (28mm or 45mm)Avoid using standard stationary knives on fabrics. Cloth catches on the blade tip, stretching the weave and leaving frayed edges. A 45mm rotary cutter is ideal for slicing broad cuts of fabric quickly, while a 28mm mini cutter excels at tracing garment patterns and trimming small curved pieces.
Recommended Cutters: Heavy-Duty Utility Knife (18mm blade), 30-Degree Precision Craft Knife (for thin leather)Leathercraft demands rigid tool construction that does not yield to the thickness and density of hide. For heavy leather (2mm or thicker), use a heavy-duty cutter equipped with a rigid blade lock. Traditional leather craft knives (leather skiving knives) are popular, but beginners can substitute them effectively with a sturdy, wobble-free heavy-duty utility knife. For fine trimming on thinner leathers, a 30-degree craft knife works wonderfully.
Recommended Cutter: Acrylic Cutter (P-Cutter)When creating shrink-plastic charms and accessories, you often need to cut sheets before heating them. Ultra-thin plastic sheets (around 0.2mm) can be cut with scissors or a design knife, but for thicknesses of 0.3mm or more—and for cast acrylic sheets—a scoring cutter is required. Score a deep groove by scraping along the line multiple times, then snap the board cleanly over an edge.
Recommended Cutter: Medium to Heavy-Duty Utility Knife (with 30-degree or standard heavy blade)The 2mm-thick binding board used in cartonnage box-making and dollhouses severely tests both blade sharpness and handle rigidity. Attempting this with a lightweight pocket cutter forces you to make dozens of messy passes, resulting in beveled edges. Choose a hefty cutter with a metal sleeve, hold the blade at a slight angle, and guide it through in multiple measured, moderate passes.
If your cutting doesn't feel right, chances are you are running into a procedural issue rather than a lack of technique. Here are five frequent mistakes beginners make and the direct professional practices to solve them.
The most common and damaging mistake is hesitating to snap off worn blade segments. Utility blades are consumables. Even after cutting just a few sheets of paper, the tip micro-dulls. Forcing a dull blade through material demands excess hand pressure, leading to slips and injuries.
Don't hold back to save blade segments. The moment you feel even slight resistance or catching along the cut edge, snap off a segment immediately. Working consistently with a fresh, sharp tip is the fastest path to professional-level cuts.
Are you running your blade alongside a transparent plastic school or desk ruler? Never do this. The steel blade will bite into the soft plastic edge and shave it down. A gouged ruler produces wavy cut lines, and worse, the blade can climb over the damaged edge and cause severe injuries to your fingers.
Always use a stainless steel metal ruler or an acrylic cutting ruler fitted with a protective steel edge. A metal edge guarantees the blade slides smoothly without biting into the guide, producing a straight line safely.
When cutting dense chipboard or leather, people often press down hard in an attempt to cut completely through on the first stroke. This is the primary reason cut lines wander. Applying excessive force causes your hand to slip and pulls the blade away from your guide ruler.
The golden rule for thick stock is to make multiple light passes along the same groove. The first pass should simply score a light reference groove. Deepen it on the second and third passes, and allow the material to part cleanly around the fifth or sixth pass. Focus on pass count rather than sheer muscle power to achieve vertical, square edges.
Are you working on top of discarded cardboard boxes or magazines? Cutting over soft, uneven cardboard causes the blade tip to sink too deep, wavering your cut and dulling the edge rapidly.
Always lay down a dedicated self-healing craft cutting mat. These mats provide the ideal firmness to support the blade tip without damaging it, and their surface texture prevents material from shifting. I recommend choosing a roomy A3 or A2 mat over a tiny one. When mats are too small, rulers and materials hang off the edges, disrupting your cutting flow.
Extending a utility blade three or four segments out is dangerous and ruins cutting accuracy. A long blade flexes under downward pressure, tilting the cut angle and leaving a beveled edge.
As a rule, extend the blade only by a single segment—just a few millimeters. Having it extend 1 to 2mm beyond the thickness of your material is plenty. Keeping the blade extension minimal eliminates flex and keeps your cuts perpendicular to the mat.
If you're wondering where to start among all these options, here are the three core cutters and auxiliary tools I recommend picking up first. This is the exact setup I rely on constantly in my own studio and consider essential for versatile craft work.
Auxiliary tools are just as vital as the cutter itself. Pair your blades with these two essentials:
Once you have good tools, treat them with proper care and storage habits. Maintaining your gear ensures reliable sharpness and prevents workplace accidents.
Cutting masking tape, double-sided tape, or sticker paper leaves gummy adhesive on the blade. Leaving this residue on the steel dulls cutting efficiency drastically and causes papers to tear.
Wipe the blade clean using a tissue dampened with adhesive remover, rubbing alcohol, or citrus oil (limonene). If you cut sticky tapes frequently, look for replacement blades treated with fluoropolymer (PTFE) or titanium coatings designed to resist adhesive buildup.
Beginners often hesitate to snap worn blades, but dedicated blade-snapping cases (such as the Olfa Blade Disposal Case) let you snap segments off safely in a second. While you can snap segments using the removable pocket clip on the back of the knife handle, loose segments can fly off unpredictably.
Enclosed blade cases trap discarded segments safely inside, preventing sharp metal pieces from piercing through garbage bags. Once full, dispose of the sealed container according to your local waste management guidelines for scrap metal or hazardous items.
Many craft blades are forged from carbon tool steel, which is prone to moisture. Handling blades with sweaty fingers or storing tools in humid rooms causes microscopic rust along the cutting edge, destroying sharpness.
Always retract the blade fully into the handle after use and keep tools in a dry area. If you plan to store blades unused for an extended period, applying a light coat of anti-rust tool oil or mineral sewing machine oil will keep the steel in peak condition.
Here is a quick checklist of the best cutter choices and key points for each material:
We've taken a deep dive into the types of craft cutters and how to pick the right one for your materials.
A craft cutter is far more than mere desk stationery—it is your most vital partner in turning creative ideas into finished physical objects. Rather than making do with whatever blade is within reach, select a cutter engineered for your specific material, use safe, proper techniques, and refresh your blades often.
With just these adjustments, the crispness of your cut edges will improve remarkably, lifting your overall work to a clean, professional standard. Cutting becomes genuinely satisfying, making your craft sessions far more rewarding and enjoyable.
Equip yourself with the right cutting tools and bring your ideal craft designs to life!
If you found this guide helpful, sharing it with your crafting friends on social media means the world to me. See you in the next article! This was Yassy from Crafters!




For example, if you are looking for articles about mizuhiki, try searching for "mizuhiki"; if you are interested in tools, try keywords like "nippers" or "pliers."
