Upgrade Your Soapmaking Tools: The Essential Priority Guide for Professional Quality
yassy
Crafters!

Hello, this is Yassy from Crafters! (・∀・)
I love making, admiring, and buying all kinds of handmade crafts. Through my experience, I have become convinced of one thing: the ultimate factor that determines the finished quality of a piece is tool precision. Especially when building three-dimensional projects—whether in leather, paper, clay, or woodworking—a discrepancy of just a single millimeter can distort an entire piece.
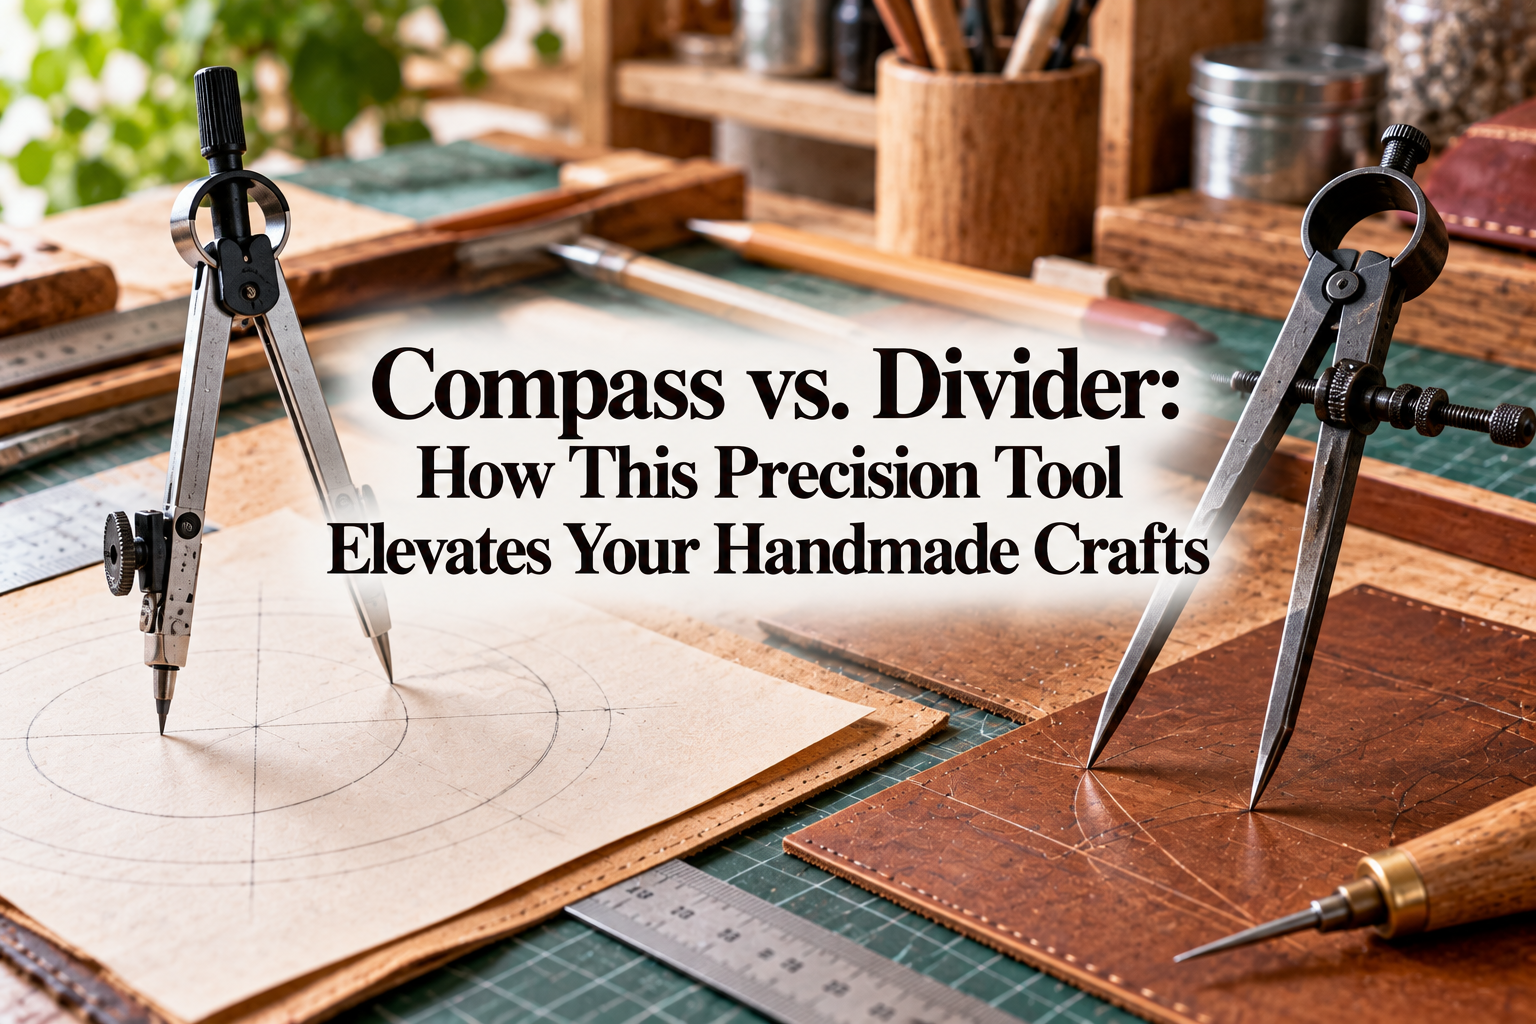
Two indispensable tools for drastically boosting your accuracy are the compass and the divider. While many people remember using a compass during school days, surprisingly few crafters understand the clear distinction between the two in a workshop setting or realize the immense value that a divider brings to handmade work.
"What is the difference between a compass and a divider?" "Can't I just use a standard school compass?" Here, I will answer all these questions in depth. From practical handling tips to preventing mistakes and key points to inspect before buying, this guide covers everything you need to know to take your craft precision to a professional level.
Let's clearly define the core differences between a compass and a divider. While they look almost identical at first glance, their purposes and designs are completely different. Understanding this distinction is the first step toward creating beautiful, finely aligned work.
A compass is equipped with a sharp needle point on one leg and a pencil, lead holder, or pen attachment on the other. Its primary purpose is to draw circles and arcs directly onto the surface of your material.
It is ideally suited for sketching clean circles on paper or marking cutting guidelines onto clay or wood. Its defining characteristic is leaving a visible, distinct line of ink or graphite. Whenever marking directly onto a material with graphite or ink poses no problem, a compass works wonderfully.
A divider, by contrast, features sharp metal needles on both legs. It is not designed to hold writing instruments.
A divider serves three primary roles in crafting:
Because it marks using a fine metal point rather than ink or graphite, there is zero measurement error caused by the thickness of a pencil lead. When you need exact placement down to 0.1 mm, a dual-needle divider is the only tool that can deliver it reliably.
In a handmade craft workshop, the tool that gets used far more frequently and proves truly indispensable is the divider, rather than the compass.
Drawing pencil lines directly on materials like leather, paper, or wood means you will have to erase them later. Rubbing leather with an eraser can scuff or damage the grain, and faint leftover pencil marks can cheapen the finished look of your piece. With a divider, however, you can simply run one point along the edge to scribe a faint, perfectly parallel guideline without leaving any pigment behind.
Furthermore, pencil leads wear down and flatten as you use them, causing line widths to expand and measurements to drift. A divider with finely honed metal tips maintains an exact, razor-sharp marking edge from start to finish. This unwavering consistency is why experienced crafters consider the divider one of the most powerful layout tools in their kit.
Here is a breakdown of how compasses and dividers are used across specific craft mediums. Having just one good tool on hand will dramatically streamline your workflow and refine your finishes.
In leathercraft, a divider is an absolute essential. It is practically impossible to tailor clean leather goods without one.
Its primary role is scribing stitching lines—typically 3 mm or 4 mm in from the edge of the leather—as guides for pricking irons or chisels. By resting one leg against the cut edge of the leather and lightly dragging the other leg across the surface, you score an exquisitely parallel guideline with minimal effort.
A divider is also invaluable when plotting pocket positions on a bag or spacing out belt holes. Once you set the leg width, you can walk the tips across the leather like a recurring stamp, marking identical intervals consecutively. This completely eliminates the tedious chore of repeatedly calculating measurements along a ruler.
Dividers are equally powerful in papercraft, cartonnage, and paper quilling.
When assembling intricate three-dimensional paper structures, you frequently need to copy the exact dimension of Component A onto Component B. If you measure with a ruler and try to transcribe something like "27.5 mm," misreading the ruler or miswriting the fraction is bound to happen eventually. With a divider, you simply span the points across the ends of Component A and gently press them onto Component B to transfer the exact dimension flawlessly.
Furthermore, when scoring fold lines on heavy paper or cardstock, lightly tracing along a straightedge with the un-inked tip of a divider creates a crisp indentation, allowing you to fold sharp, clean edges without tearing the paper fibers.
In dimensional modeling—such as polymer clay, resin clay, craft band weaving, or small-scale woodwork—both compasses and dividers play critical roles.
When cutting a clean circle out of clay, using a paper template and a craft knife often causes the paper to shift, warping the circle. If you plant one needle of a divider in the center and rotate the other needle lightly around it, you score an exact circular groove into the clay surface. You can then simply guide your blade along that groove for a perfect circular cutout.
When building the bases of craft band baskets or woodworking pieces, a divider is also indispensable for finding exact geometric centers and stepping out equidistant marks for drilled holes.
Before purchasing a divider, you might wonder whether other tools in your workshop can do the same job. Here is how dividers compare to specialized and everyday alternatives.
In leathercraft, specialized tools like stitching groovers or edge creasers are often used to mark stitching channels at fixed distances from an edge. While convenient, these tools are built specifically for one task: marking along an edge. They cannot handle arbitrary spacing adjustments, continuous repeating marks across open panels, or measuring curved distances.
A divider allows you to adjust its span anywhere from 0 mm to several centimeters. It can mark from an edge, position independent parts, scribe arcs, and divide lines into equal segments. Additionally, while a groover physically gouges out a channel of leather, a divider merely indents a line or measures distance, keeping the material intact.
Beginners often assume a clear ruler or a vernier caliper is enough for layout. Calipers and rulers are indeed the right tools when you need to read a numerical value. However, the goal in crafting is rarely "knowing the exact number"; it is "reproducing the exact same distance reliably."
Imagine laying out ten marks at 15 mm intervals. With a ruler, you have to add up 15, 30, 45, 60 mm in your head, find the tiny tick marks, and dot each one with a pencil. If your pencil drifts by even 1 mm early on, the tenth mark will be noticeably misaligned. With a divider set to 15 mm, you simply walk the points step by step along your line. No mental math, no tick marks to misread, and zero cumulative error. The speed and repeatability far outclass a ruler.
This is the most critical distinction. I strongly advise against using cheap 100-yen shop compasses or school stationery compasses for craft projects.
Stationery compasses are designed to glide lightly over paper while holding a pencil; their hinge friction is relatively weak. When pressed against resistant materials like thick cardstock or stiff leather, the legs easily flex or splay open under hand pressure, completely throwing off your measurement.
Craft dividers and drafting compasses are built from heavy-duty metal and feature a rigid locking mechanism, such as a spring-and-thumb-nut system. Even when pulled firmly across tough leather, the legs will not budge a fraction of a millimeter. That absolute rigidity is the defining difference.
Even with the right tool, poor handling can ruin a piece. Here are common beginner mistakes and the professional techniques to prevent them.
The tips of a divider are needle-sharp. Beginners often press down with excessive force in an attempt to make the scribed line clearly visible.
Pressing too hard into the grain side of leather tears the surface fibers, leaving jagged, irreversible scars. On paper, it can easily slice through the sheet. The correct amount of pressure is just enough to skim the surface. Let the tool's own weight and a light guiding touch do the work. Aim to leave a subtle witness crease, never a deep gouge.
If you use a friction-hinge divider or fail to tighten the thumb nut fully, the drag resistance against the material will gradually nudge the legs apart as you work. This causes your stitching lines to drift crookedly or parts to end up mismatched.
Always verify that your locking screw is fully secured before touching the tool to your workpiece. When rotating or pulling the divider, hold it by the top knurled handle or head pivot. Never squeeze or yank the legs themselves, as your hand pressure can subtly flex the setting.
When using a divider or a compass with replaceable points, the tips of both legs must align at the exact same height. If one needle is shorter, tilting the tool to catch an edge will throw the effective measurement off, scribing a line narrower than what you set.
Before starting a project, stand the divider vertically on a flat, level work surface. Check that both needle tips touch the table at the exact same instant. If they are uneven, loosen the retaining screw, adjust the needle height, and secure it firmly.
When scribing a line along the edge of leather, pay attention to the tilt of your wrist. Rather than holding the tool strictly perpendicular (90 degrees) to your cutting mat, tilt it slightly forward into the direction of your stroke—around 70 to 80 degrees. Think of it like smoothing a spoon gently along the surface.
Holding it completely vertical causes the needle to catch on the leather fibers, chatter, and create a wavy line. Tilting it too far backward allows the guide needle to slip off the edge entirely. Keep a steady angle and draw the tool in a single, smooth motion at a consistent speed.
Browsing craft stores or online shops will reveal many varieties and price ranges. Here are the core criteria I recommend to any crafter looking for a reliable, lifelong tool.
Dividers come in two primary configurations: friction-joint models that open by hand pressure alone, and spring-joint dividers featuring a central threaded screw and thumb nut (spring dividers).
For craft work, I recommend a screw-adjusting spring divider without hesitation. Friction-joint models are frustrating to micro-adjust and slip easily if bumped. A spring divider allows you to dial in adjustments down to 0.1 mm increments simply by turning the knurled nut, and the legs stay locked exactly where you set them. It eliminates layout frustration entirely.
Look carefully at the build material. Avoid cheap plastic bodies or soft zinc alloys, which flex under hand pressure and ruin accuracy. Choose tools forged from solid carbon steel or stainless steel. A tool with substantial heft feels stable in the hand and marks cleanly using its own weight rather than brute force.
High-quality dividers also feature hardened, heat-treated needle tips that resist dulling over years of repeated use on tough materials, sparing you frequent sharpening.
Dividers range from compact 100 mm (roughly 4-inch) models to large workshop dividers measuring over 200 mm. Larger is not better for detailed craft work; an oversized tool is clumsy to rotate within your palm and makes delicate layout work awkward.
For small leather goods, papercraft, and general benchtop crafts, a compact divider with a leg length between 100 mm and 125 mm is ideal. It rests comfortably in your palm, transferring subtle fingertip control straight to the needle tips for smooth curves and precise marks.
If I lost all my bench tools today and had to start over from scratch, the very first layout tool I would buy is a 100 mm spring divider with twin needle points.
Searching for a "100mm spring divider" at home centers, hardware retailers, or leathercraft supply shops will turn up professional-grade models that will last a lifetime for around 1,500 to 3,000 yen (approx. $10–$25 USD).
If you also need pencil-drawing capabilities, consider either a convertible divider that allows swapping one needle for a lead holder, or keep a separate spring-type drafting compass alongside your divider. But as your foundational workhorse, start with a solid, screw-locked, dual-needle divider. You will be amazed at how quickly your work improves.
We have explored the differences between compasses and dividers, their uses across craft disciplines, correct handling techniques, and how to select the best tool for your bench.
If you previously relied only on rulers for layout, seeing what a dedicated divider can do will transform how you approach your projects. In handmade crafts, what separates a polished, store-quality finish from an amateur look is often not raw artistic talent, but clean lines and consistent dimensions. A stitch line that runs perfectly parallel to the edge or evenly spaced hardware creates an immediate impression of craftsmanship and care.
Instead of relying purely on visual estimation, let a reliable spring divider become your trusted workshop companion. It will raise the precision of your craft to the next level.
I hope you pick up a quality spring divider and enjoy crafting with greater accuracy than ever before! If you found this guide helpful, please share it with your fellow makers. See you in the next article—this was Yassy from Crafters!


For example, if you are looking for articles about mizuhiki, try searching for "mizuhiki"; if you are interested in tools, try keywords like "nippers" or "pliers."
