Japanese Fabric Preparation 101: Grain Straightening (Jinaoshi) and Pre-Washing Techniques
yassy
Crafters!

Hello, this is Yassy from Crafters! (・∀・)
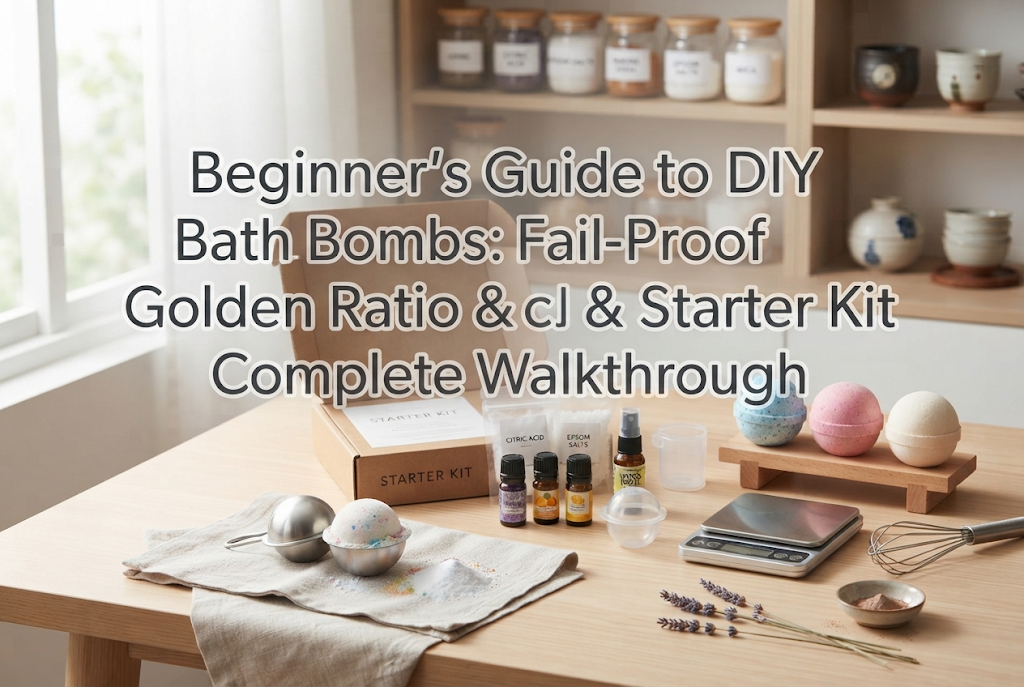
Bath bombs are amazing—dropping one into the bath, listening to that soothing fizzing sound as refreshing aromas and vibrant colors fill the tub is pure bliss. Buying pre-made ones at boutiques or admiring cute shop displays is super fun, but making your own bath bombs at home is many times more rewarding—and much more economical! Floating a homemade bath bomb that you crafted yourself into the bath is truly the ultimate cozy experience for any craft lover.
You might be thinking, "Chemistry reactions sound complicated," or "I'm worried it will crumble out of the mold." But don't worry! If you select the right ingredients, follow the correct ratio, and control the moisture properly, anyone can achieve a professional-quality result on their very first try.
In this article, I will explain the fundamental mechanism behind bath bombs, the real reasons behind common beginner failures and how to avoid them, and a foolproof step-by-step preparation guide to get you to a finished product in the shortest time possible. Let's transform your daily bath time into a luxurious spa-like experience with handmade bath bombs!
There is a clear chemical reason why a bath bomb fizzes instantly when dropped into water. Understanding this mechanism is the very first step in preventing failure.
The secret behind the fizz is carbon dioxide gas released when acidic and alkaline substances react together in water. There are no mysterious synthetic chemicals involved; bath bombs are made entirely from safe, familiar ingredients used in everyday cooking and cleaning.
The main ingredient of a bath bomb is baking soda (sodium bicarbonate). Baking soda is weakly alkaline and softens bathwater as it dissolves.
When purchasing baking soda, always choose "food grade" or "pharmaceutical grade." Cleaning-grade baking soda has coarse particles and may contain impurities, making it unsuitable for bath bombs that directly contact your skin. Food-grade or pharmaceutical-grade baking soda has fine particles, making it gentle, safe, and pleasant for skin use.
Citric acid is the partner ingredient that reacts with baking soda to produce carbon dioxide gas. It is an acidic compound, the same sour component found in lemons and citrus fruits.
Citric acid also comes in different grades, so be sure to select "food grade." Additionally, there are two types of citric acid: "anhydrous citric acid" (water-free) and "monohydrate citric acid." The best choice for making bath bombs is anhydrous citric acid. Monohydrate citric acid contains water molecules within its crystalline structure, which can cause the mixture to react and puff up prematurely during crafting. Always look for citric acid labeled as anhydrous.
If you use only baking soda and citric acid, they will react violently the moment they hit the water and finish in a flash. Cornstarch acts as a binder to slow down the fizzing reaction speed and prevent the bomb from crumbling.
Adding cornstarch helps bind the dry powders together, resulting in a hard, sturdy bath bomb that holds its shape well. It also gives the bathwater a silky, smooth texture. Furthermore, adding Epsom salt or natural sea salt is great for enhancing skin moisturizing and sweat-inducing spa benefits.
What really brings bath bombs to life are scent and color. For fragrance, use 100% natural essential oils rather than synthetic perfume oils. Essential oils provide skin-nourishing benefits and relaxing aromatherapy effects, dramatically improving your bath quality.
For coloring, use food coloring or natural mineral-derived mica powder (the same powder used in cosmetics like eyeshadows). Never use paints, dyes, or craft colors intended for art supplies, as they can cause severe skin irritation.
There is a fundamental formula for crafting bath bombs without fail. Deviating from this weight ratio can prevent proper fizzing or cause the bomb to fall apart, so accurate measuring is essential.
The standard ratio for bath bombs relies on the following proportions by weight:
Baking Soda : Anhydrous Citric Acid : Cornstarch = 2 : 1 : 1
Here is a concrete calculation example for making a batch of medium-sized bath bombs:
Sticking to this precise weight ratio yields the ideal balance between hardness and fizzing power.
Beginners usually encounter four main failure patterns when making bath bombs. If you know the causes and remedies beforehand, you can easily avoid them altogether!
This happens when the powder puffs up into a soft foam before or right after packing it into the mold. The chemical reaction between the baking soda and citric acid has already triggered prematurely.
The main causes are adding too much moisture and high room humidity. Dripping water directly or adding a large amount of liquid all at once sets off the reaction immediately. To prevent this, always use a fine-mist spray bottle to apply liquid in tiny amounts.
Also, avoid making bath bombs on rainy or overly humid days. The powders readily absorb moisture from the air and swell. Crafting on dry, clear days is a secret rule for success.
This occurs when the bath bomb cracks or disintegrates into powder the moment you take it out of the mold. The cause is either insufficient moisture or not pressing firmly enough.
If the powder is too dry, it won't bind together properly inside the mold. The mixture needs enough dampness so that when squeezed tightly in your palm, it holds its shape. Furthermore, if you pack the powder too loosely into the mold without applying pressure, internal gaps form, making it fragile. Use your fingers or palm to press the powder down firmly until it cannot be packed any tighter.
This happens when the surface stays soft and sticky during drying. It is caused by adding too much plant oil, leaving excess moisture behind, or drying in a humid spot.
Adding carrier oils (like jojoba or olive oil) acts as a conditioner, but too much will hinder the hardening process. Strictly follow the recommended oil amounts. When drying, place the bath bombs in a well-ventilated, dry room. For best results, leave them in an air-conditioned room with a dehumidifier running or inside an airtight container with desiccant packets for a full 24 hours.
In this case, dropping the bath bomb into the tub produces little to no fizzing—it simply sinks or slowly dissolves. This happens if the baking soda to citric acid ratio is incorrect, or if the fizzing reaction already expended itself during crafting.
If excessive moisture was added during making, the gas reaction was exhausted before reaching the water. Additionally, using too much cornstarch can suppress the fizzing reaction. Stick carefully to the golden ratio of 2:1:1 and use anhydrous ethanol instead of water to prevent premature fizzing during shaping.
You can easily craft bath bombs on your kitchen counter or dining table. However, choosing the right tool materials makes a big difference in the quality of your finished craft.
Gather the following tools for a smooth crafting experience:
While many basic recipes recommend using water to moisten the powders, switching to anhydrous ethanol (high-purity alcohol) is the real pro trick for guaranteed success.
Anhydrous ethanol contains virtually no water, meaning it won't trigger the fizzing reaction when spritzed onto baking soda and citric acid. Because it evaporates rapidly, it allows the molded bath bomb to dry and harden super fast into a solid, sturdy shell.
It can easily be found online or at local pharmacies, so if you're a beginner looking for zero failures, definitely pick up a bottle of anhydrous ethanol for your spray bottle!
When starting out with bath bombs, purchasing every single ingredient and tool individually can be surprisingly time-consuming and costly.
While baking soda and citric acid are easy to find at local stores, buying spherical molds, skin-safe mica powder colorants, pure essential oils, and measuring spoons separately drives up initial costs and leaves you with leftover materials.
That is why I highly recommend starting with a Bath Bomb Starter Kit available from online retailers like Amazon.
Rather than struggling to source everything individually, grabbing a well-reviewed starter kit online and getting that first successful hands-on experience is the absolute shortest path to enjoying this handmade craft!
Here is a step-by-step walkthrough to crafting a flawless bath bomb from start to finish!
Using your digital scale, accurately weigh out the baking soda, anhydrous citric acid, and cornstarch.
Pass the weighed powders through a fine sieve into your bowl. Breaking up all clumps with your fingers ensures uniform drying and an even fizzing reaction throughout the bomb.
Wearing your gloves, thoroughly mix the dry powders in the bowl. Scoop up from the bottom to ensure every particle is evenly blended.
Pre-mix your carrier oil (such as jojoba oil) with your chosen essential oils in a small cup. Drizzle this mixture slowly over the dry ingredients in the bowl.
Rub the powders between both hands to distribute the oil evenly throughout the batch. You will start to smell a wonderful aroma spreading through the air!
Add mica powder or food coloring to tint your mixture. If making a solid-colored bath bomb, blend it thoroughly here.
If you want to create colorful layers or a marbled effect, divide the mixture into separate bowls at this stage and blend a different color powder into each bowl.
Hold your spray bottle filled with anhydrous ethanol slightly away from the bowl and spritz 2 to 3 times over the mixture.
Immediately rub and knead the powder with your hands to distribute the moisture. Repeat this spritzing process gradually while testing the texture.
The target consistency is "damp beach sand." When you squeeze a clump tightly in your hand, it should hold its shape firmly without crumbling, yet break apart easily when lightly poked with a finger.
If using a two-piece sphere mold, heap the mixture into both halves. Don't just scoop it loosely—use your fingers to pack the powder in tightly and densely.
Slightly overfill both halves with a small mound of powder, then press the two halves together with strong pressure. Squeeze tightly until there are no gaps left, then gently brush away any excess powder around the seam.
Let the filled mold sit for a few minutes to set. Next, tap the outside of the mold gently with the back of a spoon to create a small gap between the inner wall and the bath bomb.
Carefully lift off the top mold half, flip it over, and slide off the bottom half. Freshly unmolded bath bombs are delicate, so handle them as little as possible!
Place the bath bomb on a sheet of paper towel or a soft towel in a well-ventilated spot away from direct sunlight. Allow it to dry completely for at least 24 hours. Once it hardens rock-solid, your handmade bath bomb is complete!
Once you've mastered the basic technique, try these fun variations to elevate your bath bombs' looks and spa benefits!
Before packing the powder into the mold, place a layer of dried lavender buds, chamomile flowers, or rose petals at the very bottom of the mold half.
When unmolded, you'll have a sophisticated botanical design crowning the top of your bath bomb. As it dissolves in the tub, the petals float gracefully on the water's surface for a delightful spa feeling.
By filling your mold with alternating layers of pink, blue, and yellow powders, you can create a gorgeous striped bath bomb resembling natural rock strata.
Alternatively, gently toss different colored powders together in a single bowl before packing them into the mold to create a one-of-a-kind, elegant marble swirl pattern.
Pack half of the mold with powder, place a tiny plastic toy or a waterproofed mini message card in the center, and cover it with more powder before sealing the mold halves together.
As the bath bomb fizzes away in the tub, the tiny toy or secret message pops out! This makes a fantastic surprise for kids or a special gift for loved ones.
Bath bombs are delicate craft items that are very sensitive to ambient humidity. If stored incorrectly after drying, they can absorb moisture from the air and puff up before you ever get to use them!
As soon as your bath bombs are completely dry, wrap each one tightly in plastic cling wrap to seal out air. Then, store them in a ziplock bag or airtight glass jar along with a food-grade silica gel packet. This is an absolute rule for long-lasting freshness.
For gift-giving, place wrapped bath bombs into clear cellophane bags tied with a ribbon, or nestle them into a gift box filled with shredded paper cushion. They will look so gorgeous that everyone will mistake them for luxury store-bought treats!
Crafting bath bombs brings together the fun of simple science, the relaxation of aromatherapy, and the joy of creative modeling into one amazing handmade hobby!
As long as you keep these key principles in mind, you can reliably craft beautiful, high-quality bath bombs every time.
If you're eager to start a fun new creative hobby or want to turn home evenings into a relaxing spa escape, don't wait! Grab a starter kit and basic supplies online today, and dive straight into crafting your very own bath bombs as soon as your box arrives. Relaxing in a warm bath powered by your handcrafted bath bomb will wash away all your daily fatigue!
If you enjoyed this guide, please share it with your crafty friends on social media or messaging apps—it really means the world to me and keeps me inspired!
Until next time, happy crafting! This was Yassy from Crafters!




For example, if you are looking for articles about mizuhiki, try searching for "mizuhiki"; if you are interested in tools, try keywords like "nippers" or "pliers."
