Beating Rising Material Costs: A Japanese Crafter’s Guide to Profit Calculation and Cost Control
yassy
Crafters!

Hi everyone, Yassy from Crafters here! (・∀・)
There is something undeniably mesmerizing about stained glass catching the sunlight. Watching vibrant glass pieces glow on a window sill has probably made almost every craft enthusiast think, "I'd love to make a beautiful piece of interior decor like that myself!"
However, making traditional stained glass involves cutting heavy sheets of glass, grinding rough edges, and soldering with high-heat tools that emit hazardous fumes. Requiring a dedicated workshop and expensive specialized machinery creates a huge barrier for beginners wanting a simple home hobby.
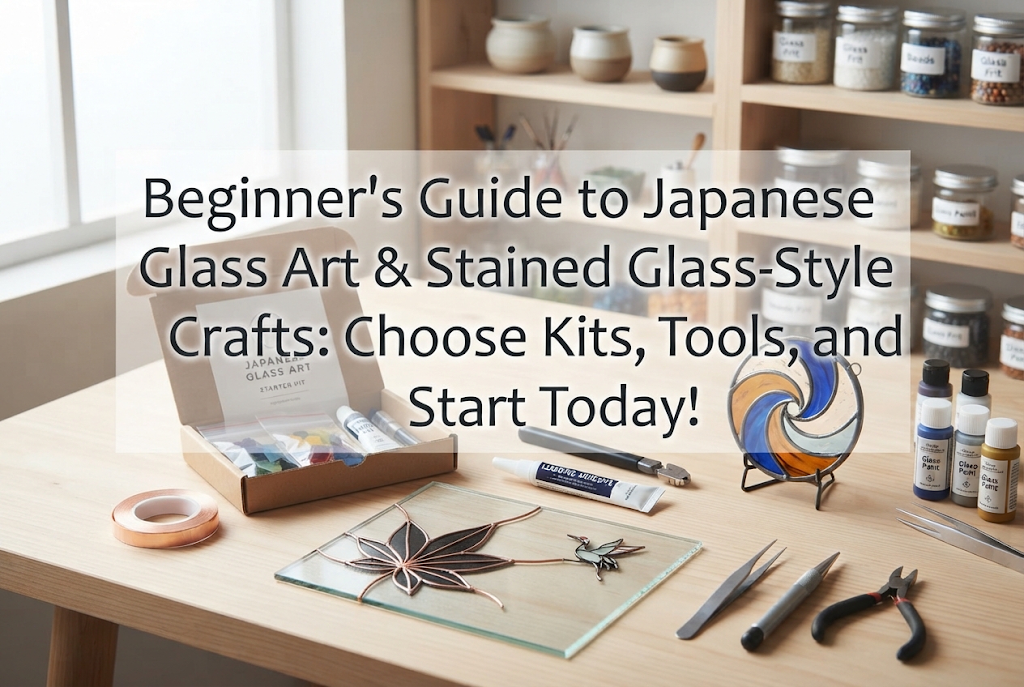
That is why I highly recommend Glass Art and stained glass-style crafts! These techniques require no open flames or hazardous glass cutting. By using acrylic sheets or off-the-shelf photo frames as a base, anyone can safely create professional-quality pieces right at their dining table.
I personally love making colorful handmade crafts, browsing cute decor in stores, and hunting for charming craft supplies in online shops. Drawing on that passion, I'll walk you through everything—from the unique appeal of Glass Art and selecting beginner-proof tools, to picking your first starter kit and mastering the exact creation steps.
There's no need to hesitate! By the time you finish reading this guide, you will know exactly what to buy and how to start making your first piece today. Let's dive into the enchanting world of Glass Art!
The greatest feature of stained glass-style crafting comes down to three words: safe, easy, and beautiful.
Traditional stained glass requires cutting thick glass plates with a specialized cutter, grinding the cut edges smooth, wrapping them in copper foil, and fusing them together using a scorching soldering iron. Between sharp glass shards and solder fumes, securing a safe working environment is tough—especially in homes with young children or pets.
In contrast, Glass Art and stained glass-style crafts use safe acrylic panels or readily available glass photo frames. You never have to cut glass. Simply apply line-making materials onto a clear acrylic board and add color!
Despite the easy process, finished pieces offer a brilliant transparency and light refraction that rivals authentic stained glass. Placed near a sunlit window, your artwork casts colorful, radiant shadows across the room, transforming your space into an extraordinary interior retreat.
All you need is a desk big enough to fit an A4-sized cutting mat. Because the process is virtually odorless and quiet, it's perfect for late-night crafting. With initial supply costs staying around a few thousand yen (or around $20–$40 USD), it is a fantastic zero-risk craft genre to jump into!
While we group these under "stained glass-style crafts," there are actually two main techniques, especially popular in Japan. Depending on which you pick, your tools and artistic style will vary greatly. Choose the approach that best fits your design goals!
The first method is the official "Glass Art" technique promoted by organizations such as the Japan Glass Art Society, and it enjoys immense popularity across Japan.
In this method, specialized self-adhesive color film is applied onto a clear acrylic sheet or glass plate. Then, adhesive lead wire (thin lead tape) is placed along the color borders and outer frame to define crisp metallic lines.
The major benefits of this technique are its flawless beauty and uniform line work. Because color film is used, there are zero brush strokes or uneven streaks. Furthermore, real metallic lead wire recreates the signature lead came lines found in traditional stained glass windows.
If you want to create sleek modern designs, Nordic geometric patterns, or crisp graphic art, this is the ideal method. To give your finished work a truly professional look, choose this film and lead wire technique.
The second method uses specialized paints and dimensional tube liners directly on glass or acrylic, commonly referred to as glass painting or faux stained glass paint.
Using a tube of dimensional liner (outliner), you draw contour lines on an acrylic sheet. Once dried, you fill the outlined spaces with transparent glass paint or tinted resin.
The main advantage here is creative freedom and fluid line work, similar to freehand drawing. It's fantastic for expressive artwork, rounded floral patterns, or whimsical illustrations.
Because there is no film cutting involved, even crafters who feel they aren't nimble with blades can work intuitively. If you want a casual project and love the dimensional, slightly raised texture of dimensional paint, this technique is for you!
Tracking down craft items piece by piece can be frustrating. Thankfully, most materials can be gathered in one order from major online platforms like Amazon or local craft suppliers.
Here are the essential supply lists categorized by technique:
Pro tip: Applying lead wire to both the front and back sides creates a flawless, double-sided stained glass appearance! Starting with 3.0mm or 3.5mm lead wire gives you optimal control.
Important: Always select paints explicitly labeled "transparent" or "clear." Opaque acrylic paints block light, ruining the luminous stained glass effect!
The single biggest mistake newcomers make is buying random tools from separate sellers. Incorrect film thickness might not pair well with your lead wire, or certain paints might bead up on unsuitable acrylic surfaces.
That is why I strongly encourage beginners to grab a dedicated Glass Art Starter Kit or Glass Paint Introductory Set online.
A proper starter kit contains matching base materials, coordinated film sheets or paints, specialized smoothing tools, dimensional liners, and step-by-step pattern templates. Opening a single box and starting right away removes all frustration for new crafters.
Starter kits are usually very affordable (around $20–$40 USD), making them far more economical than paying separate shipping fees for individual supplies.
Even in straightforward crafts like Glass Art, beginners can run into minor snags. Knowing these pitfalls beforehand ensures your very first project turns out perfect!
Here are my foolproof tips learned from hands-on crafting experience:
A few days after completing a piece, the edges of the lead wire or corners of the film might lift up. This is almost always caused by residual surface oil or insufficient pressure during application.
Base sheets of acrylic or glass naturally pick up invisible skin oils and dust. Applying adhesive materials over oil prevents proper bonding.
How to Fix It:Before starting, thoroughly wipe down your acrylic sheet using isopropyl alcohol or an anhydrous ethanol micro-cloth. Avoid touching the clean surface directly with your fingers. After laying down your film and lead wire, use your smoothing tool to press firmly from the center outward, expelling all air and locking the adhesive in place. This extra step guarantees permanent adhesion!
When placing film on acrylic, small air pockets can get trapped, creating cloudy spots. When held up to light, these bubbles stand out and ruin the polished finish.
How to Fix It:Never peel off the entire paper backing of your film at once! Peel back just a few millimeters to anchor one edge, then slowly peel back the rest while sliding your squeegee smoothingly across the surface. Think of it like putting a screen protector on a smartphone. If a bubble still appears, gently prick the edge with a fine needle point and smooth the air out with your tool.
In glass painting, squeezing outliner straight from the tube can result in shaky lines or uneven thickness.
How to Fix It:Do not drag the tube tip directly against the acrylic board. Hover the nozzle about 2 to 3 millimeters above the surface, letting the extruded "string" of paste gently fall onto the board as you move your hand. Draw in short segments between line intersections rather than long continuous strokes. If you make a mistake, simply wipe it away with a cotton swab or toothpick before it dries and try again!
It's easy to get ambitious and choose a intricate cathedral window pattern for your first project, only to get overwhelmed by the sheer volume of detailed work.
How to Fix It:For your initial project, choose a design with simple straight lines or large 3-to-4 petal floral shapes. Nordic-style geometric patterns (combining triangles and rectangles) or simplified tulips and succulents are perfect. Completing a small project in 1 to 2 hours builds confidence through a quick, rewarding success!
Here is my tried-and-true process for creating a piece using the Film & Lead Wire (Glass Art) Technique, which delivers high-end results with minimal hassle.
Take your photo frame, remove the backing board and wooden trim, and keep only the clear acrylic (or glass) pane.
Place your chosen pattern sheet on your work surface. Lay the clear acrylic pane directly over the pattern and secure all four corners to your desk with masking tape to keep it from shifting. Tracing over a pattern underneath allows anyone to craft precise artwork without needing drawing skills!
Wipe the acrylic surface thoroughly using tissue or a cloth lightly dampened with alcohol. Make sure no dust, lint, or fingerprints remain. This step is key to achieving professional durability.
Unpeel the protective backing from the lead wire bit by bit, positioning it over the black contour lines of your pattern. For curves, gently curve the soft lead wire using the pad of your thumb. Because lead wire is pliable, it bends smoothly without much force.
Where lines intersect or meet corners, use your craft knife to cut cleanly from above. Once all lines are laid down, rub your smoothing tool firmly along the lead wire to bind it firmly to the pane. When properly pressed, the wire takes on a sleek, metallic sheen and sits flush against the board.
Cut your color film slightly larger (about 1 to 2 millimeters wider) than the section outlined by the lead wire. Peel off the backing paper, place the film over the area, and press air out with your squeegee.
Trim away excess film along the inner edge of the lead wire using your precision knife. Ideally, the edge of the film should tuck slightly under the lead wire line. Repeat this process area by area until all sections are filled with color.
Inspect the entire piece. Check for any loose film edges or air bubbles, and give the entire surface one final firm press with your squeegee.
Gentle wipe away any surface dust, then reassemble your pane into the original photo frame—leaving out the opaque backing board. Frame it clear so light passes straight through!
Display it near a sunny window or light source to enjoy the radiant glowing light!
If you're excited to try this craft, the best momentum comes from taking action right away!
Open your favorite online craft store or Amazon, and search for "Glass Art Kit" or "Stained Glass Craft Kit."
Keep these three simple criteria in mind when selecting a kit:
Kits around $25 to $35 USD offer plenty of quality supplies. Add an A4 cutting mat and masking tape to your cart, and you're set! By the weekend, you could be setting up your very first handmade light catcher by your window.
Stained glass-style craft and Glass Art overturn the old idea that making stained glass is difficult or dangerous. It is an approachable, safe, and deeply satisfying craft.
No heavy machinery or specialized skills are required. Armed with the right tools and clear instructions, anyone can create gallery-worthy decorative art on day one.
Choose the Film & Lead Wire Technique for clean metallic lines and authentic weight, or go with Glass Painting for freehand fun and raised textures. Either way, starting with a beginner kit online is your fastest route to success!
Seeing light filter through your handmade creation and cast colorful reflections across your room is a joyful experience like no other. Find your favorite kit today and step into the sparkling world of Japanese Glass Art!
I hope my guide gives you a wonderful head start on your creative journey. If you enjoyed this article, please share it with your craft-loving friends! See you in the next post—Yassy out! (・∀・)





For example, if you are looking for articles about mizuhiki, try searching for "mizuhiki"; if you are interested in tools, try keywords like "nippers" or "pliers."
