Beginner’s Guide to Sewing Small Fabric Goods: Zero-Failure Essentials, Fabrics, and Starter Kits
yassy
Crafters!

Hello, everyone! This is Yassy from Crafters! (・∀・)
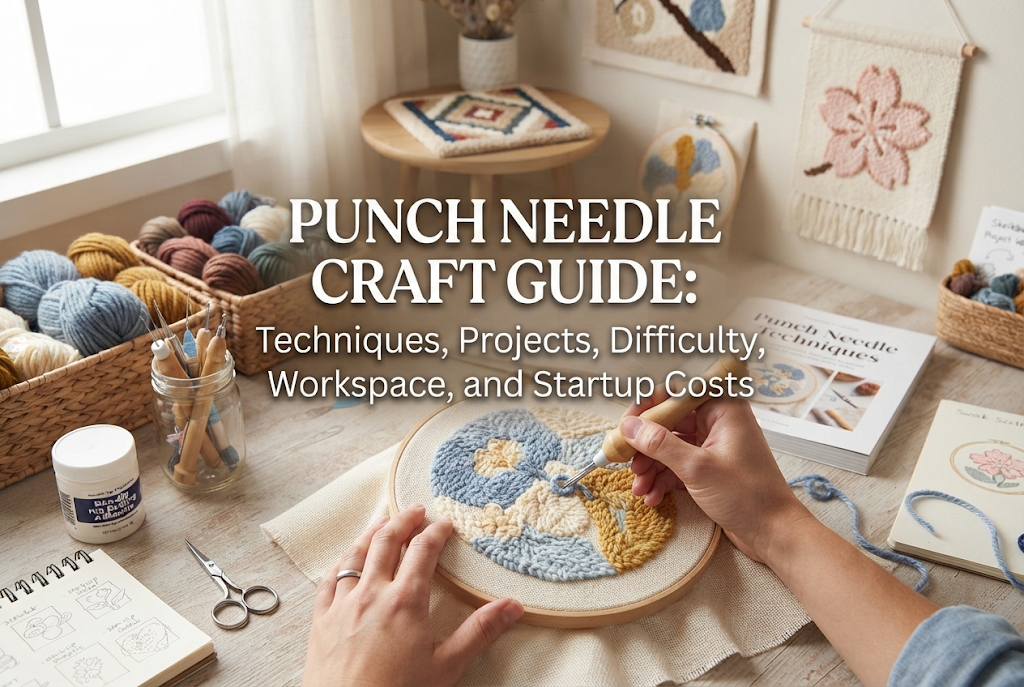
Punch needle is a craft where you simply punch a specialized hollow needle into fabric as if you were drawing a picture, creating cute, fluffy, three-dimensional loop patterns. Right now, it is one of the absolute hottest trends in the handmade crafting community!
I personally enjoy making various crafts and collecting handmade pieces, and I am completely captivated by the expressive power and sheer fun of punch needle. Looking at it for the first time, many people wonder, "How does the yarn stay in place?" or "It looks difficult—can I really make this?"
In this article, I will clearly cover everything you need to know: what punch needle actually is, what you can create, how to care for finished pieces, difficulty levels, required workspace, and startup costs. By the end of this guide, you will have a complete understanding of punch needle and can confidently take your very first step!
Punch needle is a type of embroidery technique where yarn is threaded through a hollow, tubular needle with a hole at the tip (a punch needle) and repeatedly punched down into tightly stretched cloth.
When people hear "embroidery," they usually picture meticulously passing a needle back and forth through the front and back of fabric. Punch needle is completely different. By simply punching the needle into the fabric from the front side and pulling it back out, a loop of yarn is automatically pushed out on the reverse side of the cloth.
In other words, the side you work on displays flat, clean stitches, while turning the fabric over reveals a soft, fluffy 3D loop surface. Showing completely different textures on the front and back is the biggest feature and charm of punch needle.
You might worry that if you just punch and pull the needle out, the yarn will easily slide right out. Surprisingly, you never tie a single knot in punch needle!
The yarn stays in place due to the friction generated by the weave of the fabric. The specialized needle pushes open the fabric's weave to push the yarn through to the back. When you pull the needle back out, the threads of the fabric try to return to their original positions, tightly gripping the yarn. This elastic recovery and friction of the fabric alone hold the yarn securely.
Because you do not tie any knots, the crafting speed is exceptionally fast. You do not have to worry about yarn getting tangled like in knitting, or fussing over how to finish the back like in traditional hand embroidery. Simply repeating a rhythmic "punch and lift" fills up your design in no time at all.
Because punch needle allows you to freely change yarn thickness and loop height, you can make an astonishingly wide variety of items, from small accessories to large home decor pieces. Here are some recommended items that I have made or purchased and love using!
The true highlight of punch needle is creating interior items that showcase its soft, fluffy texture.
Coasters and mini rugs are especially ideal for beginners. They take very little time to complete and are highly practical, making them the best choice for your very first project!
Punch needle is not just for home decor; it can also be transformed into portable everyday accessories.
Accessories and brooches can be made in a short time using leftover yarn, making them great for anyone who wants to feel a quick sense of accomplishment.
When you make or receive a punch needle piece, a common concern is whether the yarn will come out during use or if it can be washed. Here is the correct knowledge to keep your creations looking beautiful for a long time.
A properly punched piece will definitely not pull out if you lightly tug on it with your fingers! However, if a loop gets snagged on a sharp fingernail, metal fitting, or pet claw, a single thread might get pulled out.
If a thread happens to stick out, never cut it at the base with scissors! Cutting it can cause the surrounding loop structure to unravel. The correct way to handle a snagged loop is to use a tapestry needle or toothpick to blend the thread back into the surrounding loops or push it back through to the reverse side.
The biggest secret to long-lasting durability lies in the backing treatment during creation. Applying fabric glue or latex rubber backing to the reverse side of the work anchors the base of the yarn completely. Once dry, the yarn will never pull out, giving you a strong, durable finished piece. If you plan to sell your work or create rugs that will be walked on, coating the back is essential.
How you care for punch needle items depends on the yarn material used and the backing treatment applied.
If you wash a piece made with 100% wool yarn in a standard washing machine, it will shrink heavily and harden due to felting. Furthermore, washing a piece whose back has not been secured with adhesive will cause the loops to drop out from the water flow and friction.
As a rule, avoid washing with water entirely whenever possible. Cleaning dirty spots by gently dabbing them with a tightly wrung damp towel is the absolute best way to preserve the item's beauty long-term.
If you must wash an entire item, make sure it is made from 100% acrylic yarn and sealed with a waterproof fabric adhesive on the back. Then, gently hand-wash it using a detergent designed for delicates. Machine washing and tumble drying are strictly off-limits.
Compared to other crafts, the difficulty level of punch needle is remarkably low. Unlike knitting or hand embroidery, there are no complex charts to read or tricky needle maneuvers to learn. You simply follow a line traced onto the fabric, so even self-proclaimed clumsy crafters can complete a project in a single day.
However, if you start casually assuming you just need to stab the fabric, you will run into trouble! Here are the common mistakes beginners make, along with absolute professional tips on how to avoid them.
The single most frustrating issue beginners face is having the yarn pull right back out when they lift the needle. This happens for three clear reasons:
First, you might not be punching deeply enough—you need to insert the needle all the way up to its handle grip. If you punch at an incomplete depth, a proper loop cannot form on the back, causing it to slip out. Always push the needle fully until the metal touches the fabric.
Second, you might be lifting the needle tip too high off the fabric surface when moving to the next stitch. Slide the needle tip right along the surface of the cloth without letting it lift even a millimeter off the fabric. Raising the needle high pulls on the loop just created on the back, unraveling your work.
Third, check the tension on the yarn feeding from your yarn ball. If the working yarn gets caught on your hand, lap, or furniture, the needle cannot pull out new yarn smoothly. Before punching, always pull a generous amount of slack from your yarn ball so it rests loosely while you work.
The biggest culprit behind punch needle failure is choosing the wrong combination of tools and materials.
If you try to punch thick yarn with a fine embroidery punch needle, the yarn will not pass through the tip. Conversely, if you punch a thick needle into tightly woven regular cotton fabric (like broadcloth), the needle will snap the fabric threads, leaving large holes where the yarn simply flops around loosely.
Punch needle relies on golden combinations:
If you ignore these material pairings and buy random supplies from discount stores, you will struggle to punch properly. Beginners should always start with the golden combination: Bulky Yarn × Thick Punch Needle × Monk's Cloth. This reduces your failure rate to practically zero!
Punch needle requires fabric to be stretched drum-tight.
If the cloth is loose, it will yield when you press down with the needle, preventing the needle from penetrating to the proper depth. A loose fabric also bounces with each punch, resulting in uneven loop heights.
When securing your fabric in an embroidery hoop or wooden frame, pull it tightly until it makes a firm, drum-like "tap-tap" sound when tapped with a finger. If the fabric loosens as you work, re-tighten it immediately—that is the secret to a neat finish.
Well-meaning beginners who want a dense, flawless finish often make the mistake of placing their stitches too close together.
When you punch stitches too tightly, the loops on the back crowd each other out, causing the underlying fabric to warp and buckle into waves.
The proper stitch spacing depends on needle and yarn thickness, but for bulky yarn, spacing stitches about 3 mm to 5 mm apart is ideal. Even if it looks like there are small gaps on the flat working side, the loops on the reverse side will fluff out and completely fill the space once finished. Keep a consistent rhythm with confidence!
If you are wondering where in your home you can set up for punch needle and how much space you need, here is the good news: you do not need a dedicated art studio or a massive workbench at all!
For beginner projects like coasters, mini tapestries, or brooches, all the workspace you need is about 50 cm wide by 40 cm deep (roughly 20 x 16 inches). If you have a desk or dining table big enough to open a laptop, you can start today!
Here is what you need to prepare:
Since punch needle does not require water, chemical solvents, or heat sources, you can work on a living room coffee table, at a cafe desk, or even on your lap. It produces no chemical odors or fine dust, making it safe to enjoy around small children and pets.
If you eventually want to create large entryway rugs or home decor pieces over 50 cm (20 inches) in size, you will need a larger table or space to set up or lean a large wooden frame (such as a gripper frame or tufting frame).
However, there is no need to secure a large space right from the start. Beginning with small items that fit inside a 15 cm to 20 cm (6 to 8-inch) round embroidery hoop and gradually upgrading frame sizes as you get used to the technique is the smartest way to progress.
When considering a new craft, startup costs are always a key factor. Punch needle is extremely budget-friendly compared to crafts like resin art, ceramics, or textile dyeing.
If you gather all the essential tools from scratch as a beginner, the initial investment is only around 2,000 to 5,000 JPY (approximately $15 to $35 USD)!
All together, you can establish a complete crafting setup for a modest budget.
If gathering tools individually feels overwhelming, my top advice is to start with a beginner starter kit (around 1,500 to 3,000 JPY). Kits include the needle, yarn, fabric, hoop, pattern, and instructions, allowing you to unbox and start creating the day it arrives!
Having experienced a wide variety of handmade crafts over the years, here are my definitive golden rules for having the absolute best time with punch needle!
Follow these steps for guaranteed crafting success:
From its clever mechanism and project possibilities to care tips, difficulty, workspace setup, and costs, we have covered all things punch needle!
Let's do a quick recap of the key takeaways:
As you punch along, watching the plush, tactile patterns emerge is a wonderfully meditative experience that lets you lose track of time. Even if you feel you aren't good at drawing, simply tracing a design onto fabric and rhythmically punching away allows you to create stylish, professional-looking pieces!
If you are looking to start a fresh handmade hobby without learning overly complex techniques, or if you want to experience the joy of completing lovely items quickly, punch needle is my number-one recommendation.
Grab a needle and a skein of your favorite yarn, and jump into the cozy, charming world of punch needle today!
If you enjoyed this guide, please share it with your crafty friends on social media or messaging apps—it truly means the world to me and keeps me going! Until next time, happy crafting! This was Yassy from Crafters!




For example, if you are looking for articles about mizuhiki, try searching for "mizuhiki"; if you are interested in tools, try keywords like "nippers" or "pliers."
