The Golden Rules of Heating Resin: A Japanese Crafter’s Guide to Viscosity, Bubble Removal, and Safety
yassy
Crafters!

Hello craft lovers! Yassy here from Crafters! (・∀・)
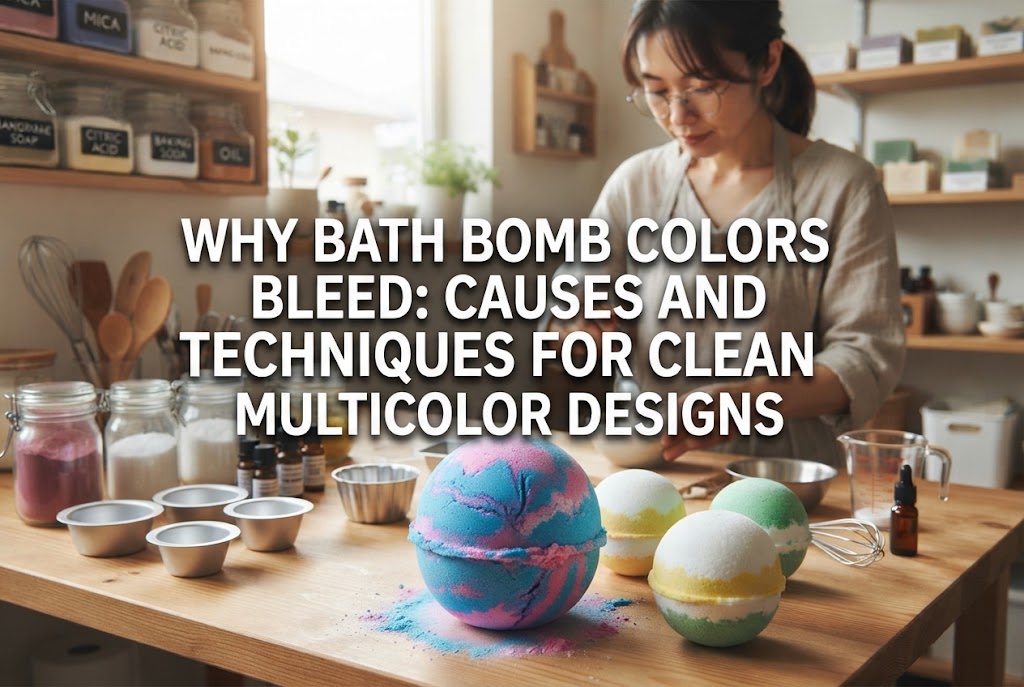
Making handmade bath bombs to add a vibrant splash of color to bath time is such a fun experience, isn't it? As someone who loves working on various craft projects, bath bomb making is particularly thrilling—from kneading the ingredients and packing them into molds to watching that satisfying fizz in the tub. Whenever I see colorful bath bombs at online shops or craft fairs, I immediately feel inspired to experiment with new designs.
However, have you ever tried making a crisp two-tone marble design with pink and blue, only for the colors to bleed together into a murky, muddy purple? Or perhaps you aimed for a sharp layered design, but while drying, the colors seeped across the boundary, turning the entire bath bomb cloudy? Color bleeding and muddying during drying is one of the most common frustrations bath bomb makers face.
There are clear scientific reasons why colors bleed unintentionally. Once you understand the root causes and implement the right techniques, anyone can achieve vibrant, cleanly separated colors and intricate marble patterns. In this guide, I will break down why bath bomb colors bleed and share complete crafting techniques to help you keep your colors crisp and beautiful!
The biggest culprit behind failed multicolor bath bomb designs is the movement of color itself. It isn't just about dry powders mixing together; the dyes migrate due to chemical reactions and physical moisture movement during molding and drying. These issues generally stem from four main causes:
The primary ingredients of bath bombs—baking soda (sodium bicarbonate) and citric acid—react with water to generate carbon dioxide gas. If you add too much moisture while preparing the mixture, a microscopic fizzing reaction begins even before packing the mold or during the setting phase.
As fizzing occurs, moisture trapped between powder particles moves alongside microscopic carbon dioxide bubbles. As this moisture moves, dissolved pigments flow into adjacent color zones. This is the main reason why color boundaries blur or become muddy. Unless moisture in your bath bomb mixture is kept to the absolute bare minimum required to hold the shape, dyes will migrate with the fizzing.
Water-soluble dyes commonly used for coloring bath bombs (such as food dyes like Red No. 40 or Blue No. 1) dissolve extremely easily in water. Even tiny amounts of moisture or humidity cause them to dissolve quickly and bleed into surrounding powders.
If you pour liquid water-soluble dye directly into dry powder without diluting or dispersing it properly, moisture concentrates in one spot, causing that specific area to retain excessive water even after molding. As a result, the dye slowly bleeds into neighboring sections during the drying process. While water-soluble dyes produce vibrant shades easily, they are the most prone to bleeding if moisture control isn't handled carefully.
When packing two different colored mixtures into a mold, insufficient pressure at the boundary prevents clean separation. If powders aren't tightly packed against each other, loose particles crumble across the boundary and mix together.
Additionally, stray powder stuck to your hands or utensils can accidentally drop into the wrong area while filling the mold. Uneven compression also creates pockets of low density where moisture tends to gather, causing localized color bleeding.
The drying environment after unmolding also plays a major role in color migration. If left to dry in a high-humidity room, the bath bomb absorbs ambient moisture from the air. The absorbed moisture triggers a minor reaction between baking soda and citric acid near the surface, dissolving and mixing the surface pigments.
Furthermore, residual moisture trapped deep inside the bath bomb naturally migrates outward as it dries. As this internal water moves to the surface, it carries dye along with it, causing boundaries to bleed hours or days after molding.
To succeed with multicolor designs, you must select materials that resist bleeding right from the ingredient phase. The combination of colorants and binders determines the final outcome.
Unlike water-soluble dyes that dissolve and spread, insoluble colorants—such as cosmetic-grade mica powders, clays, and natural botanical powders (like cacao powder or rosehip powder)—are powerful allies against color bleeding.
These powders disperse as tiny solid particles rather than dissolving in liquid. Because the particles do not dissolve or flow, the color boundaries remain exceptionally sharp and clean.
If you do choose to use water-soluble dyes, it is essential to pre-dissolve dry dye powder in a tiny amount of anhydrous alcohol (rubbing alcohol with near 0% water content) and thoroughly blend it into the dry mixture to prevent clumping.
Avoid using water as a wetting agent to bind bath bomb ingredients. Water triggers an immediate reaction between baking soda and citric acid, inducing color bleeding.
The best non-reactive binder is anhydrous alcohol (99% isopropyl alcohol or ethanol). Because it contains no water, it allows the powders to stick together without triggering a fizzing reaction. Furthermore, because it evaporates quickly, it dries rapidly after molding, preventing pigment movement.
Adding a small amount of carrier oil (such as jojoba oil or sweet almond oil) is another highly effective method. Oils help bind the powder while acting as a water repellent, creating a strong barrier that blocks dyes from bleeding across layers.
Once your materials are ready, it’s time for the molding phase. Crafting multicolor bath bombs requires extra attention compared to single-color designs.
When preparing different colored mixtures, adjust the moisture level for each batch individually. If moisture levels differ between colors, water and pigment will migrate from the wetter color to the drier one.
The ideal texture is achieved when the mixture holds its shape when squeezed firmly in your hand, but crumbles easily when poked with a finger—just like wet beach sand. When spraying anhydrous alcohol, avoid spraying too much at once. Spray once or twice, then immediately knead the mixture thoroughly with your hands to assess the texture.
When creating clean two- or three-tier layered designs, fill the mold in a specific sequence:
When creating stylish marble patterns, over-mixing before filling the mold is the number one cause of failure.
Instead of mixing colors completely in a bowl, place alternating chunks of different colored mixtures directly into the mold. Once placed, use the end of a spoon handle or a bamboo skewer to cut through the mixture in one or two gentle circular motions.
Swirling repeatedly will cause the colors to blend into a single muddy shade. For vivid marble designs, arrange chunks coarsely and create patterns with minimal movement.
Even if your bath bomb looks perfectly separated right after unmolding, colors can still bleed while drying. Managing the environment post-molding is essential.
If you are using plastic or metal bath bomb molds, avoid leaving the bath bombs inside the mold for long periods. Moisture gets trapped inside the sealed space, accelerating color bleeding.
If you applied sufficient pressure during molding, you can safely unmold your bath bomb after 15 to 30 minutes. Once unmolded, place it in a well-ventilated area so the surface dries quickly. Fast surface drying locks pigments in place and stops outward color movement.
Room temperature and humidity directly affect the final result. Avoid drying bath bombs in environments with humidity over 50%. It is best to work on dry, clear days rather than rainy days or humid seasons.
If you must craft during humid weather, work in an air-conditioned room with dehumidification turned on, or place your bath bombs on a rack inside an airtight container lined with desiccants (silica gel packets). The combination of an airtight container and plenty of silica gel forcefully strips moisture from the air, completely preventing color bleed.
Here are common mistakes beginners make and how to prevent them:
Spraying alcohol directly onto the packed mixture inside the mold oversaturates that specific area, causing baking soda and citric acid to react. As a result, the seam fizzes and colors melt together.
Solution: Only spray anhydrous alcohol while the mixture is still in the mixing bowl. Achieve the perfect moisture level before packing, and never spray alcohol after placing the mixture into the mold.
Dripping liquid food dye directly onto dry powder creates wet clumps that retain moisture even inside the mold, causing dye to seep into surrounding areas later.
Solution: Mix liquid dyes into your anhydrous alcohol or carrier oil first to create a colored liquid binder, then distribute it evenly throughout the powder. Never drop undiluted liquid dye directly onto dry powder.
Transferring powder from your hands or tools onto adjacent colored sections creates unwanted colored dots on the finished surface.
Solution: Wipe your hands and clean your spoons or mold edges with a clean cloth every time you switch colors. Keeping tools and hands clean produces a crisp, professional finish.
Here is my personal step-by-step recipe and technique for making crisp, non-bleeding two-tone bath bombs!
Step 1: Mix the Base Powders ThoroughlyCombine baking soda, citric acid, and cornstarch in a bowl. Rub the powders with your hands until no lumps remain. Once uniformly mixed, divide the dry mixture equally into two separate bowls using a digital scale.
Step 2: Add Colorants and Oils IndividuallyAdd Mica Color A to one bowl and Mica Color B to the other. Mix until the powder in each bowl is evenly colored. Using insoluble mica ensures a non-bleeding base right from the start. Next, add 1/2 tsp of carrier oil to each bowl and rub the powder between your palms to distribute it evenly. The oil coats the powder particles, acting as a hydrophobic shield against moisture.
Step 3: Adjust Moisture with Anhydrous AlcoholSpray anhydrous alcohol once or twice into the first bowl and immediately knead thoroughly. Adjust little by little until the mixture holds its shape when squeezed but crumbles when poked. Repeat the process for the second bowl until both mixtures have the exact same moisture consistency. Matching moisture levels between colors is the golden rule to prevent dye migration.
Step 4: Pack and Compress into MoldsFill one half of your mold with Color A mixture and press down firmly with your thumb. Smooth the surface, then fill the remaining space to the rim with Color B mixture, pressing down firmly again. Repeat for the other mold half. Bring the two halves together and compress firmly at the center for a few seconds. Do not twist the mold halves—apply strong, direct vertical pressure.
Step 5: Unmold and Manage DryingLet the packed mold sit for about 20 minutes, then carefully unmold. Place a wire rack inside an airtight container lined with silica gel packets, arrange your bath bombs on top, and close the lid tightly. Allow them to dry undisturbed for 24 hours in this moisture-free environment.
Following these steps will give you beautifully separated multicolor bath bombs with lines as sharp as if drawn with a ruler! When dropped into warm water, both colors dissolve vividly into the bath.
Let's recap the key rules for preventing color bleed in multicolor bath bombs:
By understanding a little bit of the science behind bath bomb chemistry, your finished creations will improve dramatically. Displaying your vibrant creations, giving them as heartfelt handmade gifts, or enjoying their fizzy colors in the bath is a truly rewarding experience.
Give these techniques a try and create your own gorgeous multicolor bath bombs!
If you enjoyed this guide, please share it with your crafty friends on social media or messaging apps! It really means a lot to me and keeps me inspired!
Until next time, happy crafting! This was Yassy from Crafters!





For example, if you are looking for articles about mizuhiki, try searching for "mizuhiki"; if you are interested in tools, try keywords like "nippers" or "pliers."
