How to Unmold Handmade Soap Perfectly: Mold-by-Mold Techniques to Prevent Chipped Corners and Dents
yassy
Crafters!

Hello everyone! It’s Yassy from Crafters! (・∀・)
Whether you are making wooden home decor, upcycled tin cans, clay creations, or interior accessories, paint is the ultimate game-changer for handmade crafts. Simply adding color can completely transform the texture of your work, elevating a simple project into something stylish with a professional finish.
I love making and buying various handmade crafts myself, and pieces finished with paint always have a unique warmth and presence. That charming, boutique-style aesthetic you see in gift shops is created through careful paint selection and proper application techniques.
However, when visiting the paint section at a home center or craft store, many crafters get overwhelmed by the sheer variety of products available. Choosing the wrong type of paint can result in peeling, endless stickiness, or ruined surfaces—wasting all the hard work you put into your creation.
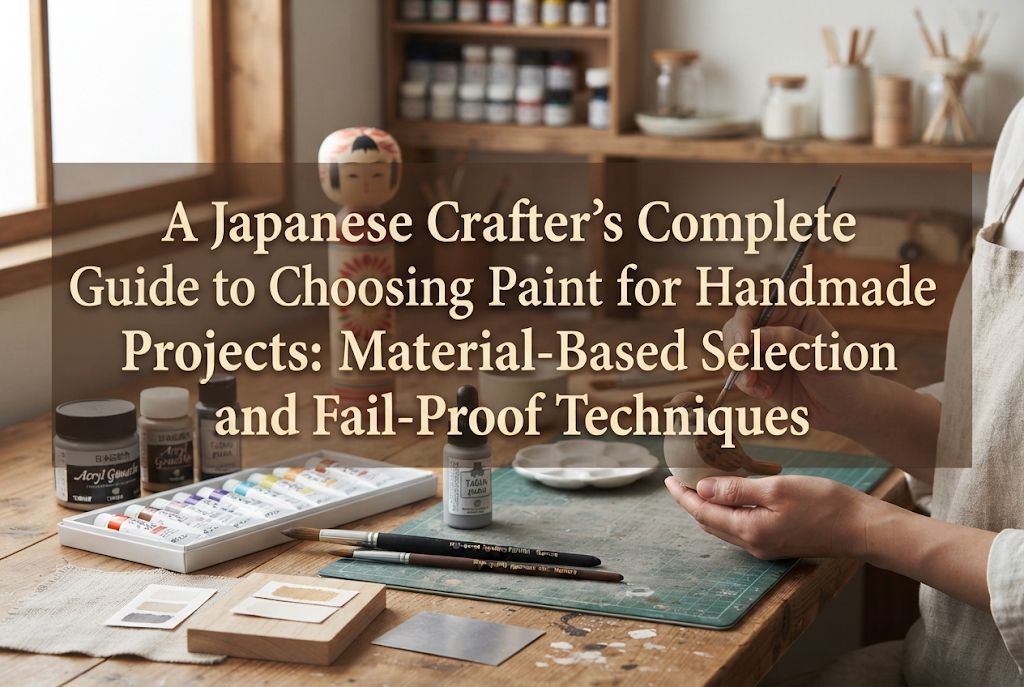
In this guide, I will break down everything you need to know about selecting the perfect paint for your handmade projects, along with essential painting rules to ensure complete success every time. We will cover material-specific choices, surface preparation, and protective topcoats, so be sure to read through to the end and apply these tips to your crafting!
One of the most common misconceptions among beginners is thinking, "I already have acrylic craft paints, so do I really need to buy paint?" To put it simply: depending on the material and intended use of your piece, you absolutely should use specialized paint rather than standard acrylic craft paint.
While both craft paints and architectural or specialty paints are used for coloring, their ingredients and original purposes are fundamentally different. Understanding this distinction will save you from major durability failures.
Acrylic craft paints are primarily designed for flat surfaces like paper or canvas. As a result, the paint film (the layer formed once dried) is relatively thin and flexible. While perfect for fine illustrations, it lacks resistance against friction and physical impact.
In contrast, standard paint is designed to protect three-dimensional objects—such as wood, metal, and walls—while maintaining their visual appeal. It cures into a thicker, robust coating, making it vastly superior for interior goods and woodwork that are handled frequently.
If you rely solely on thin craft acrylics for everyday items or decorative objects, the color can easily chip off from minor bumps or deteriorate from skin oils. To create lasting handmade items, choosing a paint with a strong, durable film is an essential rule.
Specialty paints feature high "hiding power" (opacity), meaning they effectively cover underlying wood grain or base colors. If you want to completely mask uneven wood tones with a solid color, acrylic craft paints require multiple layers, whereas dedicated paint achieves vibrant coverage with far fewer coats.
High hiding power is equally vital when working with materials like upcycled cans that already have printed text or graphics. Completely resetting the surface to build a fresh design requires a paint with strong coverage.
Of course, acrylic craft paints excel at fine detail painting and illustrations. My recommended approach for maximum quality is to use dedicated paint for the base layer, and then use acrylic paints for intricate patterns or fine artwork.
When looking at paint labels, you will notice two main types: water-based and oil-based. Beginners often get stuck here, but for handmade crafting, you should always choose water-based paint. There is virtually no reason to choose oil-based paint for craft projects.
Some worry that water-based paint will dissolve or wash off in rain or water, but this is a complete misunderstanding. Once you understand how water-based paint works, the choice becomes crystal clear.
While water-based paint is wet, you can easily thin it with water and wash your brushes in the sink. However, once it dries completely, the paint undergoes a chemical process that transforms it into a tough, water-resistant film.
Even if it comes into contact with water after drying, the color will not bleed or wash away. Even for outdoor garden decor, water-based paint (especially formulas rated for exterior use) provides excellent durability.
This combination of easy cleanup while wet and heavy-duty water resistance once cured makes water-based paint the ideal choice for crafters.
Oil-based paints contain strong organic solvents (thinners). Painting indoors with them causes intense fumes that can make you feel unwell, posing a significant issue for anyone crafting at home.
Additionally, brushes and tools used with oil-based paint cannot be washed with water; they require specialized paint thinners. This makes cleanup cumbersome and degrades your tools much faster.
Modern water-based paints have evolved to match oil-based formulas in color payout and drying speed. Taking safety, ease of use, and home environment into account, water-based paint is indisputably the best option.
Even within water-based paints, there are distinct formulations available at craft stores and home centers. Matching the paint type to the aesthetic and texture of your piece is a key technique for professional results.
Here are four major paint types widely loved in the handmade community:
Milk paint is an eco-friendly water-based paint made with milk casein (a protein derived from milk). Many lines replicate traditional Early American color palettes, offering a rich variety of muted, pastel, and earthy tones.
Its defining feature is a soft, velvety matte finish. Applying milk paint instantly imbues wooden crafts, miniature furniture, or picture frames with a vintage charm and natural warmth.
Because it is highly safe and virtually odorless, it is perfect for indoor crafting. It binds beautifully with raw wood, making it the essential starting paint for woodworking projects.
Chalk paint dries to a chalky, ultra-matte texture. When creating European-style shabby chic decor or antique-style accessories, there is no better paint to work with.
The standout quality of chalk paint is its incredible adhesion. It grips directly onto wood, metal, glass, and furniture without requiring heavy sanding or priming. Its slightly thick consistency lets you intentionally leave brush mark textures to mimic aged character.
Once dry, lightly sanding the edges with sandpaper reveals the base material underneath, creating an authentic distressed finish.
Commonly sold as multi-purpose acrylic-urethane paint at hardware stores, this option cures into a tough film containing durable urethane resins that resist scratches and stains.
Because its film is tougher than milk paint, it is ideal for items handled regularly, such as wooden serving trays, outdoor hanging signs, or small stools.
It comes in gloss, semi-gloss, and matte sheens, making it a reliable choice when practical strength is a priority.
Spray paint atomizes paint into a fine mist, bypassing the need for brushes. It is exceptionally effective for intricate 3D items where brushes cannot easily reach, such as wirework, woven craft bands, or complex clay sculptures.
Because it leaves zero brush strokes, it yields a smooth, uniform finish reminiscent of manufactured goods.
Keep in mind that overspray requires thorough masking and workspace protection. Spraying should be done outdoors on calm days or inside a cardboard spray booth, but for complex geometry, it is an invaluable tool.
Handmade crafts go beyond wood—they involve tin cans, plastic, glass, clay, Jesmonite, and more. When selecting paint, the main priority is ensuring proper adhesion to the target material. Using incorrect techniques will cause the dried paint to peel off like film. Memorize these material-specific steps for clean results!
Wood naturally absorbs water-based paint, making it compatible with almost any paint type. However, painting raw wood without prep can raise the wood fibers, resulting in a rough surface.
Before painting wood, always sand the surface smoothly with 240-grit sandpaper. Preparing the wood grain first ensures an unbelievably smooth finish.
Engineered woods like MDF or plywood can absorb paint too rapidly, dulling the final color. Applying a coat of white wood sealer (undercoat) before painting is my golden rule for vibrant color development.
When painting upcycled tins, plastic sheets, or metal hooks, never apply paint directly onto the bare, slick surface. Paint cannot grip smooth materials and will peel off easily.
When working with metal or plastic, always apply a multi-primer (adhesion promoter) first.
Primers act as a chemical bridge between smooth surfaces and topcoats. Applying a thin coat of primer and letting it dry allows paint to bond firmly onto metal and plastic surfaces.
When applying paint to air-dry clay, resin clay, terracotta, or water-based resin like Jesmonite, keep surface absorbency in mind.
Un-glazed terracotta and dry clay absorb moisture from paint rapidly, making paint drag and leaving uneven streaks.
To prevent this, apply a layer of diluted water-based sealer or clear varnish as a pore sealer (*medome*) before painting. Prepping the surface lets your paint glide smoothly for rich, uniform color.
When selecting paint, sheen (the level of gloss) influences the character of your finished piece as much as color does. The exact same shade of pink or blue will feel completely different depending on whether it is shiny or matte.
Choose the sheen deliberately to align with your creative concept:
Non-reflective matte finishes are a top trend in handmade home decor. A matte coat softens surface irregularities and grants a refined, calming appearance. It pairs perfectly with Nordic interiors, vintage accessories, and arrangements with dried flowers.
Milk paint and chalk paint are inherently formulated with a matte finish. For natural, subtle textures, matte is the go-to choice.
Semi-gloss offers a gentle, soft reflection akin to an eggshell. It provides a balanced, elegant sheen that is versatile for many applications.
Compared to flat matte finishes, semi-gloss is more resistant to fingerprints and smudges, making it easy to wipe down with a damp cloth.
For practical wooden items or decor in children's rooms, semi-gloss strikes the sweet spot between aesthetics and physical durability.
High-gloss paint reflects light strongly, producing a polished, protective coating effect. It works brilliantly for retro-pop art, mid-century American decor, or when creating smooth, plastic-like surfaces.
Note that high-gloss sheens tend to highlight underlying surface flaws and uneven brushwork. Thorough surface prep and smooth brush technique are essential when using glossy paints.
Beginner painting mistakes follow predictable patterns, and almost all of them stem from a lack of preparation or technique. By keeping these three countermeasures in mind, you can eliminate painting failures entirely!
If dried paint easily peels off when scratched with a fingernail, the culprit is almost certainly insufficient surface preparation.
Slick materials (metal, glass, plastic, or pre-varnished wood) lack mechanical texture for paint to hold onto, leaving the layer resting loosely on top.
To solve this, use two steps: First, lightly scuff the surface with 400-grit sandpaper to create micro-grooves ("sanding for adhesion"). Second, apply a multi-primer. Together, these steps create a tough bond that won't scratch off.
If visible brush ridges remain on your project after drying, the paint was likely too thick or applied too heavily in a single coat.
Straight out of the container, paint can be viscous. When using water-based paint, mix in a tiny amount of water (about 5% to 10%) and stir thoroughly. Slightly thinning the paint enables a self-leveling effect where gravity flattens the wet paint film, eliminating brush marks.
Crucially, never try to achieve total coverage in a single heavy coat. Apply a thin first coat (even if the base shows through slightly), let it dry completely, and then apply a thin second coat to build an even layer.
If the surface feels tacky or sticks to your fingers long after painting, it is due to insufficient drying time or trapped moisture caused by heavy application.
Even if the surface feels dry to the touch, moisture trapped underneath causes tackiness. Thick layers lock moisture inside, preventing proper curing.
Always stick to thin coats and respect recommended dry times (roughly 1 hour in summer, 2+ hours in winter) between layers. Applying paint over half-dry layers traps moisture permanently.
Beyond simply applying paint, adding one small extra step can elevate your handmade crafts to retail quality. That extra step involves intermediate sanding between coats and applying a protective topcoat.
I never skip these steps in my own work because they dramatically improve both feel and durability!
Once your first coat of paint is completely dry—and before applying the second coat—gently stroke the surface with fine sandpaper (400-grit or higher) without applying pressure. In Japanese crafting, this technique is known as nakatogi (intermediate sanding).
This step removes raised wood fibers, tiny dust specks, and minor brush ridges, leaving the surface silky smooth. Wipe away sanding dust with a well-wrung damp cloth before applying your second coat, and you'll be amazed at the professional texture!
After your paint job is dry, applying a topcoat of water-based urethane varnish or clear topcoat adds an extra layer of protection.
Matte paints like milk paint or chalk paint can be sensitive to moisture or finger oils if left unprotected. Adding a clear protective varnish preserves the color while boosting water resistance and durability.
Topcoats come in matte clear and glossy clear variations. If you wish to preserve the soft texture of matte paint, be sure to select a matte clear varnish.
Even with high-grade paint, poor tools or an unorganized workspace will compromise your results. Here are the tools and environmental practices I use to ensure stress-free painting:
Inexpensive, low-quality brushes often shed bristles onto your work or leave severe brush marks due to uneven bristles.
It is worth investing in a brush designed specifically for water-based paint with fine nylon bristles. Fine nylon bristles hold paint well and yield a smooth, gorgeous coat effortlessly.
For flat surfaces, using a foam brush or mini roller instead of a traditional brush is another smart option, as they eliminate brush marks completely.
Proper workspace prep accounts for 80% of painting success. Before starting, spread newspaper or plastic sheeting over your work surface to protect against drips.
For crisp edges, apply craft masking tape firmly along borders. Press the edges of the tape down firmly with a ruler or fingernail so paint cannot bleed underneath via capillary action.
For clean lines, remove the masking tape while the paint is semi-dry, before it cures completely.
While water-based paints have low odor, they are not completely odorless. Keep at least two windows open during work to maintain good airflow.
To avoid paint under your fingernails, wear thin disposable nitrile gloves. Wearing a dedicated work apron also keeps your clothes clean so you can focus entirely on crafting.
Here is a handy summary table to help you select the right paint and primer combinations for your projects:
Rarely will a craft project require an entire container of paint. Knowing how to store leftover paint and dispose of it safely is an essential skill for every crafter.
After painting, thoroughly clean paint residue from the rim and grooves of the container using a damp cloth or tissue. Dried paint in the rim will seal the lid shut permanently.
To seal the lid, place a scrap piece of wood over it and tap gently with a mallet for an airtight seal. Store paint in a cool, dark place away from direct sunlight, and protect it from freezing. If water-based paint freezes below 0°C (32°F), its components separate permanently.
Never wash leftover water-based paint directly down the sink drain. It can clog plumbing pipes and cause environmental harm.
When cleaning brushes, rinse the bulk of the paint in a bucket of water, then absorb that water with newspaper or rags to dispose of as burnable trash.
To dispose of larger amounts of leftover paint, use a paint hardener compound or spread the paint thinly over newspaper to dry completely before discarding according to local waste regulations.
In this guide, we explored how to choose the right paint for handmade projects alongside techniques for flawless painting results.
Let’s review the key rules for painting success:
Mastering paint expands your creative possibilities endlessly. Turning a plain wooden board into a vintage sign or upcycling a tin can into a planter brings wonderful satisfaction that only handmade crafting can provide.
Start with small projects like wooden boxes or upcycled cans. As long as you follow these core steps, you can create beautifully finished pieces that look like boutique store finds!
Grab your favorite colors and make your crafting journey even more exciting! If you found this article helpful, please share it with your crafting friends on social media. See you in the next article—this was Yassy from Crafters!






For example, if you are looking for articles about mizuhiki, try searching for "mizuhiki"; if you are interested in tools, try keywords like "nippers" or "pliers."
