Why Won’t Your Ink Dry? Ultimate Troubleshooting & Drying Guide for Crafters
yassy
Crafters!

Hello, craft lovers! This is Yassy from Crafters! (・∀・)
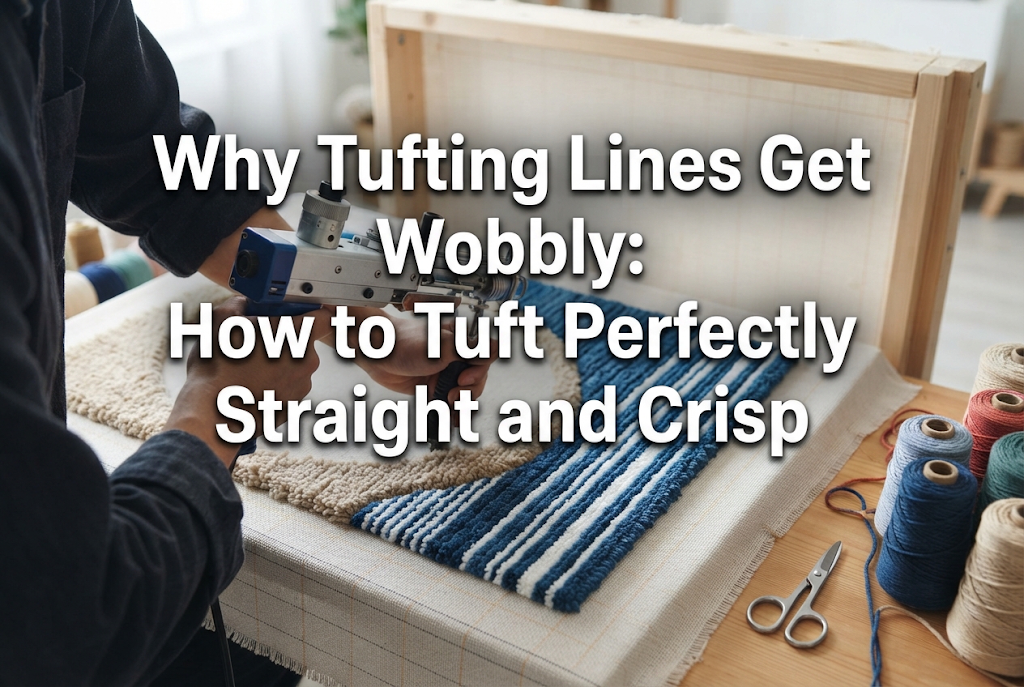
When first starting out with rug tufting, nearly everyone hits the same frustrating roadblock: crooked, wobbly, and wavy lines.
You think you're following your traced design accurately, but when you step back to check the back of the cloth or feel the pile on the front, the lines wander, snake around, or wobble. A tufting gun is a machine designed to oscillate its needle back and forth at a strictly consistent rate. The fact that the lines turn out crooked despite the machine moving rhythmically means one thing: the cause lies entirely in our operational technique and how we prep our backing fabric.
It is not just a matter of luck or vague "practice." There is a clear physical mechanism behind wobbly lines. Once you understand what physically causes those deviations and eliminate each issue step-by-step, anyone can achieve crisp, razor-sharp straight lines and curves. In this guide, I will break down the root causes of uneven tufting lines and share the essential rules and techniques for laying down clean, steady lines every time.
A crooked line occurs whenever the needle punctures the primary tufting cloth off its intended track—even slightly to the left, right, up, or down. The needle of a tufting gun cycles back and forth dozens of times every second. If you slide the gun smoothly in one direction, the yarn will anchor into the weave at even intervals, creating a crisp, single line.
However, if the primary backing sags or the angle at which you press the gun shifts, the puncture point drifts by a millimeter or two. When these tiny one- or two-millimeter misalignments happen continuously, they multiply into visible waves and zigzags.
Furthermore, when the density of the tufted yarn (cut or loop pile) on the back of the fabric is uneven, the dense fibers push against each other. This mutual pressure bends the yarn outward, distorting the contours visible on the front face of the rug.
Wobbly lines aren't just caused by "shaky hands." They stem from a complex interaction of four elements: primary cloth tension, how the gun is held, travel speed, and yarn feeding tension. Identifying where the issue lies among these factors is your first step toward success.
The single biggest cause of wobbly lines—and the one beginners overlook most often—is the tension of the primary tufting cloth. If your backing fabric is not mounted onto the frame correctly, even the most skilled gun handling will never produce a straight line.
When mounting cloth onto your tufting frame, if the stretch is loose, the fabric will sink backward the moment the gun presses against it. When the cloth yields, the depth to which the presser foot pushes in varies with every stroke. This sagging causes the needle to enter at an angle, shifting the puncture point sideways with each cycle.
You must stretch the primary cloth firmly until it makes a high-pitched, drum-like "thump-thump" sound when tapped with your hand. As you work, the persistent vibration and pressure of the gun will inevitably loosen the fabric. If you notice your lines starting to wobble, stop immediately and retighten the cloth over the gripper strips. In my own workflow, I make it a habit to tap and check the cloth's tension after every single line. Consistent tension is the bedrock of clean tufting.
Standard primary tufting cloth usually features woven gridlines (often yellow). If these guidelines are stretched diagonally or wavy across your frame, your visual perception gets thrown off. The human eye subconsciously uses the fabric's grid as a reference when guiding the tool. If the weave itself is warped, a line that feels straight along the grid will end up crooked once finished.
When stretching cloth, align the horizontal and vertical centers first, ensuring the woven lines run strictly parallel and perpendicular to the inner frame edges. When transferring your design—whether tracing freehand or using a projector—anchor your composition to that straight weave. When the grid is true, the needle naturally tracks within the openings of the weave, gliding into place as if pulled along rails.
Once your cloth is properly tensioned, the next critical element is how you hold and guide the machine. How your hands support the gun and make contact with the fabric directly controls your precision.
The flat black guide on the front of the gun—the presser foot—must stay firmly pressed against the primary cloth. If this pressure is too weak, or if it fluctuates between heavy and light while moving, your lines will waver.
When pressure is too light, the recoil of the needle piercing the cloth pushes the gun back toward you, causing the needle tip to skate across the surface. Conversely, pressing too hard forces the backing too deep, straining the fibers and preventing the gun from gliding smoothly forward. The ideal pressure ensures the foot remains flush against the fabric, pushing the cloth inward just slightly, held at an unwavering pressure.
If you rely solely on your arm muscles to push the gun, your arms will fatigue quickly and your pressure will waver. Instead, lean slightly into the tool, maintaining steady forward pressure using your core and upper body rather than just your wrists.
The front of the tufting gun must always meet the cloth at a strict 90-degree perpendicular angle. If the tool tilts sideways, upward, or downward, the needle enters the fabric obliquely, depositing the yarn slightly off-center from your track.
A common mistake when tufting a straight vertical line is pivoting solely from the elbow. Moving only your forearm causes the gun to sweep in an arc like a fan. That subtle angle shift explains why lines that felt straight end up gently bowed or wavy. When guiding the gun, do not rely purely on arm joints; slide your torso and hips together in parallel with the frame. Always keep an eye on the foot to ensure its entire flat surface rests evenly against the fabric.
Tufting guns feature an adjustable speed dial to control how fast the needle cycles. If the speed at which you physically move the gun along the cloth does not match the cycling rate of the needle, your lines will turn messy.
If you pull the gun forward faster than the needle can cycle, the spacing between yarn stitches stretches too wide. The needle skips threads in the primary cloth, leaving sparse lines. Worse, because the gun moves before the needle can fully anchor into the weave, the needle tip tugs on the backing sideways, making the line jittery and uneven. In extreme cases, this tears the cloth.
There is no need to forcefully drag the machine forward. By design, the mechanical kick of the needle and the rocking motion of the foot generate forward momentum on their own. Your hands should simply guide and support that natural forward drive.
Conversely, if you advance the gun too slowly while the motor runs fast, the needle punches into the exact same spot repeatedly. This packs in too much yarn, creating a dense, bulging ridge on the back. That mountain of compact yarn becomes an obstacle, deflecting the needle on its next stroke and causing the line to derail sideways.
When starting out, avoid dialing your gun to high speeds. Keep the speed dial at its lowest setting so you can clearly see and feel the steady rhythm of each individual stitch. Dialing it back lets you synchronize your physical movement with the gun's cadence perfectly.
Even with perfect cloth tension and proper gun handling, any snag or friction along your yarn path will immediately pull your lines off course. Yarn feeding problems are often subtle, making them an overlooked culprit.
If the yarn does not travel freely from the ball to the gun, it acts like a sudden brake on your movements. The instant yarn snags, a sharp tug reaches your hands, jerking the needle tip off its path. Once the snag breaks free, the gun jolts forward, skipping stitches. This cycle of catching and releasing creates repeated wobbles throughout your line.
Whether you work with acrylic or wool, never pull yarn from the outside of a commercial skein; always pull from the center core (center-pull). Better yet, use a yarn winder to rewind skeins into neat, free-flowing yarn cakes before tufting. Taking the time to wind your yarn reduces tension to practically zero, letting the gun glide unhindered.
Mounting yarn hooks or guides directly above your tufting frame is essential so yarn feeds down smoothly from above. The yarn must drop straight into the top eyelet of your gun with zero friction. If the strand rubs against the edge of the frame or feeds in at an awkward side angle, changing the gun's orientation will introduce sudden tension shifts into your hand movements. As a rule, aim for yarn that feeds so effortlessly it feels as light as air.
Sometimes an isolated line looks perfectly straight, but as soon as you fill in neighboring rows or colors, the entire area begins to look distorted. This usually boils down to improper spacing between your lines.
Many beginners assume that packing rows tightly together produces a higher quality, denser rug, leading them to tuft rows right against or directly over each other. Overpacking creates immense internal pressure on the back of the canvas. With nowhere else to go, the dense yarn pushes outward laterally, bending the surrounding rows out of alignment. Lines that looked straight while tufting end up visibly wavy from both sides.
While ideal spacing varies depending on yarn weight and strand count (such as tufting with two strands at once), aim to leave a gap roughly equivalent to one to two needle widths—about 3 mm to 5 mm—between parallel rows. Leaving visible backing cloth between rows on the reverse side may feel too loose, but the fibers bloom and expand on the front, providing full, lush coverage. Giving lines breathing room prevents fibers from crowding each other out, keeping every row straight and defined.
Wobbles are particularly obvious where two contrasting colors meet. When tufting color transitions, lay down your single outline row first with absolute precision. Then, when filling in the adjacent color, keep your next pass roughly 3 mm away from that outline. Tufting directly against or on top of the outline will bleed the colors together and warp the edge into a jagged border. To achieve crisp separations, always keep outline rows distinct and maintain disciplined spacing between colors.
If a line turns out crooked, don't panic and never keep tufting over it hoping it will fix itself. Tufting allows for full corrections as long as you haven't applied primary latex backing glue yet. Uncorrected mistakes become permanent once glued, so get into the habit of fixing crooked sections the moment you spot them.
If a line is clearly off-track, pull the yarn out completely from the back using tweezers or your fingers. Once the yarn is removed, you will see noticeable holes left by the needle. If you try to re-tuft over open holes right away, the needle will slip into the old perforations, throwing your line off course again.
After removing the yarn, gently rub the warp and weft threads of the backing fabric using your fingernail or the rounded metal tip of your gun. The woven threads will shift back into place, closing up the holes. Check that the weave has recovered, verify your canvas tension, and re-tuft the line cleanly. This sequence—pulling out the yarn, healing the weave, and re-tufting—lets you fix mistakes without compromising your backing.
If a line is only misaligned by a millimeter or so, you don't need to rip out the yarn. From the back of the cloth, use the tip of precision tweezers or an awl to gently nudge the base of the loops or cut tufts into a straight row. Because tufting backing is forgiving, manual micro-adjustments are very effective. Aligning the rows neatly on the back produces an instantly sharper, cleaner line on the front pile.
Whenever I work on large projects, I always inspect the whole canvas after tufting and use tweezers to fine-tune my line alignments. That small extra step makes a world of difference in reaching a professional finish.
Putting all these principles together, here is my personal checklist for consistently laying down straight lines and smooth curves:
Wobbly tufting lines are not a mysterious accident—they are the direct physical result of identifiable variables: loose backing cloth, tilted gun angles, unmatched movement speeds, snagged yarn, or cramped rows. When you address each of these factors during setup and tuft with steady patience, even beginners can achieve razor-sharp, beautiful lines.
If your lines start to wobble, step back, put the gun down, and calmly evaluate your fabric tension, yarn feed, and stance. With the right foundation and deliberate technique, the quality of your tufting will level up dramatically. There is nothing quite like the satisfaction of watching crisp, perfectly aligned rows turn into a polished handmade rug!
If you found this guide helpful, please share it with your fellow makers! Until next time, happy crafting from Yassy at Crafters!







For example, if you are looking for articles about mizuhiki, try searching for "mizuhiki"; if you are interested in tools, try keywords like "nippers" or "pliers."
