Why Your Jesmonite Won’t Cure: Causes and How to Avoid Curing Failures
yassy
Crafters!

Hello, crafters! It’s Yassy! (・∀・)
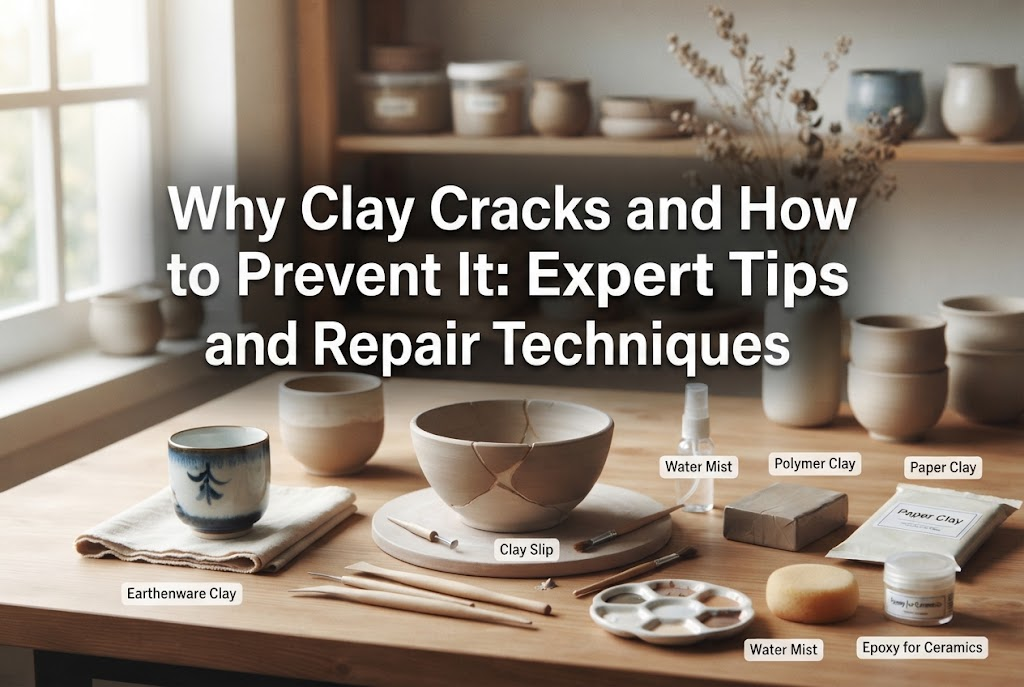
When you are enjoying clay crafting, what is the most heartbreaking moment? For many, it is that agonizing instant when a piece you spent hours shaping with love and precision dries out, only to develop sharp, unsightly cracks. Right after sculpting, it looked glossy, smooth, and perfect—yet once fully dry, countless hairline cracks cover the surface, or separate pieces split right along their seams. It can be truly devastating.
When I first started clay crafting in Japan, I shed plenty of tears over cracked pieces, too. Having experimented endlessly with miniature food, fake sweets (deco sweets), whimsical figurines, and craft accessories, I can tell you this with complete confidence: clay pieces crack for distinct, scientific reasons.
Cracking is not a matter of bad luck or coincidence. Once you properly understand why it happens and follow the right procedures, you can prevent cracks entirely. In this guide, I will share every piece of practical know-how I have gathered: from the core mechanisms behind cracking and clay-specific precautions to molding mistakes and seamless repair techniques if the worst happens!
The primary culprits behind cracking are drying shrinkage and internal stress. Most air-dry clays harden as moisture or plasticizers evaporate, which naturally causes the entire piece to shrink in size. When this shrinkage occurs unevenly, strong opposing tension builds up across the surface and throughout the core. The moment that tension exceeds what the clay can withstand, the material tears open into a crack.
Let’s examine the three core mechanisms that trigger these fractures. Understanding the physics behind your material is the fastest route to zero-defect crafting.
As water leaves the clay, its volume inevitably decreases. This rate of volume loss is known as the shrinkage rate. If an entire piece were to shrink at an identical speed and uniform ratio throughout, cracks would never form.
However, when a piece has a complex shape or uneven thickness, the shrinking forces become unbalanced. Thin sections shrink rapidly, while thick sections shrink slowly. When this mechanical tug-of-war reaches its breaking point, a crack rips across the surface.
Clay always dries from the outside in—starting with the outer surface exposed to air. Once that outer skin dries and turns rigid, the moisture trapped inside begins to evaporate and shrink later. This time lag is a major cause of fractures.
When the interior attempts to shrink, the already-hardened, inelastic outer shell cannot accommodate the movement. As a result, the outer shell bursts or tears open. This phenomenon is especially common in thick, chunky clay creations.
Using clay straight from the packaging without kneading, or sprinkling water halfway through without blending it thoroughly, often leaves moisture distributed unevenly. Sections with higher moisture shrink dramatically, while drier areas shrink very little. This discrepancy produces microscopic distortions inside the body of the clay.
Furthermore, folding air bubbles into the clay during kneading creates structural weak points. As the clay contracts around these air pockets, they become the exact starting points for fractures. Skipping the essential step of thoroughly kneading and de-airing your clay almost guarantees cracks.
Crafting clays encompass a wide variety of formulas, each with distinct primary ingredients and curing mechanisms—from Japanese resin clay and lightweight clay to stone clay (ishi-so clay) and polymer clay. Treating all clays identically will inevitably lead to unexpected failures. Here are the specific risks and rules for each type.
Popular in Japan for miniature sweets and delicate parts, resin clay is primarily composed of vinyl acetate resin or acrylic resin. When cured, it offers remarkable toughness and a delicate, translucent finish. However, it exhibits a relatively high shrinkage rate—typically around 10% to 15%.
A higher shrinkage rate means stronger pulling forces during the drying process. If you sculpt resin clay over an armature or core without ensuring thorough adhesion, the clay will pull away from the core as it shrinks, causing tears. Additionally, mixing in excessive amounts of acrylic paint weakens the clay's structural binding, making it brittle and prone to breaking once dry.
Lightweight clay blends microscopic hollow spheres (micro-balloons) with water-soluble binders to create an ultra-light, fluffy material. While its soft texture is wonderfully easy on the hands, it dries remarkably fast.
Because the surface begins drying almost immediately during handling, you must sculpt quickly. If you hesitate, a thin, dry skin will form. Pressing or smoothing over this skin afterwards will cause it to tear, forming surface wrinkles and cracks. Furthermore, due to its high water content, lightweight clay shrinks noticeably, often causing thin petals or flat sheets to warp and snap.
Formulated from finely ground stone powder and pulp binders, stone clay dries into a dense, ceramic-like material that can be carved with gouges or smoothed with sandpaper. It is a staple among Japanese dollmakers and brooch artists. However, it lacks elasticity.
Stone clay has very little flex. If your sculpture features abrupt transitions between thick and thin areas, clean cracks will run along those boundaries. Moreover, if you add fresh stone clay onto a cured section without dampening the seam, the new layer will often peel or snap off completely once dry.
Composed of polyvinyl chloride (PVC) resin and plasticizers, polymer clay hardens via a chemical curing reaction when baked in an oven. Because it does not dry out in the air, you can take all the time you need to sculpt fine details.
About 90% of polymer clay breakage stems from improper baking temperatures or trapped air. Baking below the manufacturer's specified temperature prevents complete polymerization, leaving the piece fragile and prone to snapping. Furthermore, any air pockets trapped between clay layers will expand inside the hot oven, bursting through the surface and leaving large fissures.
Traditional paper clay relies on cellulose pulp fibers and holds a substantial amount of water. Because shrinkage is pronounced and drying behavior varies depending on the alignment of the pulp fibers, it is susceptible to uneven contraction.
Placing paper clay under direct airflow from an air conditioner or fan pulls moisture out too rapidly, tearing the fibers apart into deep fractures. Paper clay must always be allowed to dry slowly and naturally.
While cracks reveal themselves during drying, their true causes are almost always planted during the sculpting phase. Here are four common pitfalls to eliminate from your routine:
Do you smooth your clay by repeatedly dabbing a dripping wet finger across the surface? Please stop immediately!
Dousing the exterior dissolves the surface clay into a thin slurry, creating an extreme moisture imbalance between the soaked outer layer and the firmer interior. As that wet exterior dries, it contracts violently, creating a dense web of spiderweb-like hairline cracks (crazing). Instead of water, use a small dab of clay paste, or wait until the piece is half-dry and gently sand it smooth.
When joining separate components—such as a head to a body, or petals to a stem—simply pressing wet pieces together is never enough. Even if both parts feel damp, failing to merge their contact surfaces and remove trapped air will cause them to pull apart as shrinkage sets in.
Always score both surfaces (crosshatching with a needle tool or toothpick), apply clay adhesive or a clay slip/paste, and firmly press the parts together. Skipping this crucial prep work guarantees parts will pop off at the slightest impact after drying.
Inserting cores made of aluminum foil, polystyrene foam, or wood reduces weight and saves clay. However, using armatures incorrectly can ruin your entire piece.
The issue is the dramatic difference in shrinkage rates. Aluminum foil and polystyrene do not shrink at all. Meanwhile, the surrounding clay shell contracts significantly. If the core remains rigid while the outer layer shrinks, the outer clay stretches until it inevitably tears open.
When using an armature, maintain an even, moderate clay thickness—never paper-thin—and build a structure that allows the clay to settle smoothly. Additionally, never bake polystyrene foam inside polymer clay, as the heat will melt the foam, releasing gas and causing the piece to rupture.
Folding clay over repeatedly like bread dough traps pockets of air between the layers. In clay crafting, this folding technique must be avoided.
Trapped air pockets become compressed as the clay shrinks, eventually bursting outward in search of an escape route. This leaves pinholes or serves as the epicenter of a crack. Instead of folding, use the heel of your palm to firmly smear and press the clay against your work mat, pushing the air out as you blend.
Now that you know what causes cracks and which habits to avoid, let us look at the foolproof prevention process. This is the exact workflow I follow in my own studio to ensure flawless, durable results every single time.
Even clay freshly removed from an unopened package should be kneaded thoroughly before use. Moisture often settles toward the bottom of the packaging, leaving the top slightly stiff.
Using the palms of your hands, press and roll the clay firmly against your work surface. Knead until the moisture and density are completely uniform and the texture matches the softness of an earlobe. This step purges trapped air and establishes an elastic, crack-resistant structural network.
When building larger three-dimensional pieces, a tightly crumpled ball of aluminum foil makes an excellent lightweight core. However, because foil is slick, clay can easily slip, fail to bond, and crack as it contracts.
To solve this, wrap the crumpled foil core with masking tape or paper floral tape, or apply a thin coat of PVA wood glue and let it dry first. This slight texture gives the clay a secure physical and adhesive grip. As the clay contracts, it hugs the core tightly instead of pulling away.
Furthermore, ensure the clay covering your armature maintains a consistent thickness of at least 3 mm to 5 mm (approx. 1/8 to 1/5 inch). If any area drops to an ultra-thin 1 mm, it will tear wide open along that stress line.
Whenever you join parts, use a custom clay paste made from the exact same clay as your project. The recipe is simple: take a small scrap of your working clay, add a few drops of water, and blend it with a palette knife until it forms a creamy, toothpaste-like consistency. (For polymer clay, use a liquid polymer clay medium instead of water.)
Score both contact surfaces, spread a generous layer of this clay paste onto the joint, and press firmly together. Clean up any squeezed-out excess with a damp brush or cotton swab. Because the paste dries into the exact same density and material as the body, the risk of splitting along the seam drops to zero.
Once sculpting is finished, drying begins—and this is where patience counts most. Never attempt to rush drying using a hair dryer, direct sunlight, or the direct draft of an air conditioner. Rapid drying causes cracks 100% of the time.
My go-to technique is humidity-controlled slow drying. Place your finished piece on a soft sponge, then loosely cover it with an upturned plastic storage container or a cardboard box. You do not need an airtight seal; the goal is simply to shield it from moving air while allowing the internal humidity under the cover to decline gently and evenly.
Keep the piece covered for the first one to two days. Once the surface is firm to the touch, remove the cover and allow it to finish air-drying at room temperature. Depending on the size of the piece, allowing it to dry gradually over 3 to 7 days guarantees a remarkably tough, crack-free result.
Even with meticulous care, seasonal humidity shifts or unexpected accidents can sometimes cause a crack. Do not throw your hard work into the trash! With proper repair techniques, clay projects can be restored so cleanly that the damage becomes completely invisible.
For fine surface lines or shallow fissures:
If you have a deep crack reaching into the core or a piece that has split wide open, simply smearing paste over the surface will not work. It will merely bridge the gap, leaving an air pocket underneath that will split open again as soon as the repair shrinks.
To fix deep splits permanently, you must first widen the gap:
Once repairs are complete and the piece is thoroughly dry, reinforce its durability. A repaired section naturally has slightly less structural integrity than the surrounding cured clay.
Apply two to three light coats of water-based craft varnish (matte or gloss) or a high-grade protective topcoat. This creates a resilient barrier that blocks out ambient humidity and guards against physical impacts.
For fragile, thin parts—such as miniature animal ears or flower petals—brushing a thin layer of UV resin onto the backside and curing it, or letting a drop of thin cyanoacrylate (super glue) soak into the reverse side, provides tremendous structural reinforcement.
To wrap things up, here are two daily studio habits I practice to keep my crafting smooth and crack-free.
Clay reacts sensitively to room climate. Sculpting in a dry room during winter or right under an active air conditioner during summer siphons away moisture while the clay is still in your hands.
I run a humidifier in my workspace to keep room humidity around 50% to 60%. Furthermore, any clay I am not actively using is immediately wrapped in plastic film and kept in a sealed container lined with a damp cloth. Only take out the exact amount you need for the immediate step, keeping the rest sealed. This simple habit preserves your clay in prime condition.
Attempting to sculpt a large, intricate character or structure in one continuous piece creates massive thickness disparities, making uneven drying rates and cracks almost inevitable.
The professional solution is modular sculpting: sculpt separate components independently, let them dry fully, and assemble them afterwards. For example, if you are making a figurine, sculpt the head, torso, arms, and legs as separate parts. Let each part dry completely so that all shrinkage has concluded. Then, drill small guide holes with a pin vise, insert reinforcing craft wire or bamboo skewers, and join the dry pieces securely with strong adhesive.
Adopting this modular method reduced my drying failures to absolute zero. If you are planning an ambitious or complex sculpture, I strongly recommend giving it a try!
Clay crafting is one of the most rewarding and tactile arts, letting you bring charming, beautiful three-dimensional creations to life with your own hands. Once you conquer the fear of cracking, your creative possibilities expand infinitely!
Keep these fundamental rules in mind:
Armed with these techniques, you can sculpt with total peace of mind. I hope your workspace is filled with wonderful, durable clay creations! If you found these tips helpful, please share them with your fellow makers. See you in the next craft guide—this was Yassy!







For example, if you are looking for articles about mizuhiki, try searching for "mizuhiki"; if you are interested in tools, try keywords like "nippers" or "pliers."
