How Much Does It Cost to Start Crafting? A Complete Breakdown of Startup Costs by Genre & Smart Budgeting
yassy
Crafters!
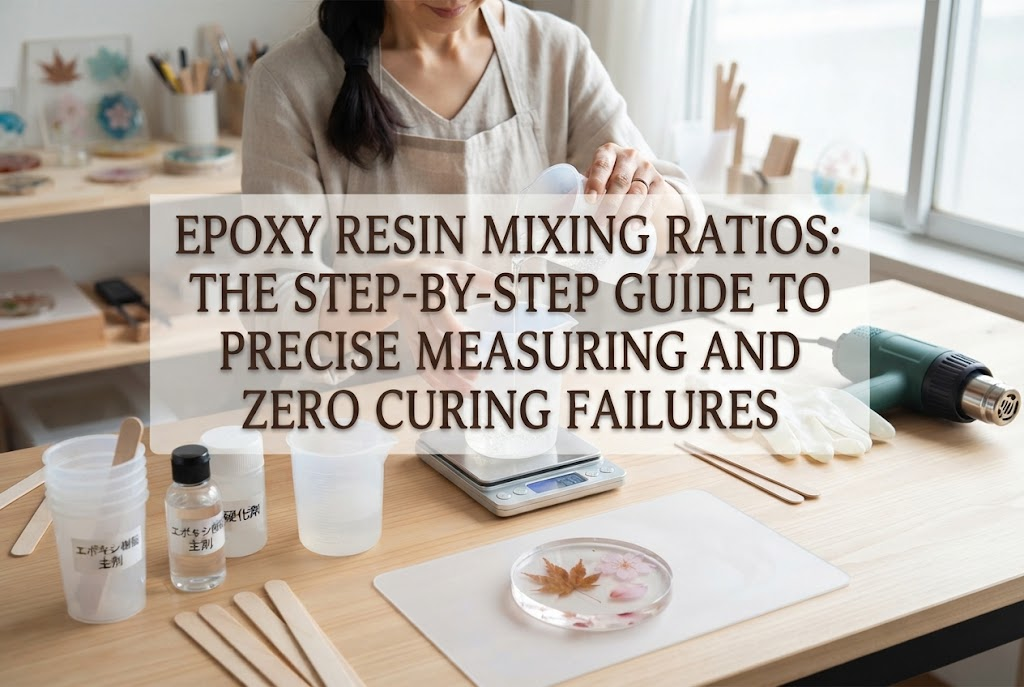

Hello, crafters! This is Yassy from Crafters! (・∀・)
Whether making handcrafted pieces myself, admiring the incredible work of creators across Japan, or purchasing unique one-of-a-kind treasures online and at craft fairs, crafting is my passion. Among all the mediums I work with, epoxy resin (two-part resin) holds a truly special place.
The breathtaking clarity, the solid weight of 3D casts, and the glossy finish that looks like natural water or polished glass are qualities unique to epoxy. Over the years, I have tested countless brands of resin liquids and crafted a vast number of pieces.
However, nearly every beginner who dives into epoxy resin runs into one massive hurdle: getting the mix ratio between the resin (Part A) and the hardener (Part B) right.
“I thought I followed the recipe, but it won’t cure even after several days.”“The surface remains sticky, and my fingerprints stick to it.”“I measured using the lines on the mixing cup, but it completely failed.”
I receive questions like these all the time. And 99% of the time, the underlying cause comes down to misunderstanding how the resin base, the hardener, and the mixing ratio actually work together.
Epoxy resin cannot be handled by intuition or eyeballing measurements. It is a precise craft based entirely on an exact chemical reaction. Once you equip yourself with the right knowledge and proper measuring tools, curing failures can be reduced to absolute zero.
In this guide, I will break down the fundamental chemistry of resin and hardener, explain the crucial difference between weight ratio and volume ratio, walk through exact calculations, and share my fail-proof measuring and stirring techniques. Read on, and let’s master this together!
The first step toward resin success is understanding the chemistry behind how the material transitions from liquid to solid. Even though it shares the name “resin” with UV or LED resin, the curing mechanism is entirely different. Grasping this process makes it clear why exact ratios are not optional.
Epoxy resin is always supplied as a two-bottle system: Part A (the resin base) and Part B (the hardener). Chemically, they are two completely distinct substances.
Part A is the epoxy resin itself, which forms the structural backbone of your finished piece. It typically has a higher viscosity and pours as a thick liquid. On its own, it will never harden—no matter how many days you wait or how much sunlight hits it.
Part B is the catalyst and cross-linking agent designed to bridge the resin molecules together. It is usually thinner and has a lower viscosity than Part A. Just like the resin, the hardener alone will never cure on its own.
Only when the molecules of Part A and Part B meet in the exact predetermined ratio does the cross-linking chemical reaction begin. If there is too much or too little of either component, unbound molecules remain stranded, preventing complete solidification. This is the fundamental rule of epoxy resin.
Beginners often confuse epoxy resin with UV/LED resin. UV resin relies on ultraviolet light energy to trigger polymerization. Because light must reach every layer, it cannot properly cure in thick, deep molds or when mixed with opaque pigments and heavy inclusions.
Epoxy resin, by contrast, cures via an exothermic chemical reaction. When the two components are combined, their molecules bond and release mild heat, gradually curing from the inside out over several hours.
Because it does not rely on light, epoxy can cure rock-hard uniformly through deep pours, large thick castings, or deeply colored, opaque projects. For items with depth—such as orgonite pyramids, thick coasters, or river table pours—epoxy resin is the clear choice.
However, relying on a chemical reaction rather than light means that the clock starts as soon as you mix them. More critically, if the ratio is off, there is no tool or light source that can force it to harden after the fact. That is why your initial measurement decides everything.
The single biggest pitfall for beginners is mixing up “weight ratio” and “volume ratio.” Falling into this trap guarantees failure, no matter how diligently you follow other steps. Keep this distinction firmly in mind.
Mixing ratios come in two distinct formats: by weight in grams (g), or by volume in milliliters (ml/cc).
The vital detail to note is whether your manufacturer’s stated ratio (such as 2:1) is based on weight or volume. Over 90% of craft-grade epoxy resins sold in Japan are specified by weight ratio. Always inspect the back of your bottle or the instruction sheet. If it says “100:50 by weight,” you must use a scale to measure in grams.
You might wonder: “Doesn't 100 ml and 50 ml equal 100 g and 50 g?” With water, 1 ml equals 1 g. But resin components are not water.
Part A and Part B contain completely different chemical compounds, which means their specific gravity (mass per unit volume) is different. Typically, the thick Part A resin is heavier, with a specific gravity of roughly 1.1 to 1.15. The thinner Part B hardener is lighter, with a specific gravity around 0.95 to 0.98.
This means that 100 ml of Part A weighs approximately 110 g, while 100 ml of Part B weighs only about 95 g.
If you take an epoxy formulated for a 2:1 weight ratio (100 g to 50 g) and measure it by volume at 100 ml to 50 ml using the marks on a cup, your actual weights end up around 110 g of resin to roughly 47.5 g of hardener. The ratio becomes severely unbalanced with too much resin, leaving you with a permanently sticky, uncured piece.
Stop relying on the printed lines of mixing cups. The non-negotiable rule of epoxy resin is to always weigh your parts in grams using a digital scale.
Different resin brands specify different mixing formulas. Check your product and use the calculations below. Here are the three most common ratio patterns and how to calculate them accurately.
In the Japanese craft market, a 2:1 ratio (2 parts resin to 1 part hardener) is the most standard and approachable formula. The hardener equals 50% of the resin's weight.
For example, if you want to prepare a total of 30 g of mixed resin:
Check: 20 g resin to 10 g hardener equals 2:1, totaling 30 g.
If you already know how much resin you are using, it is even simpler: divide the resin weight by 2. If your resin weighs 40 g, you need 40 ÷ 2 = 20 g of hardener.
A 3:1 ratio (3 parts resin to 1 part hardener) is common among high-clarity, non-yellowing premium formulas and many international resin brands. In this case, the hardener constitutes a smaller proportion.
To prepare a total of 40 g of mixed resin:
Check: 30 g resin to 10 g hardener equals 3:1, totaling 40 g.
If your resin weight is fixed, divide the resin weight by 3. For example, 45 g of resin requires 45 ÷ 3 = 15 g of hardener. Because calculations can yield decimals, make sure to weigh accurately to one decimal place.
Some professional, industrial, or large-casting resins specify formulas such as 100:45 or 100:40.
While this looks daunting at first glance, you can calculate the exact amount with this straightforward formula:Resin Weight × (Specified Ratio ÷ 100) = Required Hardener Weight
Use your smartphone calculator, write down the target numbers on a notepad before pouring, and keep it beside your workspace. Trying to calculate mentally while pouring almost always leads to accidental over-pouring.
Thoughts like “I’ll add a bit more hardener so it sets faster” or “I have a tiny bit of resin left, so I’ll just pour it in” will lead directly to failure with epoxy. Here is what happens when ratios get distorted.
If you pour more Part A than instructed, there will not be enough hardener molecules to bind with all the resin molecules. The leftover, unlinked resin remains in a liquid or semi-solid state inside and on the surface of your project.
Even after unmolding, the piece may bend like a soft pencil eraser, or the surface will remain tacky enough to hold distinct fingerprints. No matter how many weeks you let it sit or how long you put it under the sun, it will never cure completely. Uncured epoxy cannot be repaired; the piece must be discarded.
Adding extra Part B in hopes of speeding up curing time is dangerous. Excessive hardener causes unlinked molecules to undergo rapid over-reaction, leading to an aggressive thermal spike.
The mixing cup can become scalding hot to the touch, warp plastic containers, or even emit smoke. Furthermore, the intense heat causes the resin to discolor into a murky yellow, and once cured, the finished piece will be brittle and prone to cracking under minor stress. Increasing hardener does not make the piece cure better—it ruins it.
Even if you weigh your components to the tenth of a gram, improper mixing creates localized ratio errors right inside your cup. The right side of the cup might have an excess of resin while the left side has too much hardener.
Pouring this into a mold creates spotty curing: one half of the piece cures rock-solid while the other remains syrupy and soft. Thorough mixing is every bit as critical as accurate weighing.
Here are the exact tools and procedures I rely on in my own studio to ensure flawless, crystal-clear results every time.
Standard kitchen scales that measure only in 1-gram increments are not precise enough for resin crafting. When making small jewelry pieces or charms, a 1-gram margin of error is disastrous.
Consider a small piece needing 2 g of resin and 1 g of hardener (3 g total). On a 1 g scale, a pour of 0.6 g displays as “1 g,” and 1.4 g also displays as “1 g.” That represents an error margin of over 50%, guaranteeing curing issues.
Invest in a precision digital scale that reads down to 0.1 g. Excellent options are readily available online for modest prices, and this single tool will dramatically reduce your failure rate.
Always use your scale’s tare function during the measuring process. Follow these steps consistently:
Avoid bumping the scale during this process, and always double-check that you tared the container before pouring.
Once measured, mixing begins. A wooden craft stick or silicone stir stick works best. Press the stick firmly against the bottom and sides of the cup, scraping thoroughly as you stir.
When first combined, the differing viscosities create wavy, cloudy swirls in the liquid (known as striations or the Schlieren effect). Continue stirring gently and consistently until these striations vanish completely and the mixture turns uniformly transparent without cloudiness.
As a general guideline, stir for at least 3 minutes for small cups, and 5 minutes or more for larger batches. Stirring too aggressively whips excess air bubbles into the resin. Keep your pace slow, deliberate, and scoop from the bottom up while scraping the walls.
In my own workflow, I use the “double-cup method.” After thoroughly mixing in the first cup, I pour the liquid into a fresh, clean cup and mix for another full minute. This guarantees that unmixed resin clinging to the first cup's walls never makes it into the final mold.
Even with good fundamentals, small oversights can catch you off guard. Here are key answers to questions and real-world issues crafters often encounter.
When making a single small earring, you might be tempted to mix a tiny batch, like 1.0 g resin to 0.5 g hardener (1.5 g total). I strongly advise against this.
Even with a 0.1 g scale, a single drop of liquid weighs roughly 0.03 to 0.05 g. In a 1.5 g batch, one accidental extra drop represents several percentage points of deviation, causing curing failures. Furthermore, a substantial percentage of the liquid stays stuck to the cup walls, skewing the final pour ratio.
Always prepare a minimum combined batch of at least 10 g, regardless of how small your project is. Pour any remaining resin into spare small molds or cabochon trays so nothing goes to waste. A larger total volume minimizes the impact of tiny measurement variances.
When adding liquid colorants, mica powders, glitters, or dried botanicals, timing matters:
Always mix Part A and Part B thoroughly before adding your colorants. If you mix dyes into Part A alone, the colorant can coat the resin molecules and interfere with the chemical reaction when the hardener is added.
Keep colorant quantities under 5% of the total resin volume. Adding too much liquid pigment disrupts the polymer network, preventing proper hardening even if your base ratio was spot-on.
Never use acrylic paints or water-based inks as colorants. Epoxy resin is extremely sensitive to moisture; even a single droplet of water can cause cloudiness, bubbling, or surface stickiness. Always use oil- or resin-based pigments formulated specifically for epoxy.
Some crafters try to tweak their ratios depending on the season—adding extra hardener in winter because curing is sluggish, or reducing it in summer to extend working time. This is a critical mistake.
Epoxy resin’s molecular bonding ratio does not change with ambient temperature. Modifying the ratio will not correct the cure time; it will only ruin the piece.
If curing is slow in winter, address the temperature of your environment instead: maintain a room temperature around 20°C to 25°C (68°F to 77°F), or warm the Part A bottle gently in a warm water bath before mixing. Keep the manufacturer’s stated ratio unchanged under all circumstances.
Getting your resin, hardener, and mixing ratio right is the foundation of clean, professional epoxy resin art. Here is a quick review of the core rules:
Epoxy resin can seem intimidating at first with its precise measurements. But once the habits of weighing accurately in grams and mixing thoroughly become second nature, it transforms into one of the most rewarding mediums in the crafting world.
There is nothing quite like unmolding a glass-clear coaster, an intricate floral paperweight, or a deep dimensional piece that you crafted with your own hands.
Check the packaging on your resin bottles, grab your 0.1 g scale, and enjoy crafting with confidence! If you found this guide helpful, feel free to share it with your fellow makers. See you in the next post—this was Yassy from Crafters!







For example, if you are looking for articles about mizuhiki, try searching for "mizuhiki"; if you are interested in tools, try keywords like "nippers" or "pliers."
