Combining Japanese Shrink Plastic & Resin: Pro Rules to Prevent Peeling, Warping, and Bleeding
yassy
Crafters!

Hello, everyone! It’s Yassy from Crafters! (・∀・)
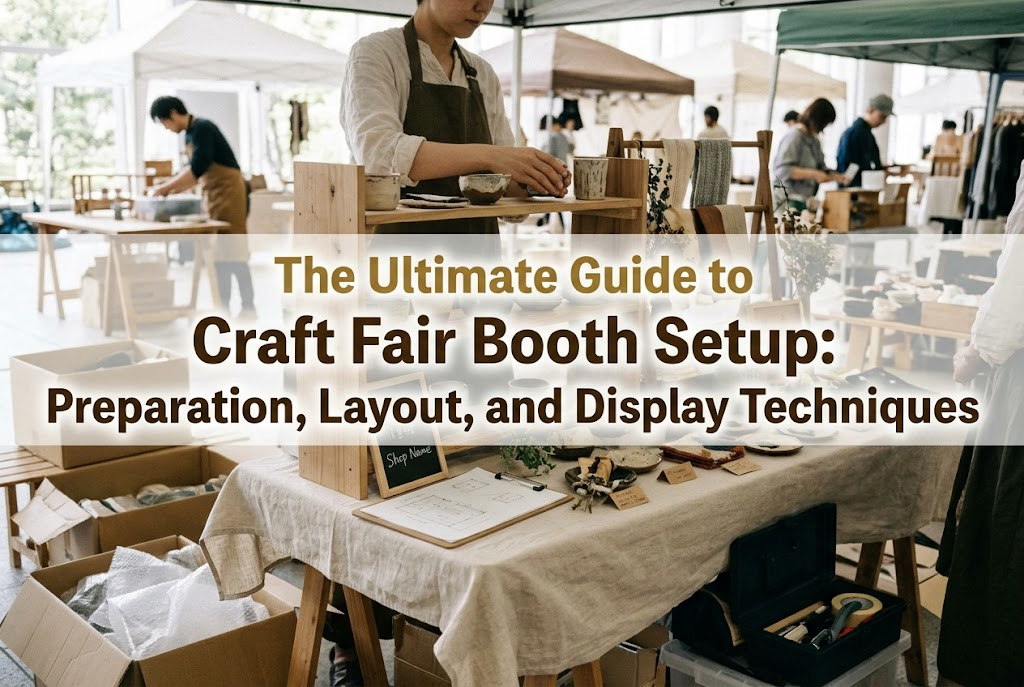
I absolutely love making, looking at, and shopping for handmade items, but there is something truly special about immersing yourself in the bustling energy of a craft event. Having customers hold your handcrafted pieces in their hands, seeing their smiles, and connecting directly with them is one of the greatest milestones for any artisan.
However, when you are getting ready for your first craft fair or still finding your footing, it is completely natural to feel overwhelmed. You might wonder, "What should I pack?" or "How should I arrange my items so people actually notice them?" No matter how wonderful your creations are, a poorly planned booth or flat display can easily hide half of their charm.
Success at an event is not just down to luck on the day; it is driven entirely by careful advance preparation and a calculated booth layout. There are clear, proven principles that make passing shoppers stop in their tracks and reach for your work. In this guide, I will share all of my practical experience and techniques—from early planning and smooth morning setup to display strategies that dramatically elevate your items. Let’s get fully prepared so you can enjoy a rewarding, stress-free event debut!
Once your spot at an event is confirmed, your very first step is organizing what needs to be done and in what order. If you spend all your time crafting without a clear roadmap, you will find yourself in a panic right before the event, scrambling for packing supplies or missing vital fixtures. Work backward from your event date to establish a firm schedule.
At least one month before the event, finalize your target inventory numbers and product lineup. If you bring too few items for your table size, your booth will look sparse and uninviting. Conversely, overcrowding your space makes it cluttered and difficult to browse.
For a standard single-table space (roughly 180 cm wide by 45–60 cm deep, a typical Japanese banquet table size), preparing an inventory of 30 to 50 main pieces creates an appealing balance. For compact items like accessories, having 70 to 100 pieces, including color and design variations, creates an engaging, substantial presentation.
You should also finalize your pricing and prepare all price tags at the one-month mark. At a busy market, shoppers must be able to understand prices instantly. Set your prices in round, easy-to-calculate increments, such as 1,000 yen, 2,000 yen, or 3,500 yen (using 500-yen or 100-yen intervals). Avoid awkward increments like 50-yen or 10-yen fractions; they complicate checkout, increase calculation errors, and cause bottlenecks at your table.
In my own setups, I structure the lineup with a mix of accessible, entry-level items priced around 1,000 yen alongside signature, high-end pieces in the 5,000 to 10,000 yen range. This allows you to cater to a broad audience, from casual passersby to dedicated collectors.
Forgetting even a single critical tool on the morning of the fair can halt your setup entirely. Create a checklist and finish packing everything by the day before.
Here are the must-have essentials:
Cash float and removable tape (such as Japanese curing tape or painter's tape) are especially easy to forget. Do not rely on nearby banks or convenience stores to break bills on the morning of the event; change exchange machines often run dry or are unavailable early in the day. Always prep your cash change at a bank at least three days in advance.
At a large craft venue, dozens or even hundreds of booths stand side by side. To capture the gaze of walking shoppers and draw them toward your table, you must move away from flat arrangements and build a multi-level, three-dimensional display.
Avoid simply laying your pieces flat on the tabletop. Flat displays can only be seen when someone leans directly over the table, making them completely invisible to shoppers walking along the aisle. The secret to standing out from a distance is adding varied height.
Design your vertical levels based on standing eye level. When people walk, their gaze naturally falls between 130 cm and 150 cm from the floor. Since venue tables usually sit around 70 cm high, you need risers or fixtures that add an extra 30 cm to 50 cm of vertical space on top of the table.
Here are effective ways to create vertical variation:
Position your hero pieces and signature creations at the highest point, matching eye level. Place secondary items and color variations on middle and lower tiers. This simple height variation catches the eyes of distant shoppers and dramatically increases the chances they will stop.
A tablecloth covers the majority of your visual space and plays a decisive role in how your work is perceived. Venue-provided tables are usually plain conference tables. Leaving them bare immediately diminishes the handcrafted charm and perceived value of your items. Use a floor-length cloth that completely conceals the metal legs and boxes stored underneath.
Choose your tablecloth color based on theory rather than personal preference. Pick a shade that makes your creations pop.
Guidelines by material and category:
A crucial rule is to avoid heavily patterned fabrics. Bold floral prints or gingham plaids distract the eye, swallowing your pieces and confusing customers about what is actually for sale. Stick to solid colors or subtly textured plain weaves, such as linen or canvas.
New exhibitors often fall into predictable display traps. Recognizing these mistakes ahead of time allows you to design a polished, professional booth right from the start.
When you want to show off everything you made, it is tempting to cover every inch of the table. This is the single most common pitfall for beginner artisans.
A display lacking breathing room feels overwhelming, confusing, and stressful to browse. Shoppers struggle to identify your best pieces and often worry they might knock something over. When faced with too many choices packed together, human nature is to walk away without deciding.
Always leave at least a "two-finger width" of empty space between items. Giving each piece its own distinct breathing room makes your work look far more refined and valuable.
Keep surplus inventory tucked out of sight under the table. When an item sells, simply restock it from below. Limit tabletop displays to sample pieces and modest quantities, keeping intentional negative space that ultimately drives stronger sales.
When shoppers pause at your booth, their immediate questions are price, materials, and key features. Yet, many booths have missing price tags, tags flipped facedown, or text so tiny it cannot be read.
Many shoppers—especially in polite market settings—hesitate to ask a maker for prices directly. If they cannot spot the price quickly, they simply move on.
Follow these essential rules for pricing and signs:
Aim for a setup where the materials, benefits, and prices are fully understood without requiring a verbal explanation. This alone lowers buying resistance significantly.
The morning of a craft fair brings a distinctive buzz and fast-paced energy. To finish your setup smoothly within the tight load-in window, use a methodical, structured sequence.
Most fairs allow only one to two hours before doors open for load-in and setup. If you hesitate over where to place things, opening time will arrive before your booth looks ready.
Follow this exact step-by-step order:
I strongly recommend running a full rehearsal at home beforehand. Tape out your exact booth dimensions (such as 90 cm wide by 45 cm deep) on a table, arrange everything, and snap a reference photo with your smartphone. On event day, simply recreate the photo to finish your entire setup in 20 to 30 minutes.
When organizing your booth layout, plan the movement paths for both yourself and your shoppers.
If a maker sits squarely in the middle of a booth on a chair, staring straight ahead, shoppers feel intense pressure and will avoid approaching. Standing directly in front of your display and blocking traffic is equally counterproductive.
Use these positioning techniques to create an approachable atmosphere:
Always provide a small coin tray for transactions. Exchanging payment and change on a tray feels courteous and professional while preventing dropped coins and accounting errors.
Different handmade mediums require distinct fixtures to showcase their texture and craftsmanship effectively. Choose display approaches suited to your craft category.
Delicate jewelry easily gets lost if laid flat. Prioritizing dimensional fixtures and clear lighting angles is essential.
Textile and fiber creations carry natural warmth. The goal is to show their full three-dimensional form and help customers picture using them.
Substantial, heavier items require a display that balances cohesive atmosphere with solid structural safety.
Setting up for a handmade fair is far more than just arranging inventory on a table—it is building the best possible stage for pieces you poured your heart and time into creating.
By sticking to a clear preparation timeline, organizing your checklist, leveraging vertical tiers, and offering clear pricing and welcoming space, your booth will transform into an inviting destination where shoppers happily pause and explore.
It is completely normal to feel nervous your first few times. But with advance simulation and sound display principles in place, you have nothing to fear. Create a space you genuinely love, and savor the unforgettable experience of connecting with your audience! I am cheering for your event success all the way!
If you found this guide helpful, please share it with your fellow makers on social media! See you in the next article—this was Yassy from Crafters!



For example, if you are looking for articles about mizuhiki, try searching for "mizuhiki"; if you are interested in tools, try keywords like "nippers" or "pliers."
