Professional Sewing Techniques for a Flawless Finish: From Fabric Prep to Final Pressing
yassy
Crafters!

Hello everyone, Yassy from Crafters here! (・∀・)
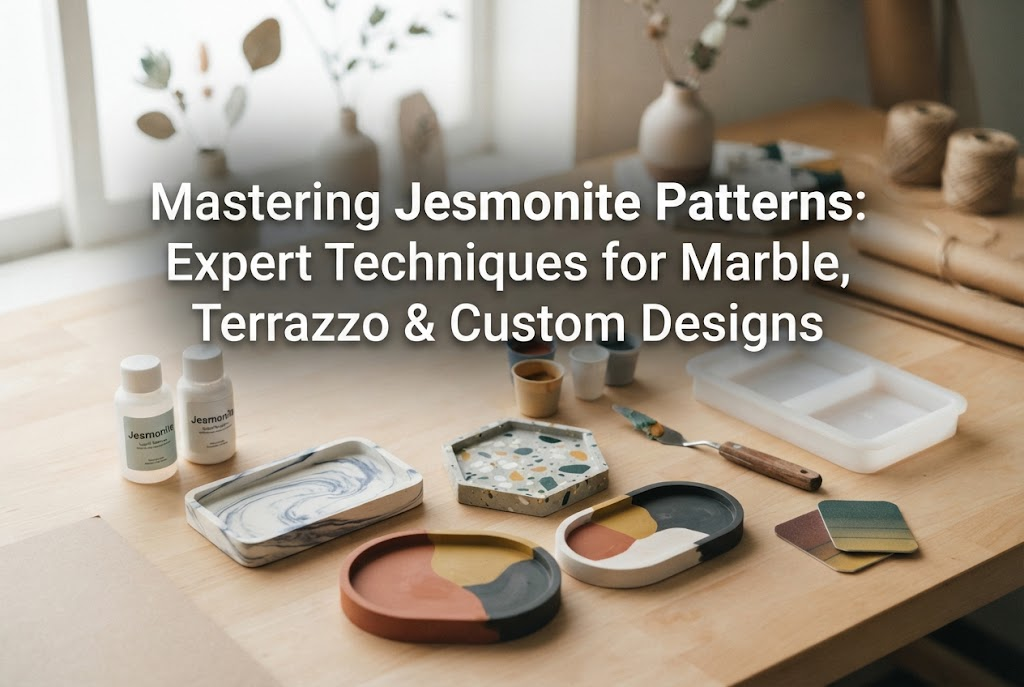
Have you ever seen those stylish marble coasters or trays sprinkled with colorful chips in home decor shops? Being able to create those beautiful pieces with your own hands makes handmade crafting so much more exciting.
Jesmonite, an eco-friendly water-based resin, offers a wonderful ceramic-like texture even when cast in a single solid color. However, once you master techniques for adding patterns and designs, the quality of your creations jumps by ten times or more.
Creating patterns with Jesmonite feels like a thrilling blend of science experiment and art. Because no two patterns ever turn out exactly the same, the ultimate charm lies in creating a truly one-of-a-kind piece.
That said, when beginners try it without knowing the key principles, they often hit major roadblocks—such as trying to make a marble pattern only to have the colors blend into a single muddy shade, or having terrazzo chips sink straight to the bottom so no pattern appears on the surface.
In this guide, I'll thoroughly explain the absolute rules for achieving flawless marble, terrazzo, and various custom designs in your Jesmonite projects, based on my own practical crafting experience. By reading this, your work will evolve into shop-worthy, top-tier quality.
Because Jesmonite transforms from a liquid into a solid, you can create a wide variety of designs depending on your approach. Before diving into the technical steps, let's cover the four main representative designs. Clarifying your ideal vision beforehand is the first step toward a successful project.
This is the most popular style and pairs perfectly with Jesmonite's smooth texture. Base and accent colors intertwine like waves, creating graceful lines similar to natural marble or driftwood. From elegant, delicate fine lines to bold, high-contrast modern looks, you can control the outcome freely once you master the technique.
Terrazzo originally refers to a building material made by mixing crushed stone or glass chips into cement or resin and polishing the cured surface. In Jesmonite crafting, you can replicate authentic terrazzo by mixing pre-cured, crushed "Jesmonite chips (flakes)" into your liquid base mix. Depending on the color combinations and chip sizes, you can craft anything from cozy Scandinavian-style pieces to vibrant Korean-interior-inspired pop designs.
This active design involves flicking or dotting pigment onto the base liquid surface using a brush or spatula. It's exceptionally effective when you want to create modern pieces with a street-art edge or bold statement art. The rhythmic randomness of this technique makes it highly recommended for creators looking to highlight their individuality.
This technique involves pouring different colors of Jesmonite liquid in separate layers over timed intervals. You can create sharp, modern two-tone splits, geometric diagonal angles, or soft, stratum-like gradations. While it requires methodical planning, the result is a beautifully calculated, precise piece of work.
Many beginners experience the frustration of trying to make marble, only to end up with a single washed-out color. There are absolute rules to ensure you never fail when crafting marble patterns. Instead of relying purely on guesswork, make sure to follow these steps and rules carefully.
The single biggest reason marble patterns disappear into a solid color is over-mixing. When you pour colored liquid into your white base liquid, never swirl it around continuously. Once you add the accent color, use a stir stick or spatula to cut through the mixture in a "figure-8" motion just once or twice. Stopping when it feels like it isn't mixed enough is the secret to crisp, beautiful marble. The liquids will continue to blend naturally as you pour them into the mold, so aim to keep distinct color lines inside the mixing cup.
When pouring your marbled mixture into a silicone mold, moving the cup around is a mistake. Shifting the pour point distorts and ruins the delicate marble lines. Anchor your pour to a single point at the edge of the mold and pour steadily at a constant speed. As the liquid hits the mold, it will flow across the bottom naturally, forming smooth, sweeping marble waves. Furthermore, pouring from high up traps large amounts of air and crushes the pattern. Pouring gently from a low height near the rim is an essential rule.
The texture of your marble pattern changes dramatically between the thin, watery state right after mixing and the slightly thickened state a few moments later. If you want delicate, fine, vein-like lines, pour quickly while the mix is fresh and watery. If you prefer bold, dynamic marble with sharp color boundaries, let it sit for a couple of minutes until it thickens slightly before pouring. Because Jesmonite cures quickly, you only have a few dozen seconds to work once it thickens. This requires swift handling, so practice with thinner mixtures first when starting out.
Terrazzo is a deep, rewarding technique where sanding down the surface of the cured piece reveals the colorful chips inside, resulting in incredible visual quality. Here is the step-by-step process for making shop-quality terrazzo.
While premade chips are available, making your own from scratch is the fastest way to create truly original work. Spread colored Jesmonite liquid onto parchment paper or a silicone mat using a palette knife to a thickness of about 1 to 2 mm, then let it dry. Once fully hardened, crack it by hand or place it in a bag to crush with your hands or a roller. Larger chips give a luxurious, bold impression, while finely crushed chips yield a delicate, soft look. Adjust the chip size according to the scale of your project.
The proportion of chips added to the base liquid greatly impacts the final look. The golden ratio is adding chips equal to 20% to 30% of the base liquid's total weight. If you use too few chips, the pattern looks sparse and empty. If you add too many, the mixture loses its fluidity, preventing it from reaching the mold's corners and causing large air gaps or missing sections.
The most common failure in terrazzo crafting is having all the chips sink to the bottom (the front face of the mold) or float unevenly. To prevent this, gently stir the base liquid and chips together in the cup while waiting for the viscosity to increase slightly. If poured when watery, heavy chips sink instantly. Pouring when the mixture has thickened slightly keeps the chips suspended throughout the liquid.
Fresh out of the mold, a terrazzo piece is covered in a film of base liquid, making the chips underneath look dull and hidden. This is where the magic happens! Using wet/dry sandpaper, sand the surface thoroughly while keeping it wet. Start with a coarse grit like 240 or 320 to strip away the thin top layer of the base. As you do, the colorful hidden chips pop out vividly—this moment is genuinely thrilling! Once the chips are exposed cleanly, progress through 600, 1000, and 1500 grit to smooth out the surface for a silky, polished feel.
Once you've mastered marble and terrazzo, try these advanced techniques to widen your creative horizons and produce unique, striking items.
Flick colored Jesmonite liquid onto the inside of an empty silicone mold before pouring your main mix. Dip a stiff paintbrush or spatula into concentrated colored liquid and snap your fingers against it to splatter paint inside the mold. Wait a few minutes until the splatters are completely hard to the touch, then pour your white base liquid over the entire mold. Unmolding reveals a crisp splatter pattern fixed perfectly onto the surface.
Use a fine paintbrush to paint illustrations, lines, or geometric patterns directly onto the bottom and inner walls of the mold. You can also apply pieces of fake gold leaf. Allow the painted design to dry and harden completely before softly pouring in the background base liquid. This creates precise designs with sharp contrast against the background.
To create neat, stratum-like stripes, pour your mixture in multiple stages over time. Pour the first layer and wait about 10 to 15 minutes until it cures completely or becomes firm to the touch. Once set, pour the next color on top. If you tilt the mold while curing the first layer and then lay it flat for the second, you can form clean, diagonal geometric lines. Jesmonite layers adhere exceptionally well to each other, so there is no risk of the layers peeling apart later.
Creating patterns involves different precautions compared to single-color casting. Learning these five common beginner pitfalls in advance will save you time and materials.
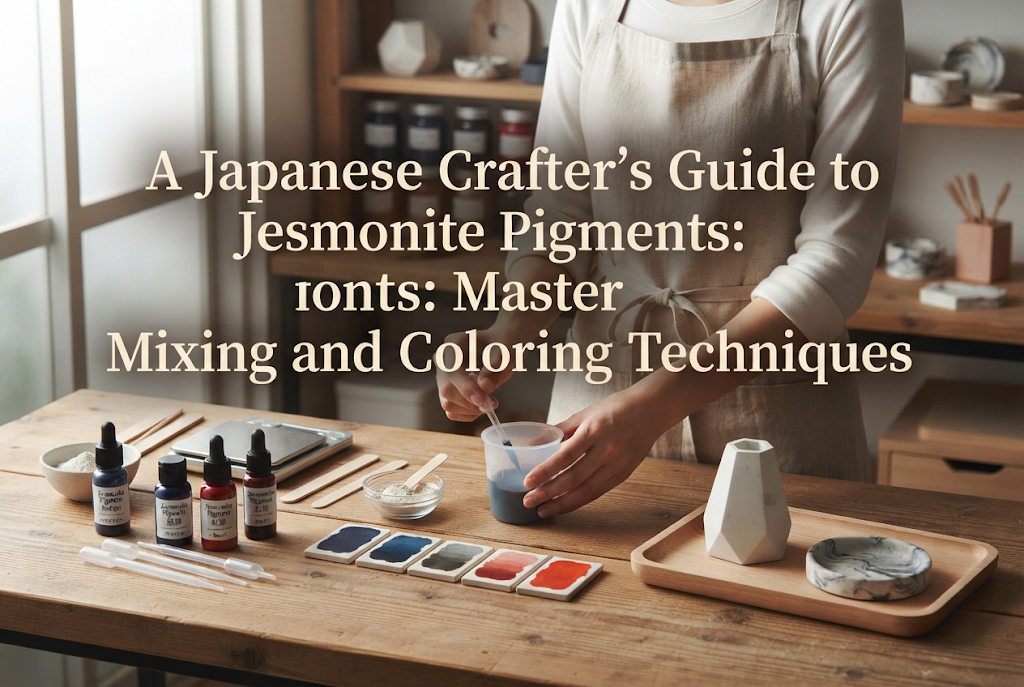
Trying to make colors pop by adding excessive pigment is a definite mistake. The golden rule for Jesmonite pigment loading is keeping it within 2% of total weight (and never exceeding 5%). Going over this cap interferes with the chemical reaction, causing curing failure or leaving the finished piece powdery and brittle. Always observe the maximum limit, even for intense colors.
Tapping the mold on your workbench is essential for releasing trapped air bubbles. However, if you continue tapping aggressively after pouring marble-patterned liquid, the vibrations will cause the colors to blend inside the mold. As a result, the beautiful marble lines you poured will dissolve into a muddy mix. When making marbled items, keep tapping to a minimum (about 3 to 5 light taps) and gently rub the sides of the mold to release air instead.
Preparing multiple colors for marble or custom designs requires mixing several cups at once. If you dawdle, the Jesmonite will start curing in the mixing cups before you can pour. To prevent this, organize all your tools, pigments, and molds beforehand before mixing the base liquid. If you need extra working time, add a tiny amount of dedicated Retarder to extend your working window by a few precious minutes.
When making terrazzo chips, using non-Jesmonite materials (like fully cured, hard plaster or different resins) makes sanding extremely difficult. If there is a large difference in hardness between the base Jesmonite and the embedded chips, sanding will wear down the softer base faster, leaving the chips protruding and creating an uneven surface. Always use chips made from the same Jesmonite material (such as AC100). Equal hardness ensures a completely flat, beautifully smooth finish when sanded.
A giant air bubble hole right in the middle of a marble line ruins the aesthetic of your piece. When making patterned items, minimizing air bubbles is crucial. Stir the liquid gently with your spatula pressed against the bottom of the cup to avoid whipping air into the mix. After pouring, pop any visible surface bubbles individually using a toothpick or wooden skewer.
Once you understand the technical rules, the next step is choosing colors. If you feel unsure about color theory, here are my top recommended combination formulas that guaranteed a sophisticated, professional finish.
Keep the base as uncolored Natural White (the off-white shade native to Jesmonite). Add just a small touch of beige, terracotta, or muted sage green for the marble swirl. This subtle, gentle color palette blends seamlessly with trending Korean and Nordic interior aesthetics.
Add Titanium White pigment to the base liquid for a crisp, pure white foundation. Mix in chips of mustard yellow, terracotta, and dark gray at random. The stark white background makes the colorful chips pop, creating a modern terrazzo look worthy of a museum gift shop.
Tint the base heavily with black pigment to create a deep, dark foundation. Swirl in a small amount of white along with small torn pieces of fake gold leaf as accent marble lines. This style creates a heavy, luxurious feel reminiscent of natural black marble, making it popular for coasters, trays, and gifts.
Trying to cram every technique into your very first attempt can lead to panic and mistakes. If I were starting out, I would level up step by step in this order:
By advancing step by step, you can build professional skills without getting overwhelmed or frustrated.
Adding swirls, marble, and custom patterns to Jesmonite is easily achievable for anyone once the basic rules are understood. Let's do a quick recap of the golden rules:
The moment you unmold a piece or sand away the surface to reveal an unexpected, breathtaking pattern gives an undeniable thrill every single time. Even if a pour doesn't turn out as planned, the beauty of Jesmonite is that every outcome feels like an intentional, artistic coincidence.
Use these tips and techniques as your guide to create your very own one-of-a-kind interior pieces! I'm cheering you on!
If you found this article helpful, sharing it with your crafting friends on social media would mean the world to me! Until next time, happy crafting—this was Yassy from Crafters!



For example, if you are looking for articles about mizuhiki, try searching for "mizuhiki"; if you are interested in tools, try keywords like "nippers" or "pliers."
