Upgrade Your Soapmaking Tools: The Essential Priority Guide for Professional Quality
yassy
Crafters!

Hello, crafters! It’s Yassy from Crafters! (・∀・)
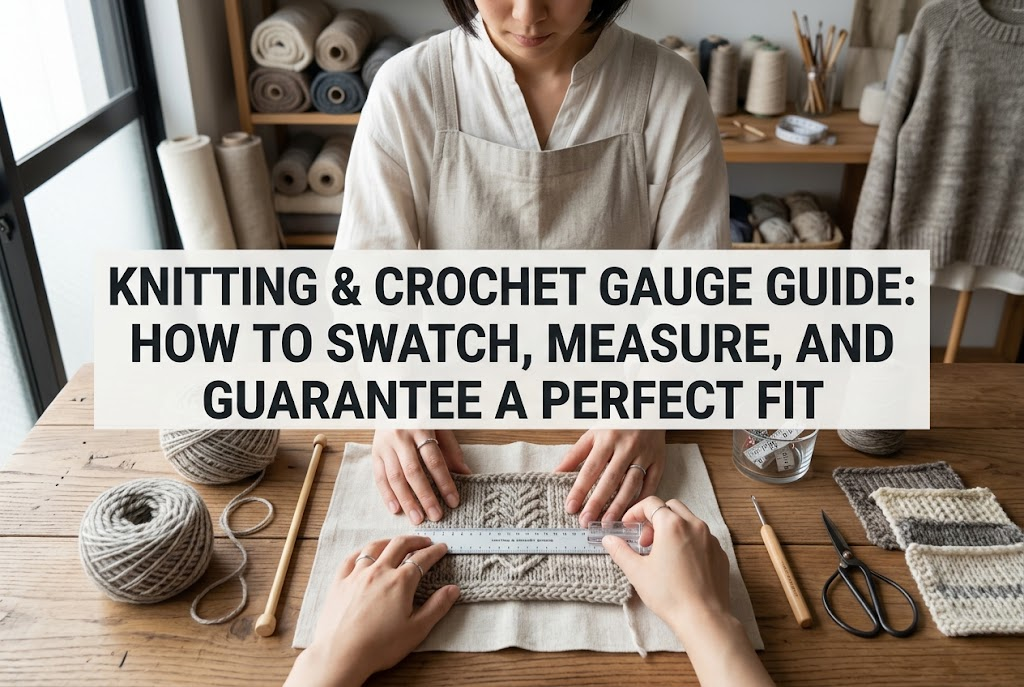
When you start knitting or crocheting, one word you will inevitably encounter is "gauge." It’s that little note at the beginning of every pattern or book that says something like "10 cm × 10 cm = 20 stitches and 28 rows." I often hear from beginners asking, "Do I really have to knit a swatch?" or "It feels like such a chore—can't I just start making the project right away?"
I absolutely love both knitting and crochet, and I have made countless scarves, sweaters, amigurumi, and bags over the years. Because of that experience, I can say with total confidence: gauge is the single most important key to getting the exact finished size you want and making your project a true success!
When you understand gauge and make it work for you, sizing failures disappear. On the flip side, if you skip gauge, you might spend dozens of hours working carefully only to end up with a sweater that is way too small to put on, or so huge it looks shapeless. In this guide, I will share professional insights covering everything from what gauge really means, how to make and measure a proper swatch, and how to adjust your needles or hooks when your gauge doesn't match!
In knitting and crochet, "gauge" (often referred to as tension) is a measurement of the density of your fabric. Specifically, it tells you how many stitches (width) and how many rows (height) fit within a standard 10 cm square (approximately 4 inches).
Unlike weaving or sewing, where you cut pre-made fabric, yarn crafts create three-dimensional fabric from a single continuous strand of yarn. This means the finished size changes dramatically depending on the crafter's tension and tools. The "standard gauge" printed in Japanese and international pattern books is the designer’s original specification: they are telling you, "If you work at this exact stitch density, your finished item will match the schematic dimensions."
Gauge is not decided by yarn thickness alone. It is shaped by an interplay of three key factors:
Gauge only exists when yarn, tools, and human hands come together. Simply buying the yarn and needle size recommended in the pattern does not guarantee your work will turn out the same size as the designer's sample. Checking your gauge is the only way to see how your personal tension affects the fabric.
"I bought the exact yarn recommended in the book, and I’m using the exact needle size listed, so it should turn out the right size, right?"
It is completely natural to think so, but this is one of the most common pitfalls for beginners. Personal tension varies far more than you might imagine. A tight knitter may get two or three stitches more than the pattern gauge, resulting in a stiff, undersized piece. A loose knitter may get two or three stitches fewer, resulting in a loose, oversized piece.
Never dismiss a difference of "just one or two stitches." Let’s look at the math.
Imagine you are knitting a sweater with a planned chest width of 50 cm. If the pattern gauge is 20 stitches per 10 cm, you need to cast on 100 stitches to achieve that 50 cm width.
Now suppose your tension is slightly tight, giving you 22 stitches per 10 cm—a difference of just two stitches. What happens when you knit those 100 stitches?100 stitches ÷ 22 stitches × 10 cm = approximately 45.4 cm.
That is 4.6 cm narrower than intended! When you combine the front and back panels, the total body circumference shrinks by 9.2 cm (over 3.5 inches). For an adult garment, that could mean it won’t fit at all.
Conversely, if your tension is loose at 18 stitches per 10 cm, 100 stitches will give you a width of about 55.5 cm, leaving the garment baggy and out of shape. Moreover, a larger fabric consumes more yarn, which can lead to the nightmare of running out of yarn before finishing. Considering the massive amount of time required to rip back and redo an entire garment, the few minutes spent knitting a swatch is an incredible investment.
A "swatch" is the small practice square you work to measure your tension. If you knit the swatch incorrectly, you will not get an accurate measurement. Here are three rules professional makers follow:
The most common beginner mistake is casting on just enough stitches to reach 10 cm. Avoid doing this!
The edges of any knitted piece—the cast-on edge, the edge stitches, and the bind-off row—tend to curl, pull, and distort. If you include these unstable edge stitches in your 10 cm measurement, your count will be inaccurate.
Always cast on about 1.5 times the recommended stitch count (enough for 15 cm to 18 cm) and work until the piece is at least 15 cm tall. Knit a generous square, and measure only the stable 10 cm section in the center.
Always knit your swatch in the same stitch pattern specified for the finished item. If the garment is stockinette stitch (or double crochet for crochet), make your swatch in stockinette stitch. If the project features textured stitchwork like cables, ribbing, or lace, your swatch must be worked in that specific stitch pattern.
Different stitch patterns have vastly different elasticity and density, even when made with identical yarn and needles. Measuring gauge in stockinette stitch and then using those numbers for an Aran cable project will result in major sizing discrepancies.
Do not pull your swatch off the needles and immediately lay a ruler on it. Freshly worked fabric still holds tension distortions and twist from the yarn that have not settled into their resting state.
Treat your swatch exactly as you plan to care for the finished project:
Some yarns bloom and shrink slightly when washed, while others stretch lengthwise from their own weight. Measuring gauge on finished, blocked fabric is the only way to ensure your garment will fit when worn.
Once your swatch is completely dry, you are ready to measure. Avoid casual eyeballing and follow these steps:
Place your swatch on a hard, flat table. Do not pull, stretch, or compress the fabric with your hands. Allow it to sit in its natural resting state, smoothing the surface gently with your palm.
Place a rigid ruler—such as a clear plastic ruler or a traditional Japanese bamboo ruler—across the center of the swatch. Soft tape measures can stretch and create inaccuracies, making them unsuitable for gauge measurement. A dedicated gauge frame with a cut-out 10 cm square window makes counting clean and error-free.
In stockinette stitch, each knit stitch forms a distinct "V" shape. Count how many full "V"s sit across the 10 cm line horizontally. For crochet, count the tops of the stitches (the V shapes) or the vertical posts along the 10 cm span.
Next, count how many "V" shapes are stacked vertically within the 10 cm space. For crochet, count the horizontal tiers of rows along that vertical distance.
Here is an essential pro tip: your measurement will rarely land on an exact whole number. If you see 20 full stitches plus about half a stitch within the 10 cm mark, record it as 20.5 stitches.
Rounding up or down because it feels simpler will cause cumulative math errors across an entire project of 100 or more stitches. Writing down fractions like 0.5 or 0.25 stitches is the secret to pattern precision.
Finding that your swatch does not match the pattern gauge is completely normal. There is no need to worry, because standard adjustment methods are well established.
The golden rule is: change your needle or hook size, not your hands. Trying to deliberately knit tighter or looser than your natural habit is virtually impossible; after five minutes of stitching, muscle memory takes over and your hands return to their normal tension. Always change your tools using these guidelines:
Example: Pattern gauge is 20 stitches, but your swatch has 22 stitches per 10 cm.
Having 22 stitches in 10 cm means your stitches are smaller and tighter than the pattern sample. Working the pattern as-is will make the finished item too small.
Solution: Go up 1 to 2 needle sizes. If you were using a Japanese size 8 needle (approx. 4.5 mm), switch to a size 9 (4.8 mm) or size 10 (5.1 mm) and knit a fresh swatch. The thicker needle makes each stitch slightly larger, reducing the number of stitches that fit into 10 cm and bringing you closer to 20 stitches.
Example: Pattern gauge is 20 stitches, but your swatch has 18 stitches per 10 cm.
Having only 18 stitches in 10 cm means your stitches are larger and looser than the designer's. Continuing this way will produce an oversized, floppy garment.
Solution: Go down 1 to 2 needle sizes. If you were using a size 8 needle, try a size 7 (4.2 mm) or size 6 (3.9 mm). Thinner needles pull the fabric tighter, increasing the stitch count per 10 cm to match the required 20 stitches.
A very common situation is matching the stitch count across, but being off on the row count vertically. What should you do?
In almost all cases, prioritize your stitch gauge (width) when choosing your needle size!
Width (chest circumference, hat circumference) is critical for fit. Vertical length (sweater body length, sleeve length) can easily be adjusted by working more or fewer rows before binding off. Width is far harder to change once started, so always choose the needle that matches the horizontal stitch count.
What if your gauge doesn't quite match after changing needle sizes, or you want to make a custom size, or you want to use a completely different yarn from the pattern? The answer is simple: calculate your required stitches and rows using your own swatch gauge!
Even if you dislike math, this basic formula allows you to resize any project freely:
Basic Formula:Desired dimension (cm) × Stitches per 1 cm (10 cm stitch count ÷ 10) = Stitches to cast on
Let's work through an example:
Calculation: 15 cm × 1.8 stitches = 27 stitches.Cast on 27 stitches, and your scarf will turn out exactly 15 cm wide!
The row calculation works the same way:
Calculation: 100 cm × 2.4 rows = 240 rows.Knit 240 rows to achieve exactly 100 cm in length.
Mastering this simple calculation gives you the freedom to substitute yarns and create custom garments that fit your measurements down to the millimeter.
Knitting and crochet behave somewhat differently regarding tension. Here are key tendencies to keep in mind:
In crochet, row height depends significantly on the angle at which you hold your hook and how high you draw up your working loop. For double crochet or treble crochet, crafters who pull their loops high will have much taller rows than those who keep loops tight and low. If your crochet row gauge is off, pay attention to the height of your drawn loops and turning chains.
When working flat stockinette stitch, you alternate knit rows on the right side and purl rows on the wrong side. Many knitters naturally purl looser than they knit.
If your purl rows are loose, your vertical row gauge will lengthen. Furthermore, if you are making an item in the round (like a beanie or cowl), you are only working knit stitches on the right side. It is best practice to swatch in the round for circular projects, as your gauge in the round often differs from flat back-and-forth knitting.
Here are five classic pitfalls beginners encounter when dealing with gauge:
Whenever I make a new project, I always document my work in a dedicated swatch notebook. Here are two habits that keep my projects organized:
Attach a small paper tag to each swatch listing the following information, punch a hole in it, and store it in a binder:
Over time, this becomes your personal knitting database. If you pick up that yarn again years later, you can check your notes and know immediately how it behaves with your hands and needles.
While a standard ruler works, these tools make measuring faster and more precise:
Knitting a swatch might feel like an extra step when you are excited to start working with brand-new yarn. But making a swatch is never wasted time. It is a welcoming warm-up where you get to know the texture of the yarn, see how it pairs with your needles, and understand how your own hands shape the fabric.
With a reliable gauge, you will never face the heartbreak of finishing a project only to find it doesn't fit. Experiencing that moment when a finished piece fits exactly as you imagined is one of the greatest joys of making things by hand.
Before you begin your next project, pour your favorite warm drink, take your time, and enjoy knitting that first swatch. I’m cheering on your craft journey!
If you found this guide helpful, please feel free to share it with your fellow makers. See you in the next article—this was Yassy from Crafters!




For example, if you are looking for articles about mizuhiki, try searching for "mizuhiki"; if you are interested in tools, try keywords like "nippers" or "pliers."
