How to Choose Measuring Spoons and Cups for Crafting: Prevent Failures and Pick the Right Materials
yassy
Crafters!
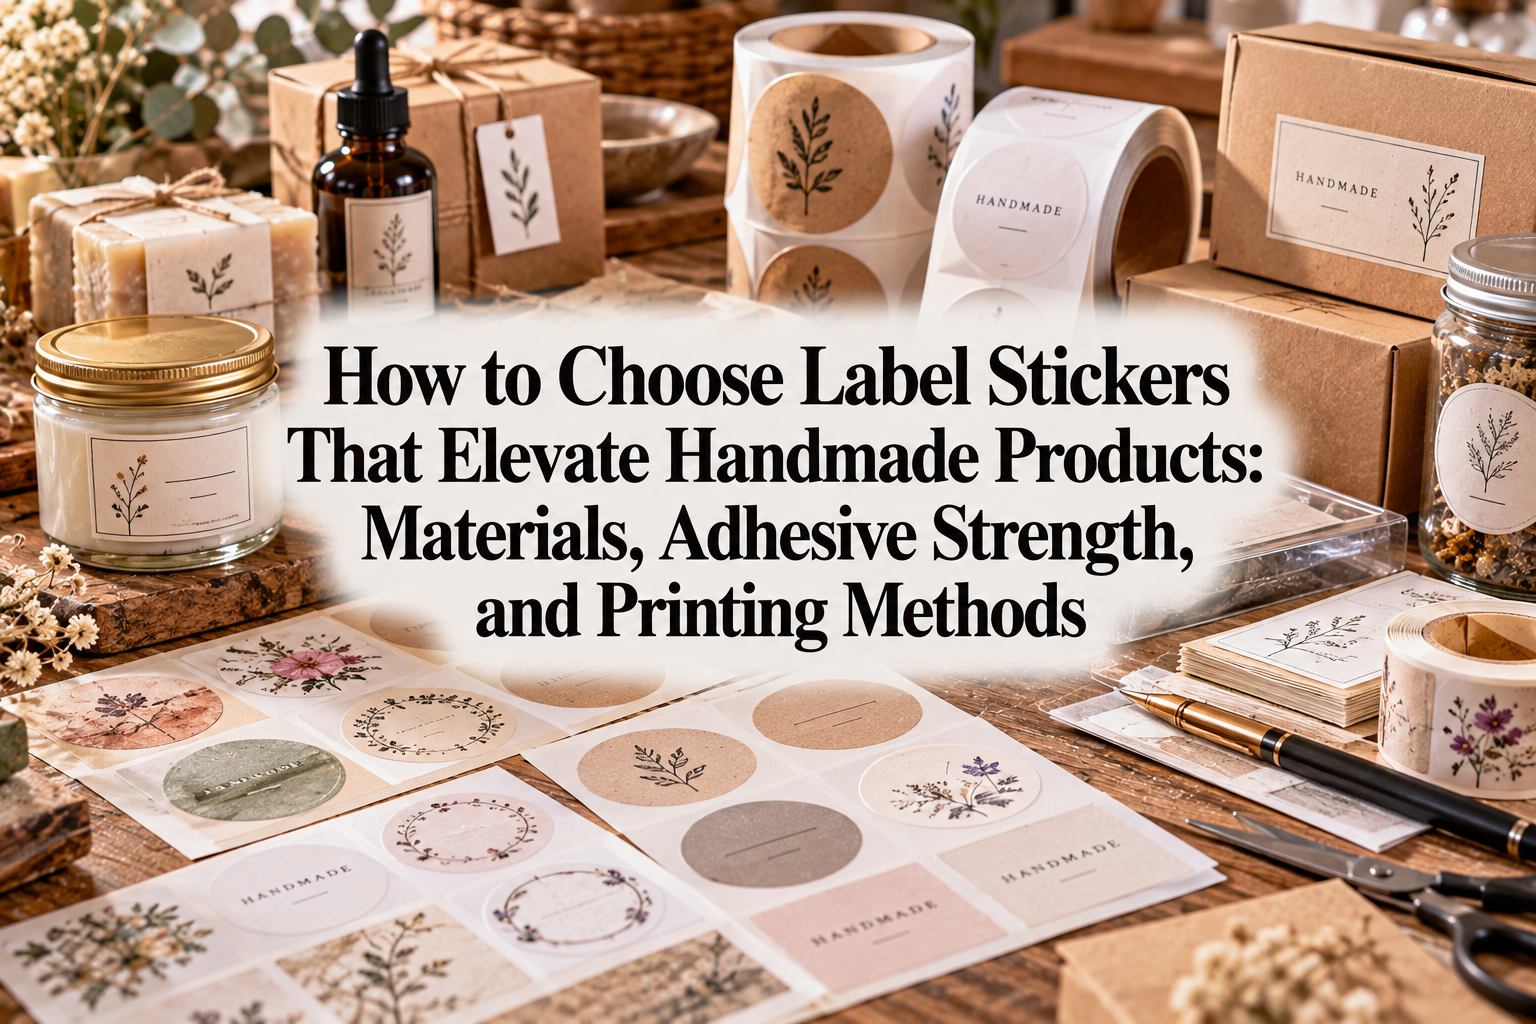

Hi everyone, it's Yassy from Crafters! (・∀・)
I love making all kinds of handmade items, as well as browsing and buying gorgeous creations from other makers. Whenever I receive a handmade parcel and open it, I often find myself moved, thinking, "Wow, this looks like something straight out of a high-end boutique!" One of the crucial elements supporting that high level of finish is the label sticker used on the product or packaging.
No matter how wonderful your creation is, if the label sticker on the packaging looks cheap or is peeling off because it wasn't suited for the application, the overall charm of your work is cut in half. Conversely, simply using a label sticker that perfectly matches the mood and material of your item can dramatically boost your brand's trustworthiness and perceived quality.
However, when you search online shops or stationery stores to buy label stickers, you are confronted with a bewildering variety of choices: glossy, matte, kraft, transparent film, water-resistant, strong adhesive, removable, and more. It is very common to feel completely lost about which one to pick.
So in this article, I will thoroughly explain how to choose the best label stickers to bring out the absolute best in your handmade items! From material characteristics and adhesive power to printer compatibility and application-specific solutions, I have packed this guide with my experience and knowledge to make it easy to understand. Read this, and you will never make a mistake with label stickers again!
A label sticker is not just a piece of paper printed with a product name or logo. It is the "face" of your packaging—the very first thing a customer sees when holding your item—and an extremely important tool for visually conveying your brand's worldview.
Through buying many handmade items myself, there is something I have felt deeply: the choice of label material alone can instantly define the price point and atmosphere of a creation.
For example, what if a sleek, bluish-white glossy sticker were slapped onto a natural-style dried flower arrangement or a handcrafted wooden item? The natural warmth of the materials would be ruined, creating an awkward, mismatched impression. In this case, the correct answer would be to pair it with a kraft paper or Japanese washi-textured label that has a slightly textured feel.
Furthermore, the required functionality varies entirely depending on where the sticker is used—whether it's a shop logo sticker, an ingredient/caution label on the back, or a thank-you seal on shipping materials. Choosing based solely on visual design leads directly to trouble, such as ink bleeding from water droplets or labels peeling off almost immediately.
To deliver your creations with care and ensure that buyers feel completely satisfied with their purchase, let's equip ourselves with the right knowledge about label stickers.
When selecting label stickers, the most critical factor is the sticker material (paper type). The touch, color saturation, transparency, and water resistance vary greatly depending on the material. Here is a detailed look at five representative materials, their characteristics, and the items they pair best with.
Matte paper has a non-reflective surface and a subdued, classic texture. It feels similar to standard copy paper or high-quality printing paper, producing a soft finish without glare.
Because colors print in soft, gentle tones rather than overly vivid ones, text is exceptionally easy to read. This makes it ideal when you want illustrations, line drawings, or messages to look clear and clean. Additionally, if you want to write additional notes or add a rubber stamp after printing, matte paper absorbs ink smoothly, making it the best choice.
Great compatibility with: Natural fabric goods, food products like baked treats or tea leaves, illustration cards, simple stationery, and rustic handmade crafts.
It is affordable and widely available, making it a reliable default option if you want to create standard labels first.
Glossy paper has a high shine on the surface, achieving vivid color payoff and sharpness similar to printed photographs. Blacks and deep tones appear crisp, and smooth gradients or fine photographic details are beautifully reproduced.
The shiny surface conveys a luxurious feel, making it incredibly effective when you want your work to look glamorous or high-end. However, be aware that fingerprints show easily, and glare can make text hard to read from certain angles. Also, if you write on it by hand, water-based ink will bead up and fail to dry, so you must use a permanent oil-based marker.
Great compatibility with: Bead and gemstone jewelry, UV resin crafts, vibrant preserved flower arrangements, gift packaging where you want a luxury touch, and brand logo stickers.
If you want to highlight the sparkling texture of your creations, choosing glossy paper instantly elevates that store-bought feel.
Kraft paper is made from unbleached wood pulp, characterized by its warm, brownish, rustic texture. It is the absolute best material for creating a handmade, organic, or vintage feel.
Because the paper itself has a deep brown tone, full-color printing will mix with the paper's natural background color, resulting in muted or muddy tones. Therefore, the golden rule for kraft paper is to design using monochrome black ink only. Printing in solid black easily creates a stylish, cafe-like label.
Great compatibility with: Aromatherapy candles, small leather goods, woodworking, dried flower swags, organic cosmetics, and handmade soaps.
For brands that want to convey warmth or retro-natural concepts, kraft paper is your ultimate partner.
Transparent film labels are plastic-based (PET, PP, etc.) stickers that allow the surface underneath to show through. When applied to glass jars, clear poly bags, or acrylic cases, they deliver a seamless finish that looks as if the design was printed directly onto the container.
Semi-transparent types (tracing paper style) offer a soft, subtle translucency, providing an elegant, frosted-glass effect.
The biggest caution with clear labels is that standard printer ink is translucent, meaning designs disappear if placed on dark surfaces. Typical home printers cannot print white ink. Thus, putting a clear label on a black box causes text and graphics to blend in completely and become invisible. Clear labels must always be applied to a white background or clear containers containing light-colored liquids or items.
Great compatibility with: Herbariums, candles in glass containers, jewelry placed in clear OPP bags, bottles, and stylish gift wrapping.
When you want to make the most of the underlying texture, there is no substitute for transparent film.
Paper stickers will soak up moisture, wrinkle, or suffer from running ink if even a single drop of water hits them. For any craft that might be exposed to water or outdoor elements, you must use a waterproof or water-resistant film label.
Because water-resistant film is made from synthetic resin rather than paper, it will not tear when wet, and the ink adhesion is remarkably strong. There is a rich variety of textures available, including matte water-resistant film and shiny glossy film.
Great compatibility with: Handmade cosmetics (lip balms, body creams), refill bottles for shampoos or essential oils, cups and tumblers, mizuhiki (Japanese cord craft) or floral arrangements that might experience condensation, and items sold at outdoor markets.
Using paper labels in places exposed to moisture is a definite no-no. Picture how your customer will use the item in their daily life, and if water resistance is needed, choose film without hesitation.
Equally as important as the paper texture is the type of adhesive on the back of the label. Choosing this carelessly can lead to labels peeling off products prematurely or, conversely, tearing the customer's packaging when they try to remove them.
Adhesives are broadly divided into three main categories. Matching them to your specific purpose is key to success.
Permanent adhesive stickers use strong glue that won't easily peel off once applied. Use this for any application where falling off mid-transit or during use would cause problems.
Specific uses include ingredient/warning labels on the back of products, shipping address labels on packages, and seal stickers securing box lids.
In particular, when applying stickers to curved surfaces (like round bottles or tins) or textured surfaces, standard adhesive strength can cause the edges to lift over time. Always specify permanent high-tack adhesive for curved or textured materials.
Removable stickers adhere firmly yet peel off smoothly without leaving sticky residue behind when you want to remove them.
In the handmade world, removable stickers are absolute must-haves in certain situations: labels applied directly to the product itself or packaging that customers will peel open later.
Examples include brand logo stickers on the underside of ceramics, protective labels on glass items, or temporary closure stickers on greeting cards. If you use permanent adhesive here, customers will face sticky residue when peeling it off, ruining their experience with your work.
Always ask yourself whether the buyer might peel the sticker off after arrival, and choose removable adhesive for those spots without exception.
Some labels feature a grey or black opaque backing layer on the adhesive side, completely blocking out text or colors underneath.
When you need to cover up a printing error on packaging or place a logo sticker over a pre-patterned box, regular stickers allow the underlying pattern or text to show faintly through. When you want to eliminate background patterns completely and make your label design pop, cover-up labels with light-blocking backing are a professional trick.
Before purchasing label sticker sheets, you must check your home printer's printing technology. Getting this wrong not only wastes label paper, but can also cause your printer to break.
Label paper packaging sold in stores will always state compatibility, such as "Inkjet Dedicated," "Laser Printer Dedicated," or "Multi-Purpose (Laser/Inkjet)."
Inkjet printers work by spraying liquid ink droplets onto paper. Therefore, inkjet-specific label papers feature a special coating designed to absorb and dry liquid ink rapidly.
If you put inkjet-dedicated paper into a laser printer—which uses high heat to melt toner powder onto paper—disaster strikes. The intense heat melts the surface coating and adhesive, causing the paper to wrap around the internal rollers and ruin the machine. Never do this!
Additionally, paper stickers printed via inkjet are inherently sensitive to moisture. Dye-based inks bleed instantly when hit by water droplets. You must use pigment inks, apply a clear waterproof spray after printing, or choose water-resistant film paper designed specifically for inkjets.
Laser printers (and commercial copiers) use heat and pressure to fuse powder toner onto paper.
Laser-dedicated sticker papers are constructed with materials and glues engineered to withstand intense heat. They offer exceptionally stable color reproduction, with the strong advantage that printed text and illustrations will not bleed when exposed to water.
However, if you put laser paper into an inkjet printer, the liquid ink will not absorb into the paper; instead, it will bead up on the slick surface and turn into a smeared mess.
It is mandatory to be 100% sure whether your printer is inkjet or laser and select matching paper accordingly.
Sometimes you might want to create label stickers without a printer, using handwritten messages, carved eraser stamps, or rubber stamps instead.
In this case, your material choice should strictly be matte paper or kraft paper.
If you attempt to stamp or write with a water-based pen on glossy paper or polyester film labels, the ink will slide off the surface and never dry, smudging onto your hands the moment you touch it. If you wish to stamp on slick materials, you must use versatile permanent oil-based ink pads designed for metal and plastic.
Consider the properties of your writing tools or stamp inks, and pick uncoated paper labels that absorb ink readily.
For four common packaging scenarios in handmade business, here are specific label combinations I recommend. When in doubt, feel free to mirror these combinations directly!
Purpose: To define brand image and elevate overall product presentation.Recommended Materials:- For a high-end, shiny look: Glossy paper- For a natural, antique feel: Kraft paper- For a clean, subtle impression: Matte paper or semi-transparent tracing paperAdhesive: Permanent
Logo stickers are placed in the most prominent locations, such as the top center of a package or the front of an OPP bag. Therefore, aligning the product concept with paper texture (matte vs. gloss) is top priority. Since a peeling logo looks unappealing, choose permanent adhesive.
Purpose: To convey legal information and safety instructions clearly while resisting water and oil damage.Recommended Material: Waterproof White Film (Matte or Glossy)Printing Method: Laser printing, or Inkjet pigment inkAdhesive: Permanent
Labels applied to the back of essential oils, candles, handmade soaps, herbariums, or baked goods face a high risk of exposure to oils, water droplets, or condensation. If you use paper labels here, oil can make the text translucent and unreadable, or moisture might tear the label, losing that clean look. Do not skimp on cost here—always use waterproof film materials. To ensure small text remains crisp and legible, choose a white background as a rule.
Purpose: To secure box lids or bag openings while expressing gratitude.Recommended Materials:- For clear OPP bags: Transparent film stickers- For paper boxes or kraft envelopes: Kraft paper or matte paperAdhesive: Permanent (Round or rounded-corner shapes recommended)
Seal stickers serve to keep packaging securely closed. Choosing round (circular) shapes or rectangles with rounded corners prevents the edges from lifting or peeling over time. When sealing transparent bags without cluttering the bag's visual appeal, using clear stickers with simple black "Thank you" text creates a very smart, refined impression.
Purpose: To ensure mail carriers read addresses without errors, arriving safely even on rainy days.Recommended Material: Standard Matte Paper or Water-Resistant PaperAdhesive: Permanent
Shipping labels require no gloss or fancy aesthetics. Clear legibility of address text and accurate barcode scanning are the top priorities. Avoid glossy paper, as scanner lights at sorting facilities can reflect off glossy surfaces and trigger scan errors. To guarantee zero shipping issues on rainy days, applying broad clear tape over the address section or using water-resistant matte labels is a great professional touch.
Here are typical label sticker mistakes made by beginners, along with foolproof solutions. I have experienced these frustrating blunders myself in the past!
You print a black or colored logo on a clear sticker and apply it to a dark navy or black gift box, only to find the design swallowed up by the background color and completely invisible.
Cause: As mentioned, home printer inks are translucent and cannot print white ink. Thus, dark underlying colors blend with the ink color, making it disappear.
Solution: When applying labels to dark packaging, select white-background stickers (matte or glossy) instead of transparent ones. If you really want to showcase the container background, consider switching to light natural box colors, or layer a piece of white paper under the transparent sticker.
You apply a sticker to the side of a round glass bottle or metal tin, and a few hours later, the edges lift up and peel off.
Cause: Paper stickers have strong shape memory and try to spring back to their flat state. If you use standard adhesive, the tension of the curve overcomes the glue over time.
Solution: For curved surfaces, follow these three steps:1. Always use permanent high-tack adhesive.2. Choose flexible film materials rather than stiff paper.3. Sharp rectangular corners lift easily; choose round stickers or designs with rounded corners.
You buy pre-cut label sheets (sheets pre-punched with round or rectangular shapes) and print at home, but the print shifts by a few millimeters, cutting off border text.
Cause: Home printers inevitably have minor paper-feed variance (a margin of error of a few millimeters). Placing text or borders right up against the die-cut edge causes noticeable misalignment even with minor shifts.
Solution: When using pre-cut label sheets, position crucial text and graphics at least 2 to 3 millimeters inside the die-cut border. Also, if your design includes background color, extend the color fill 2 millimeters past the cut line (a bleed margin). Avoid designs with thin border lines that run flush against the sticker edge, as print shifts will be very noticeable.
Label paper comes in pre-cut sheet formats (e.g., an A4 sheet divided into 24 round or 12 rectangular labels) and uncut full sheets (single continuous A4 sticker paper).
Each has pros and cons, so choose based on work efficiency and costs.
Pros: After printing, simply peel and stick. No cutting with scissors or craft knives is required, offering incredible efficiency when producing labels in bulk, such as shipping address labels or large quantities of thank-you seals.Cons: Susceptible to printer misalignment issues as mentioned above. Also, individual label sizes are fixed, so you cannot create custom sizes freely.Best for: Shipping address labels, standard thank-you seals, and high-volume product info labels.
Pros: Since it is one large sticker sheet, you can lay out designs in any shape or size you want. Great for unique irregular shapes or long wrap-around band labels. With no pre-cut lines, you don't have to worry about text getting cut off due to sheet alignment errors.Cons: Requires manual cutting after printing using scissors, craft knives, rotary cutters, or small desktop cutting machines, taking extra time.Best for: Custom logo shapes, wrap-around packaging bands, and small-batch prototype labels.
In the world of handmade crafts, a label sticker is an essential bridge connecting your hard work with your customer.
Let's recap the key points for choosing label stickers:
Although it is just a single label sticker, pouring attention to detail and proper knowledge into it will transform your work from a simple "homemade craft" into a polished, professional product from an authentic handmade brand.
Find the perfect label stickers that highlight your worldview, and deliver delight to your customers!
If you found this guide helpful, please share it with your craft friends on social media! See you in the next article—this was Yassy from Crafters!




For example, if you are looking for articles about mizuhiki, try searching for "mizuhiki"; if you are interested in tools, try keywords like "nippers" or "pliers."
