7 Reasons Your Stitches Are Too Tight & Pro Fixes: Transform Stiff Knitting & Crochet into Soft, Beautiful Fabric
yassy
Crafters!

Hello, everyone! This is Yassy from Crafters! (・∀・)
When you complete a handmade piece, what do you use for that final surface finish to protect your hard work?
"I just wanted some shine, so I applied some varnish I had lying around at home.""It seemed quick and easy, so I layered on a nail polish top coat."
Choosing a finishing coat carelessly for reasons like these is extremely risky. Many common post-project disasters—such as pieces becoming sticky over time and collecting dust, hand-drawn designs melting away, or surfaces cracking severely—are caused by selecting the wrong finish between varnish and top coat.
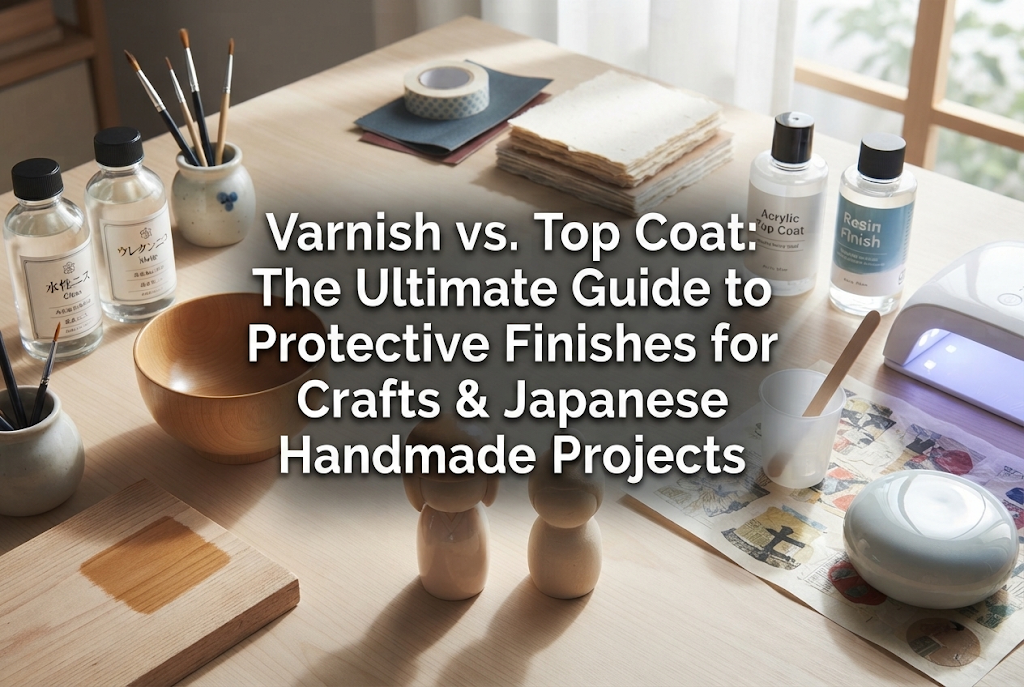
Both varnish and top coat create a transparent protective film that protects the surface and improves the appearance of your work. However, their ingredients, film hardness, drying mechanisms, and suitable materials are completely different!
Having created countless handmade pieces myself and having admired and purchased many works from fellow crafters, I have witnessed time and again how a single finishing choice can dramatically alter a piece's lifespan and overall quality.
In this guide, I will thoroughly explain the crucial differences between varnish and top coat—a hurdle every handmade beginner inevitably encounters. We will cover how to choose the right coating for each material, common mistakes to avoid, and secret techniques for achieving a professional-grade finish. Read through to the end, and you will never hesitate when choosing a finishing coat again!
To put it simply, the biggest differences between varnish and top coat lie in film flexibility and thickness, as well as the target materials they were designed for.
While both are clear protective coatings applied to surfaces, their intended purposes and chemical properties are entirely distinct. Understanding this core difference is the first step toward flawless craft projects.
Varnish is primarily formulated for porous materials—surfaces with microscopic pores that absorb moisture and oils—such as woodworking, paper clay, clay crafts, and paper crafts (including Japanese craft band/paper band).
The defining feature of varnish is that its dry film maintains an appropriate degree of flexibility (elasticity). Wood and clay expand and contract slightly depending on changes in season and humidity. Because varnish can yield to these subtle movements, the finish is resistant to cracking, providing gentle, long-lasting protection over the entire project.
Additionally, many varnish products are formulated with relatively low viscosity, allowing them to penetrate slightly into the material while adhering firmly. The resulting film thickness ranges from thin to medium, delivering a natural protective layer that preserves the authentic texture of the base material.
Top coat was originally developed as a final protective layer for nail art, resin crafts, scale model painting, and industrial finishes.
Its standout characteristics are fast drying times and an exceptionally hard, smooth film. It strongly shields underlying colors and decorations (such as nail polish, acrylic paint layers, or resin surfaces) from scratches and friction, providing either a glass-like glossy finish or a completely velvety matte texture.
The crucial difference from varnish is that top coats are designed to be applied over hard, non-porous materials. They possess virtually no flexibility and cure to a rigid state. If applied to flexible or expanding materials, top coats will crack under impact or deformation.
Even under the single term "varnish," you will find many varieties lined up at craft stores and home centers. Picking the wrong type can result in the nightmare of a surface remaining permanently tacky even after drying. Here are the main types of varnish every crafter should know.
Water-based acrylic varnish is the most versatile and beginner-friendly option in handmade crafting. Tools can be cleaned with water, making it safe for indoor use with almost no lingering odor.
It is the absolute right choice for finishing paper clay, resin clay, lightweight clay, dried wood, and paper crafts. Once dry, it becomes completely transparent and water-resistant. It comes in gloss, satin (semi-gloss), and matte finishes, allowing you to choose the look that best matches your design.
Water-based polyurethane varnish forms an even tougher protective layer than acrylic varnish. Thanks to the strong bonding properties of polyurethane resin, it offers superior resistance against friction, water droplets, and heat.
It is an absolute rule to use polyurethane varnish on wooden coasters, trays, wood smartphone cases, and home decor items that are handled frequently. While slightly more expensive than acrylic varnish, its hardness and protective performance are unmatched. If you are making item surfaces that come into contact with food, always choose a water-based polyurethane varnish certified as safe under relevant food sanitation standards.
Solvent-based varnishes contain organic solvents (like thinners) and are also available in aerosol spray cans. They provide maximum film strength, but strong odors mean proper ventilation is essential during application.
Spray varnishes (both water-based and solvent-based) excel when you want to avoid brush marks entirely or need to coat complex 3D shapes quickly. For intricate pieces with hard-to-reach crevices, choosing a spray varnish is a professional technique that yields smooth results.
Next, let's explore top coats. Top coat acts like magic to elevate gloss and texture, but because it relies on chemical curing or active solvents, proper knowledge is required when handling it.
In recent years, bottle-type resin top coats that cure under a UV/LED light within seconds to minutes have become immensely popular in the craft community. These low-viscosity, thin liquids often come with a brush attached to the bottle cap.
Resin coating top coats work wonders for removing surface tackiness from UV resin pieces, applying a high-shine finish to shrink plastic (puraban), and preventing rust on metal findings. Achieving ultimate glass-like clarity with a quick light exposure also drastically increases work efficiency.
These are aerosol spray top coats commonly used for plastic scale models and figures. Available in gloss, semi-gloss, and flat matte options, their ultra-fine particles create a completely even, flawless coating.
If you want to protect colored surfaces on shrink plastic accessories or achieve a perfect flat matte texture (similar to unglazed ceramic or fine figures) on clay pieces, spraying a model-grade matte top coat from a slight distance is the ideal technique.
While nail polish top coat is the most easily accessible option, using it on handmade craft materials requires extreme caution. Because it is formulated specifically for human nails, it contains plasticizers for flexibility and strong solvents.
If you apply nail polish top coat directly onto plastic, certain clays, or acrylic paints, the solvents can dissolve the base material, causing it to remain permanently sticky even after drying. Avoid using nail polish top coats for general craft materials simply because they are convenient.
Based on these properties, here are my definitive recommendations for choosing between varnish and top coat for popular handmade materials.
Verdict: Use water-based acrylic varnish as the base finish. Apply resin top coat selectively for high-shine accents like strawberries or jelly!
For clay creations, applying a water-based acrylic varnish (matte or satin) over the entire piece is essential so the coating can expand and contract with the material. Coating the whole piece in a rigid top coat can cause the finish to crack or flake off over time or upon impact.
However, for areas where you want intense gloss and dimensional depth—such as fruit slices, sauces, or jams in sweets deco—apply a UV/LED resin top coat specifically to those spots after the water-based varnish has dried completely, then cure it. This combination technique ("varnish overall, top coat for accents") is a secret to drastically boosting piece quality!
Verdict: Choose varnish (water-based acrylic or water-based polyurethane) 100% of the time!
Paper and wood are living materials that expand and contract with moisture and humidity changes. Applying a rigid, non-flexible top coat will almost certainly result in micro-cracks and a cloudy white appearance over time.
For craft band bags or woven paper interior goods, brush or spray water-based acrylic varnish thoroughly so it penetrates deep into the fibers. This fixes the shape firmly while enhancing water resistance and durability.
Verdict: Resin coating top coat is ideal. If colored with Posca markers or colored pencils, seal with water-based varnish first, then apply top coat!
Hard plastic materials like shrink plastic and resin do not expand or contract, making them perfectly suited for top coats. Applying a thin coat of resin top coat to a resin piece fills in minor mold scratches, restoring beautiful glass-like transparency.
Watch out for a common beginner trap! If you apply solvent-based or resin top coats directly over designs drawn with Posca paint pens, colored pencils, or pastels on shrink plastic, the active chemicals will react and immediately bleed or smear your artwork.
The golden rule to prevent this is a two-step process: First, apply a layer of water-based acrylic varnish (or water-based spray) over the colored design to seal and protect it. Once fully dry, layer the top coat on top. This simple step prevents bleeding completely!
Verdict: Top coat (model spray or resin top coat) is the only choice!
Varnish lacks sufficient adhesion for metals and hard, slick plastics. Because these surfaces are too smooth, varnish layers may peel off like a thin film. Applying a high-hardness top coat that bonds firmly to non-porous surfaces is the correct approach.
Applying varnish or top coat may seem simple, but because these are chemical coatings, skipping correct procedures can lead to frustrating mistakes. Here are real issues crafters face and how to fix them.
Cause: Applying too thick a layer at once, or a chemical mismatch between the material and the solvent. Heavy application causes the outer layer to dry first and form a skin, trapping moisture or solvents underneath and preventing thorough drying.
Solution: The golden rule of coating is to apply 2 to 3 very thin layers. After one thin coat, allow it to dry thoroughly—ideally for half a day even if it looks dry—before applying the second layer. If a surface is already sticky, try drying it with cool air from a hairdryer over an extended period, or apply a very thin coat of compatible water-based matte varnish over it to seal in the tackiness.
Cause: Working in high-humidity conditions (such as rainy days) or applying solvent-based coats over a base that still contains moisture. Trapped atmospheric humidity crystallizes as the finish dries, turning it milky.
Solution: Never apply protective top coats on rainy days or when humidity exceeds 70%. Always confirm that underlying paints or clay are 100% dry before sealing. For mild cloudiness, applying another very thin, fresh coat of clear varnish or top coat can sometimes re-dissolve the layer slightly and restore transparency.
Cause: Brushing back and forth repeatedly, or shaking the finish bottle vigorously before application, introducing trapped air.
Solution: When applying varnish with a brush, glide the brush smoothly in one direction at a steady speed. Brushing back and forth pulls on quick-drying film, leaving uneven ridges. Avoid shaking varnish or top coat bottles heavily. If bubbles appear, pass warm air from a hairdryer lightly over the surface from a distance or pop them carefully with the tip of a toothpick before drying.
Here is my standard step-by-step procedure for achieving a flawless finish on handmade projects every single time.
Preparation determines 80% of your final finish quality. Fingerprints, oils, or dust particles on the surface will repel liquid finishes or get trapped inside the coating.
For clay and wood, lightly sand the surface using ultra-fine sandpaper (around 800 to 1000 grit), then remove all dust with a tightly wrung damp cloth or canned air. For resin and shrink plastic, wipe the surface cleanly with isopropyl alcohol. Removing surface oils prevents the coating from repelling or pooling.
Load a moderate amount of finish onto your brush and wipe excess liquid against the rim of the container. Glide the brush smoothly in a single direction (e.g., top to bottom), spreading a light, uniform layer quickly.
At this first stage, it should feel almost too thin. Forcing thickness early causes sags, drips, and uneven textures.
Once applied, protect the wet piece. Drying coats act like magnets for airborne dust. Place a deep plastic container or box upside down over your work piece as a protective roof while it cures.
A safe practice is to allow 1.5 to 2 times the drying time stated on the product package. Even if the surface feels dry, full internal curing takes extra time.
Once the first layer is completely dry, apply the second coat. When applying the second coat, stroke the brush perpendicular to the first direction (e.g., horizontally if the first was vertical). This cross-coating method creates a more even film thickness and dramatically increases durability.
Repeat this "thin coat → complete dry" process 2 to 3 times until you achieve your desired gloss level and protection.
Understanding the properties of varnish and top coat—and selecting the right finish for each material—will elevate your handmade projects to a whole new level.
Let's recap the key takeaways for success:
The finishing stage is the rewarding process that breathes long-lasting life into a piece you invested time and love to create. By selecting the correct protective finish with confidence, your handmade creations will maintain their true beauty for years to come.
With this knowledge in hand, you are ready to complete your projects without fear of finishing mistakes! Go ahead and bring your dream designs to life with confidence.
If you found this guide helpful, please share it with your fellow crafting friends on social media! See you in the next article! This was Yassy from Crafters!




For example, if you are looking for articles about mizuhiki, try searching for "mizuhiki"; if you are interested in tools, try keywords like "nippers" or "pliers."
