Mastering Crochet Increases and Decreases: A Japanese Craft Guide to Shaping and Flawless Silhouettes
yassy
Crafters!

Hello everyone, I'm Yassy from Crafters! (・∀・)
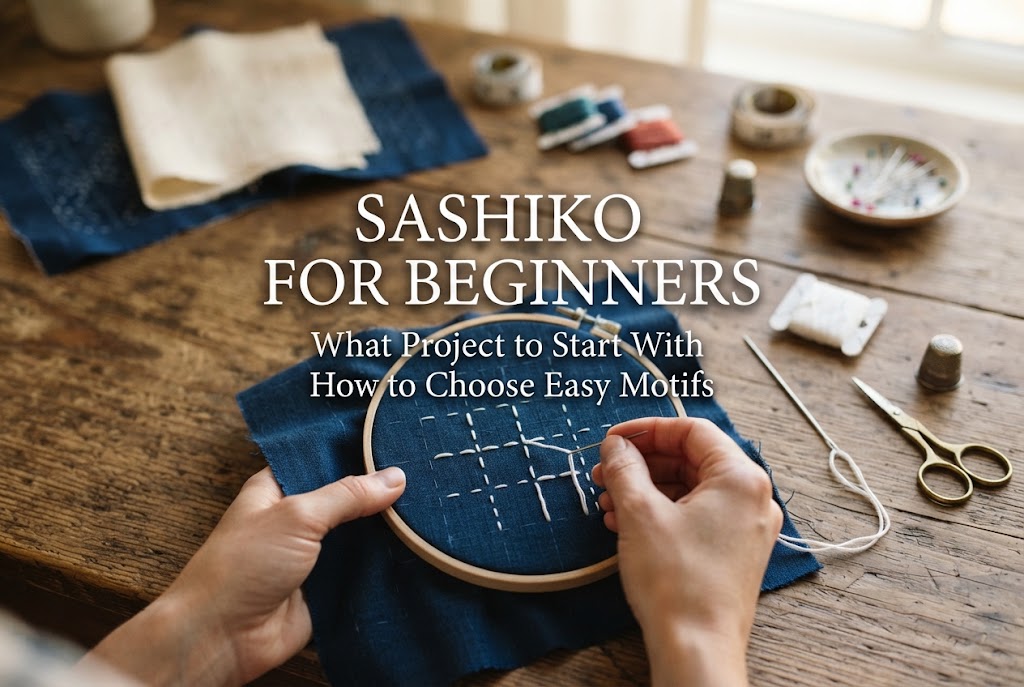
Sashiko is a traditional Japanese embroidery technique that creates rustic and beautiful patterns using nothing more than a single needle and thread. Seeing cute sashiko hanafukin (embroidered kitchen cloths) displayed in craft stores or lifestyle shops makes so many people think, "I want to try making that too!"
The wonderful thing about sashiko is that it doesn't require expensive tools or special sewing machines. As long as you have fabric, a needle, and thread, it's a craft you can enjoy anywhere. As someone who loves making, looking at, and buying all kinds of handmade items and fabric crafts, I find special charm in sashiko—both in the quiet, focused time it provides and in how practical the finished pieces are for daily life.
However, when beginners decide to dive into sashiko, they almost always run into the exact same obstacle: "What should I make first?"
If you visit a craft shop, you'll see many kits with gorgeous, intricate patterns. It's completely understandable to think, "If I'm going to spend time on this, I want to make one of these elaborate flower cloths!" But choosing the wrong project for your first attempt carries a high risk: you might get overwhelmed before finishing, or end up with pulled, puckered fabric that ruins the experience and turns you off sashiko altogether.
In this guide, based on my own experience and craft knowledge, I will explain step-by-step how to choose your very first sashiko project so you can complete it successfully and enjoy every minute of the process!
For anyone starting sashiko for the first time, the ideal starting project is already clear. You don't need to hesitate! For your very first project, choose either a coaster or a small pre-printed sashiko cloth (mini hanafukin).
Please don't start with large drawstring bags, complex garment mending, or full-sized tablecloths right away. Your top priority should be getting used to the basic needle movements on a small surface area.
My absolute top recommendation for beginners is a coaster measuring around 10 cm to 15 cm (4 to 6 inches) square. Coasters have a small stitching area and require very little thread, allowing you to finish them quickly in one sitting. In handcrafting, the feeling of accomplishment from completing a project is the strongest motivation to keep improving.
If you'd rather make a functional cloth right away, the next best option is a small pre-printed sashiko hanafukin (around 30 cm or 12 inches square). Many craft manufacturers sell kits where the design is printed directly onto pre-cut and hemmed fabric using water-soluble ink. With these kits, there's no need to cut fabric or draw patterns yourself—you can start stitching the moment it arrives!
The two main reasons beginners give up on sashiko are losing patience midway through and puckering the fabric because they haven't mastered thread tension.
Sashiko involves repeating the exact same needle motion over and over. If an inexperienced crafter chooses a large piece or a complicated design, stitching for dozens of hours without seeing the end can turn the fun into a chore.
Furthermore, sashiko requires a unique feeling for thread slackness, known in Japanese as shigoki (smoothing out tension). If you tackle a large piece before mastering this technique, the thread will pull the fabric tight, resulting in warped, puckered cloth that even an iron can't fix. Starting small with a coaster or simple cloth allows you to learn thread tension quickly with minimal stress.
When browsing craft stores or online shops filled with sashiko kits and pre-patterned fabrics, use these three criteria to identify the right starting project. If your choice meets all three, your chance of failure drops to zero!
Choose a size that can be finished in about 2 to 5 hours of total crafting time. A 10–15 cm square coaster is ideal. Even if you choose a 30 cm hanafukin cloth, pick a design with plenty of negative space and fewer stitch lines. Experiencing the joy of starting and finishing a piece in a single day or weekend is the secret to building a lasting craft habit.
Sashiko patterns generally fall into two categories: those made strictly of straight lines, and those featuring intricate curves. Beginners should always start with straight-line patterns.
The foundation of sashiko is a technique called unshin (continuous rhythm stitching), where you gather multiple stitches onto your long needle before pulling the thread through. Straight lines make this movement smooth and natural. Curved or circular designs, on the other hand, require taking stitches one by one and adjusting tension delicately around bends. Save curved patterns for after you've completed 2 or 3 straight-line pieces!
While experienced sashiko crafters draw their own grid lines on plain cotton using tailors' chalk and rulers, doing this as a beginner is a mistake. Accurately transferring sashiko grids requires special tools and experience; if the grid is off by even a millimeter, the pattern won't align cleanly no matter how well you stitch. Start with fabric or starter kits featuring pre-printed, water-soluble design lines. You simply trace the printed lines with your needle to achieve a professional result.
Even among straight-line designs, Japan has many traditional sashiko motifs. Here are three representative patterns perfect for beginners, listed from easiest to slightly more advanced:
The absolute best choice for a first project is a pattern composed of cross shapes called Ju (the Japanese character for "ten"), or simple grid lattices known as Hogan-zashi or Igeta (well-frame pattern).
These patterns are built entirely from straight vertical and horizontal lines. You stitch all the vertical lines from end to end first, then stitch all the horizontal lines across. As they cross, a beautiful geometric grid emerges. Because there are no diagonal lines, it is the best pattern for mastering the gentle thread tension (shigoki) unique to sashiko.
Asa-no-ha (hemp leaf) is one of the most famous traditional Japanese motifs, offering a classic sashiko look. While it appears intricate, it is actually composed entirely of straight lines!
You stitch in three distinct passes: vertical lines, right-slanted diagonals, and left-slanted diagonals. As these straight lines intersect, striking hexagonal hemp leaf shapes appear. Learning how to place your needle at the intersections and following a structured stitch order makes this pattern deeply satisfying to complete.
If you prefer rounded, softer aesthetics, consider Shippo-tsunagi (interlocking circles), an auspicious traditional design representing harmony and good fortune. Because this pattern consists of overlapping circular arcs, it is slightly more challenging than straight-line grids. It requires a bit more care to keep stitch lengths uniform, but using pre-printed fabric makes it manageable even for dedicated beginners. It makes a wonderful second project after you've completed a straight-line coaster!
When starting sashiko, avoid using standard household sewing needles or regular machine sewing thread. Sashiko uses specialized tools and materials designed specifically for the craft. Using incorrect supplies makes stitching frustrating and affects the final look.
Standard sewing needles are too short and have eyes too small to fit thick sashiko thread. A sashiko needle (sashiko-bari) is long, sturdy, and slightly flexible, engineered to hold multiple stitches on the shaft at once.
Sashiko thread (sashiko-ito) is a thick, 100% cotton thread that is used intact rather than separated into individual plies like standard embroidery floss. While sashiko thread comes in fine, medium, and heavy weights, beginners should choose medium to heavy weight thread. Thicker thread makes your stitches pop visually and gives the finished work a cozy, charming texture even if stitch lengths are slightly uneven.
Traditional sashiko uses loosely woven cotton fabric known as wazarashi (traditional bleached cotton) or dedicated sashiko cotton cloth. The weave allows long, thick needles to glide smoothly through without straining your fingers. Tightly woven standard cotton broadcloth or stiff linen can be tough to pierce and may hurt your hands.
To start smoothly, purchase pre-printed sashiko fabric or kits. These are widely available through craft supply manufacturers, online shops like Amazon and Etsy, or craft markets.
Traditional sashiko stitchers often use a leather or metal palm thimble (yubinuki) to push the long needle, but as a beginner, you don't need to force yourself to use one right away. Hold the needle comfortably as you normally would for hand sewing and follow the printed lines.
The most crucial technique to remember is maintaining thread slack (yutori):
This smoothing step (shigoki) prevents the thread from contracting tight and pulling the fabric out of shape.
Once you have your pre-printed cloth, sashiko needle, and sashiko thread ready, follow these steps to complete your coaster or small cloth with ease:
Sashiko thread often comes in skeins. Cut the loop to get manageable working lengths of about 40 cm to 50 cm (16 to 20 inches). Working with thread that is too long causes friction, fraying, and tangling.
Thread your needle, but leave the end without a big knot. Traditionally, sashiko avoids thick knots (tamadome) because pieces like cloths and coasters are double-sided. Instead, thread ends are secured between fabric layers or anchored with overlapping stitches. (However, if you're worried about threads unraveling on your very first try, making a tiny hidden knot inside the double fabric layer is completely fine!)
If your design has an outer square border (gaiwaku), stitch this outer line first. Stitching the perimeter holds the two layers of fabric securely together, preventing them from shifting while you work on the inner motif.
To anchor your thread without a knot along the frame: insert your needle 3 stitches ahead of your starting point, stitch 3 stitches backward, and then stitch forward in your intended direction. This overlap holds the thread firmly in place.
When stitching the interior motif, following a structured sequence is the key to a neat finish. Avoid stitching random spots across the design!
Stitching all parallel lines in one go keeps the back of the fabric clean and ensures beautiful intersections on the front. When traveling from one line to an adjacent line on the back, pass the thread through the space between the two cloth layers or leave a slightly loose loop on the reverse side so the fabric stays flat.
Once all stitches are complete, it's time for the most rewarding step! Submerge your finished piece in a bowl of cool water. The printed ink guidelines will dissolve completely into the water like magic!
No soap is required. Gently press the cloth underwater to wash away any remaining ink, squeeze out excess water with a towel, and lay flat to dry in the shade. While slightly damp, press the back of the piece with an iron on a low setting. The raised, textured sashiko threads will plump up beautifully, creating a professional-looking coaster you made yourself!
Even with careful preparation, a few common issues can happen during a first project. Here is how to prevent and troubleshoot them:
Cause: Thread tension is too tight. Sashiko thread is 100% cotton and shrinks slightly when washed. If the thread is pulled taut while stitching, washing it will pull the cloth into a distorted trapezoid or diamond shape.
Solution: Remember to stretch and smooth the fabric (shigoki) vertically and horizontally after every few stitches. The thread should feel relaxed. If you notice puckering mid-project, use the tip of your needle to gently pull slack into the loops on the back side.
Cause: Knots placed directly on the outer surface show through or create lumps under thin cotton layers.
Solution: Insert your needle between the two layers of fabric so the knot stays hidden in the middle space. As you gain confidence, switch to knotless backstitching (overlapping 3 stitches at the start and end of a line) for a completely flat finish on both sides.
Cause: Choosing a project that takes too long before you've built stitch muscle memory.
Solution: Stick to a small coaster for project #1! If you are working on a larger cloth, break the project down into bite-sized daily goals—such as "I'll stitch 3 vertical lines tonight while listening to music." Sashiko doesn't need to be rushed; spending 15 peaceful minutes a night is a wonderful way to weave craft into your routine.
Sashiko is a historic Japanese folk craft, yet its clean geometric aesthetic fits effortlessly into modern interior decor and lifestyle accessories. Your first stitches might not be perfectly uniform, but the handmade warmth of hand-stitched thread is the true heart of sashiko. Unlike machine-made textiles, every stitch carries personal care and character.
Keep these summary steps in mind when picking your first kit:
Once you experience the joy of using a coaster you stitched yourself for your daily coffee or tea, you'll be eager to start your second and third projects!
If you found this guide helpful, please share it with your fellow crafter friends on social media. Happy stitching, and see you in the next article! — Yassy from Crafters


For example, if you are looking for articles about mizuhiki, try searching for "mizuhiki"; if you are interested in tools, try keywords like "nippers" or "pliers."
