How to Plan Seasonal Handmade Collections: Stay Ahead of Trends and Never Miss Peak Sales
yassy
Crafters!

Hello, everyone! It’s Yassy from Crafters! (・∀・)
As a true handmade enthusiast, I love creating my own items, admiring stunning pieces at craft markets, and collecting those special finds that instantly catch my eye. I know both the pure joy of making and the excitement of using handcrafted creations!
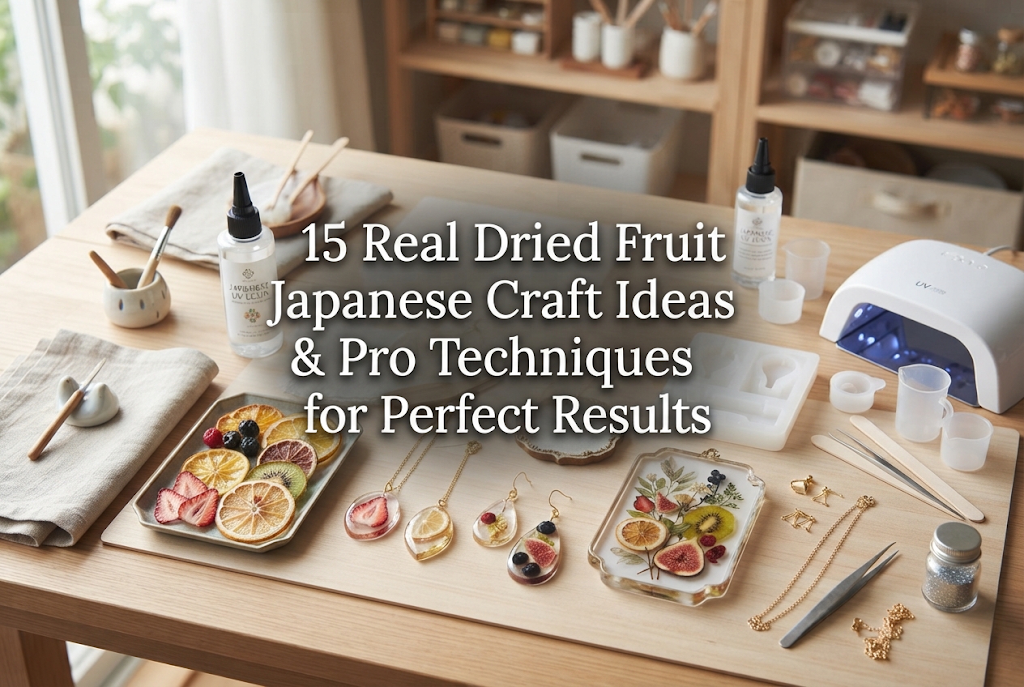
Today’s theme is one that brings instant delight: handmade craft ideas using real dried fruit. The vivid colors, natural textures, and delicate color gradients of real fruit simply cannot be replicated by artificial materials. Their unique presence makes real fruit crafts a perennial favorite at craft shows and online markets.
However, working with real dried fruit requires specific knowledge and techniques. I often hear troubleshooting stories from beginners: "My piece grew mold after a few days!" or "The fruit turned dark and cloudy after I encapsulated it in resin."
In this guide, I will walk you through 15 inspiring project ideas perfect for beginners, along with essential techniques to prevent mold, clouding, and fading. By the end of this article, you will have all the confidence you need to create long-lasting, professional-quality dried fruit crafts. Let’s dive in!
Before jumping into the project ideas, let’s go over three non-negotiable rules for working with natural botanical materials. Skipping these steps can cause your hard work to spoil within weeks. As a crafter, I can tell you that proper preparation determines the final quality of your work!
Commercially sold store-bought dried fruit intended for eating often retains internal moisture. If even a small amount of moisture remains inside the fruit pulp when sealed in resin or oil, it will inevitably lead to mold and decay within days or weeks.
Always use completely dehydrated materials—such as specialty pressed fruit craft supplies or fruits thoroughly dried using silica gel or a food dehydrator. The fruit must feel completely dry and crisp to the touch, with zero residual moisture.
When you place raw dried fruit straight into liquid resin, the resin slowly seeps into the microscopic pores of the fruit flesh. While it might look great immediately after curing, over time the fruit becomes semi-translucent, dark, and discolored.
To prevent this, always apply a pre-coat. Paint a thin layer of specialized coating varnish or decoupage glue on both sides of the dried fruit and let it dry completely before embedding it in resin. This transparent barrier prevents resin absorption and preserves the fruit's vivid color.
Natural pigments in fruit (like anthocyanins and carotenoids) naturally break down when exposed to ultraviolet light. While this is a natural physical process, you can significantly slow it down.
Use a UV-blocking topcoat resin or apply a clear UV-resistant protective spray as a final finish. Additionally, if you sell your work, always include a care card advising customers to keep their items out of direct sunlight as a professional standard of quality.
Here are 15 colorful and rewarding dried fruit craft ideas that are accessible for beginners. I’ll explain key techniques for each and share how I personally like to customize them!
Bold, cheerful earrings made by coating whole or half orange slices in crystal-clear resin. They bring a bright pop of color and are exceptionally popular during spring and summer seasons.
Key Technique: Because orange rind is thick, coating it once will not cover it evenly. Apply thin coats of resin and cure under a UV/LED light in 2 to 3 layers ("layer coating"). Use sturdy earring hooks or durable screw-back clip-ons to support the piece securely.
Yassy's Pro Tip: To highlight the translucent flesh, sprinkle ultra-fine gold glitter lightly along the edge of the peel. This simple step adds a touch of elegance, elevating the design to a boutique-ready finish!
A classic interior decoration bottle where vibrant red strawberry slices are suspended in mineral or silicone herbarium oil, showcasing seeds and delicate outlines.
Key Technique: Dried strawberries are extremely lightweight and tend to float to the top once oil is added. Secure them at the bottom using curing silicone gel or anchor them in place by sandwiching them between other dried flowers.
Yassy's Pro Tip: Fill the bottle with preserved white hydrangea petals and tuck the strawberry slices between them. This creates a sweet "strawberry milk" color palette that appeals to flower lovers.
Aromatic wax tablets made by pouring soy or paraffin wax into molds and arranging dried fruits on top as the wax begins to set. They release a gentle fragrance without a flame, making them fantastic gifts.
Key Technique: Timing is everything! Placing fruit into liquid wax makes it sink to the bottom, while waiting too long prevents it from adhering. Place your fruit right as a thin film starts forming on the wax surface.
Yassy's Pro Tip: Combine dried orange slices, star anise, and cinnamon sticks for a timeless botanical look. Pair this arrangement with a refreshing bergamot essential oil fragrance.
Plump, glossy keychains created using deep silicone molds filled with clear two-part epoxy resin and sliced lemons or kiwis. Epoxy resin offers high clarity and excellent yellowing resistance.
Key Technique: Epoxy resin takes 24 hours to cure. During this slow process, tiny air bubbles trapped inside the fruit can escape into the resin. Pre-coat the dried fruit with a thin layer of UV resin before submerging it into epoxy resin to trap air completely.
Yassy's Pro Tip: Create two asymmetrical charm pieces—one with yellow lemon and one with green kiwi—and link them together on a single bag clip for a fun, playful accessory.
A double-structured pillar candle featuring thin, ring-shaped dried apple slices along the outer container layer, ensuring the fruit design stays visible even as the center wick burns down.
Key Technique: Heat from the burning center can scorch outer fruits if placed too close. Maintain safe clearance between the inner candle core and outer mold, and use high-melting-point paraffin wax for the outer shell for thermal safety.
Yassy's Pro Tip: Arrange dried eucalyptus leaves alongside deep red dried apple slices. The contrast between deep green and rich red creates a cozy, warm look ideal for autumn and winter decor.
A popular high-end custom item made by arranging paper-thin pressed fruit slices on a clear phone case and sealing the entire surface flat with high-clarity resin.
Key Technique: Any lifted edge will create bumps on the case surface. Adhere fruits flat onto the case first before pouring resin smoothly across the surface. Use a heat tool to pop trapped air bubbles before curing under light.
Yassy's Pro Tip: Center a bold kiwi slice and scatter delicate white baby's breath blossoms around it. Utilize negative space so the color of the phone shows through nicely.
A compact project where miniature fruit slices and tiny flower petals are set into the metal base of a phone ring holder. It’s quick to make and ideal for craft beginners.
Key Technique: Due to the small base area, use miniature fruits like crabapple slices or small orange segments. Check component dimensions beforehand so parts do not interfere with the ring's movement.
Yassy's Pro Tip: Apply a small layer of gold leaf foil onto the base before setting a mini dried strawberry piece over it. Red and gold create an eye-catching focal point.
A stylish functional home accessory featuring specialized diffuser oil and dried fruits inside a glass bottle, paired with rattan or bamboo reed sticks to disperse scent.
Key Technique: Do not use standard herbarium oil. Always select dedicated reed diffuser base oil; standard mineral oils will not evaporate or travel up reed sticks properly.
Yassy's Pro Tip: Layer lemon and lime slices alternately and scent with a crisp citrus fragrance blend. It instantly brightens up entryways or bathroom counter spaces.
A natural hanging garland made by stringing dehydrated lime slices, orange slices, cinnamon sticks, and bay leaves onto jute twine—no resin required!
Key Technique: Punching holes directly through fruit pulp can cause cracking. Apply a small strip of clear tape on the back of the fruit slice before using an awl to pierce the stringing hole safely.
Yassy's Pro Tip: Insert natural wooden beads between fruits and spices to enhance the rustic, country-style charm. It’s perfect for cozy interior aesthetics.
Charming hair clips and ties created by securing small resin-encased fruit slices onto metal alloy clip bases or ponytail elastics.
Key Technique: Since these touch hair and skin, sand down any sharp resin edges or burrs thoroughly with sandpaper and re-apply a smooth topcoat polish so hair won't snag.
Yassy's Pro Tip: Arrange mini lemon slices and small dried rosebuds along an oval hair clip base for a fresh, feminine look suitable for casual weekend outings.
A practical kitchen decor project where real dried fruits are arranged on round or square wooden bases and sealed under a thick layer of smooth epoxy resin.
Key Technique: Natural wood releases trapped air when resin is poured over it. Always apply a wood sealer or varnish layer to the coaster surface and let it dry completely before adding fruit and resin.
Yassy's Pro Tip: Place a vibrant blood orange slice in the center of a natural wood-grain coaster. The minimalist layout highlights both natural wood and fruit beauty.
Warm, handmade greeting cards created by mounting ultra-thin pressed fruit slices onto heavy craft paper or textured Japanese washi paper using craft adhesive.
Key Technique: Excess moisture will warp paper. Use flat-pressed fruits under 1 mm in thickness that contain zero water content so cards stay flat and fit inside envelopes easily.
Yassy's Pro Tip: Accent hand-lettered "Thank You" calligraphy with a small heart-shaped dried strawberry slice for a memorable personalized touch.
A decorative signage piece created inside a wooden or glass shadowbox frame filled with layered dried fruit slices, customized with lettering for weddings or entryway decor.
Key Technique: Balance is critical across large surface areas. Lay out your dried fruits inside the frame first and snap a quick photo on your smartphone. Use the photo as a reference map while gluing pieces down one by one.
Yassy's Pro Tip: Use a double-glass floating frame structure. The translucent background lets wall textures show through, adapting elegantly to any room decor.
A dynamic bag accessory pairing resin-coated dried fruit charms with natural wood beads and fabric tassels.
Key Technique: Bag charms undergo movement and impact. Ensure screw eyes or jump rings attached to resin charms are set securely inside pre-drilled holes reinforced with liquid resin before curing.
Yassy's Pro Tip: Use a starfruit slice (which has a distinct star-shaped cross section) paired with a warm mustard-yellow tassel for a unique, modern accessory.
A solid, decorative desk accessory crafted by embedding 3D arrangements of dried fruits, nuts, and spices inside a clear hemispherical silicone mold filled with resin.
Key Technique: Pouring large volumes of resin at once generates high exothermic heat, which can discolor fruit or crack the resin. Pour resin in incremental layers, curing between steps.
Yassy's Pro Tip: Combine lime slices, orange segments, and pink peppercorns in a 3D arrangement so the design looks stunning from every angle on your desk.
Now that you're inspired by these project ideas, here is a list of essential tools and supplies to help you get started on the right track:
Proper care will prolong the life of your real fruit creations. Keep these key maintenance practices in mind:
Working with real dried fruit allows you to preserve nature's unique shapes and colors in beautiful, lasting handmade creations. The authentic texture and vibrancy of real fruit offer a charm that artificial supplies simply cannot match.
If you remember the three core rules—use completely dehydrated fruit, pre-coat before resin application, and protect from direct sunlight—you will be able to craft brilliant, long-lasting pieces with confidence!
Start small with manageable projects like phone rings or hair clips to build your skills. I hope you enjoy bringing these vibrant nature-inspired pieces into your craft routine!
Until next time, happy crafting! This was Yassy from Crafters!






For example, if you are looking for articles about mizuhiki, try searching for "mizuhiki"; if you are interested in tools, try keywords like "nippers" or "pliers."
