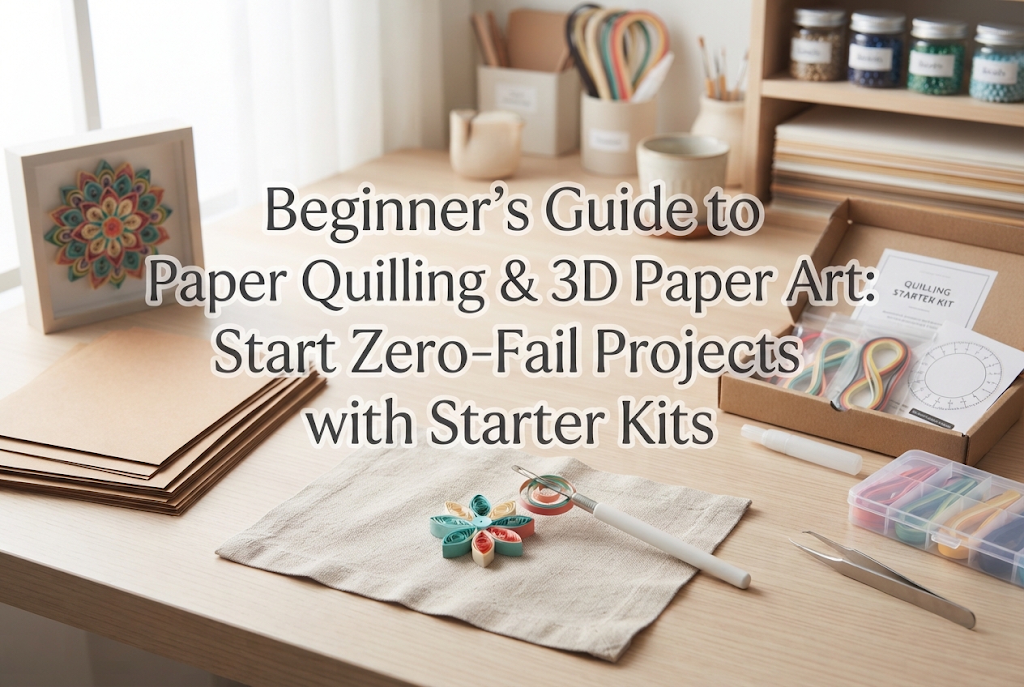
Beginner’s Guide to Paper Quilling & 3D Paper Art: Start Zero-Fail Projects with Starter Kits

yassy
FIND IT ON AMAZON.COMpaper quilling starter kit on Amazon.comSearch and find related products on Amazon.com.
Some content displayed on this site is provided by Amazon. This content is provided as-is and may be changed or removed at any time.

Hello from Yassy! Welcome to the World of Paper Quilling

Hi everyone! It’s Yassy from Crafters! (・∀・)

Have you ever seen delicate paper craft artwork online or in a boutique gift shop and thought, "That is so detailed and adorable! I wish I could create something like that myself!"? I certainly have. When I first held a three-dimensional paper quilling piece in my hands, I was completely enchanted by its depth and beauty—it was hard to believe it was crafted entirely from paper.

As someone who absolutely loves making, viewing, and collecting handmade crafts, I can assure you: paper quilling and 3D paper art do not require exceptional artistic talent or innate dexterity. As long as you have the right tools and basic techniques, anyone can start making flawless projects today.

However, you might be thinking: "It looks so intricate, I don't know where to start," "Do I have to cut all the paper myself?" or "There are too many tools to choose from!" If these worries are holding you back, don't worry. In this guide, I’ll walk you through essential knowledge, how to choose tools without making mistakes, and a step-by-step roadmap to complete your first project without frustration.

Here is my ultimate takeaway right upfront: don't spend time overthinking it! If you're a beginner wanting to try paper quilling, the best single choice is to buy a comprehensive "Paper Quilling Starter Kit" on online marketplaces like Amazon or Rakuten and jump right in. Let's dive into why that is and explore practical techniques from a craft writer's perspective!

What Are Paper Quilling and 3D Paper Art?

First, let's understand the core techniques and wonderful appeal of paper quilling and 3D paper art.

Paper Quilling is a technique where thin strips of paper (typically 3 mm to 5 mm wide) are rolled using a specialized slotted tool. Once rolled into a coil, the paper is pinched and shaped into various components, which are then glued onto a backing board or assembled together to form flowers, intricate patterns, and motifs.

3D Paper Art (Three-Dimensional Papercraft) refers to broader techniques where paper is cut, layered, or embossed into curved shapes to give a work 3D depth. Creating dome-shaped flowers or miniature paper animals using quilling components is a classic example of 3D paper art.

This craft discipline offers three distinct advantages over other handmade hobbies:

  1. Requires minimal space and creates no mess: Unlike resin crafts, there are no chemical fumes or ventilation issues, and unlike clay, your hands won't get sticky. All you need is a small cutting mat on your desk or dining table.
  2. Incredibly affordable materials: Since the primary material is paper, initial setup costs and testing expenses are minimal compared to other crafts. Being able to practice repeatedly without worrying about wasting money is a huge benefit for beginners.
  3. Endless 3D expressions through simple combinations: By gently pushing out the center of a rolled paper coil with your fingers, you can easily create 3D flower petals, animal faces, or framed dimensional artwork. The magical sensation of transforming familiar paper into dimensional art with your own hands is truly addictive.
Shop the MaterialsFind craft supplies and materials on Amazon.com.Explore on Amazon.com
Some content displayed on this site is provided by Amazon. This content is provided as-is and may be changed or removed at any time.

3 Common Misconceptions and Beginner Pitfalls

While paper quilling is very approachable, there are a few common misunderstandings that cause beginners to get frustrated and quit. Let me clear these up right now!

Misconception 1: "I need super nimble fingers to make neat coils."

This is completely untrue. Manual dexterity isn't what determines the beauty of quilling—it's using the right specialized tools, specifically a slotted quilling tool and a circle sizing board.

The slotted tool features a small slit at its metal tip. You simply slide the end of the paper strip into the slot and turn the handle. The tool does the work of rolling a neat coil automatically. Trying to roll strips evenly using only your bare fingers is what makes it feel difficult. With a proper tool, anyone can roll a professional-looking coil in under a minute.

Misconception 2: "I can just cut construction paper with scissors or buy 100-yen shop substitutes."

This is the most common mistake beginners make: trying to cut regular cardstock or craft paper manually with scissors or a utility knife. Please avoid doing this!

Standard construction paper is often too rigid and uneven in weight for quilling. Furthermore, hand-cut strips inevitably vary in width by fractions of a millimeter. When you combine strips of inconsistent widths, the surface of your finished design becomes uneven and loses its clean look.

Dedicated quilling paper strips are machine-cut to precise, uniform widths (such as 3 mm or 5 mm) and possess the exact flexibility needed to curl smoothly. Using pre-cut, specialized quilling paper from the start is rule number one for avoiding failure.

Misconception 3: "Quilling is only for flat, glued-down designs."

People often assume paper quilling is limited to pasting flat flower shapes on the corner of a greeting card. But that's just the beginning!

By pressing the center of a rolled coil outward using a 3D shaping tool or your thumb, you can turn flat coils into domes and cones. Joining these shaped parts allows you to create 3D rose bouquets, miniature animals, and dimensional framed art. Expanding from flat surfaces into true 3D space is where the real fun lies.

Essential Tools and Material Selection Guide

Here is an overview of the core tools required for paper quilling and 3D paper art, along with tips on choosing them:

  1. Slotted Quilling Tool (Quilling Bar): The primary rolling tool. Look for one with a comfortable handle and a sturdy metal rod containing a fine slot at the tip.
  2. Quilling Paper Strips: Pre-cut strips available in widths like 3 mm, 5 mm, 7 mm, and 10 mm. For beginners, 5 mm width is strongly recommended. While 3 mm produces delicate results, it can be tricky to handle at first; 5 mm is easier to see, manipulate, and shape into 3D forms. Choosing gradient color mix packs rather than single solid colors adds instant depth and elegance to your projects.
  3. Circle Sizing Board (Quilling Template Board): A plastic board with round holes of various diameter measurements. Dropping a freshly rolled coil into a designated hole lets it unroll naturally to an exact size, enabling you to create identical flower petals every single time.
  4. Precision Craft Glue & Fine-Tip Glue Dispenser Bottle: Standard PVA/wood glue works, but quick-drying craft glue that dries clear is ideal. Paired with an applicator bottle featuring a needle-fine tip, you can apply micro-dots of glue without over-saturating the paper.
  5. Fine-Point Tweezers: Essential for handling delicate coils and placing glue-coated components precisely where you want them. Stainless steel tweezers with narrow, aligned tips are best.
  6. 3D Curling/Shaping Mold: A tool with hemispherical and conical domes used to press flat paper coils into curved 3D shapes. A must-have tool for dimensional paper art.

Why Buying a "Starter Kit" Online is the Smartest Move

Instead of searching for and purchasing each tool individually—which often leads to mismatched paper sizes, missing accessories, and higher overall costs—buying a complete Paper Quilling Starter Kit from online retailers like Amazon or Rakuten is the most reliable option.

3 Main Benefits of Starter Kits:

  1. All essential tools in one case: Kits include slotted tools, size boards, tweezers, 3D molds, glue bottles, scissors, and hundreds of colorful paper strips. You can start crafting the moment the package arrives.
  2. Exceptional cost performance: Buying items separately can easily cost 4,000 to 5,000 yen, whereas starter kits with carrying cases generally cost around 2,000 to 3,000 yen.
  3. Guaranteed compatibility: The tools and paper strips inside a kit are sized to match, eliminating issues like paper being too thick for the slotted tool tip.

Basic Quilling Techniques for Zero Failures

Once your kit arrives, you're ready to start crafting! All paper quilling shapes stem from two fundamental forms: the Tight Coil and the Loose Coil.

1. Making a Tight Coil

Tight coils are firmly wound spirals used for centers of flowers or structural bases in 3D pieces.

  1. Insert one end of a paper strip into the slot of your quilling tool.
  2. Rotate the tool evenly, keeping gentle tension on the paper strip so it rolls tightly.
  3. Once fully rolled, apply a tiny dot of glue to the end of the strip and hold it in place for a few seconds.
  4. Gently slide the coil off the tool.

Tip: Keep your fingers lightly supporting the top and bottom of the coil as you turn to prevent the spiral from tilting diagonally.

2. Making a Loose Coil

Loose coils are unrolled slightly to create workable shapes for petals and leaves.

  1. Roll the paper strip onto the tool just as you would for a tight coil.
  2. Without applying glue, slide the roll off the tool.
  3. Drop the coil into a desired hole on your circle sizing board.
  4. Let the paper unroll naturally to fill the hole size.
  5. Carefully lift the coil out with tweezers and glue the loose outer tail to secure the shape.

3. Shaping Loose Coils into Basic Motifs

Pinching a loose coil at specific points creates versatile shapes:

  • Teardrop: Pinch a loose coil at one point. Ideal for basic flower petals.
  • Marquise (Eye / Leaf Shape): Pinch opposite sides of a loose coil simultaneously. Great for leaves and pointed petals.
  • Square: Make a marquise shape, rotate it 90 degrees, and pinch the other two sides.
  • Heart: Pinch a teardrop, then push the rounded end inward using a fingernail or tool tip.

How to Elevate Flat Designs into 3D Paper Art

Ready to go beyond flat cards? Here are three practical approaches to creating true 3D depth:

  1. Form Domes with 3D Molds: Take a tight coil and press it over a dome shape on a 3D molding board to turn it into a hemisphere or cone. Coat the inner concave side with a thin layer of craft glue and let it dry to lock the 3D shape permanently. Use these for curved flower petals, mini bowls, or animal heads.
  2. Vertical Strip Placement (Paper Layering / Contour Technique): Instead of laying paper flat, apply glue to the narrow edge of a shaped strip and stand it vertically on your backing board. The thin edges catch light and create elegant shadows that give instant depth.
  3. Layering inside Shadow Boxes: Use a deep frame (shadow box). By placing components at varying heights using small pieces of foam tape, you create foreground, midground, and background layers. Framing your art this way also protects delicate paper from dust.

Step-by-Step Project Roadmap for Beginners

Follow this gentle progression to build your skills step-by-step:

  • STEP 1: 5-Petal Flower Gift CardMake 5 teardrop coils of identical size using your circle sizing board. Place a small tight coil in the center, arrange the 5 teardrops around it, and glue them onto a greeting card.
  • STEP 2: Dimensional Flower Mini FrameUse a 3D mold to slightly dome flower petals, make a few leaf shapes, and arrange them inside a 10cm x 10cm photo frame. Overlap petals slightly to add natural dimension.
  • STEP 3: 3D Miniature Ornaments (Animal Motifs or Flower Pots)Combine two domed tight coils together to form a 3D paper sphere for animal heads or miniature planters. Glue small quilling flowers closely inside a mini pot to create a desktop display.

Yassy’s Tips for Enjoying and Preserving Your Art

To preserve your finished 3D paper crafts long-term, I recommend displaying them inside glass-fronted shadow box frames or clear acrylic display cases. Because paper absorbs room humidity and collects dust easily, enclosed displays keep your work pristine for years while giving it a polished look.

For organizing your workflow, try using clear plastic craft storage boxes with small compartments (easily found at 100-yen shops or craft stores). You can pre-roll coils during spare moments, sort them by color and shape, and assemble full projects on the weekend!

Summary: Starting Your Paper Quilling Journey

Paper quilling and 3D paper art are accessible, immensely satisfying crafts that require minimal space and investment. Here's a quick recap:

  • Use specialized slotted tools to easily create uniform coils.
  • Choose pre-cut quilling paper (5 mm width recommended) rather than cutting cardstock manually.
  • Start with a complete online Starter Kit for convenience and value.
  • Use a circle sizing board to ensure consistent petal sizes.
  • Explore 3D shaping molds and shadow box frames to add impressive depth.

If you're excited to try it, search for a starter kit online today and give rolling a try! If you found this article helpful, please share it with your fellow craft lovers on social media. See you in the next article! This was Yassy from Crafters!
■You can search using keywords to find information on topics that interest you or things you want to look up.
For example, if you are looking for articles about mizuhiki, try searching for "mizuhiki"; if you are interested in tools, try keywords like "nippers" or "pliers."

Some content displayed on this site is provided by Amazon. This content is provided as-is and may be changed or removed at any time.
Xからの読者コメントをお待ちしています。
ブログ更新の励みになります!
ABOUT ME
やっしー@クラフターズ
やっしー@クラフターズ
デザイナー・ハンドメイド大好き!
ハンドメイド作家のための情報サイト:クラフターズ! 「作りたい」「売りたい」を応援する!初心者から上級者・販売まで、役立つハンドメイド情報を発信しています。 ▼△▼△▼△▼△▼△▼△▼△▼△▼△▼△▼△▼△▼△▼△▼
記事URLをコピーしました