Genuine Leather vs. Faux Leather: Complete Guide to Differences, Identification, and Project Selection
yassy
Crafters!

Hello, crafters! It’s Yassy from Crafters! (・∀・)
We all use soap every single day for washing our faces and taking baths. Have you ever wondered if you could make your own instead of just buying it off store shelves? In the handmade community, crafting your own soap by combining your favorite oils, scents, herbs, and colors is an incredibly popular, wonderfully rich creative field. The biggest appeal is that you can achieve both a stunning appearance that delights the eye and an ultra-hydrating lather that feels amazing against your skin.
Personally, I love making, browsing, and buying all kinds of handmade crafts, but soap making holds a truly special place in my heart because of how it seamlessly blends practicality with artistry. Just setting a bar on your vanity fills the entire room with a gentle fragrance, and washing your skin with a bar you crafted from scratch turns everyday routines into pure bliss.
Even so, many beginners have understandable hesitations: "Isn't lye dangerous to work with?" "Handling caustic chemicals sounds intimidating," or "What kind of workspace and equipment do I actually need?" To help you get started safely and confidently, this guide breaks down everything from the basic science and project varieties to the key differences between the two main methods, essential safety rules, difficulty levels, required space, and startup costs!
Many commercially available bar soaps are mass-produced through a method called "milled soap," where natural glycerin—an organic moisturizing byproduct of the soap-making reaction—is often extracted. Handmade soap, on the other hand, retains all the nourishing properties of plant oils alongside the natural glycerin created during the process. Because of this, it leaves your skin feeling noticeably supple and hydrated without that tight, stripped sensation.
The charm of handmade soap goes far beyond skin-friendly moisture. You have near-infinite design freedom, allowing you to create bars that resemble polished gemstones or delicate confectionery. You can also customize your oil blend based on your exact skin type—whether that means olive oil, sesame oil, shea butter, or coconut oil. If you prefer to avoid synthetic colorants and heavy fragrances, you can rely entirely on natural clays, dried botanicals, and pure essential oils to create completely gentle, wholesome bars.
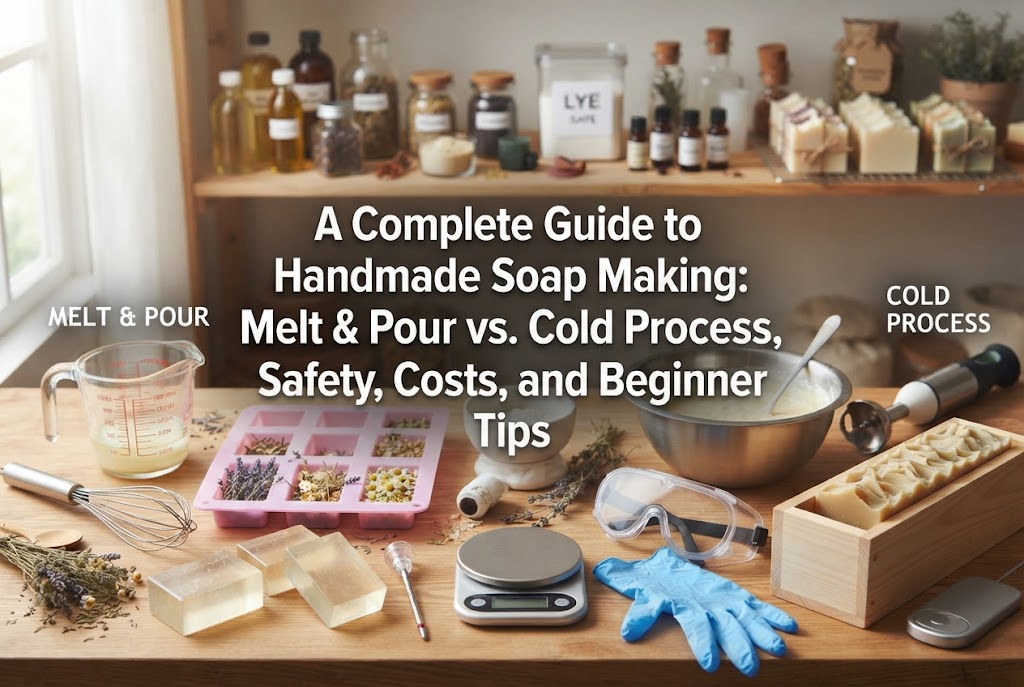
In handcrafted soap making, there are two primary approaches: the easy method of melting and molding in a microwave, and the authentic method of formulating soap from scratch using plant oils and lye. To set yourself up for success, it is important to understand the differences between these two techniques and choose the one that matches your goals.
Before diving in, every soap maker needs to know the difference between the "Cold Process (CP)" method and the "Melt & Pour (MP)" method. They require entirely different ingredients, tools, and time commitments.
MP soap uses pre-made "glycerin soap bases." You simply place the base in a heatproof container, melt it in the microwave or a hot water bath, stir in your chosen colors, fragrances, or dried botanicals, pour it into a mold, and let it cool until firm.
Cold process soap is an authentic crafting method where plant-based fats and oils (such as olive oil or coconut oil) are combined with sodium hydroxide (lye) dissolved in water, triggering saponification without external cooking heat. Because it cures at controlled, lower temperatures, the delicate nutrients of the botanical oils and the natural glycerin remain intact, resulting in a rich, deeply moisturizing bar.
Neither method is objectively better than the other. If you prioritize creative visual design and instant results, MP soap is ideal. If you want deep skin nourishment, tailored formulas, and the satisfaction of chemistry-based craftsmanship, CP is the way to go.
When making cold process soap, you must work with sodium hydroxide (caustic soda / lye). Lye is a potent alkali classified as a hazardous substance. Handled properly, it is entirely manageable, but carelessness or a lack of knowledge can lead to severe accidents. Following safety rules is non-negotiable for every soap maker.
In Japan, sodium hydroxide is regulated as a deleterious substance. Rather than picking it up at a standard home improvement store, crafters buy it at pharmacies, where you must fill out an official transfer slip, provide your signature and personal seal (hanko), and show photo identification. Always store your lye in a secure, locked cabinet or high shelf well out of reach of children and pets. Because lye is deliquescent (it absorbs atmospheric moisture and clumps), keep the container tightly sealed at all times.
Whenever you handle lye, you must protect your eyes and skin. Always wear the following four items before starting:
This is a foundational rule of chemistry: gently add the sodium hydroxide granules into the measured water while stirring. Never pour water onto dry lye. Reversing the order can cause a violent thermal eruption that splatters caustic liquid everywhere. Strictly follow the "lye into water" sequence every single time.
Dissolving lye in water instantly generates intense heat, shooting the temperature up to around 80°C to 90°C (176°F–194°F). Always use heat-resistant containers (such as heatproof glass, stainless steel, or high-density polyethylene), and work near an active exhaust fan or in a well-ventilated outdoor or open-window space.
There is also an absolute material rule for your soap-making utensils: never use bowls, pots, or whisks made from aluminum, iron, or copper. Strong alkalis react aggressively with aluminum, corroding the metal and releasing hazardous hydrogen gas while ruining your batch. Stick strictly to stainless steel, heat-resistant glass, food-grade silicone, and alkali-resistant plastics (polypropylene [PP] or polyethylene [PE]).
With a little imagination, handmade soap can become miniature works of art. Here are some of the most popular styles you will see in artisan shops and craft markets.
The signature showpiece of the Melt & Pour world. By tinting clear glycerin soap base, slicing it into irregular facets, and clustering the pieces together, you can replicate minerals like amethyst, emerald, and turquoise. They shimmer beautifully under the light and make sensational gifts.
These natural bars incorporate dried lavender, chamomile, rosemary, or dried orange peel stirred into the base or pressed onto the top surface. The muted botanical colors and herbal scents offer a soothing aesthetic that doubles as bathroom decor. Adding cosmetic clays helps draw out pore impurities for a functional, spa-like wash.
A classic cold process technique. You separate a portion of the soap batter, tint it with cosmetic micas or natural pigments, and pour it back into the mold with intentional hand motions. From delicate feather swirls and wave patterns to crisp layered blocks, you never quite know how the pattern looks until you slice into the cured loaf.
By whipping soap batter until it holds stiff peaks, you can pipe it through a pastry bag like frosting on top of soap bases. Topped with miniature cast soap berries or sprinkles, these three-dimensional creations look remarkably like real pastries and make irresistible centerpieces at craft fairs.
Formulated with unrefined shea butter, jojoba oil, and avocado oil, these cold process soaps focus purely on moisture. Designed specifically for dry or sensitive skin, their creamy lather and gentle touch frequently turn first-time users into loyal fans.
Before gathering supplies, review your home setup to ensure you have a suitable environment.
A corner of your kitchen or a sturdy table lined with newspaper or a plastic drop cloth (about the size of two open newspaper pages) is plenty of space. However, your space must meet three vital conditions:
For cold process soap, you will also need a dedicated curing spot: an indoor, well-ventilated space out of direct sunlight where you can keep your cut bars resting undisturbed in a box for 4 to 6 weeks.
With MP soap, active hands-on time is only about 30 minutes to an hour. Once poured, it solidifies in the refrigerator or at room temperature within 1 to 2 hours, making it ready to use on the very same day.
With CP soap, measuring, mixing, and pouring takes around 1 to 1.5 hours. The filled mold then rests inside an insulated box for 24 to 48 hours to stay warm and harden. Once unmolded, you cut the block into bars with a soap knife, then leave them in a well-ventilated area for 4 to 6 weeks to cure. This curing process allows moisture to evaporate and the pH to mellow, transforming the raw bar into a gentle, long-lasting soap.
You do not need to invest in high-end specialty equipment right away. Here is how startup budgets look depending on your chosen path.
Many basic tools can be sourced from 100-yen shops or your own kitchen cabinets:
Its low barrier to entry makes MP soap an accessible, low-risk hobby.
Because you need safety protection and precise measuring tools, CP has a higher initial setup cost:
Ingredients (approx. 2,500–4,000 JPY):
Equipment (approx. 3,000–6,000 JPY):
Tools like stick blenders and digital scales will last for years once purchased. From your second batch onward, your only ongoing expenses are raw oils and essential oils, making the per-bar cost remarkably economical.
Here are the classic stumbling blocks that beginners face when making soap, along with the golden rules to sidestep them.
In cold process soap, "trace" refers to the stage where the oil and lye mixture thickens to a custard-like consistency. If your batter stays thin forever, or conversely seizes into an unworkable paste the moment you blend it, temperature is usually the culprit.
The Golden Rule: Match the temperature of both the oils and lye solution to 40°C–45°C (104°F–113°F) before combining! Keep the temperature difference between the two within 5°C. If they are too hot, the batter will seize rapidly ("false trace"); if too cool, saponification stalls. Always verify temperatures with digital probes.
While CP soap cures in its mold, a fine white powder sometimes appears on the exposed top surface. This is known as "soda ash," caused when unreacted lye on the surface meets carbon dioxide in the air. While completely harmless to use, it affects the visual finish.
The Golden Rule: Cover the surface with plastic wrap and insulate the mold thoroughly! Lay a sheet of plastic wrap directly onto the freshly poured soap surface, then set the mold inside a styrofoam or corrugated cardboard box wrapped in a towel to maintain around 30°C (86°F) for 24 hours. Good insulation promotes complete saponification and creates a smooth, glossy surface.
Excited to see their creation, beginners often attempt to force a bar out too early, causing soft edges to break apart.
The Golden Rule: Choose flexible silicone molds, and chill the mold in the freezer for an hour if it sticks! Silicone releases far more cleanly than wood or rigid plastic. If the bar still clings, popping the mold into the freezer for 30 to 60 minutes shrinks the soap slightly, allowing it to slide out effortlessly.
It can be disheartening when a batch made with expensive essential oils ends up with almost no aroma once cured.
The Golden Rule: Add your essential oils only after reaching a stable trace, right before pouring! Essential oils are volatile and break down under heat. Never blend them into warm base oils early on. Fold them in swiftly at the final trace stage, give the batter a quick stir, and pour directly into your mold.
If I were starting out today with zero soap-crafting experience, this is the exact step-by-step path I would take to avoid wasted expenses and build solid skills.
Start with MP soap to bypass lye safety concerns completely. Pick up a glycerin soap base, some silicone molds, and liquid dyes online or at a local craft store. Melt the base, blend colors, practice embedding botanicals, and experiment with essential oils. This gives you a fun, risk-free taste of soap design.
Once you are hooked, take the leap into cold process soap. Assemble your digital scale, stick blender, safety goggles, and silicone mold, and source your sodium hydroxide from a pharmacy. For your first recipe, choose the time-honored traditional Marseille formula (72% olive oil). Its simple balance minimizes errors while delivering the exceptionally gentle, rich lather that handmade soap is famous for.
After your Marseille batch cures and you feel its quality on your skin, start tailoring recipes: a refreshing, bubbly bar for hot summers, an ultra-moisturizing shea butter bar for dry winters, or a clarifying clay facial bar. Once you refine your formulas, experiment with thoughtful packaging and look into selling at local craft markets or online platforms like minne and Creema.
Handmade soap is a rewarding craft that blends creative artistry with deep self-care. As long as you respect the safety fundamentals—proper lye handling, protective gear, and precise temperature checks—it is approachable for any dedicated crafter. Above all, a bar of soap created from pure, carefully chosen botanical oils provides a level of skin-loving moisture that commercial bars simply cannot match.
If you want a safe, playful start with instant results, begin with Melt & Pour soap. If you want to customize nourishing skincare formulations from raw ingredients, dive straight into Cold Process. Choose the route that fits your lifestyle, and take your first step into soap crafting. Washing up with your own handmade bar will turn everyday moments into something you truly look forward to!
If you found this guide helpful, please share it with your fellow makers! Until next time—happy crafting from Yassy!





For example, if you are looking for articles about mizuhiki, try searching for "mizuhiki"; if you are interested in tools, try keywords like "nippers" or "pliers."
