Wooden Mallet, Rubber Mallet, or Metal Hammer? How to Choose the Right Striking Tools for Japanese Crafts and DIY
yassy
Crafters!

Hello everyone, Yassy from Crafters here! (・∀・)
I love making various handmade items, looking at wonderful creations at shops and exhibitions, and buying pieces from my favorite artists! The warmth of handmade crafts and the unique textures of different materials are truly captivating, aren't they?
Recently, a material gaining passionate popularity in the handmade craft world is Jesmonite. It is a fascinating water-based resin capable of producing a luxurious, smooth stone-like texture and beautiful terrazzo (artificial marble) patterns. I have fallen completely in love with its charm myself and craft various small items every day.
However, when making Jesmonite pieces, many crafters encounter a major obstacle: sanding and polishing. Right after demolding, Jesmonite pieces often have a slightly dull surface or leftover burrs/flashes. To elevate your work to a premium texture, sanding with the correct tools is absolutely essential.
Many beginners wonder: "What kind of sandpaper should I choose?" "Is 100-yen shop sandpaper good enough?" or "How should I combine different grit sizes?" In fact, 80% of the beauty of your final finish and work efficiency depends on how you select your sanding tools.
In this article, I will thoroughly explain how to choose sanding tools to guide your Jesmonite creations to a flawless, professional finish! Drawing from my own experience and expertise, I will cover everything from choosing the right tools without failure to perfect grit step-by-step guides and budget-friendly purchasing plans.
Sanding Jesmonite requires unique characteristics different from general woodworking or metalworking. This is because while Jesmonite is hard, it produces fine dust easily and tends to clog abrasives quickly if sanded dry.
First, let's look at the main types of tools you should definitely use for sanding Jesmonite and understand their detailed features. Choosing suitable tools prevents scratching your piece or ruining your tools prematurely.
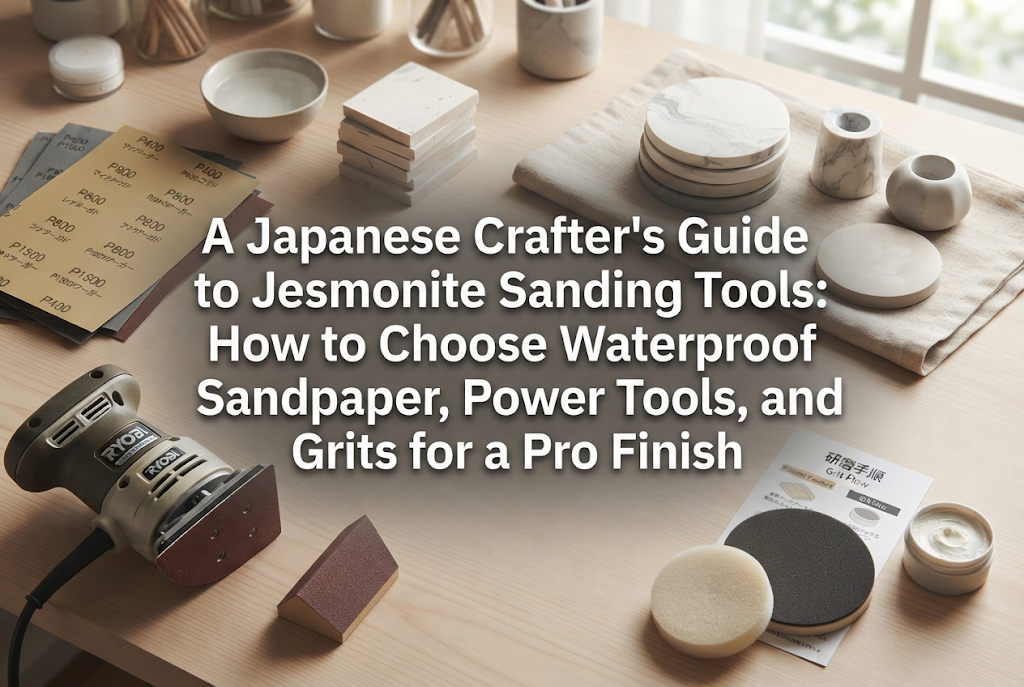
The most fundamental and indispensable tool in Jesmonite sanding is waterproof sandpaper. The key difference between this and regular sandpaper is that it supports wet sanding (sanding while wet with water).
When sanding Jesmonite, wet sanding is a golden rule. Sanding with water washes away the dust along with the liquid, completely preventing the sandpaper from clogging. Additionally, it prevents harmful fine dust from flying into the air.
When choosing waterproof sandpaper, pay attention to the abrasive grain material on the surface. For Jesmonite, sheets using dark-colored Silicon Carbide (C) abrasive grains are ideal. Due to its high hardness and sharp cutting ability, it can sand the Jesmonite surface evenly and beautifully.
The strength of the backing material is also important. In addition to paper backing (waterproof paper), cloth and film backings are available. Use paper backing when you want to sand flat surfaces sharply, and opt for film or cloth backing if durability and tear resistance are your top priorities.
While paper is great for flat items like coasters and trays, sponge abrasives become essential when working on 3D objects like aroma stones or items with rounded edges.
Abrasive grains coat the surface of a high-density, cushioned sponge that fits comfortably in your hand and conforms perfectly to curved surfaces. If you hold waterproof sandpaper with your bare hands to polish a round object, finger pressure concentrates in specific spots, causing unevenness. Sponge abrasives distribute pressure evenly, creating smooth, uniform curves.
Another major advantage is that you can easily wet-sand just by moistening the sponge with water and lightly squeezing it. They are highly durable and can be washed with water and reused many times, making them excellent in terms of cost performance.
When you need to file away large burrs (excess resin leaked from mold seams) or expose hard aggregates embedded for terrazzo effects (such as glass, natural stone, shells, or cured Jesmonite chips), diamond files show their true power.
These files feature fine diamond particles electroplated onto a metal surface, offering unmatched cutting power compared to ordinary sandpaper. They can grind through hard materials that regular sandpaper cannot touch without requiring heavy manual force.
They come in various shapes, including metal rods, sheets, and hand-polishing pads. Keeping one flat and one half-round metal diamond file for edge treatments and initial rough shaping will dramatically increase your workflow efficiency.
Hand sanding is a wonderful, loving process, but as your production volume grows or when crafting larger trays and home decor items, hand sanding reaches its limits in time and physical effort. That is when you should consider introducing power tools.
For fine details, hole interiors, or edge burrs on small pieces, a mini rotary tool (pen-type power tool) is overwhelmingly convenient. By swapping attachments to sanding discs or grinding bits, you can remove burrs in seconds.
When sanding large flat surfaces, power sanders like orbital sanders or random orbital sanders excel. They can sand out a completely flat surface without distortion in a fraction of the time it takes by hand. If you plan to engage in serious production or selling your work, investing in power tools is definitely worth it.
The most common dilemma when selecting sanding tools is choosing the grit size (indicated by the # number). Smaller numbers mean coarser grains, while larger numbers indicate finer grains.
If you don't use the correct grit progression, no matter how much time you spend polishing, you risk leaving the surface covered in scratches or failing to achieve any shine. Here is a breakdown of the role of each grit range and the best combinations for Jesmonite.
Grit sizes used in Jesmonite sanding can be broadly divided into four categories:
The most frequent mistake beginners make is skipping grit numbers out of impatience—for example, jumping straight from a coarse #120 file to #800 sandpaper.
If you do this, even if the piece looks clean at first glance, deep scratches from the #120 grit will stand out clearly when held up to the light. No matter how long you sand with #800, fine sandpaper does not have the cutting power to remove deep scratches.
The ironclad rule of sanding is "completely erase the scratches from the previous grit using the next grit up." Stepping up sequentially without skipping numbers is actually the fastest path to achieving flawless beauty.
Here are the exact grit combinations you should gather based on your target finish:
For Clear, Beautiful Terrazzo (Artificial Marble) Patterns:
For Single-Color Matte with Smooth Ceramic-Like Texture:
For a High-Gloss, Luxurious Shine:
Choosing the right support tools alongside your sandpaper can dramatically elevate your finishing accuracy. The gap between professional and amateur results often lies in how these auxiliary tools are used.
Never hold waterproof sandpaper directly with your bare fingers to sand a flat surface. Your fingertips apply uneven pressure, causing the sanded surface to warp or dip in the center, ruining flat geometry.
Always wrap your waterproof sandpaper around a sanding block made of hard rubber or EVA material. Using a block ensures pressure is distributed completely flat across the surface, resulting in sharp, true, beautiful flat edges.
While both hard and semi-flexible soft blocks exist, a hard flat block is the top choice for sanding the fronts and backs of coasters and trays. Whether you use one or not makes a world of difference in your final quality.
Selecting the right container for wet sanding is also important. If you use a shallow dish, water will splash around and mess up your workspace during sanding.
Prepare a plastic tray or small bucket with a wide bottom and adequate depth. Placing a non-slip mat or sponge pad at the bottom of the container keeps your piece from slipping underwater, allowing you to sand safely with a stable posture.
If you want to achieve an even higher level of gloss or depth after completing your sandpaper progression, introduce liquid polishing compounds.
Choose liquid abrasives designed for plastics or painted surfaces (fine, micro-fine, ultra-fine). Apply an appropriate amount to a microfiber cloth and gently buff in circular motions to give your Jesmonite surface an amazingly rich, silky luster.
Choosing the wrong sanding tools can instantly ruin a piece you spent time casting. Here are specific mistakes beginners often make and how to resolve them.
If you buy standard woodworking sandpaper (with brown paper backing) from a home center or 100-yen shop and submerge it in water, the paper backing will instantly soak, tear, and lose its abrasive grit, rendering it useless.
Solution: Always verify that the package states "Waterproof" or "Wet/Dry". Dark grey, black, or deep blue backings are typical indicators of waterproof sandpaper. Non-waterproof papers cannot be used for wet-sanding Jesmonite.
Using cheap, low-quality waterproof paper can cause black abrasive grains (grit) to crumble off while sanding. These loose particles get trapped inside microscopic air bubbles on the Jesmonite surface, leaving dark stains. Removing black particles trapped in pinholes is extremely difficult.
Solution: Choose sandpaper made by reliable, major abrasive manufacturers (reputable Japanese or international brands). Their abrasive grains adhere strongly with minimal shedding, so you can sand white Jesmonite pieces safely without worrying about black stains.
Hearing that "sponge pads are easy to use," some crafters attempt to sand square trays or hexagonal coasters entirely with sponge abrasives. Because sponges are soft, they round off the sharp edges of the piece, destroying its crisp design geometry.
Solution: For designs where flat surfaces and crisp edges are crucial, strictly use waterproof sandpaper paired with a hard sanding block. Limit sponge abrasives to rounded designs or the final gentle deburring step on edges.
For those wondering, "What exactly should I buy first?" here are clear purchasing plans tailored to different goals and budgets.
If you just want to try making one or two pieces, this set will give you a beautiful finish:
Buying an assortment pack saves costs. By sanding properly with a block and water, even beginners can achieve surprisingly smooth, beautiful results.
If you want to create terrazzo pieces or craft higher-quality items to gift to friends, choose this versatile setup:
Adding a diamond file makes stubborn burr removal and initial terrazzo grinding dramatically easier. With sponge pads included, you can handle any shape effortlessly.
If you aim to sell your creations in handmade shops or want smooth mass production, build an environment utilizing power tools without hesitation:
By introducing a power sander, sanding a tray that used to take 30 minutes by hand can be completed in just 3 minutes. Physical fatigue drops drastically, allowing you to mass-produce pieces of consistent, perfect quality.
Once you gather good sanding tools, knowing how to care for them properly is essential. Rough handling shortens their lifespan and leads to unnecessary costs.
After wet sanding, the surface of your waterproof paper or sponge pad is packed with microscopic Jesmonite sludge. If left to dry as-is, the residue will harden, rendering the abrasive unusable.
As soon as you finish sanding, gently rinse the surface in clean water or lukewarm water. Lightly brushing the surface with an old toothbrush easily removes clogged powder.
After washing, dry thoroughly in a well-ventilated, shaded area away from direct sunlight. Storing them wet in sealed containers can degrade the paper backing or cause mold.
When waterproof sandpaper feels slightly worn down and less aggressive, don't throw it away immediately.
For example, a worn piece of #400 paper with reduced cutting power behaves similarly to a milder #600–#800 grit. This "broken-in paper" is extremely useful for delicate edge deburring or final tactile adjustments where you don't want to leave harsh scratches.
A clever crafter's technique is to use brand-new paper when strong cutting action is needed in early stages, and transition well-used paper to gentle finishing tasks.
We have thoroughly explored how to choose sanding tools that determine the ultimate quality of your Jesmonite creations.
Sanding Jesmonite is not just a tedious chore. It is the most exciting process where you use your tools to breathe life into a rough, freshly molded piece, turning it into a gem-like or marble-like piece with an exquisite texture.
Let's review the ironclad rules for selecting tools:
With the right tools in hand, you'll experience the pure joy of watching the surface turn silky smooth and seeing vibrant terrazzo patterns emerge with every stroke. The sense of accomplishment—thinking "I made something this amazing with my own hands!"—is an irreplaceable delight.
Start by picking up basic waterproof sandpaper and a sanding block, and give your Jesmonite creations an irresistibly luxurious feel! I'm cheering you on for a wonderfully bright crafting life!
If you found this helpful, sharing this article with your friends on social media or messaging apps would mean the world to me and keep me motivated!
See you in the next article! This was Yassy from Crafters!


For example, if you are looking for articles about mizuhiki, try searching for "mizuhiki"; if you are interested in tools, try keywords like "nippers" or "pliers."
