Why Needle Felt Objects Warp and Sag: Japanese Crafter’s Guide to Firm Felting and Structural Integrity
yassy
Crafters!
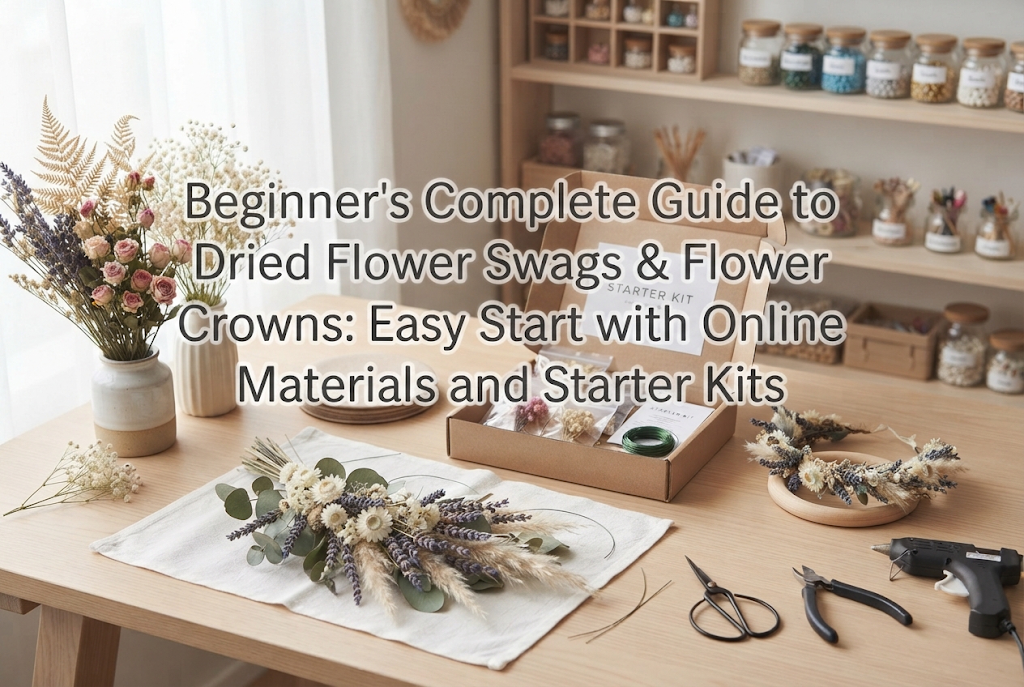

Hello, it's Yassy from Crafters! (・∀・)
Just displaying dried flowers in a room instantly creates a chic, inviting atmosphere. Lately, dried flower items have become incredibly popular—whether you are aiming for a cozy café-style interior, styling a wedding welcome board, or simply adding an accent to your everyday living space.
Personally, I absolutely love making handmade crafts, looking at inspiring designs, and shopping for beautiful supplies—my own room is practically overflowing with dried florals and craft materials! Dried flower creations have that special charm that makes your heart flutter just by having them on display.
Among all dried flower crafts, two styles stand out in popularity: wall-hanging "swags" and wearable or wreath-like display "flower crowns" (hanakanmuri in Japanese).
Yet, so many beginners hesitate to take the first step, worrying:
That is why I have put together this complete beginner's roadmap to starting dried flower swags and flower crowns with zero mistakes! From selecting basic tools and picking the best materials from major online shops like Amazon and Rakuten to fail-safe assembly techniques, I am sharing all my practical knowledge with nothing held back.
No vague steps here. By the end of this guide, you will know exactly what to buy today and how to craft your very own pieces!
Handmade crafting covers countless genres, but dried flower swags and flower crowns are two projects I recommend above all others for beginners.
There are three clear reasons for this:
The feeling of displaying a swag or flower crown you crafted with your own hands is truly exceptional. It instantly brightens your everyday surroundings and brings a sense of pride every time you look at it.
When starting out, many beginners fall into predictable traps. Knowing these pitfalls ahead of time will save you unnecessary expenses and frustrating detours.
Here are the three big misconceptions you should avoid at all costs:
The most common mistake is buying fresh flowers at a florist, hanging them upside down in a room, and attempting to make dried flowers yourself.
In standard household conditions with typical humidity and airflow, petals often discolor, develop mold, or shrink drastically before they dry properly. Producing vibrant dried flowers requires precise humidity management and professional drying methods.
The correct approach for beginners is to purchase ready-made dried flower materials that have already been professionally dried. Using pre-dried botanicals gives you vibrant colors and pliable, easy-to-handle stems from day one.
Save DIY air-drying for later, once you are comfortable with crafting. Trying to dry fresh flowers right at the start is a recipe for frustration.
Starting a project with whatever standard scissors, rubber bands, or clear cellophane tape you have lying around is another strict "no."
Cutting tough floral stems or craft wire with ordinary stationery scissors can nick the blades, posing a safety hazard, and crushes the stems rather than making a clean cut. Furthermore, rubber bands and cellophane tape degrade quickly over time, causing your arrangement to fall apart later.
Using purpose-built tools directly determines the quality of your finished craft. Preparing proper floral wire, floral tape, and florist shears right from the beginning is the shortest path to success.
Some beginners arrange their flowers flat on the tabletop and bind them together as they lie. Doing this strips away all volume, leaving you with a stiff, flat result that resembles a glued pressed-flower board.
The essence of a captivating dried flower piece lies in its three-dimensional depth and sense of airiness. You need to incorporate clear variations in height and layer the botanicals thoughtfully from front to back, left to right.
Many beginners wonder whether they should start with a swag or a flower crown. Understanding the structural characteristics of each makes the crafting process much clearer.
While both involve bundling botanicals, their structural principles are completely different.
The word "swag" originates from the German word for a decorative wall hanging. It essentially looks like an inverted bouquet meant to hang on a wall.
Its key structural trait is having a flat back and a dimensional front. Because it rests flush against a wall, you keep the reverse side flat with no flowers poking out behind. On the front, you create a tiered arrangement, layering tall greenery down to shorter accent blooms.
Once you grasp this flat-back concept, making a swag is surprisingly straightforward.
A flower crown, on the other hand, is a three-dimensional circlet designed to be worn on the head or displayed like a hanging wreath.
Its key structural trait is looking graceful from any angle (360 degrees) while maintaining enough flexibility to bend smoothly. If you build it on a rigid, heavy core, it will not conform comfortably to a head and will look awkward when hung.
To achieve this, you create many small botanical bundles using fine wire, then attach them sequentially along a flexible wire base. Because it involves assembling multiple small parts, a crown takes slightly more time and patience than a swag.
My definitive answer: definitely start with a swag!
A swag has a simpler layout and fewer steps, meaning even a first-timer can complete an impressive piece in about an hour.
Start with a swag to get a feel for handling wire, managing delicate dried stems, and creating height differences. Stepping up to a flower crown after that is the smoothest learning curve.
Here is the core checklist of tools and materials needed to craft dried flower pieces smoothly and beautifully. Rather than compromising with makeshift substitutes, gather these essentials:
Wire is indispensable for bundling stems, reinforcing fragile elements, and building structural bases. Wire thickness is measured in gauges (#). A lower number means thicker, stiffer wire, while a higher number means thinner, more pliable wire.
The three essential wire gauges for dried floral work are:
Choose green or brown wires that blend seamlessly with plant stems. Paper-wrapped floral wire (known as jimaki wire in Japan) is far superior to bare metal wire because it grips stems and tape without slipping.
This is a specialized paper tape used to conceal wire and integrate it with natural stems. Prepare it in green or brown.
Floral tape has an important secret: it will not adhere if you simply press it down. It is coated with a wax adhesive that activates only when you gently stretch the tape as you wrap. Always pull it slightly taut, wrapping diagonally downward along the stem.
Keep your botanical cutters and wire cutters separate! Cutting metal wire with delicate floral shears will instantly ruin their cutting edge. Conversely, cutting plant stems with standard craft wire snips can crush and splinter the plant fibers.
A hot melt glue gun is essential for tacking in small blooms to fill gaps or securing ribbons in place. While budget options work, a dedicated craft glue gun with a decent cord length and consistent heating provides far better control.
Jute twine is indispensable for binding the swag handle and fashioning a hanging loop. It adds an earthy, natural look. For finishing ribbons, materials like cotton, linen, or sheer organza harmonize beautifully with the rustic texture of dried florals.
These are the botanical stars of your piece. Here are classic, beginner-friendly options:
Choosing varieties that hold their color well and shed minimally is the key to lasting success.
If you don't have a specialized floral wholesale shop nearby, don't worry—major online retailers like Amazon have an extensive selection of craft starter kits and assorted dried flower packs.
For absolute beginners, buying a starter kit that bundles wire, floral tape, basic shears, twine, and a curated assortment of dried flowers is the most foolproof option.
When choosing a kit, look for these three criteria:
A complete kit lets you open the box and start crafting immediately, completely eliminating mistakes like buying the wrong wire gauge or unsuitable tape.
If you prefer selecting your own color palette, buy a basic florist tool set and floral materials separately.
Helpful search terms include:
Always opt for botanical "assortment packs" that contain a variety of textures and sizes in modest quantities. Buying single-variety bulk bunches often leaves beginners with too much of one flower and not enough variation to create a balanced piece.
Here is the exact assembly procedure for crafting a sturdy, beautiful dried flower swag with your prepared materials.
Lay out your botanicals on your work surface. If you have long, branched stems, snip off side shoots to manageable lengths. Strip leaves and small twigs from the bottom 2 to 3 inches (5 to 8 cm) of every stem—this will be your handle area. Leaving foliage on the handle makes the bundle bulky and slippery to bind.
If any accent flowers have stems that are too short or brittle, reinforce them using #24 wire: place the wire parallel to the stem and secure it snugly with stretched floral tape to create an artificial stem.
A swag is built from back to front. Start by selecting your tallest, firmest greenery (such as eucalyptus) and place it flat on your workspace. This forms the spine of your swag, providing stability so the piece hangs neatly against the wall without wobbling.
Once the backing foliage is positioned, lay your largest focal flower (like a protea or large dried rose) slightly in front of it.
To create professional depth, arrange the botanicals in descending tiers. Keep the background foliage highest, position the main focal blooms lower in the midsection, and bring delicate accent flowers toward the front and lower tier.
Angle the flower heads slightly outward rather than facing them all straight forward. Hold the bundle lightly without crushing the stems, letting air circulate between the layers for organic volume.
Once you are happy with the arrangement, firmly grip the spot where the stems converge (the focal binding point). Holding it securely, wrap a piece of #20 or #24 wire tightly around the stems 2 to 3 times. Twist the wire ends together using pliers or your fingers until tight. If this binding is loose, stems will slip out when the swag hangs on the wall.
Wrap jute twine or decorative ribbon over the wire binding to conceal it completely, finishing with a tidy knot or bow.
On the back of the handle, create a hanging loop by threading a small loop of wire under the binding or tying a loop of twine. Finally, trim the protruding bottom stems to an even length—either straight across or on a gentle diagonal. Your handcrafted dried flower swag is ready to hang!
Once you are comfortable with swag construction, try your hand at a flower crown! While it looks intricate, the process is very manageable once you break it down.
Take a length of sturdy #20 wire and bend it into a gentle arch or circle sized to fit the head (typically around 21 to 22 inches / 53 to 56 cm, or smaller if making a decorative mini-wreath). Bend both wire ends back into small rounded hooks.
Wrap the entire wire base completely with brown or green floral tape. This sticky-wrapped foundation prevents attached flower bundles from sliding around.
The secret to an even flower crown is never attaching individual stems directly to the base one by one! Instead, assemble 15 to 20 palm-sized mini-bundles beforehand.
Combine 3 to 4 small stems—such as tiny eucalyptus sprigs, baby's breath, and statice buds—and bind their stems tightly with #26 wire, finishing with a wrap of floral tape. Pre-assembling these uniform mini-bundles makes the final crown assembly remarkably smooth.
Take your first mini-bundle and secure its stem to the base wire using fine #26 wire or floral tape. Place the second mini-bundle slightly below the first, overlapping it like roof shingles so the flower heads of the second bundle hide the wired stems of the first.
Continue wrapping bundles in the same direction along the arc. Ensure blooms face forward and slightly to the sides in an alternating rhythm so the crown looks full from every angle.
When you reach the far end of the base, secure the last bundle stems firmly with wire and cover raw ends with floral tape so no sharp metal is exposed.
Thread your chosen ribbon through the wire loops at each end. Using ribbons to tie the crown closed allows for easy size adjustments when worn. Place the crown on a table to check its circular shape; if you spot any sparse areas, add a few small dried florets using a drop of hot glue.
To take your arrangements from simply "bundled flowers" to genuinely chic interior accents, keep these styling principles in mind:
Classify your botanicals into three distinct functional roles:
A common beginner mistake is gathering only large focal flowers, which end up competing for attention. Aim for a golden proportion of roughly 2 parts Focal : 3 parts Accents : 5 parts Base Fillers for a balanced, sophisticated design.
Dried flowers shine brightest in soft, nuanced "dusty" tones. Form roughly 80% of your arrangement with calming neutrals: beige, ivory, cream, and muted sage greens. Reserve the remaining 20% for an accent pop—such as mustard yellow, deep wine, or antique rose.
This "80% muted neutrals, 20% accent pop" rule prevents visual clutter while creating a focused, stylish focal point.
To keep your handmade pieces looking their best for as long as possible, protect them from their two biggest enemies: direct sunlight and high humidity.
Dried flower crafting doesn't require innate artistic talent or complex machinery. By gathering the right tools, understanding structural principles, and following the assembly steps, anyone can craft a stunning piece on their very first try!
Living in a space decorated with botanical pieces you crafted yourself brings a quiet sense of satisfaction every day. It is equally rewarding to craft seasonal variations or gift a handmade swag to a friend.
Don't just keep it in your thoughts—hop online, look up a starter kit or a dried flower assortment pack, and give it a try! The moment your package arrives, your new crafting journey begins. Take that first step and enjoy the wonderful world of handmade dried florals.
If you found this guide helpful, feel free to share it with your fellow crafting friends! See you in the next post—this was Yassy from Crafters!


For example, if you are looking for articles about mizuhiki, try searching for "mizuhiki"; if you are interested in tools, try keywords like "nippers" or "pliers."
