Japanese Leathercraft Guide: The Science of Leather Patina & Care Secrets for Crafters
yassy
Crafters!

Hello, crafters! It’s Yassy from Crafters! (・∀・)
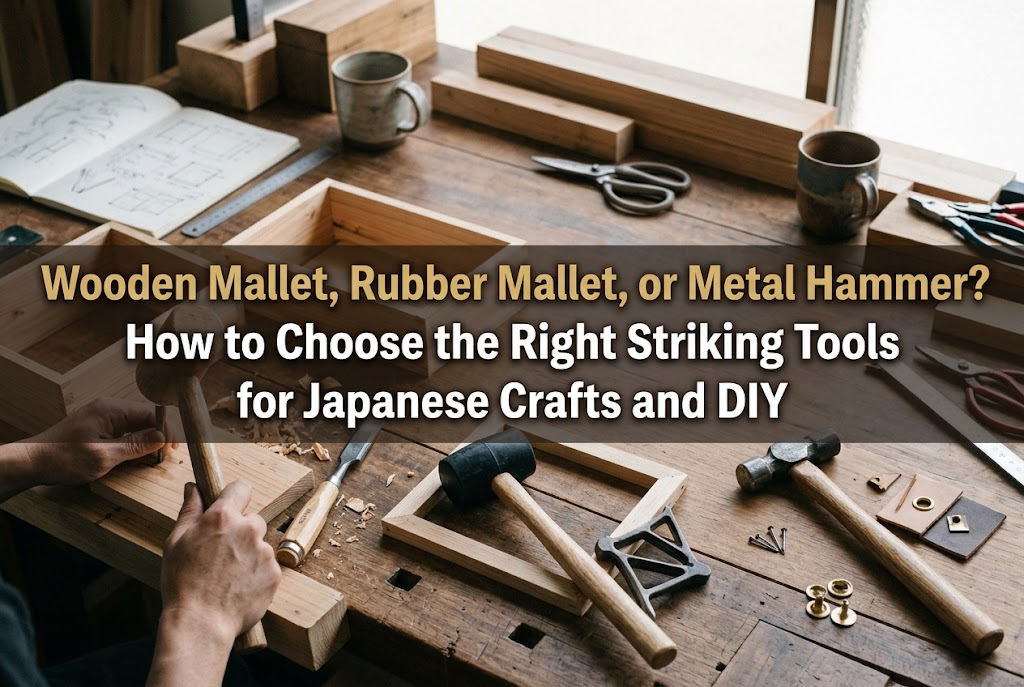
In the world of handcrafts and DIY, we perform countless techniques—cutting, sewing, painting, and gluing. Among them, striking or hammering is an essential process used to reinforce structural strength, shape materials with precision, and join components securely.
However, when browsing a craft store or hardware shop, you will encounter rows of different striking tools: wooden mallets, rubber mallets, metal hammers, and more. While they might appear interchangeable at first glance, picking the wrong tool can leave permanent dents on your materials, distort delicate findings, or ruin a project entirely.
I personally love creating, viewing, and collecting all kinds of handmade crafts, ranging from leathercraft and woodworking to metal jewelry and clay modeling. From my extensive hands-on experience, I can tell you with certainty: choosing the right striking tool directly determines the final quality of your work.
In this guide, I will break down the characteristics, variations, practical craft uses, comparisons with similar tools, genre-by-genre recommendations, and even noise-reduction techniques for the three major striking tools: wooden mallets, rubber mallets, and metal hammers. By the end of this article, you will know exactly which hammer is the perfect match for your creative endeavors.
In crafting, striking is not about brute force or destruction; it is about precise material control. Striking tools allow you to apply localized or uniform pressure that your bare hands simply cannot achieve.
For instance, in leathercraft, you strike pricking irons (diamond chisels) and hole punches to pierce tough leather. In woodworking, you tap joinery snugly into place or drive wooden dowels. In wire and metalcraft, hammering work-hardens wire, flattens sheet metal, or stamps crisp designs into metal blanks.
If you use an ill-suited hammer, you may lack the force needed to complete the task, or conversely, deliver too much shock and break your material. Matching the right tool to the material’s hardness and the task’s purpose is your first solid step toward zero mistakes.
Let’s start with a timeless, classic craft staple: the wooden mallet, known in Japan as kizuchi (木槌). Made from dense hardwood, this traditional tool has been a beloved workshop essential throughout craft history.
The greatest strength of a wooden mallet lies in its balanced energy transfer: it delivers solid striking force while protecting metal craft tools from damage. If you hit a steel punch or pricking iron with a hardened metal hammer, the mushrooming impact will gradually deform or chip the tool head. A wooden mallet’s natural fiber elasticity acts as a shock buffer, absorbing harsh recoil while cleanly transferring driving momentum.
Wooden mallets also sit comfortably in the hand, developing a beautiful patina the more you use them. Their natural weight distribution makes swinging smooth and controlled, reducing wrist and arm fatigue during repetitive tasks.
Wooden mallets come in distinct head shapes and timber types:
Wooden mallets shine brightest in leathercraft. When striking diamond stitching chisels (pricking irons) to create stitching holes, a wooden mallet is your best companion. It avoids the harsh metallic ring of metal-on-metal impact and preserves your expensive leather punches for years.
They are also superb for wood joinery, driving woodworking chisels (nomi), and setting leather hardware like snap fasteners and rivets. Because the moderate weight drives tools efficiently, crafters of any physical strength can work comfortably.
Next up is the rubber mallet. Featuring a dense rubber head, it is designed specifically to minimize impact shock on delicate surfaces.
The two main strengths of a rubber mallet are that it will never dent your workpieces, and it absorbs sound and vibration dramatically. Hitting an assembly directly with a hard hammer can leave unsightly gouges, but a resilient rubber face drives parts into place without scratching.
Additionally, for crafters living in apartments or close quarters, a rubber mallet is a lifesaver. The strike produces a low, muffled thud rather than a sharp crack, drastically reducing structural vibration through tables and floors.
There is one non-negotiable rule when choosing a rubber mallet for crafts: check the color of the rubber head. Overlooking this detail can ruin hours of careful work in a fraction of a second.
Rubber mallets excel at assembly and gentle alignment. When tapping glued wooden components together or pressing friction-fit joints into place without surface marring, a rubber mallet is unbeatable.
They are equally handy for wire jewelry making. After bending craft wire around a mandrel or jig, light taps with a white rubber mallet will work-harden the wire and lock the shape in place without scratching delicate plated surfaces.
In leathercraft, rubber mallets are also useful for tapping glued seams together to ensure firm adhesive bonding without leaving tool marks on the grain side of the leather.
Our third tool is the metal hammer, known in Japanese woodworking and craft traditions as kanazuchi (金槌) or gennou (玄能). Fitted with a forged steel head, it provides superior hardness and maximum impact force.
A metal hammer delivers 100% of your swing energy directly into the target without damping or rebounding. Because there is no elasticity to soften the strike, you can generate immense force with a compact, minimal swing.
Furthermore, altering metal—such as flattening wire, texturing brass sheet, or driving metal alphabet stamps—is impossible without the unyielding hardness of steel. Its focused, crisp impact allows for pinpoint accuracy in jewelry and metalwork.
Craft hammers differ significantly from heavy framing or construction hammers:
A metal hammer is indispensable for metal jewelry making, silversmithing, and metalsmithing. Stamping initials, numbers, or decorative patterns into silver or brass blanks, creating hammered surface textures, and flattening jewelry wire require the density and solid rigidity of steel.
They are also essential when driving tiny decorative brads or antique finishing nails into miniature wooden chests and shadow boxes.
In addition to wooden, rubber, and metal mallets, several related striking tools appear on craft store shelves. Understanding their distinct roles prevents unnecessary spending.
Headed with hard plastic (nylon or polyurethane), these sit midway in hardness—softer than steel or wood, but harder than rubber. While they deliver firmer strikes than rubber without wearing down as fast as wood, they lack shock absorption, transferring a jarring vibration to your hand. Misaligned strikes can also leave sharp corner dents on soft woods. Beginners working in leathercraft or general DIY can easily handle all tasks with a wooden mallet and a white rubber mallet without needing to purchase a plastic one right away.
These specialized hammers contain loose steel shot or sand inside the head. When struck, the internal weight lags slightly behind the impact, eliminating rebound and driving 100% of the force forward without bounce. While exceptional for reducing wrist strain in heavy mechanics or large-scale furniture building, compact versions for tabletop crafts are rare and expensive. They are not necessary for everyday crafting beginners.
Specialty leathercraft shops often sell cylindrical round mauls made of dense polymer or bronze. Designed with a cylindrical barrel, they allow professional leathercrafters to strike stitching chisels in rapid succession without having to constantly check tool orientation. Because the tool rotates naturally in hand, face wear is completely even. However, professional mauls are costly investments. Beginners can produce equally beautiful leather goods using an accessible wooden mallet.
Depending on your chosen creative medium, your ideal first tool will vary. Follow these guidelines to find your ideal match:
If you are starting leather bags, wallets, or accessories, a wooden mallet is your absolute top priority. Punching stitch holes with pricking irons, setting eyelets, and installing snaps account for over 80% of leatherwork impact tasks, and a wooden mallet handles all of them effortlessly. Look for a standard craft mallet with a head length around 10 cm (4 inches). If noise is a concern in your home, add a white rubber mallet as your secondary tool.
For artistic wire wrapping, brass jewelry, and personalized metal stamping, pick up a compact metal hammer (such as a small ball-peen hammer) alongside a white rubber mallet. Use the metal hammer for stamping and creating hammered textures, and swap to the white rubber mallet to harden wire loops and adjust shapes without nicking delicate surfaces.
If you build dollhouses, small wooden shelving, or paper-band baskets, a white rubber mallet will be your primary companion. It knocks fitted joints together snugly without bruising raw wood grain. Keep a small metal hammer on hand only when you need to tap tiny finishing nails or mount small metal hinges and hooks.
Before purchasing your hammer online or in person, review these five practical checkpoints:
Having the right tool is only half the battle; proper technique ensures clean, blemish-free results. Here are three core techniques I always rely on:
When you need firm driving pressure but want to ensure zero surface marks on your project, never strike the finished piece directly. Place a flat scrap piece of wood (ate-gi) or a scrap of thick leather over the target area, then hammer on top of the scrap. The sacrificial piece spreads the impact evenly across the surface, transferring full force while leaving the finished work mark-free.
Swinging a hammer from your shoulder makes it difficult to maintain vertical alignment; the head will hit at an angle, skidding across tools and marring your work. Keep your upper arm relaxed and close to your torso. Swing primarily from the elbow, applying a controlled flick of the wrist just before impact to land the hammer face flat and perpendicular to the striking surface.
If your workbench flexes, wobbles, or vibrates, a huge percentage of your striking force is absorbed and wasted by the furniture. When setting rivets, punching leather, or stamping metal, place a solid, heavy base directly underneath your working area. A thick rubber bench block (at least 2 cm thick) or a heavy steel jeweler’s bench block set on top of a dense craft mat provides an unyielding foundation, allowing crisp, clean results with light hammer taps.
Rhythmic pounding can transmit surprisingly loud, low-frequency vibrations to adjacent rooms or downstairs neighbors. Here is how to keep your workspace whisper-quiet in apartments or shared homes:
Hammering directly on an unpadded desk turns the entire tabletop into an acoustic amplifier. To eliminate rumbling vibrations, assemble this three-layer sound barrier on your desk:Bottom Layer: A folded heavy bath towel or an anti-vibration rubber mat.Middle Layer: A high-density rubber pound board (standard in leathercraft).Top Layer: A self-healing cutting mat or small steel bench plate.This tiered setup dampens deep low-frequency vibrations by over 90% before they can penetrate the desk structure.
As standard workshop etiquette, schedule heavy striking tasks during daylight hours (roughly 10:00 AM to 6:00 PM). If you must work late at night, swap your wooden mallet for a white rubber mallet and work over your padded base. The acoustic profile drops from a sharp "clack" to an inconspicuous, muted thud.
If you live in a sensitive apartment building where desk vibrations are a constant concern, the most effective shock absorber in existence is your own lap. Place a firm pillow or folded bath towel across your thighs, set your rubber punching pad on top, and perform your punching tasks there. The human body naturally absorbs 100% of the shock waves, ensuring zero mechanical vibration reaches the floor below. It is an invaluable tip for night-owl crafters!
Here is a quick summary comparing the three primary striking tools:
No single hammer outperforms the others in every category; rather, their distinct material properties complement each other. Selecting the right tool for your specific craft genre is your shortest path to success.
In handcrafting, striking tools are not mere brute implements; they are precise bridges that channel your creative intent directly into raw materials.
Once you understand how material hardness interacts with impact energy, you will never have to worry about accidentally ruining a beloved project. Start by investing in the single hammer best suited to your current craft passion, and add complementary tools as your repertoire grows.
Equipped with the right striking tool, tricky assembly steps become effortless, and your handmade creations will gain noticeable durability and refined craftsmanship. Have fun building your dream workshop setup!
If you found this guide helpful, please feel free to share it with your fellow makers on social media! See you in the next craft guide—this was Yassy from Crafters! (・∀・)


For example, if you are looking for articles about mizuhiki, try searching for "mizuhiki"; if you are interested in tools, try keywords like "nippers" or "pliers."
