Essential Japanese Sewing Tools Guide: Must-Have Items for Fabric, Leather, and Embroidery
yassy
Crafters!

Hello, this is Yassy from Crafters! (・∀・)
When making handmade items, almost every crafter has experienced wanting to drill clean, perfectly round holes in wood, resin, acrylic sheets, or metal findings. I personally love making all kinds of crafts, as well as collecting and admiring lovely handmade pieces. Through these experiences, I truly feel every day that the precision of your tools directly determines the overall finish of your work.
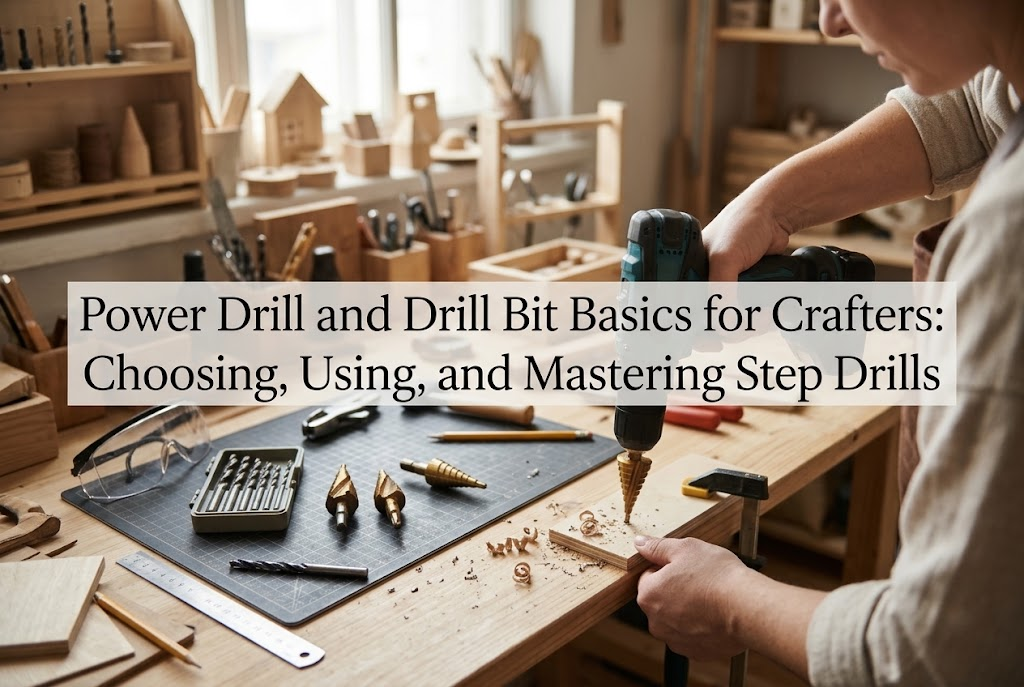
Drilling holes slowly by hand using a pin vise or an awl is certainly one of the enjoyable parts of crafting. However, when you want to increase your production volume or drill wobble-free holes into thicker materials, power tools demonstrate their true power. At the center of it all is the electric power drill.
Many beginners often worry: "Aren't power tools intimidating?" "There are so many drill bit types that I don't know how to choose," or "What on earth is a step drill used for?" In this guide, I will clearly explain everything—from the basic structure of power drills suited for crafting, to the various drill bits available, and how step drills work wonders for enlarging holes and deburring.
Introducing a power drill to your crafting workflow dramatically improves both your production speed and accuracy. Drilling through cured resin or hardwood with a manual pin vise consumes a lot of time and physical effort. With a power drill, you can create a clean, straight hole in just a few seconds.
With manual tools, the bit can easily tilt, leading to common mistakes where the exit hole on the backside shifts out of place. A power drill maintains a stable axis of rotation and allows you to apply force perpendicularly without wobbling, significantly reducing the risk of mistakes.
Furthermore, reducing fatigue from drilling lets you focus your energy on creative tasks like detailing and brainstorming new designs. Whether for wooden accessories, resin jewelry, acrylic processing, or mounting hardware in leathercraft, a power drill is a fantastic partner that expands your creative possibilities.
To drill holes properly, it is essential to understand the roles of the power tool itself and the cutting attachments. Power tools only function when the main body and the attached bit work together.
The power drill body generates rotational force, while the drill bit attached to the tip cuts into the material to form the hole. Understanding this relationship helps you select the ideal combination for the specific piece you want to create.
The tool commonly used in crafting is called a drill driver (or cordless power drill). It uses motor rotation to spin the cutting bit, allowing you to bore holes and drive screws into materials. It typically features switchable rotation speeds and a clutch mechanism that lets you adjust the tightening torque (power).
The metal cutting tools attached to the chuck of a power drill are called drill bits. They feature spiral flutes that scrape away material while rotating and channel out the debris (swarf). You switch bits depending on the hole diameter (in millimeters) and the material you are drilling into (wood, metal, plastic, etc.).
A step drill is a specialized drill bit with a cone-shaped body cut into multiple stepped tiers. In Japan, it is often affectionately called a "takenoko drill" (bamboo shoot drill) because of its tiered, tapered appearance. It is an extremely useful accessory that allows you to expand hole diameters step by step—from small to large—using a single bit.
In crafting, there are several tools used for drilling and cutting that appear similar. Choosing the wrong tool can crack your piece or result in messy holes, so let us clearly outline the differences.
Here are the distinct differences between a power drill and tools that beginners often confuse: the pin vise, rotary tool (mini router), and impact driver.
A pin vise is a small handheld tool operated manually by twisting its shaft. It is well-suited for drilling tiny holes (under 1 mm up to around 2 mm) or making fine adjustments on delicate resin parts. However, piercing through thicker materials takes significant time, and keeping the hole perfectly vertical is difficult. In terms of efficiency and vertical accuracy, a power drill is overwhelmingly superior.
A rotary tool spins attachments at very high speeds and is designed for surface polishing, engraving, and detailed carving. While you can insert small drill bits to make thin holes, rotary tools generally lack torque (cutting power) and are not suited for drilling completely through thick wood or hard materials. As a rule of thumb, use a power drill for boring holes and a rotary tool for surface smoothing and fine detailing.
An impact driver looks nearly identical to a drill driver, but their mechanics differ completely. An impact driver applies rotational impacts (hammering shocks) to drive screws into tough materials with immense force. In crafting, this hammering mechanism will instantly shatter or split delicate acrylic sheets, thin wood, and resin pieces. For delicate crafting holes, always choose a drill driver without an impact function.
At a glance, drill bits may all look similar, but their tip shapes and materials are strictly tailored to specific workpieces. Using a bit that does not match your material can tear fibers, leave ragged burrs, or crack your workpiece. Be sure to pick the right bit for your medium.
Wood drill bits feature a sharp center point (often called a brad point) that looks like a needle. This center spur bites into the wood first, preventing the bit from wandering and ensuring precise placement. The outer spurs cut cleanly through wood grain, leaving a neat, circular hole. Always have dedicated wood drill bits ready when working on wooden accessories or woodwork crafts.
Bits designed for metalworking feature a gently angled, chisel-like tip. They are forged from durable high-speed steel (HSS) and are used to drill metal components such as brass, aluminum, or iron. They are versatile enough to drill through plastic and wood in addition to metals. Having a basic HSS set on hand is very handy for all-around crafting.
When working with resin or acrylic sheets, regular metal or wood bits can bite too aggressively into the material, causing sudden cracks. Bits specifically designed for plastics feature adjusted tip cutting angles that prevent the blade from catching and pulling too hard. They also help prevent friction heat from melting the resin and clogging the flutes, making them ideal for resin jewelry and acrylic sheet processing.
When drilling ultra-hard materials such as glass bottles, ceramic pieces, sea glass, or semi-precious stones, you need diamond bits coated with fine diamond dust rather than standard cutting flutes. These grind away the material at low speeds while being cooled with water. Standard drill bits cannot pierce these materials at all, so specialized diamond tools are required.
Step drills have earned high praise among crafters. As mentioned earlier, they feature a distinctive stepped cone shape with expanding diameters.
Many people wonder what exact tasks they are used for, but they offer major practical advantages in handmade production. Let us explore the specific benefits of step drills.
With standard drill bits, you have to loosen the chuck and swap bits every time you want to change sizes—from 4 mm to 6 mm, 8 mm, or 10 mm. With a step drill, a single bit lets you create small holes with a shallow press, or larger holes by boring deeper. This completely eliminates the hassle of constantly changing bits.
If you press a large drill bit (10 mm or wider) directly into an acrylic sheet, thin wood panel, or resin piece, the cutting torque will easily overwhelm and shatter the material. A step drill widens holes gradually in increments—such as 4 mm, then 6 mm, 8 mm, and 10 mm—putting very little sudden stress on the workpiece. As a result, you can bore clean, wide holes even in fragile materials.
After drilling a hole, rough, jagged edges known as "burrs" often remain on the entrance and exit surfaces. By gently touching the edge of the hole with the next step of the step drill right after boring, you can instantly create a smooth, chamfered edge. This saves you from having to file away burrs by hand, quickly elevating your finishing quality.
Browsing online shops or hardware stores can feel overwhelming because of the sheer variety of tools available. Here are clear specifications and criteria tailored for crafting beginners. There is no need to buy heavy, high-spec industrial models.
The top priority for craft use is finding a tool that is lightweight and easy to handle. If a drill weighs over 1 kg (2.2 lbs), your hands will fatigue quickly, making delicate work difficult. Look for a compact drill driver weighing around 500 g to 800 g (1.1 to 1.7 lbs).
A cordless, rechargeable battery model is ideal because the power cord will not get in the way of your crafting workbench. A voltage range of 7.2V to 10.8V provides plenty of power for woodwork, resin, and thin metal sheets.
The part that clamps the drill bit into the tool is called the chuck. Choosing a tool with a keyless chuck allows you to tighten and release bits by hand without extra keys. Alternatively, picking a drill driver compatible with standard 6.35 mm (1/4-inch) hex shanks makes swapping bits quick and provides broad compatibility with commercially available bits.
For your initial bit selection, I recommend an HSS (metalworking) drill bit set covering sizes from roughly 1.5 mm to 6.0 mm. Because HSS bits can handle wood, resin, plastic sheets, and soft metals, they will never go to waste.
In addition, purchase one titanium-coated step drill covering 4 mm to 12 mm. Having just these two items will cover over 90% of the drilling, hole-enlarging, and deburring tasks you encounter in crafting.
Even with the right drill and bits, improper technique can lead to mistakes. Here is the reliable process to prevent off-center holes, backside tear-out, and spinning workpieces.
Mark your desired hole position with a pencil or fine pen. At the center of your mark, press a center punch or a sturdy craft awl (meuchi) to make a small indentation or guide dimple. This indentation prevents the drill tip from skating across the surface, ensuring you bore exactly where intended.
If you hold the material only with your hands while drilling, the rotating bit can catch on the piece, causing it to spin violently in your grip and leading to serious injury or broken crafts. Always clamp the piece securely to your work table using quick-grip clamps or a small vise. Freeing both hands allows you to concentrate fully on holding the drill perpendicular.
The moment a drill bit breaks through the underside of wood or resin, the material gets pushed outward, causing rough splintering and tear-out (burrs). The technique to prevent this completely is using a sacrificial backer board. Place a scrap piece of wood flush against the backside of your workpiece, clamp them together, and drill straight through both. Because the backer board supports the exit point, your hole will finish cleanly on both sides.
When operating a power drill, pressing down with all your body weight is a mistake. Forcing it down can cause the bit to bind and stop, or cause thin bits to snap and fly off. Hold the drill perpendicular to the surface and apply gentle, steady pressure, letting the spinning cutting edges shave through the material naturally.
While power drills are convenient tools, they spin at high speeds, and safety must never be compromised. Follow these essential rules to keep your crafting workspace accident-free.
The most dangerous power tool hazard is having loose sleeves, long hair, or jewelry caught in the rotating chuck or bit. Tie long hair back securely, and avoid loose, billowy sleeves. Furthermore, never wear knit or fabric work gloves while using rotary power tools; if loose threads catch on the spinning bit, your entire hand can be pulled in. Work with bare hands or snug-fitting rubber/nitrile gloves that fit like a second skin.
Drilling generates flying chips, invisible fine dust, and, in rare cases, fragments if a bit snaps. To protect your eyes from corneal scratches, always wear safety glasses. In particular, inhaling dust from cured resin or fine wood can be harmful, so wearing a dust mask is also essential.
When drilling resin, acrylic, or other plastics, setting the rotation speed too high generates friction heat that can melt the material. Molten resin can stick to the bit's flutes and solidify, rapidly degrading its cutting performance. When working with plastic resins, set the drill to a lower speed, and pull the bit out periodically to clear chips and let the heat dissipate.
Properly caring for your favorite tools and bits preserves their sharpness for a long time. Simple post-use maintenance supports a comfortable and economical craft life.
After finishing your work, clean away wood dust and resin debris trapped inside the flutes using a stiff brush, such as an old toothbrush. Leaving accumulated debris in place increases friction and dulls the cutting edge during your next project.
Additionally, metal bits and step drills can develop rust from humidity. After cleaning, wipe them down with a cloth lightly dampened with anti-rust spray or machine oil, and store them in a dedicated case. Storing bits loosely where their cutting edges bang together should be avoided to prevent chipping.
In this guide, we explored power drills, drill bits, and step drills—from their basic functions and selection tips to safe handling techniques for crafters.
Tasks that once felt slow with a manual pin vise can be completed with surprising speed and precision by using a power drill with the right bits. Furthermore, a step drill—capable of drilling, enlarging, and deburring all in one—is a dependable addition that dramatically boosts your production efficiency.
Set aside the preconception that power tools are strictly for heavy construction, and try adding a lightweight, user-friendly drill driver to your studio. As your drilling precision improves, assembling parts and setting findings becomes significantly smoother, taking the finish of your handmade creations to a truly professional level!
Arm yourself with solid knowledge and proper safety habits, and enjoy an even more creative and fulfilling handmade crafting journey!
If you found this article helpful, sharing it with your fellow crafting friends on social media would mean the world to me! See you in the next article—this was Yassy from Crafters!




For example, if you are looking for articles about mizuhiki, try searching for "mizuhiki"; if you are interested in tools, try keywords like "nippers" or "pliers."
