Mastering Resin Viscosity: A Complete Guide to Low, Medium, and High Viscosity UV/LED Resins
yassy
Crafters!

Hello, crafters! It’s Yassy from Crafters! (・∀・)
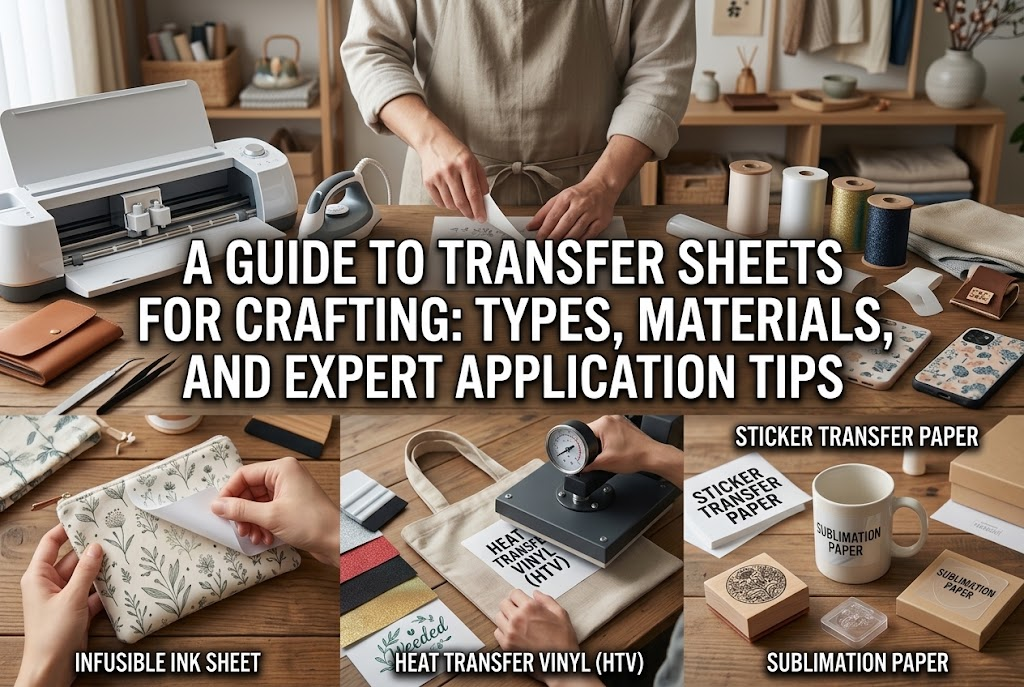
Whether making cute handmade items or admiring and collecting gorgeous pieces crafted by others, I truly love it all. Today, I want to take a deep dive into the fascinating world of transfer sheets!
When working on handmade projects, have you ever thought, "I really want to add an intricate illustration here," or "I wish I could print fine typography that is impossible to write by hand"? Even if drawing isn't your strong suit, transfer sheets make it possible to achieve a clean, professional finish in an instant—just like commercially produced goods.
However, the term "transfer sheet" covers a surprisingly wide variety of products depending on how they adhere and what materials they work with. Picking the wrong type can lead to major craft mishaps—like sheets failing to stick at all, peeling off after a single wash, or losing their glossy finish completely.
In this guide, I will draw on my own crafting experience to thoroughly explain the main types of transfer sheets used in handmade crafts, their unique characteristics, compatible materials, and essential tips to prevent mistakes. By the end of this article, you will know exactly which transfer sheet to choose for your next project!
There are many ways to add text or patterns to handmade pieces: freehand drawing, rubber stamps, or standard stickers. Among these, transfer sheets stand out for two major reasons: extraordinary detail and a seamless blend with the base material.
Ultra-fine lines under 0.5 mm, smooth gradients, and uniform typography that are simply impossible by hand can be replicated effortlessly using transfer sheets. They also allow you to create complex graphic layouts and multi-color prints that rubber stamps cannot easily achieve.
Furthermore, unlike regular stickers or adhesive labels, transfer sheets transfer only the ink layer or a microscopic film to the object. Because there is no thick, visible sticker border around your design, it looks as though the artwork was printed directly onto the surface itself.
From everyday accessories and fabric goods to interior home decor, adding an upscale, polished feel to almost any project is the greatest appeal of transfer sheets.
Transfer sheets can be categorized by their bonding mechanism—the method used to move the ink from the carrier backing to your target material. Whether they rely on water, heat, or pressure, each functions completely differently.
Choosing the correct sheet for your base material is essential. Otherwise, the design will fail to adhere, or you may even damage your piece. Let’s start by looking at the five fundamental types commonly used in craft projects:
Let’s explore how each works and where they excel.
Waterslide decal sheets consist of a water-soluble glue backing topped with an ultra-thin clear film and ink layer. If you have ever built plastic scale models, it is the exact same mechanism.
Submerging the sheet in water for a few tens of seconds dissolves the water-soluble glue on the backing paper, allowing the ultra-thin film to float free. You slide this film onto your work using tweezers, blot away excess moisture, and let it dry to secure it in place.
Waterslide decals work best on hard, smooth surfaces: plastic, glass, ceramics, metal, painted wood, cured resin components, and Jesmonite surfaces.
Because the edge thickness is only a few microns (thousandths of a millimeter), borders are barely noticeable. Even when applied to transparent pieces, blank margins remain unobtrusive, making them a fantastic match for glass bottles and clear resin crafts.
The most frequent issues with waterslide decals are tearing while blotting water and trapping bubbles due to poor adhesion. Because the film is delicate, pulling it aggressively with the sharp tips of tweezers will easily tear it. Always slide the decal gently using your fingertip or a soft cotton swab.
Additionally, if moisture or air remains trapped beneath the sheet, it can leave a cloudy white haze after drying or peel off easily. Right after positioning, roll a damp cotton swab from the center outward to press out every drop of water and air pocket.
If you print your own decals on inkjet waterslide paper, you must seal the printed surface with a clear acrylic coat before submerging it in water. Skipping this step will cause the ink to dissolve completely the second it touches water.
Heat transfer sheets are coated on the back with a heat-activated adhesive resin. Applying heat and pressure with a household iron or heat press melts this resin into the fabric fibers, creating a durable bond.
Common varieties include sheets for light fabrics, sheets for dark fabrics, vinyl sheets cut with a plotter, and specialized transfer papers designed for wood and leather.
Their primary domain is fabric. They are ideal for cotton, polyester, canvas, and linen bags, pouches, drawstring sacks, T-shirts, and baby clothes.
They produce vivid colors and offer excellent wash durability. You can transform your original artwork and lettering into professional-looking custom textile goods.
The main causes of failed heat transfers are insufficient temperature and lack of applied pressure. Simply gliding the iron back and forth like you would when pressing clothes will not work.
Set your iron to the temperature recommended for your fabric (typically medium-high, around 150–160°C / 300–320°F). Lean your body weight over the iron and press straight down firmly for 15 to 20 seconds per section. Working on a firm, flat, solid surface rather than a soft, cushioned ironing board is essential to ensure adequate pressure.
Also, check whether your sheet requires a "cold peel" (peeling the backing film only after it cools completely) or a "hot peel" (peeling while still warm). Removing the film at the wrong temperature can pull the transferred ink off with the backing.
Rub-on transfer sheets feature ink and adhesive on the underside of a clear protective carrier. By rubbing firmly over the design with a stylus or wooden stick, the pressure transfers only the design to the target surface.
Because they require neither water nor heat, they offer the fastest, cleanest workflow among all transfer methods.
These sheets work on almost any flat, dry surface: paper, wood, plastic, leather, metal, glass, journal covers, and candle surfaces.
They are an ideal choice when working with paper goods that cannot tolerate moisture (cartonnage, papercrafts, custom shop cards), heat-sensitive plastics, or raw wood that you want to keep dry.
The most common mishap is patchy or missing design elements caused by uneven rubbing. If any section misses firm pressure, that part of the artwork will stay stuck to the clear sheet and tear when peeled.
To guarantee success, tape the transfer sheet securely in place with masking tape before rubbing. Then, using a wooden burnisher or the back of a pen, rub thoroughly and evenly from edge to edge without missing a spot.
When removing the clear sheet, do not pull it up quickly. Peel it slowly at a 45-degree angle. If you see any part of the design lifting, immediately press the carrier back down and rub that spot firmly once more. Checking carefully as you peel will eliminate transfer failures.
Extremely popular in the fields of resin crafting and gel nail art, these transfer foils feature metallic leaf, holographic patterns, or delicate lace vapor-deposited onto an ultra-thin polyester film.
Instead of water or heat, they rely on the tacky, sticky layer of uncured resin or specialized transfer foil gel to pick up the pattern.
These are best suited for UV and LED resin pieces, gel-nail-style jewelry accents, and surface embellishments on polymer clay crafts.
They instantly impart genuine metallic shine, complex marble textures, or floral motifs that are impossible to paint by hand onto small accessories.
Failures with transfer foils usually stem from mismanaging the stickiness of the uncured layer. If resin is cured too long until it becomes completely slick and smooth, the foil will not adhere. Conversely, if it is under-cured and too liquid, the wet resin smudges over the foil, ruining the pattern.
The secret is to use a dedicated foil transfer gel, or to cure UV resin slightly shorter than usual to leave a distinct tacky inhibition layer on top.
Press the matte back side of the foil firmly against this tacky layer, smooth out any air pockets with a silicone tool, and peel it off cleanly in one swift motion. Finally, seal it with a doming layer of clear resin to prevent the delicate foil from wearing off through friction.
In specialized crafting fields, dedicated transfer sheets tailored to specific materials take center stage. While they require unique steps, they elevate handmade work to a commercial standard.
Applied to porcelain or glassware like a waterslide decal, these transfers are subsequently fired in a specialized electric kiln at high temperatures around 800°C (1470°F). The heat burns away the carrier film entirely, melting the inorganic pigments directly into the glaze.
Because the finished pieces achieve the exact same heat resistance, water resistance, and food-safety qualities as commercial tableware, this method is the gold standard for custom tableware.
These sheets are formulated specifically for wax candle surfaces. They utilize vegetable-based components and combustible inks designed not to release toxic fumes or heavy soot when burned.
Available in both waterslide and rub-on formats, they allow crafters to embellish plain candles with delicate botanical illustrations and typography to create high-end decorative candles.
If you are unsure which sheet to pick, start by looking at the characteristics of your base material and work backward:
Applying transfer sheets is straightforward, but thorough prep work and the right tools make an enormous difference in the finished quality. Here are the essential practices I use in my own studio:
The biggest enemies of a clean transfer are invisible oils, fingerprints, and tiny dust particles. If grease remains on the surface, adhesive strength drops dramatically, leading to peeling down the road.
Before starting, wipe the surface thoroughly with a lint-free wipe (such as a Kimwipe) dampened with rubbing alcohol or a parts cleaner. This simple degreasing step substantially boosts adhesion.
Avoid working solely with your bare hands. Having these simple tools ready will prevent most mistakes:
Never stop at just applying the transfer sheet. Except for heat transfers bonded to textiles and ceramic decals fused in a kiln, most transfers remain delicate on their own. A fingernail scratch or water splash can easily damage them.
To keep your creations looking beautiful long-term and achieve durability suitable for selling, sealing the design under a protective topcoat is an absolute rule.
For wood, plastic, or clay projects, apply several thin layers of water-based polyurethane varnish or clear acrylic spray. Letting each thin coat dry thoroughly across 2 to 3 applications will blend away the decal borders, creating a seamless look as though the design was printed directly onto the piece.
For resin crafts and small accessories, adding a doming coat of UV/LED clear resin is the ultimate protection. It delivers complete waterproof protection, deep gloss, and shields the transfer from everyday wear.
Pay close attention to chemical compatibility between your transfer sheet's ink and your clear coat. Spraying heavy solvent-based finishes (like lacquer paints) directly over a decal can dissolve the film or smudge the inks.
If you are unsure, apply a very light initial barrier coat of water-based varnish or water-based clear spray first. Once that layer has dried completely, apply your stronger topcoat. This two-step sealing method is a reliable trick to prevent smudges every time.
From waterslide decals and heat transfers to rub-on sheets, resin foils, and kiln-fired decals, each transfer method offers distinct strengths tailored to specific materials.
Whether you need the delicate precision of water application, the fabric-gripping power of heat, or the mess-free convenience of pressure, choosing the right sheet for your material is the fastest way to achieve flawless results.
Clean your surface thoroughly before transferring, and finish with a compatible clear varnish or resin seal. Your handmade creations will instantly level up to a standard rivaling store-bought pieces.
I encourage you to explore the creative possibilities of transfer sheets and enjoy crafting one-of-a-kind treasures! If you enjoyed this guide, please share it with your fellow crafters on social media. See you in the next article—happy crafting from Yassy!



For example, if you are looking for articles about mizuhiki, try searching for "mizuhiki"; if you are interested in tools, try keywords like "nippers" or "pliers."
