The Complete Guide to Choosing Gemstone Beads: Grading, Hole Sizes, Treatments, and Rules for High-End Jewelry
yassy
Crafters!
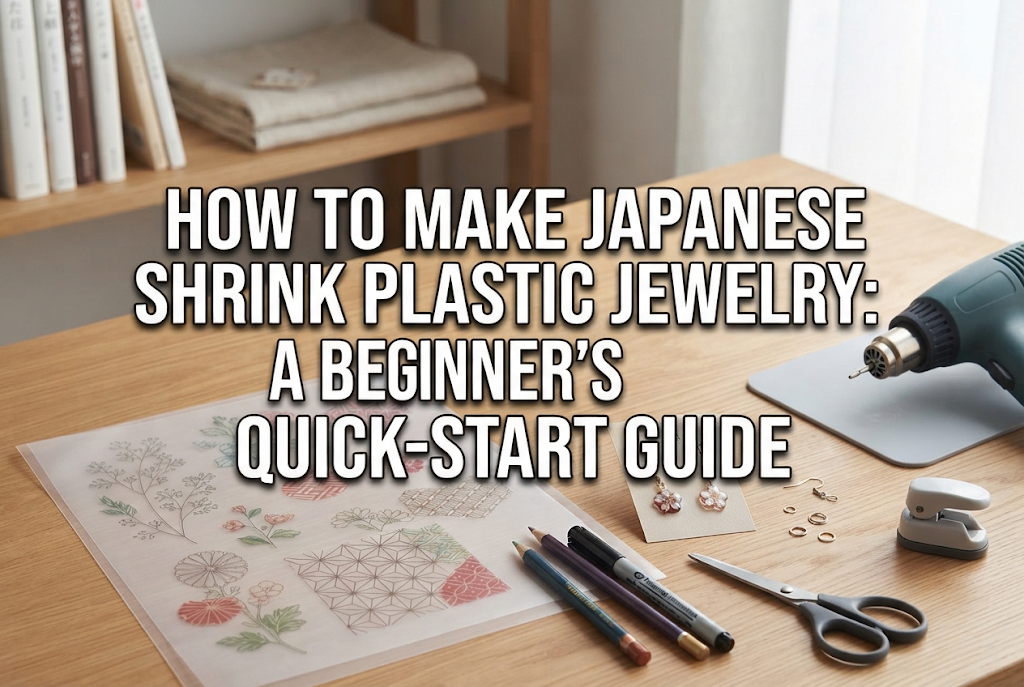

Hello, craft lovers! It's Yassy from Crafters! (・∀・)
Shrink plastic craft—known as puraban in Japan—is an absolute delight. You simply draw your favorite designs on a clear plastic sheet, heat it in a toaster oven, and watch it transform into a cute, shiny, and hard charm! Have you ever thought, "I really want to try making shrink plastic jewelry, but I don't know what to buy first" or "I'm afraid of messing up and wasting tools"?
As someone who loves making, viewing, and buying handmade crafts, I can tell you that worrying about where to start is a waste of precious creative time! Shrink plastic jewelry is hands-down one of the absolute best genres in the handmade world. It requires minimal initial investment, takes very little time, and yields surprisingly high-quality results.
In this article, I will explain all the step-by-step knowledge and techniques needed for beginners to complete gorgeous pieces without getting lost. You don't even need to run around physical stores—you can order starter kits or basic materials from online platforms like Amazon and begin your crafting journey today!
The handmade world offers countless genres: UV resin, clay, knitting, embroidery, and more. Among all of these, shrink plastic is my top recommendation for beginners. Here are three clear reasons why beginners fall in love with it:
The biggest appeal of shrink plastic craft is how affordable it is to start. You don't need to buy expensive, specialized machinery. You can use a toaster oven, scissors, and aluminum foil that you already have at home.
The basic materials are also very inexpensive. With just a small budget, you can purchase enough supplies to make dozens of accessories. Even if you decide it's not for you, there is almost zero financial risk!
There's no need to give up just because you think, "I'm not good at drawing…" Shrink plastic sheets are transparent or translucent, so all you have to do is place a sheet over line art and trace it.
Simply place your favorite illustration book, free template, or pattern sheet underneath and trace the lines to create a professional-looking design. The exhilarating feeling of turning a design you love into a tangible charm is addictive once you try it!
Because the plastic is heated and hardened, the finished pieces are incredibly light yet sturdy. Even if you make large statement earrings, they won't weigh down your ears.
Furthermore, adding a protective coating makes them resistant to water and impacts. The practical appeal of being able to incorporate your handmade creations into your daily outfit is a unique strength of shrink plastic jewelry.
The basic process of making shrink plastic jewelry is very simple. Understanding the overall flow prevents mistakes during the process. Work through these five fundamental steps:
First, decide on the design of your accessory. There is one golden rule you must never forget here: when heated in a toaster oven, shrink plastic shrinks to about 1/4 to 1/5 of its original surface area (or about 1/2 to 1/3 of its length and width).
This means you need to draw your sketch at 2 to 3 times the size of your desired final piece. At first, you might worry, "Is this really going to shrink enough?" But don't hesitate—drawing it large is the secret to success!
Cut out the plastic along your design lines using scissors or a craft knife. If your design has corners, round them slightly when cutting. Sharp corners will become rigid and sharp after baking, making the piece uncomfortable to wear.
If you plan to attach jump rings, earring hooks, or keychain hardware, you must punch the hole before baking using a hole punch. Once baked, the plastic becomes rock-hard, making it impossible to punch a clean hole.
Coloring your plastic sheet is the most exciting step, as it dictates the mood of your artwork. Different coloring tools yield completely different textures:
Line your toaster oven with a piece of crumpled aluminum foil, preheat the oven, and place your plastic sheet inside. Once heated, the sheet will curl up dramatically and twist around. This is the moment beginners panic the most, but do not touch it!
Wait a few moments, and the plastic will stop moving and flatten out on its own. Once it settles completely, quickly remove it using wooden chopsticks and transfer it onto a sheet of parchment paper on a flat surface. Immediately press it flat with a heavy book (such as an encyclopedia or dictionary) for a few seconds to straighten it out.
Once the plastic has cooled down, coat the top surface with UV resin or a glossy topcoat. This step protects your colored design and adds a glossy, high-end dome finish.
When the coating is fully cured or dried, attach metal hardware (such as earring studs, clip-ons, or keychain rings) to the back using a strong adhesive. Congratulations, your original shrink plastic jewelry is complete!
While shrink plastic is easy, there are a few common pitfalls that beginners often run into. Knowing these causes and solutions ahead of time will save you from unnecessary frustration. Here are the absolute rules based on my own past mistakes!
Cause: Insufficient heating or taking it out too early in a rush.Solution: Shrink plastic naturally curls up aggressively before flattening back out. Never open the toaster in a panic while it's still curled. The golden rule is to watch patiently until it finishes curling, shrinks completely, and lays flat. Also, preheating your toaster oven thoroughly is essential for even shrinking.
Cause: As the plastic shrinks, the density of the ink or pigment becomes concentrated.Solution: Apply your colors lighter than your target shade—aiming for a look that feels "a bit too light" before baking. Dark blue or black can easily turn into solid, muddy black when shrunk. Keep layers light to achieve your ideal vibrance after baking.
Cause: Taking too long to press the plastic after removing it from the oven, or touching it directly with fingers.Solution: Shrink plastic cools down and hardens within seconds of leaving the oven—speed is everything! Have your heavy book and parchment paper set up right next to the toaster oven in advance. Slide the plastic between the paper and press it immediately. Never touch hot plastic with bare hands, as it can cause burns and leave permanent fingerprints.
Cause: Incompatibility between the coloring medium and the resin liquid.Solution: Pouring UV resin directly over oil-based or water-based marker lines can dissolve the ink. If you used markers, seal the surface first with a water-based varnish or a spray acrylic sealer. Once that protective layer dries, apply your resin without any fear of bleeding.
Cause: Applying glue directly to the smooth plastic surface or using an adhesive that lacks strength.Solution: Lightly scuff the back of the plastic piece with sandpaper where you plan to attach the metal finding. This gives the glue teeth to grip onto. Also, skip craft glue or standard superglue—always use a two-part epoxy adhesive or a heavy-duty glue formulated for metal and hard plastic.
When starting out, the worst thing you can do is spend hours wandering around town looking for materials. Physical stores might not carry the specific type of shrink plastic or findings you need, wasting your precious time and energy.
That is why I strongly recommend buying your supplies all at once from online stores like Amazon. You can read user reviews and get high-quality crafting items delivered straight to your doorstep as soon as the next day!
You can choose between buying an all-in-one starter kit or selecting individual items. Here is how to decide which option fits you best:
Starter kits usually include shrink plastic sheets, basic coloring tools, jewelry hardware, a mini UV light, and resin liquid. The biggest advantage is that you can start crafting the day it arrives!
If you decide to assemble your kit individually, adding these items to your cart will set you up for success:
Simply shrinking plastic and gluing on a hook can sometimes end up looking like a child's school craft. However, adding just a few extra refined touches elevates your work to the level of hand-crafted accessories sold on online artisan platforms like minne or Creema! Here are my personal pro techniques:
If you leave the back of transparent shrink plastic untouched, background light will bleed through and dull your colors. To fix this, paint the back (colored side) with white acrylic paint or a white Posca paint marker after baking.
Adding a white backdrop layer makes the colors on the front stand out vividly. It eliminates transparency, giving your piece a solid, heavy-duty look similar to ceramic or high-end acrylic parts.
If you pour a large blob of resin all at once, it will overflow over the edges. The secret to a gorgeous dome finish is the two-step application:
Scissors can leave tiny jagged edges or burrs along the cut sides of shrink plastic. After baking, lightly run fine sandpaper or a sponge nail buffer (around 800 to 1000 grit) along the side edges to smooth them out.
This dramatically improves how the piece feels in your hand and gives it a polished, meticulous finish down to the smallest detail.
Here are clear answers to common questions beginners ask:
Q. Can I make professional-looking pieces using shrink plastic from 100-yen shops / dollar stores?A. Yes, you can! However, craft brand sheets offer much better consistency in shrinkage ratios and sheet thickness. Discount store plastic sheets sometimes shrink unevenly along the length and width, causing circular designs to warp into ovals. If you want precise geometric shapes or perfect circles, buying craft-grade shrink plastic sheets online is much more reliable.
Q. Can I use the oven function on a microwave oven?A. As long as it is a true convection/oven setting, yes! However, never use the microwave heating function. Always ensure you are using the oven/toaster setting and preheat it properly before placing your piece inside.
Q. Can I use a heat gun instead of a toaster oven?A. Yes! If you use an embossing heat gun, hold the plastic down with tweezers so the air stream doesn't blow it away, and heat it inside a deep, heat-resistant container or aluminum foil dish. Heat guns are actually fantastic for creating 3D curved shapes because you can direct heat to specific spots!
Shrink plastic jewelry making is a wonderful craft that lets you unlock endless design possibilities with a small budget and accessible tools. There's no need to worry about drawing skills or making mistakes—tracing makes designing easy, and knowing the simple rules guarantees beautiful results every time.
The most important part of improving in crafts isn't overthinking—it's getting your hands busy! Time spent hesitating only delays the moment your beautiful creations come into the world.
Now that you know the basics, this is your perfect moment to start. Head over to an online retailer, pick up a starter kit or supplies, and jump right in. In just a few days, you'll be holding your very first handmade glossy shrink plastic piece in your hands!
I hope you enjoy every moment of creating things with your own hands!
If you found this guide helpful, please share it with your friends on social media! See you in the next article—this was Yassy from Crafters!


For example, if you are looking for articles about mizuhiki, try searching for "mizuhiki"; if you are interested in tools, try keywords like "nippers" or "pliers."
