Beginner’s Complete Guide to Dried Flower Swags & Flower Crowns: Easy Start with Online Materials and Starter Kits
yassy
Crafters!

Hello, everyone! It’s Yassy from Crafters! (・∀・)
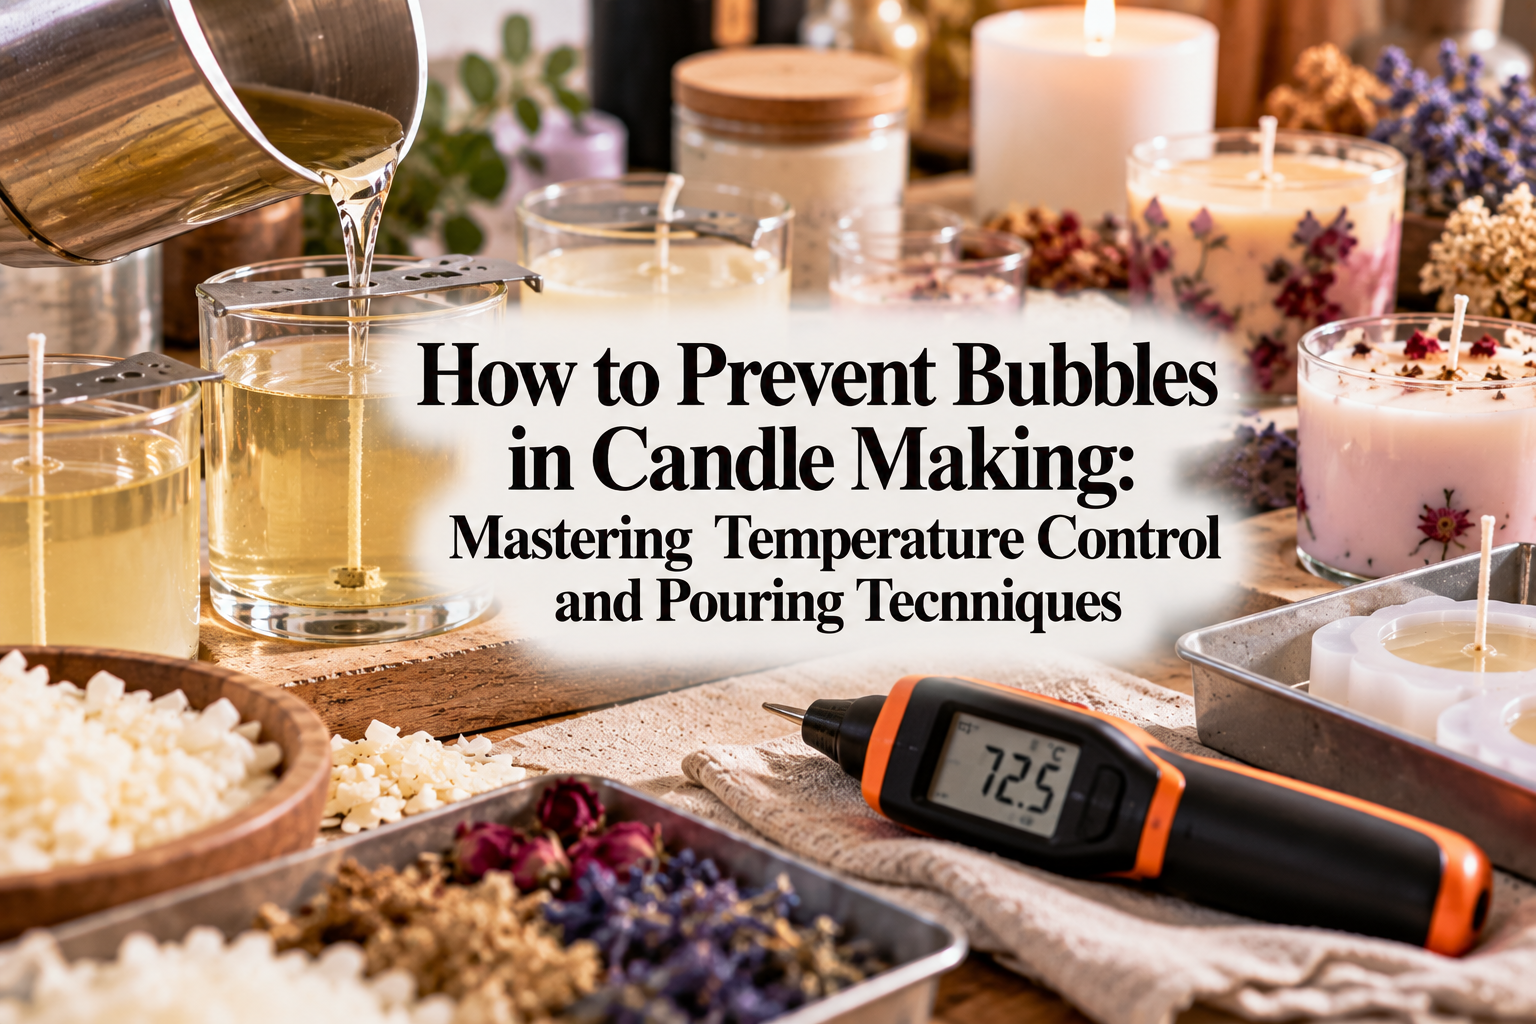
Have you ever finished making a candle, only to find tiny pinholes marring the surface, or frustrating white, pebble-like air bubbles trapped inside? It is an experience almost every candle crafter shares. When I first began making candles, no matter how carefully I thought I was pouring, air bubbles seemed to appear everywhere. It took countless trials and errors to figure out what was really going on.
Air bubbles in candles do not happen by chance. Every bubble has a clear, physical cause. This means that once you understand why they form and apply the proper techniques, you can dramatically eliminate them and achieve a smooth, professional-grade finish every single time.
In this guide, I will share comprehensive techniques and essential knowledge to help crafters overcome air bubbles. From preparing your tools and melting the wax properly to refined pouring methods and post-curing fixes, here are the exact methods I rely on in my own candle-making process.
To eliminate air bubbles, you first need to understand why air gets trapped in molten wax. There are three primary causes:
First, physically whipping air into the wax while melting it or blending in dyes and fragrances. Stirring too vigorously or using tools like whisks creates countless microscopic bubbles. If the wax sets before those bubbles can rise to the surface and pop, they remain trapped as visible cavities.
Second, temperature differences between the molten wax and the pouring vessel or mold. When warm wax is poured into a cold container, the wax rapidly chills upon contact with the walls and begins solidifying immediately. This locks in any air pockets clinging to the inner surfaces before they have a chance to escape.
Third, wax shrinkage and poor surface adhesion. Wax shrinks as it transitions from a liquid to a solid. When molten wax cools and sets before it can fully flow into intricate crevices or bottom corners of a mold, air pockets are left behind, forming noticeable voids.
Eliminating these three triggers step by step is the only reliable path to creating flawless, bubble-free candles.
Not all waxes behave the same way. The likelihood of bubble formation and the ease with which trapped air escapes depend heavily on the type of wax you use. Understanding the physical characteristics of each material is crucial.
Paraffin wax is very easy to handle, and bubbles escape from it relatively quickly. Because of its low viscosity, trapped bubbles naturally rise to the top and dissipate as long as it is poured at an appropriate temperature. However, cooling it too fast can create tiny surface pinholes, so sudden chilling must be avoided.
Natural waxes like soy wax and beeswax have a higher viscosity, remaining thicker even in a molten state. Once air gets whipped in, the bubbles have difficulty rising and tend to remain suspended inside. Pouring natural wax at temperatures that are too low will leave a substantial number of bubbles, making strict temperature control essential.
Gel wax is completely transparent, making any trapped bubble immediately visible. It has an exceptionally high viscosity, meaning you must keep the wax at an elevated temperature for an extended period to allow bubbles to rise and pop. Unless you intentionally want a bubbly, fizzy soda effect, achieving pure crystal clarity requires the strictest attention to bubble prevention.
Recognizing the viscosity and cooling behavior of your chosen wax is the foundational first step toward success.
Preventing bubbles begins the moment you start melting wax in your pouring pitcher. Introducing air at this early stage makes bubble removal significantly harder down the line.
Never heat wax rapidly. Use an induction cooktop or a double boiler to heat the wax gently and evenly. Excessive heat not only causes localized boiling that generates bubbles, but it also degrades the wax and increases fire hazards.
The most critical step is how you stir after adding colorants, essential oils, or fragrance oils. Never use a whisk or stir rapidly with a spoon. The best tools for the job are a bamboo skewer, a stainless steel spatula, or a glass stirring rod.
When stirring, keep your tool pressed close to the bottom of the pitcher and move it slowly in gentle circular motions so you do not drag air down into the liquid. The golden rule is slow, steady stirring until the color and scent are completely integrated. If tiny bubbles still form on the surface, use a tool to skim them off or push them away from the pouring spout before you begin pouring.
One of the most overlooked details by beginners is the temperature of the glass jars, silicone molds, or metal molds being used. Mastering this single step can cut bubble issues in half.
Pouring hot wax into a room-temperature or cold vessel creates thermal shock. The wax instantly chills, shrinks against the walls, and traps air, leaving behind uneven surface textures or harsh bubble marks.
The golden rule to prevent this is preheating your molds and containers. Use a heat gun or a hair dryer on warm air to heat the interior and walls for a few seconds until the surface feels warm to the touch. With glass containers, preheating closes the temperature gap with the molten wax, dramatically improving adhesion.
The same applies to silicone molds and intricately detailed shapes. Warming the interior ensures that the wax flows effortlessly into fine corners and crevices, preventing air from getting trapped in decorative details.
Pouring wax is the most critical and delicate moment in candle making, and it is where air bubbles are most easily introduced. Pouring with haste is strictly forbidden.
The golden rule of pouring is: thin, low, and gentle. Holding your pitcher high and pouring rapidly creates turbulence that pulls air beneath the surface. Instead, bring the spout of your pitcher as close to the rim of the mold or container as possible and pour in a slow, steady, thread-like stream.
When pouring into glassware, tilt the pour slightly so the wax slides down the inner wall of the container rather than dumping directly into the center. Letting the wax glide down the side fills the vessel gently from the bottom up, preventing air from getting trapped underneath.
When using molds with complex shapes, avoid filling them all the way to the top in one go. First, fill about one-third of the mold, then gently tilt or rotate it so the wax coats all inner contours and corners. This clears an escape path for trapped air before you slowly pour in the rest of the wax. Taking this extra moment makes all the difference in producing a flawless result.
Even with the most careful pour, small air bubbles can still cling to deep corners or intricate mold reliefs. However, while the wax is still in a liquid state immediately after pouring, you can physically coax those bubbles out.
The most effective initial action is vibration. Right after pouring, gently tap the sides of your container or mold with your fingertips, or tap the workbench lightly. These gentle vibrations break the surface tension holding the bubbles against the walls, allowing them to float to the surface. For silicone molds, gently flexing or massaging the exterior helps push trapped air pockets loose.
Once bubbles reach the surface or become visible just below, use a bamboo skewer or thin wire to pop them directly or guide them up along the wall of the mold.
This window of opportunity lasts only a few minutes before the surface begins to skin over. Make it a habit to inspect your poured candle immediately and clear away any trapped air while the wax is fully liquid.
When it comes to bubble prevention and surface repair, a heat gun (embossing heat tool) is an essential item for candle crafters. Unlike hair dryers, a heat gun produces focused, high heat with low airflow.
If tiny pinholes or stubborn surface bubbles get locked in as the wax begins to set, a heat gun resolves the problem in seconds. Hold the heat gun several inches away from the candle and sweep it across the top, melting just the top few millimeters of wax.
Re-liquefying the top layer allows trapped air to pop and escape, settling the wax into a perfectly level, mirror-like finish. Standard hair dryers blow too much air, which causes ripples, splashes wax, and ruins the candle's shape, so be sure to use a proper low-airflow heat gun.
If you demold a pillar candle and find tiny surface cavities on the sides, lightly sweeping the heat gun over the exterior will melt the outer micro-layer and smooth out the imperfections into a clean, uniform finish.
The single most decisive factor in preventing bubbles is precise temperature control. Rather than relying on guesswork, always monitor your wax with a digital thermometer down to the exact degree.
For paraffin wax, the ideal pouring temperature is generally around 80°C to 85°C (176°F to 185°F). At this heat, viscosity is extremely low, allowing any stray bubbles to rise and pop on their own. If the temperature drops below 70°C (158°F), the wax thickens and will hold onto bubbles.
For hard-type soy wax, the target pouring range is around 60°C to 65°C (140°F to 149°F). Pouring soy wax too hot can cause cracking or surface unevenness, while pouring too cool keeps bubbles trapped inside. Adhering strictly to this narrow temperature window is key.
For gel wax, heating it thoroughly between 90°C and 100°C (194°F to 212°F) until it flows like liquid is mandatory for eliminating bubbles. If the temperature is too low, the gel behaves like thick tape, trapping air that becomes impossible to remove. For maximum clarity, melt thoroughly near 100°C, thoroughly preheat your vessel, and pour slowly.
Every wax has an optimal temperature window where bubbles release most freely. Following the recommended temperatures for your specific wax is the golden rule for consistent success.
Despite careful preparation, wax naturally contracts as it cools, which can result in surface holes or hollow cavities around the wick once fully solid. This shrinkage is a normal physical property of wax.
When this happens, there is no need to discard your candle. You can restore it cleanly using a technique known as top-up pouring (second pouring).
First, use a bamboo skewer to poke a few relief holes around the wick and directly into any visible sinkholes. This pierces any hidden internal air pockets so your repair wax can penetrate deep inside.
Next, melt a small amount of the same wax to an appropriate temperature—ideally about 5°C (9°F) hotter than your original pouring temperature—and gently pour it into the depression. The extra heat helps the new wax meld seamlessly with the solid base without leaving noticeable seam lines.
Knowing that you can always repair shrinkage after the fact provides great peace of mind during the crafting process.
Beginners often make well-intentioned choices that actually increase bubble formation. Keep an eye out for these typical pitfalls:
1. Chilling candles in the refrigerator or cold rooms: Trying to rush the setting process by putting candles in the fridge creates extreme temperature differences between the exterior and interior wax. The resulting stress causes large internal air voids, severe shrinkage cavities, and surface fractures. Always allow candles to cool naturally at a stable room temperature away from drafts.
2. Repeatedly transferring wax back and forth: Pouring wax into a mold and then pouring it back into the pitcher to reheat because it felt too cool introduces substantial amounts of air. Avoid cycling wax in and out of molds.
3. Adding too much fragrance or essential oil: Exceeding recommended fragrance loads prevents the oil from fully incorporating into the wax matrix. Unbound oils separate out, creating cloudy patches and surface micro-bubbles. Always weigh your fragrance accurately and keep within the standard guideline (typically 6% to 10% of wax weight).
When I set out to make a crystal-clear container candle or a perfectly smooth pillar candle with zero bubbles, this is the exact workflow I follow:
Following these steps will dramatically reduce bubble failures across any wax type you choose.
Air bubbles in candle making are not an unavoidable mystery. They can be overcome completely with proper understanding and deliberate technique.
Most bubbles come from rushing, impatience, or imprecise temperature management. Remembering the basics—preheating molds, stirring gently, pouring low along the side, and verifying temperatures with a thermometer—will instantly elevate the quality of your handmade candles.
There is nothing quite like the feeling of demolding a candle to see a silky, perfectly smooth surface or lighting a crystal-clear container candle you crafted with your own hands. Mastering these techniques makes the entire creative journey far more rewarding.
Give these methods a try in your next pour, and see the difference for yourself!
If you found this guide helpful, sharing it with your fellow crafting friends would mean the world to me. See you in the next post—this was Yassy from Crafters!








For example, if you are looking for articles about mizuhiki, try searching for "mizuhiki"; if you are interested in tools, try keywords like "nippers" or "pliers."
