Japanese Leathercraft Guide: Selecting the Perfect Leather Thickness for Any Project
yassy
Crafters!

Hello, this is Yassy from Crafters! (・∀・)
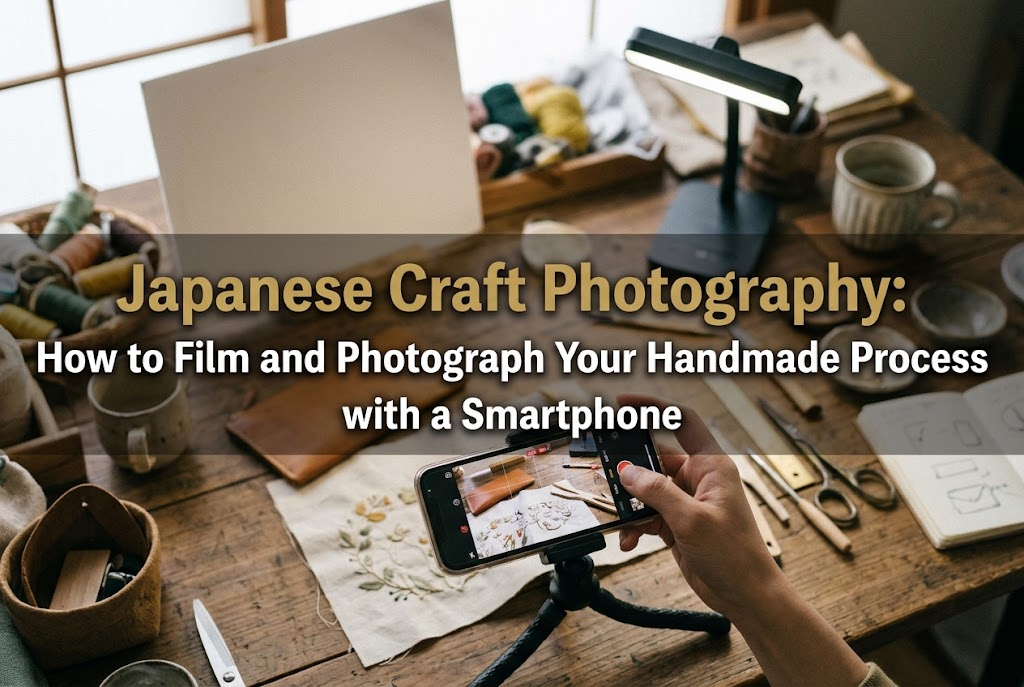
When you are making handmade crafts, have you ever thought, "I want to capture these steps and my hand movements beautifully in photos or videos"?
Personally, I love making, viewing, and buying all kinds of handmade crafts. That is why I can say with complete confidence: photos and videos of your "making-of process" hold an incredible amount of charm and value—often just as much as, or even more than, photos of the finished product.
On social media and handmade marketplace sites, simply watching an artisan's careful hands and seeing raw materials transform into a finished piece creates genuine excitement. It inspires deep appreciation, making people think, "Wow, so much time and care went into making this!" Sharing your creative journey does far more than just record your work; it builds trust in your craftsmanship and serves as a powerful tool to grow your fan base.
However, when you actually try to hold your smartphone and record your work, you almost always run into frustration: your own hands or head cast dark shadows, your hands drift out of the frame as you get absorbed in crafting, or the camera's focus gets stolen by your gloves or tools, leaving your artwork blurry.
In this guide, I will thoroughly explain how even beginner crafters can use a single smartphone to capture crisp, professional-looking photos and videos of their making process. Skipping vague advice, I will share all the practical techniques I use daily—from selecting essential gear and setting up your environment to choosing foolproof compositions and mastering video capture.
First, let's look at why capturing and sharing your production process is so vital. Clarifying this goal will dramatically elevate your awareness and the quality of your photos and videos.
The main reason to document your process is that it visually proves the hidden value and story behind your work.
Photos of finished products alone rarely convey how intricate your techniques are or how many hours of patient care went into every detail. By showing your hands assembling delicate components or polishing a piece over and over, buyers fully understand and appreciate the true value of your work.
Furthermore, process videos and photos generate remarkably high engagement on social media. People naturally love watching raw materials turn into finished items and observing skillful hand movement. As likes, saves, and comments increase, social media algorithms take notice, delivering your creations to a much wider audience.
Documenting your work also serves as an outstanding tool for self-improvement and reflection. Reviewing past footage helps you spot inefficient steps and sparks fresh ideas for your next piece. Mastering process photography is an essential step toward standing out as a handmade artist.
The most common cause of failed process photography is neglecting prep work and setup. Never attempt to shoot while holding your phone in one hand and crafting with the other. Your top priority must be creating an environment where both hands are completely free to work while your footage remains rock-steady.
To record your handwork cleanly, an overhead smartphone stand (a flat-lay mount) is absolutely essential. Overhead shooting means securing your camera directly above your workspace, facing straight down.
Standard tabletop tripods only capture low, angled shots where your own hands often block the view of the artwork. Instead, invest in a flexible arm stand capable of overhead mounting or a T-shaped tabletop stand designed for downward shooting. These are readily available on online stores like Amazon for roughly 2,000 to 4,000 yen.
Position the base of the stand either straight across at the back edge of your desk or diagonally opposite your dominant hand (e.g., front-left if you are right-handed). Position the main post so it stays out of your hands' working path, extending only the flexible arm directly over your crafting spot.
The obstacle that trips up beginners most often is dark shadows falling across the workspace. Relying solely on ceiling light causes your overhead phone, head, shoulders, and hands to cast noticeable shadows over your project.
The golden rule to eliminate these shadows is to use two-point diagonal lighting or a dedicated ring light.
The simplest and most effective option is a stand that lets you mount your smartphone right inside an LED ring light. Because light radiates evenly around the lens, shadows rarely form directly beneath the camera.
In addition, do not rely on room lights alone. Bring in soft natural light from a window coming diagonally from the front-left or front-right. On the opposite side, place a desk lamp or a simple white reflector board (such as a white foam board from a 100-yen shop). This balances the scene, creating a bright, clean surface with soft, minimal shadows. If using natural light, avoid harsh direct sunlight; diffused light through a sheer lace curtain works best.
In process photos and videos, the area surrounding your hands and materials occupies a large portion of the frame. A cluttered, messy background or household distractions will instantly diminish the appeal of your craft.
Always place a dedicated background sheet or a clean cutting mat on your work surface. Recommended options include low-glare, matte-finish wood grain sheets or neutral gray or beige photo boards. Avoid pure white backgrounds, as smartphone cameras tend to auto-correct white surfaces by making the entire image look overly dark and dim.
To add a polished atmosphere, consider subtly placing quality crafting supplies—such as a neat skein of yarn, natural stone beads, or wooden tools—near the edge of the frame. Keep your actual working area tidy, laying out only the tools you need for the current step.
When capturing still images of your process, a photo must clearly communicate what step you are performing at a single glance. Here are essential tips to achieve both high clarity and beauty.
To master process photography, focus on three primary angles:
1. Direct Overhead Flat-Lay: This angle is exceptionally effective for displaying layout arrangements, pattern cutting, and overall design balance. It flattens the frame, creating a graphic, visually pleasing layout.
2. 45-Degree Close-Up Angle: When you want to highlight action or three-dimensional texture—such as pushing a needle through fabric, bending metal wire with pliers, or applying paint with a brush—this angle is ideal. It clearly reveals the dimensional structure of your work and the exact contact point between tool and material.
3. Pre-Craft Material Flat-Lay: Before starting, neatly arrange your beads, fabrics, or paints and capture a flat-lay from directly above. This type of shot sparks curiosity and anticipation, making readers wonder, "What is about to be created from these beautiful items?"
If you have ever shot handwork on a smartphone, you have likely seen the screen flicker brighter and darker as your hands move, or watched the focus shift back and forth between your fingers and the background. This happens because of your phone's automatic adjustments (auto-focus and auto-exposure).
To prevent this, always activate your smartphone's AE/AF Lock feature. Simply tap and hold your target work area on the screen until "AE/AF Lock" appears. This locks focus and brightness in place.
With AE/AF Lock enabled, your lighting stays completely stable even as your hands move in and out of the frame, ensuring crisp, professional focus on your craft. After locking, slightly drag the brightness slider upward for a soft, luminous finish.
Viewers pay surprisingly close attention to hands, nails, and tool conditions. No matter how gorgeous your artwork is, dirty fingernails or visibly dry skin can create an unintended negative impression.
Before shooting, hydrate your hands with lotion (lightly blotting with a tissue so no oily residue transfers to your work) and make sure your nails are clean and trimmed. Similarly, remove rusted scissors or dirty cutting mats from view, or polish them prior to filming.
Well-loved leather tools with a rich patina add wonderful character, but neglected tools look unprofessional. Demonstrating care for your tools builds trust and reinforces your reputation as a thoughtful, meticulous maker.
Short-form video on platforms like Instagram Reels, TikTok, and YouTube Shorts is currently one of the most effective ways to reach craft lovers. Dynamic motion naturally grabs attention far more effectively than static images.
For longer projects or repetitive actions—such as steady knitting, sashiko stitching, or detailed sanding—your smartphone's built-in Time-Lapse mode is an outstanding tool.
Time-lapse compresses 30 minutes of careful handwork into a fast-paced, engaging 10-to-15-second clip. Viewers enjoy a satisfying sense of accomplishment as your creation quickly takes shape before their eyes.
The key to a successful time-lapse video is keeping your smartphone completely motionless. Any bump or shift during recording causes jarring jumps in the final edit. To prevent vibrations from incoming notifications, always switch your phone to Do Not Disturb or Airplane Mode before hitting record.
When editing 15-to-30-second short videos, combine regular-speed close-up shots with wider context shots rather than relying solely on time-lapse.
Here is a classic, highly effective video structure:
By alternating between wide and close-up views every 1 to 3 seconds, you keep the video dynamic and hold viewer interest until the end.
Audio plays a vital role in video engagement. For process videos, choose between capturing rich ambient crafting sounds (ASMR) or overlaying background music that aligns with your brand's style.
The crisp snip of scissors through fabric, the rhythm of wood carving, the soft molding of clay, or light drops of resin offer deeply relaxing audio for craft enthusiasts. To capture clean ambient sound, turn off background noise like televisions or fans, and work in a quiet room.
If background noise is unavoidable, mute the microphone audio entirely and add relaxing instrumental music or popular royalty-free tracks to give your video a cozy, sophisticated touch.
Here is a summary of frequent mistakes beginners face when recording their craft process, along with simple solutions to save you time and effort.
The most common headache occurs when you get so focused on crafting that your hands gradually slide right out of the camera's view, leaving an empty frame.
To easily solve this, mark your safe crafting boundary on your work table.
Look at your phone screen and place small pieces of masking tape on your desk just outside the four corners of your camera's frame. Keep your hands and project inside those tape boundaries as you work. Because the tape sits just beyond the edge of the visible area, it will not appear in your final photo or video.
This happens when you lean forward over your work to see a fine detail, blocking the room lighting and casting a large shadow over your project.
Fix this by adjusting both your posture and light placement. Consciously sit up straight, keeping your back aligned and working slightly further away from your chest.
Position your lights slightly in front of you or diagonally to the sides rather than directly overhead or behind your shoulders. When light hits your workspace from an angle facing toward you, your head and body cannot physically cast shadows onto your hands.
When working on detailed crafts like bead embroidery or clay modeling, camera focus often jumps to your tweezers, fingers, or background surface, leaving your artwork blurry.
While AE/AF Lock solves most focus issues, if your phone camera still shifts focus when your hands move, increase the distance between your smartphone and the workspace.
Smartphone camera lenses have a minimum focus distance; placing the phone too close prevents proper focusing. Instead of moving the phone closer, mount it about 30 to 40 cm away and use 2x optical zoom to enlarge the scene. Stepping back reduces hand shadows and helps the camera maintain rock-steady focus on your artwork.
Different craft mediums have different "star moments." Here is where to focus your camera based on your specific craft:
Must-capture moments for resin craft include pouring crystal-clear resin liquid into a mold, popping micro-bubbles with a heat tool, and popping the cured piece cleanly out of its silicone mold.
The demolding moment is legendary for driving high views on social media. Position light diagonally to catch reflections, emphasizing clarity and high gloss.
For clay arts, showcase how an unformed piece of clay turns into a detailed motif (like miniature food or animal sculptures) using fine tools.
Focus close-ups on adding fine textures and applying soft gradients with pastel or acrylic paints. Use simple, neutral gray or beige backgrounds so color transitions show clearly.
For beadwork, wire wrapping, or gemstone jewelry, highlight your precise hand movements using pliers or tweezers to manipulate tiny jump rings or headpins.
Capture close-ups from a 45-degree angle right as components snap together or wire coils form smoothly. To prevent reflective glare off metallic findings, diffuse your light source by placing tracing paper or a light white fabric in front of your lamp.
Textile arts like knitting, machine sewing, and hand embroidery shine through rhythmic movement and tactile texture.
Record the rhythmic flow of a crochet hook catching yarn or a sewing machine needle moving smoothly across fabric. Position your light slightly behind your project (subtle backlighting) to accentuate fluffy fibers, woven structures, and dimensional stitches.
When you are new to filming your craft, setting up equipment can feel tedious or distracting. If shooting video makes crafting feel like a chore, it defeats the purpose!
Here is my practical routine to keep filming effortless and enjoyable:
First, keep your setup ready or capable of being prepped in 30 seconds. I keep a flexible arm stand mounted to the side of my desk so I can snap my phone into place and begin recording instantly. Having to unpack and assemble stands every single time discourages consistent filming.
Second, don't feel pressured to film every step of every project in full. Trying to capture hours of work every time gets overwhelming. Instead, pick one small highlight: film a 5-second demolding step today, or take a quick photo of arranged materials tomorrow.
As long as you build a small library of clips on your phone, you can edit them together later when you have spare time. Approaching filming with a relaxed, casual mindset is the true secret to sticking with it over the long haul.
We have covered everything from essential gear and ideal lighting setups to angle tricks, genre tips, and quick troubleshooting for smartphone craft photography.
Let's recap the key points to remember:
Sharing your creative journey builds a genuine bridge between you and your audience, bringing the love, care, and passion behind your craft directly to craft lovers worldwide. Even if your first attempts aren't perfect, applying these simple tips step-by-step will soon have you creating gorgeous, professional-quality photos and videos.
Take pride in recording the wonderful moments when raw materials come to life under your hands, and share them confidently with the world! I am cheering you on!
If you found this guide helpful, sharing it with fellow crafters or friends on social media would mean the world to me. Thank you for reading, and see you in the next article! This was Yassy from Crafters!





For example, if you are looking for articles about mizuhiki, try searching for "mizuhiki"; if you are interested in tools, try keywords like "nippers" or "pliers."
