Stuck in the Mold? Causes and Foolproof Fixes for Demolding Resin and Crafts
yassy
Crafters!

Hello, it's Yassy from Crafters! (・∀・)
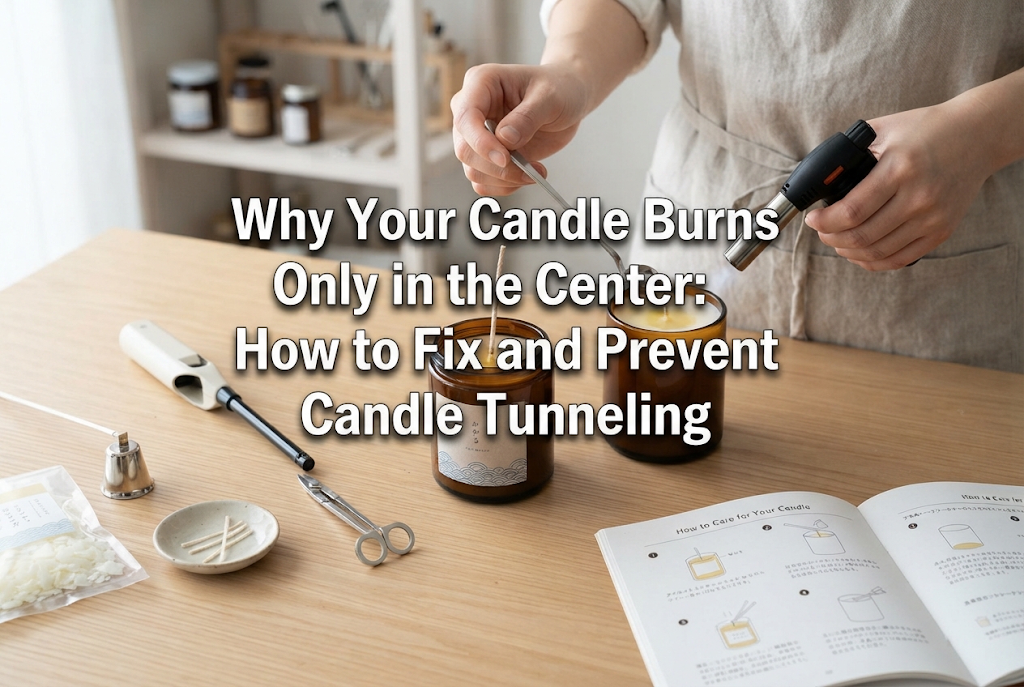
Have you ever lit your favorite scented candle or a handmade candle you worked hard on, only to find that it burns straight down the middle like a straw, leaving thick, unburned walls of wax around the sides?
In the handmade community and among candle lovers, this frustrating issue is known as "candle tunneling." Beyond looking uneven and unsightly, leaving a tunneled candle untreated causes the wick to drown in melted wax, eventually making it impossible to light and leaving more than half the wax wasted.
When I first started making candles, I struggled with this exact problem. My handmade pieces kept tunneling right down the center, and I spent a lot of time figuring out how to achieve a clean, even, flat burn from start to finish.
The good news is that candle tunneling happens for very specific reasons. Even if your candle has already tunneled deeply, you can easily restore it to a flat, smooth surface using a few simple household techniques. In this guide, I will walk you through the primary causes of candle tunneling, four proven fix methods, the golden rules for burning candles correctly, and essential wick-selection tips for crafters who make their own candles!
First, let's look at what candle tunneling actually is and why you shouldn't just let it be.
When a properly made candle burns, heat radiates outward from the flame, melting the wax evenly all the way to the edge of the container. This layer of melted liquid wax is called the "wax pool."
However, if the heat fails to reach the edges, only the wax directly beneath the flame melts and vaporizes. As a result, a solid cylinder of hard wax remains around the perimeter while the center digs deeper and deeper. That is tunneling.
You might wonder: "If it still lights, does it really matter?" Leaving a tunneled candle untouched leads to several distinct problems:
Catching tunneling early and correcting it is essential if you want to enjoy your candle's full lifespan, warm glow, and scent.
Candle tunneling generally stems from two categories: improper burning habits and design miscalculations during crafting. Check which of these applies to your candle.
Candles are often said to have "memory." The very first time you light a candle determines how it will burn for the rest of its life.
If you extinguish a brand-new candle before the melt pool reaches the outer edges of the container, the wax "remembers" that initial diameter as its maximum boundary. On subsequent burns, the heat will struggle to melt beyond that first ring, causing the flame to dig straight downward.
This is common in DIY candle making or decorative candles where wick sizing wasn't properly calculated. Every candle wick has a specific burn diameter rating. If your container has a 7 cm diameter but you use a wick meant for a 4 cm diameter, the flame simply will not generate enough heat to melt the outer wax.
Different waxes have different melting points. Paraffin wax, hard-blend soy wax, and beeswax have higher melting points and tend to solidify quickly before heat can spread outward. Additionally, burning candles in a chilly room or directly under cold airflow from an air conditioner continuously cools the container's perimeter, encouraging tunneling.
Improper wick maintenance also causes uneven burns. A wick that is trimmed too short produces a tiny flame without enough heat output. Conversely, a wick that is too long produces an erratic, flickering flame and soot, causing heat to escape inconsistently rather than warming the surface evenly.
If your candle is already hollowed out in the center, do not throw it away! You can easily melt down those high wax walls and level out the surface using items you likely already have at home.
This is the safest, most accessible, and most reliable way to fix tunneling without spending extra money. It traps the flame's heat inside the container like an oven, gently melting the outer wax walls.
The trapped ambient heat will gradually liquefy the thick outer walls of wax until the top becomes a flat, even pool. Once level, extinguish the flame, remove the foil, and let the wax cool completely. Note: The foil gets very hot during this process—do not touch it with bare hands.
If you make resin crafts or other DIY projects and own a craft heat gun or embossing tool, this is the fastest repair method.
Without lighting the wick, gently direct warm air across the top surface of the candle. Focus the heat on the raised outer rim of wax. The heat will melt the high walls smoothly, allowing the liquid wax to flow into the center depression. A hairdryer can work as a substitute, but because hair dryers blow strong air, melted wax can easily splatter. If using a hairdryer, set it to low airflow and hold it at a safe distance.
When the tunnel is so deep that the wick is about to drown completely, physically carving away the excess wax can be faster than melting it down.
Use a butter knife or an old spoon to gently scrape down the high outer wax until it matches the level of the center depression. Do not throw the scraped wax away! I recommend placing the wax shavings onto an aroma wax warmer, or melting them down into a small jar with a new wick to create a cute mini candle.
If you have a candle warmer lamp that melts wax from above using a halogen bulb, the solution is effortless: simply place your tunneled candle under the lamp and switch it on.
The radiant heat from the top evenly melts the entire surface down a few centimeters without an open flame. Turn off the lamp and let the wax re-solidify into a flat, brand-new surface. Having a candle warmer on hand is incredibly useful for everyday candle care.
Once you have restored your candle to a clean, flat surface, follow these three essential rules to ensure it never tunnels again.
The most important guideline for burning candles is balancing time with diameter. The general rule of thumb is to burn a candle for at least 1 hour per 1 inch (approx. 2.5 cm) of container diameter:
On the very first burn, never extinguish the flame until the wax pool has fully reached the outer glass. Lighting a candle for just 15 minutes before bed is the primary cause of tunneling. Always light your candles when you have enough time to let them melt properly.
Inspect the wick before every lighting. If the wick is overgrown or has developed a black, mushroom-like carbon buildup at the tip, trim it to approximately 5 to 7 mm (around 1/4 inch) using wick trimmers or nail clippers. Maintaining the correct wick length ensures a steady flame size, minimizes soot, and distributes heat evenly.
Burning a candle in a drafty location causes the flame to flicker and lean to one side, leading to an uneven burn. Furthermore, cold airflow cools the outer container walls, preventing the outer wax from melting. Place your candle on a stable, flat surface away from open windows, doorways, and direct air conditioner vents.
If you create your own handmade candles, here are key design adjustments to prevent tunneling right from the start:
Wick packaging specifies recommended burn diameters (for example, "suitable for 5–6 cm diameter"). Measure your molds and jars precisely and select the appropriate wick size. Plant-based waxes like soy wax have different melting and thermal properties compared to paraffin, so you generally need to step up one wick size larger than you would for paraffin.
When making large container candles with a diameter exceeding 8 to 10 cm, a single wick often cannot melt the wax all the way to the rim. Forcing a single, extra-thick wick can create a dangerously large flame. Instead, use a "double wick" or "triple wick" setup by spacing two or three medium wicks evenly across the container.
Using too much hard wax or stearic acid makes the candle excessively firm, hindering heat transfer. Similarly, adding too much or too little fragrance oil affects burn performance. Always follow manufacturer-recommended fragrance load ratios (typically 6% to 10% of total wax weight).
Fixing tunneled candles and burning them requires handling open flames and high heat. Always adhere to basic candle safety practices:
Candle tunneling is primarily caused by short initial burns or an undersized wick for the container. If your candle has already tunneled, simple techniques like the aluminum foil dome, gentle heating, or trimming down the outer wax walls can easily restore it to a flat, beautiful state.
Remembering two basic habits—letting the melt pool reach the edges on the first burn and trimming the wick to 5–7 mm—will completely transform how long your candles last and how well their fragrance fills the room. Whether you make candles by hand or love burning them at home, use these tips to enjoy a cozy, long-lasting candle life!
If you found this guide helpful, feel free to share it with your fellow crafter friends on social media. See you in the next article! This was Yassy from Crafters!








For example, if you are looking for articles about mizuhiki, try searching for "mizuhiki"; if you are interested in tools, try keywords like "nippers" or "pliers."
