What Is Washi Craft? A Guide to Japanese Paper: History, Types, and Handmade Projects
yassy
Crafters!
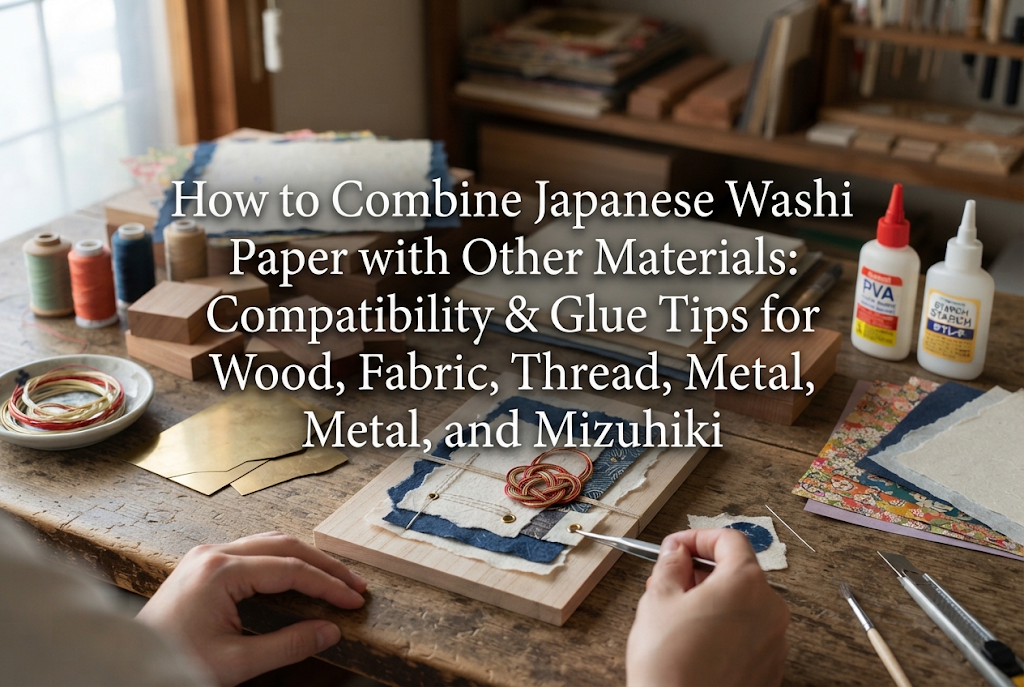

Japanese Washi paper is loved for its unique warmth, soft texture, and delicate translucency. While using it on its own for origami or chigiri-e (paper collage) is wonderful, combining Washi with other materials opens up an entire world of creative possibilities.
You might be thinking, "I want to make natural home decor by applying Washi paper to a wooden frame," or "I'd love to make modern Japanese-style accessories by pairing Washi with metal and thread." However, when you actually start crafting, common hurdles pop up: Which glue should I use? How can I prevent wrinkles and glue stains?
Because Washi is a delicate material, understanding how it interacts with other surfaces and choosing the right adhesive is the first step to success. Today, I'll share detailed compatibility guides, joining techniques, and my favorite insider tips for combining Japanese Washi paper with five common craft materials—wood, fabric, thread, metal, and mizuhiki cord—plus resin!
Washi's greatest strength lies in its flexibility, strength, and soft light transmission, which come from its long, intertwined plant fibers.
Unlike conventional Western paper, Washi fibers do not break easily when wet, allowing the paper to conform smoothly to curved surfaces. When paired with hard wood, sleek metal, or soft fabrics and threads, it creates a striking contrast that brings out the best in both materials.
The single most important factor when pairing Washi paper with other materials is the water content in your adhesive. Washi expands as it absorbs moisture and shrinks as it dries.
In contrast, materials like wood, metal, and resin do not expand or contract with moisture. This difference in expansion rates is the main cause of wrinkles, warping, buckling, and peeling after the glue dries.
To succeed with mixed-media Washi crafts, you must choose an adhesive suited to the specific joining surface and apply techniques that keep moisture to a absolute minimum.
Here is a guide to six materials commonly paired with Washi in handmade crafts, including recommended glues and step-by-step techniques.
Wood and Washi are both plant-derived, making them exceptionally compatible. This classic combination has been used in Japan for centuries in items like shoji sliding doors and andon paper lanterns. It is ideal for natural home decor, wooden box embellishments, and tabletop accessories.
Recommended Glue: Starch paste blended with PVA wood glue (7:3 ratio), or multi-purpose craft glue.
Technique: Raw wood has a rough surface. If you apply glue and Washi directly, wood grain bumps will show through or glue may seep in, causing dark stains. Always smooth the wooden surface first with medium-grit sandpaper (around 240-grit).
My favorite approach is mixing starch paste (denpun-nori) with standard wood glue at a 7:3 ratio. Starch paste alone lacks long-term strength, while wood glue dries too fast to smooth out wrinkles. Blending the two gives you the perfect open time to adjust the paper alongside strong adhesion.
Combining cotton or linen with Washi paper works brilliantly for book covers, pouches, and backing fabric (urauchi). It pairs the durability of textiles with the exquisite patterns and textures of Japanese paper.
Recommended Glue: Fabric glue, double-sided iron-on fusible webbing/sheets, or decoupage glue.
Technique: When gluing paper to fabric, liquid glues often bleed through textile fibers, curing into stiff, scratchy patches. The best solution is a double-sided iron-on fusible sheet.
Place the fusible sheet onto the fabric, place your Washi paper on top, and press with an iron. The heat melts the solid adhesive layer, creating a perfectly smooth, wrinkle-free bond without a single drop of liquid moisture. Backing thin Washi paper with fabric also adds firmness, making it much easier to sew.
Stitching or weaving thread onto Washi paper is a popular technique for handmade greeting cards and paper jewelry, adding three-dimensional texture and vibrant color accents to flat paper surfaces.
Recommended Glue: Clear fast-drying craft glue with a fine-tip nozzle.
Technique: Selecting the right paper is crucial when piercing Washi with a needle. Avoid thin Washi that tears easily under tension. Instead, choose thick, handmade Washi (tesuki Washi) crafted from long fibers such as kozo (mulberry).
To prevent paper tearing, practice "pre-punching": poke guide holes from the back using an awl or thick needle before stitching. To secure thread ends on the reverse side, apply a tiny line of clear glue so the thread bonds securely with the paper fibers.
Pairing Washi with brass bezel frames, metal findings, or wire results in sophisticated, modern Japanese-style jewelry. The contrast between cool metal and warm paper is stunning.
Recommended Glue: 2-part epoxy adhesive or UV/LED resin.
Technique: Metal is non-porous and non-absorbent. Water-based paper glues will never dry or bond to metal surfaces.
You must use adhesives that cure chemically, such as 2-part epoxy or craft resin. Apply a thin layer to the metal finding and position the Washi paper. Don't forget to degrease the metal surface first by wiping it with rubbing alcohol to remove oil residues.
Mizuhiki (decorative paper cords wrapped in thread or foil) and Washi paper share paper origins, making them a natural match. Beyond traditional shugi-bukuro (celebration envelopes) and New Year decorations, this combination is widely used in Japanese wall panels and gift wrapping.
Recommended Glue: Fast-drying wood glue (with a fine nozzle) or a low-temperature glue gun.
Technique: Because Mizuhiki has a tightly wound paper core, bent or curved cords have strong tension and tend to spring back off the paper before glue sets.
The secret to success is to "massage" or flex (shigoki) the Mizuhiki cord between your fingers before gluing to break its stiffness. Apply tiny dots of fast-drying glue, then hold the cord in place with masking tape until fully set. For thick knots or large attachment areas, a low-temp glue gun provides a quick, firm hold.
Impregnating Washi paper with UV resin or layering it with glass produces a gorgeous, glossy finish reminiscent of stained glass or blown glass ornaments.
Recommended Materials: UV/LED resin, water-based clear coat/varnish (for sealing).
Technique: Applying resin directly onto bare Washi paper causes uneven absorption, resulting in unsightly blotches and dark spots. Pre-coating (sealing or medome) is essential!
Coat both sides of the paper with a water-based clear varnish or decoupage sealer and allow it to dry completely. This protective barrier stops the resin from soaking in unevenly, allowing you to create a crystal-clear layer while preserving the original pattern and texture of the paper.
Here are three common trouble spots crafters encounter when combining Washi with other materials, along with simple solutions.
Cause: Applying too much liquid glue or distributing moisture unevenly, causing Washi to expand rapidly in spots.
Solution: Never apply liquid glue directly onto the Washi paper. Instead, brush a thin, even coat onto the base material (e.g., wood or cardstock). Place the paper down and gently smooth from the center outward using a dry sponge or soft brush to push out trapped air.
Cause: Using liquid glues on thin Washi paper or airy, fibrous papers like rakusui-shi (water-droplet Washi).
Solution: Switch to moisture-free spray adhesive, double-sided fusible web, or seal the Washi beforehand with a clear matte varnish coat. This extra sealing step prevents blotches completely.
Cause: Using standard paper glue on non-porous surfaces like metal, plastic, or slick polished wood.
Solution: Always match the glue to the non-paper substrate. Use epoxy for metal, and lightly sand slick wood surfaces to give the multi-purpose craft glue a textured surface to grip.
Here are two beginner-friendly project ideas showcasing mixed-material Washi crafting!
Using an unfinished wooden box (easily found at craft stores):
The warmth of wood paired with colorful Washi and dimensional Mizuhiki creates an elegant accessory box reminiscent of a luxury Japanese sweet box!
Creating delicate, translucent earrings with metal bezel frames:
When light passes through, the intricate fibers of the Japanese paper light up wonderfully, creating a refined accessory that complements both Western outfits and traditional Japanese attire.
Combining Japanese Washi paper with wood, fabric, thread, metal, and mizuhiki offers endless potential. While Washi is a delicate material, respecting its unique traits—managing moisture, selecting the proper glue, and prepping surfaces with sanding or sealing—guarantees success.
Whether you love the natural warmth of wooden pairings or sleek metal accents, try mixing Washi with materials around your workspace to create your own signature handmade crafts!
If you enjoyed this guide, please share it with your crafty friends on social media! See you in the next article—Yassy from Crafters!





For example, if you are looking for articles about mizuhiki, try searching for "mizuhiki"; if you are interested in tools, try keywords like "nippers" or "pliers."
