Mastering Japanese Yarn Weights and Stitch Density: The Golden Rules for Needle Selection and Gauge Calculation
yassy
Crafters!
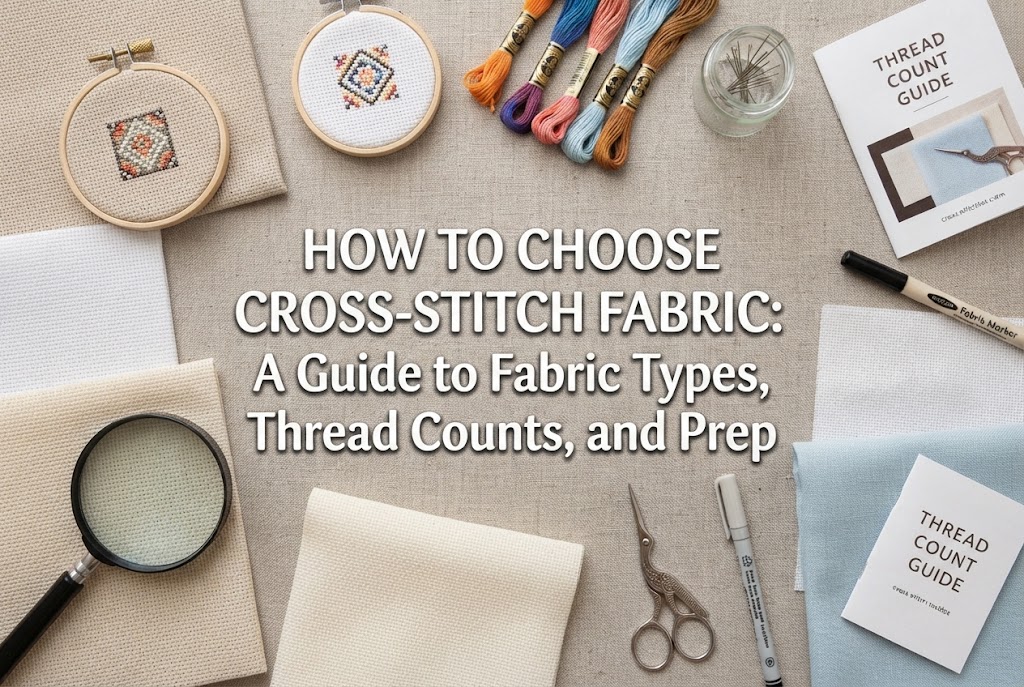

Hello everyone, it’s Yassy from Crafters! (・∀・)
Have you ever walked into a craft store or browsed an online shop looking to start cross-stitching, only to be overwhelmed by all the fabric choices? You might have wondered, “Which fabric should I pick?” or “What does 14-count or Javacross mean?”
Among various embroidery techniques, cross-stitch is one where your choice of fabric makes an enormous difference in both ease of stitching and the final look of your piece. If you try using standard sewing fabric, your grid won't stay square, and your design will quickly lose its intended proportions.
In this comprehensive guide, I'll walk you through the basic types of cross-stitch fabrics, explain how to decipher "fabric counts" (a common hurdle for beginners), outline practical rules for choosing the right cloth, and share essential prep steps before making your first stitch. With this guide, you’ll be ready to pick the perfect fabric with confidence!
First, it helps to understand why cross-stitch requires its own specialized fabric.
Everyday cotton fabrics used for clothing or tote bags—such as broadcloth, sheeting, or cotton oxford—feature tightly woven warp and weft threads. Because there are no distinct holes, you have to guess where to insert your needle. That makes it nearly impossible to stitch the uniform, repetitive "X" shapes required for cross-stitch.
In contrast, dedicated cross-stitch fabrics are woven so that the warp and weft threads cross at perfectly regular intervals, creating open grid squares and clearly defined holes for your needle. The thread density is a true 1:1 square ratio. This unique structure ensures that anyone can stitch neat, identical crosses.
Years ago, I once attempted to cross-stitch directly onto a scrap of ordinary lightweight cotton. The stitches ended up distorted, stretched vertically, and ruined the pattern completely! To create crisp patterns true to your chart, starting with dedicated cross-stitch fabric is an absolute rule.
Cross-stitch fabrics generally fall into four primary categories. Each has distinct textures and working qualities, so matching the fabric to your experience level and project goals is the key to success.
If you are just starting out, my top recommendation is Aida cloth. In Japan, it is widely known under the brand name Javacross (produced by manufacturers such as Olympus).
Aida is woven by grouping multiple threads together into a sturdy grid, creating clear squares and distinct holes. Because the fabric itself has natural stiffness and body, a major perk is that you can comfortably stitch in-hand without needing an embroidery hoop.
Since the needle holes are unmistakable, your risk of miscounting stitches drops dramatically. When mastering basic cross-stitch techniques, pick Aida without hesitation.
Linen offers a beautiful natural texture and soft drape. It is frequently chosen for heirloom projects, advanced sampler designs, and antique-style patterns.
Unlike Aida, linen does not feature rigid woven blocks. Instead, single fine threads are woven alternately in warp and weft. You typically stitch "over two threads" horizontally and vertically to form a single cross (known as stitching 2-over-2).
Because genuine linen has subtle variations in thread thickness (slubs), the finished piece has an organic, rustic, yet refined feel. However, because you have to visually track and count individual woven strands, stitches can easily slip. It is best to tackle linen after gaining plenty of confidence on Aida.
Evenweave combines the approachable readability of Aida with the soft, smooth background finish of linen. It is typically a plain-woven fabric made from cotton, rayon, or modal blends.
Like linen, you generally stitch over two threads. However, because Evenweave threads are spun to a strictly uniform thickness, counting your grid is far easier than on natural linen.
If you prefer not to have the prominent grid pattern of Aida visible in the unstitched background, but find natural linen intimidating, Evenweave is your ideal middle ground.
While not traditional textiles, perforated paper canvas and plastic canvas are popular specialty surfaces.
Because these materials do not fray at the edges, they are ideal for trimming close to the stitched border once finished. They make wonderful bookmarks, coasters, 3D keychains, and holiday ornaments.
Paper canvas must be kept away from water, but its firm structure makes stitching effortless and very enjoyable for small novelty crafts.
Whenever you look at a cross-stitch fabric package, you will see a number followed by "count" (often abbreviated as "ct"). Understanding this metric is essential for sizing your project accurately.
Fabric count indicates the number of squares (or threads) per inch (approx. 2.54 cm).
In Japan, manufacturers like Olympus often label fabrics by stitches per centimeter (e.g., approximately 5.5 stitches per cm for Javacross medium-count). Whichever metric you encounter, remember the core principle: a higher number always means finer fabric.
If you're unsure which count to choose, start with 14-count Aida (or Japanese medium-count Javacross). This is the international standard for cross-stitch and the easiest count to handle.
On 14-count fabric, the holes are clearly visible, yet the resulting crosses look neat without appearing bulky. The vast majority of beginner kits and pattern charts are designed based on 14-count.
Starting with very fine fabric, such as 18-count, forces beginners to strain their eyes searching for holes, which quickly leads to fatigue and frustration. Working with 14-count allows you to build proper stitch tension and hand rhythm smoothly.
Even for the exact same pattern (say, 100 stitches high by 100 stitches wide), the final dimensions will vary dramatically depending on your fabric count:
Furthermore, you must adjust the number of embroidery floss strands you use based on the fabric count. If you don't follow the recommended strand count specified in your pattern, the fabric background may show through gaps, or your stitches may bunch up so tightly that pushing the needle through becomes difficult.
Here are three frequent mistakes newcomers run into when preparing fabric, along with straightforward solutions.
If a pattern chart indicates a finished size of 20 cm x 20 cm, cutting your fabric to exactly 20 cm x 20 cm is a recipe for disaster.
As you stitch, the raw edges will fray. More importantly, you will have zero margin left for framing or sewing the piece into a pouch or pillow.
Always cut your fabric with an extra 5 cm to 10 cm (2 to 4 inches) on all four sides—meaning the total fabric cut should be 10 cm to 20 cm larger than the design area. This generous border also gives your embroidery hoop plenty of fabric to grip securely.
When looking at charts, you might see counts like 28-count or 32-count. Don't worry—you won't have to strain your eyes over microscopic Aida squares! These numbers refer to linen or Evenweave.
Because linen and Evenweave are worked over two threads, the effective stitch size is half the stated count. A 28-count linen stitched 2-over-2 produces the exact same finished scale as 14-count Aida.
Whenever you read a pattern calling for linen, remember the golden formula: Divide the linen count by 2 to find the equivalent Aida count.
Fabric color sets the tone for your entire project. While standard white, antique white, or natural unbleached shades are timeless choices, stitching on dark colors like black or navy makes vivid thread pop dramatically.
However, dark fabrics make holes difficult to spot, which strains your eyes even in daylight.
If you choose to work on black fabric, place a white towel or sheet of white paper on your lap so light filters up through the holes, or use a dedicated task light. For your first or second project, stick to light-colored fabrics where holes are easy to track.
Taking a few minutes to prep your fabric before stitching will dramatically improve both your working comfort and the quality of your finished embroidery. Here is the routine I always follow in my studio:
Because cross-stitch fabrics have an open weave, handling them causes threads to unravel along the edges. To prevent your cut fabric from shrinking as you work, secure the borders before stitching.
The simplest method is using masking tape (or painter's tape). Simply fold tape over the four cut edges. For a more durable finish, apply craft fray-check liquid or run a quick zigzag stitch around the border using a sewing machine.
A fundamental rule of cross-stitch is to start stitching from the center. Starting from a corner risks miscounting and having your pattern run off the edge of the cloth.
Fold your fabric lightly in half vertically, then horizontally. The intersection of those creases marks the exact center. Mark this spot lightly with a water-soluble fabric pen or a single basting thread.
For large, intricate patterns, drawing a 10×10 grid with a water-soluble marker will virtually eliminate miscounts and dropped stitches.
Stiff fabrics like Aida can be stitched comfortably in-hand without a hoop; in fact, rolling the excess fabric lightly in your hand often speeds up your stitching rhythm.
In contrast, pliable fabrics like linen and Evenweave should always be mounted taut in an embroidery hoop or Q-snap frame. If soft fabric is loose, thread tension pulls the weave out of square, causing your crosses to look warped.
These days, Japanese 100-yen stores and budget retailers carry precut cross-stitch fabrics. They work fine for basic practice, small motif patches, or testing color palettes on coasters.
However, unlike fabrics from established manufacturers such as Zweigart, Olympus, or Lecien (Cosmo), budget fabrics can suffer from slight weaving distortion—meaning the grid squares may be slightly rectangular rather than square. Fabric stiffness can also be inconsistent. If you are dedicating hours to a framed sampler or a keepsake, invest in quality fabric from a reputable craft brand.
Once you finish stitching, gently hand-wash the piece in lukewarm water with mild detergent to remove skin oils and water-soluble grid markings.
Roll the fabric in a clean towel to press out moisture, and while it is still slightly damp, iron it from the back (wrong side).
Never press an iron directly onto the front of your stitches, or you will crush the three-dimensional texture of your crosses. Lay down a fluffy bath towel, place your embroidery face down on top of it, use a pressing cloth, and gently apply steam with your iron hovering slightly over the surface. Your stitches will plump up beautifully!
Choosing your fabric accounts for 80% of how smooth your stitching will go and how lovely the final outcome will look.
For beginners, start with 14-count Aida (or Javacross medium-count). You'll enjoy crisp visibility, smooth stitching, and the true pleasure of watching your pattern take shape.
As you gain experience, expand your repertoire to natural linens or striking dark fabrics. A simple change of cloth opens up countless creative possibilities.
Cut with generous margins, prep your edges, and enjoy some relaxing stitching time! If you found this guide helpful, please share it with your fellow makers. See you in the next post—happy crafting from Yassy!

For example, if you are looking for articles about mizuhiki, try searching for "mizuhiki"; if you are interested in tools, try keywords like "nippers" or "pliers."
