Level Up Your Needle Felting: The Essential Tool Upgrade Order for Flawless Results
yassy
Crafters!

Hello! This is Yassy from Crafters! (・∀・)
When it comes to handmade crafts that involve sewing, there is a wide range of genres, including fabric accessories, embroidery, leather crafting, and doll clothing. Personally, I love making various stitched crafts as much as I love admiring and purchasing beautiful finished works by other makers.
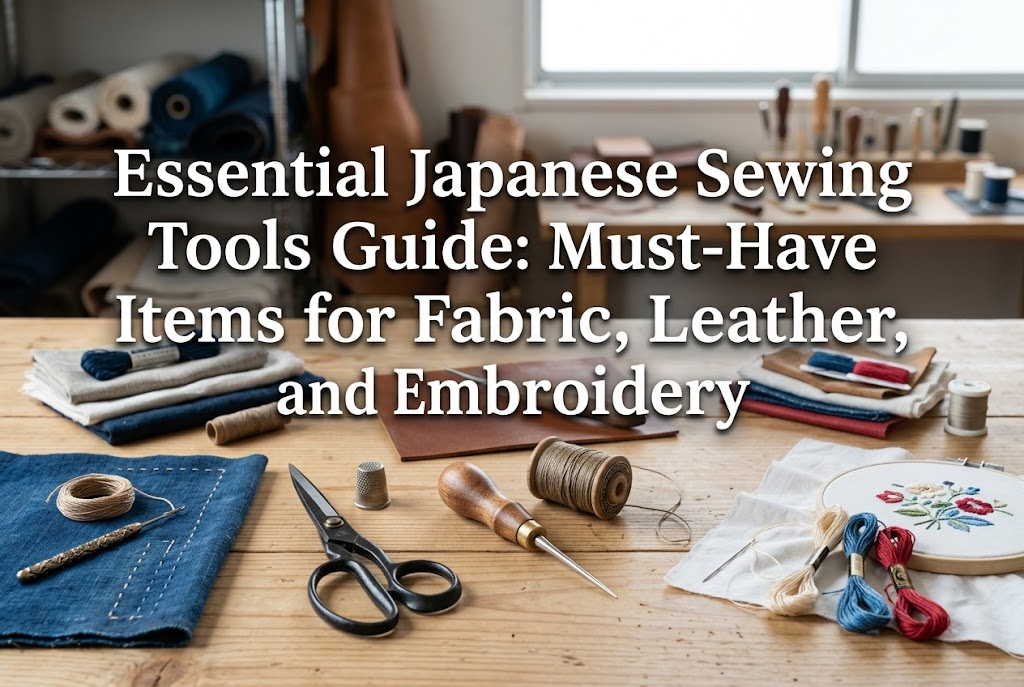
When starting needlework, many beginners hit a wall, wondering: "What tools do I actually need, and where should I start?" In reality, sewing tools are designed with specific roles for specific purposes. Using the correct tool in the correct situation is the biggest shortcut to elevating the quality of your handcrafted work.
Working with improper tools without understanding their intended use can damage your fabric or lead to crooked, uneven stitches. In this guide, I'll organize the essential sewing tools by their specific functions and explain the standards for choosing the right tool for the job.
Think of this article as your overarching guide to what belongs in a well-equipped sewing box. We will dive deeper into detailed selection guides and care instructions for each item in individual follow-up articles. First, let's get a complete handle on which tool does what!
Without a doubt, the star of any sewing project is the needle. Even though we simply call them "needles," the type you should use varies completely depending on the material you are stitching and the thickness of your thread. Using an unsuitable needle can pucker the fabric fibers or cause the needle to bend and break, so it is vital to choose the right type.
Standard sewing needles are the most fundamental tool for stitching fabrics together by hand. Their main feature is a sharp, pointed tip designed to glide smoothly between fabric fibers by pushing them aside.
Hand-sewing needles come in variations tailored for light-weight, medium-weight, and heavy-weight fabrics. If you pierce delicate cloth with a thick needle, it will leave visible holes; conversely, using a fine needle on heavy fabric will cause it to bend or snap.
Whenever I tailor fabric goods by hand, I always select a needle suited to the exact fabric thickness. For standard cotton or sheeting fabric, you can't go wrong with a needle made for medium-weight fabrics.
Embroidery needles are specialized needles designed to pull embroidery floss through fabric to create decorative patterns. The biggest differences between embroidery needles and standard sewing needles lie in the eye size and the shape of the tip.
Because embroidery thread is used in bundled strands, these needles feature a long, wide eye. Furthermore, needles designed for techniques like cross-stitch have a rounded tip to easily slip between the woven grid of the fabric without splitting threads.
The absolute rule is to use sharp-tipped embroidery needles for surface embroidery (like Crewel or French embroidery) where you pierce through the fabric, and blunt-tipped needles for counted-thread styles like cross-stitch. Attempting to embroider with a standard sewing needle will cause the thread to fray from friction, so always use a dedicated embroidery needle.
Leather needles are specialized tools designed for stitching tough materials like genuine leather and synthetic leather. Their structure is fundamentally different from fabric needles; the tips are shaped like small blades or chisels, and the needle shaft itself is extremely sturdy.
Unlike fabric, leather has dense fibers that standard sewing needles simply cannot pass through. In leathercraft, you punch pilot holes first using an awl or stitching chisel, and then pass the leather needle through those pre-made holes.
Leather needles have large eyes that accommodate thick polyester thread or waxed thread smoothly. If you are crafting leather goods, never attempt to substitute them with fabric needles—using proper leather needles is a strict requirement.
Before you begin stitching, accurate measuring, marking, and temporary pinning are essential. If you rush through this preparation phase, your finished project will turn out warped or misaligned, no matter how neatly you sew. Let's look at how to properly master these prep tools to ensure a beautiful finish.
In sewing crafts, a ruler isn't just for measuring length. The most versatile ruler in sewing is a clear grid ruler marked with a full grid pattern across its surface.
Using a clear grid ruler allows you to easily draw lines parallel to the edge of the fabric and check right angles accurately. A transparent ruler is also immensely helpful for maintaining a consistent seam allowance along folded edges.
While rigid metal or bamboo rulers have their specific uses, the very first ruler a beginner should acquire is a 45 cm to 50 cm clear grid ruler. With this single tool, you can handle everything from pattern drafting to adding seam allowances effortlessly.
Chaco pens (tailor's chalk markers) are writing tools used to mark seam lines and cutting lines onto fabric. They come in various formats, including standard pencil style, solid chalk blocks, and liquid pen types.
For modern handmade crafting, water-soluble marking pens or air-erasable pens that fade naturally over time offer the greatest convenience. They allow you to mark smooth lines without applying heavy pressure, preserving delicate fabric surfaces.
The general rule is to use white or pink markers on dark fabrics, and blue or purple markers on light-colored fabrics. Friction-erasable pens that disappear with iron heat are also popular, but because the ink can reappear if exposed to cold temperatures, choose your marking tool carefully based on your project's needs.
Sewing pins are temporary fasteners used to hold layers of fabric in place before stitching so they do not shift. They typically feature colorful heads.
The absolute most important factor when choosing sewing pins is making sure the heads are made of heat-resistant glass. Plastic-headed pins will melt and ruin your fabric if an iron accidentally touches them during pressing.
Pressing your fabric right before sewing is an essential step to achieving high precision, so equip yourself with glass-headed pins that can withstand iron heat. Ideally, match the pin thickness to your material: fine silk pins for lightweight fabrics, and sturdy, thicker pins for heavy materials.
Cutting fabric and undoing mistakes are two tasks that inevitably happen before and after stitching. The quality of your cutting tools directly impacts your work efficiency and comfort. Using task-specific blades is key to creating professional-grade results.
Fabric shears are large, high-precision scissors designed to cut fabric cleanly along your intended measurements. The blades are engineered to meet with exact tension, allowing them to glide smoothly through slippery or thick materials without pushing the fabric away.
The cardinal rule of fabric shears is: never, ever use them to cut anything other than fabric. Cutting paper, plastic, or tape with your fabric shears will instantly dull the blades, ruining their ability to cut cloth cleanly.
I store my paper scissors and fabric shears completely separately. Using sharp, dedicated fabric shears prevents frayed edges and guarantees accurately cut pattern pieces.
Thread snips are small, U-shaped clippers designed to quick-cut thread tails and embroidery floss right at the base. Fitting comfortably in the palm of your hand, they operate with a quick squeeze of your fingers.
While sewing, you will cut thread dozens of times. Picking up and setting down heavy fabric shears every single time is inefficient, making thread snips a staple tool to keep right at your side.
Choosing snips with extremely sharp tips allows you to trim threads ultra-close to the fabric surface, giving the reverse side of your project a noticeably cleaner, professional look.
A seam ripper is a small tool used to pick out incorrect stitches or to cut open machine-sewn buttonholes. It features a fork-like head with a small, sharp curved blade inside the V-shape.
Undoing stitches is a regular part of crafting for beginners and experts alike. Trying to pull threads out by force with your hands or regular scissors can tear the fabric, but a seam ripper allows you to slice thread cleanly without damaging the cloth.
When cutting buttonholes, placing a sewing pin across the end of the buttonhole prevents you from accidentally slicing too far, allowing you to create neat openings every time. It is a true lifesaver that every sewing box must have.
Needlework relies heavily on support tools that reduce finger fatigue and assist with tricky steps. Adding these tools to your workspace speeds up your workflow while preventing injuries and mishaps.
A needle threader is a handy tool designed to pull thread effortlessly through narrow needle eyes. Common styles include fine wire diamonds attached to a metal tab, or small metal hooks.
Threading thick embroidery floss or threading small-eyed needles for fine fabrics purely by hand can cause significant eye and finger strain. A needle threader completes the task in seconds without frustration.
Because wire threaders can break if pulled too forcefully, the trick to making them last is to insert and withdraw them straight through the needle eye. It is an absolute basic tool for boosting work efficiency.
A thimble is a protective shield worn on your finger to help push the needle through thick layers without injury. Available in metal, leather, and rubber, thimbles are worn on the pad or knuckle of your pushing finger.
When sewing tough materials like canvas, leather, or multiple stacked layers, pushing the needle butt with bare fingers can cause painful soreness. Using a thimble correctly minimizes discomfort and allows you to drive needles smoothly through firm fabrics.
The key is finding a style that fits your personal sewing style—whether that's a classic dimpled metal thimble ring or a soft leather thimble that molds to your finger. It is an essential protective gear for comfortable long-term crafting.
A Japanese craft awl (known as a meuchi) features a sharp metal point fixed into a comfortable handle. It is a versatile assistant tool used across almost every crafting domain.
Specific uses include guiding fabric edges under a sewing machine foot, poking out neat corners on turned-out pouches, and punching starter holes. For shaping small details where fingers can't reach, a craft awl is unmatched.
When pushing out turned corners, hook the fine tip gently into the inner seam allowance from the inside and press the corner out bit by bit to achieve crisp, professional corners. Keeping one on hand dramatically improves the polish of your items.
Needle cases and pincushions keep sharp needles securely organized and prevent them from getting lost during work. Stray needles are not only injury hazards but can be dangerous if dropped on the floor.
While working, keep your active needles stuck into a cotton-filled pincushion. When storing them away, transfer them into a closing needle case or a magnetic needle keeper. Magnetic needle cases are especially convenient because they instantly snap up stray needles from your table.
Pincushions stuffed with natural wool or oil-bearing fibers also help prevent needle rust. They are vital items for prolonging the life of your tools and maintaining a safe creative workspace.
As we've covered, every sewing tool has a distinct and important purpose. Here are my personal rules of thumb for beginners looking to build their first tool kit efficiently.
When diving into handmade crafts, many people wonder whether to buy an all-in-one sewing kit or collect tools individually. My advice is simple: Buy high-quality individual items for core cutting and stitching tools (scissors and needles), and supplement the rest with kits or budget items.
The quality of your fabric shears and sewing needles directly affects your finished product. Poor scissors slip and create jagged cuts, while rough needles snag fibers and ruin fabric surfaces.
You don't need expensive high-end tools for everything right away, but investing in core tools that make direct contact with your fabric and thread is the ultimate trick to preventing frustration.
Nowadays, you can purchase basic sewing supplies at 100-yen budget shops and discount stores. While I strongly encourage using budget tools wisely, knowing where to compromise is crucial.
For example, marking pens, rulers, needle cases, and basic pins from budget shops work completely fine. On the other hand, fabric shears, thread snips, and primary hand-sewing needles should always be purchased from trusted manufacturers at dedicated craft specialty stores.
Specialty store scissors and needles offer vastly superior durability and precision, transforming your crafting comfort. Discerning where to spend and where to save is the mark of a smart crafter.
If I were starting hand-sewing or machine stitching from scratch today, I would acquire tools in the following order:
Understanding the clear purpose and role of each sewing tool transforms crafting into a smooth, rewarding experience. Tools aren't just utility items—they are reliable partners that help bring your creative visions to life.
If you've ever struggled with uneven stitching using improper tools, simply switching to the right equipment can instantly solve the problem!
In upcoming dedicated articles, I'll dive even deeper into choosing specific tools, comparing brand characteristics, and sharing maintenance tips to make your gear last a lifetime. Be sure to check out those specialized guides as well!
Arm yourself with the right tools, and let's create wonderful, one-of-a-kind handmade treasures together!
If you found this guide helpful, sharing it with your crafting friends on social media would mean the world to me. See you in the next article—this was Yassy from Crafters!




For example, if you are looking for articles about mizuhiki, try searching for "mizuhiki"; if you are interested in tools, try keywords like "nippers" or "pliers."
