A Beginner’s Guide to Miniature & Dollhouse Crafting: Genres, Costs, Workspace, and Care
yassy
Crafters!
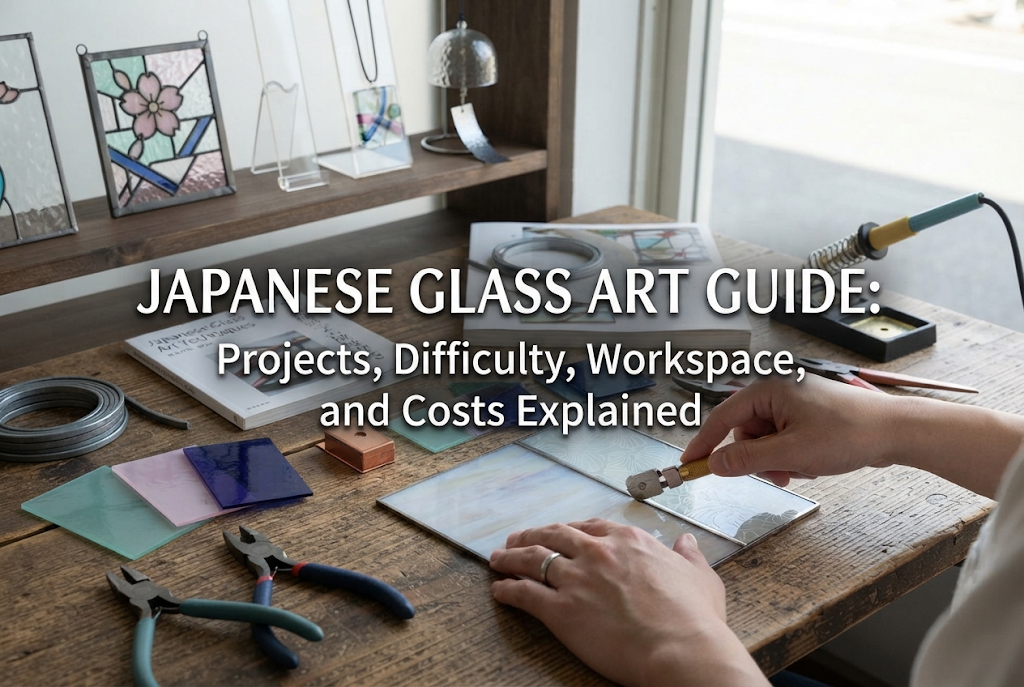

Hello, everyone! This is Yassy from Crafters! (・∀・)
Almost everyone has admired the captivating sight of sunlight streaming through translucent colored glass, casting vibrant colorful shadows across the floor. Yet, many people give up on making stained glass themselves thinking, "I'm scared of cutting glass," or "Using a soldering iron seems dangerous and too difficult."
There is a craft that solves all these concerns and lets you safely create gorgeous, authentic-looking stained-glass style pieces right at your home dining table: Glass Art! When I first saw a Glass Art piece, I was completely captivated by its breathtaking clarity and the rich, heavy texture of its metallic lines.
For anyone interested in Glass Art but wondering, "Can I really do this?" or "What tools do I need, and how much will it cost?", this guide covers everything you need to know! Drawing from my knowledge and hands-on experience, I will explain the variety of projects you can create, handling tips, difficulty levels, workspace setup, and budget expectations.
Glass Art is a craft technique where designs are drawn on a single sheet of glass or acrylic board using specialized color films and self-adhesive metal lead wires (lead tape).
Unlike traditional stained glass, there is no need to cut out individual glass pieces or solder them together. By applying color film and lead wire to both sides of a single base plate, you achieve an exquisite, sophisticated finish that is virtually indistinguishable from real stained glass when light passes through it.
The biggest differences between traditional stained glass and Glass Art are safety and ease of execution. Creating stained glass requires cutting glass with a glass cutter, grinding edges, and joining metal using high-temperature soldering irons—carrying inherent risks of cuts and burns.
In contrast, Glass Art requires zero glass cutting. The only things you cut are thin specialized films and soft lead wires that can easily be trimmed with scissors or a craft knife.
Because it involves no heat or dangerous chemicals, the greatest strength of Glass Art is that anyone—from children to seniors—can enjoy it safely indoors.
Beginners often confuse Glass Art with glass paints (stained-glass style paints) or dip art often found in craft shops.
Glass paint is easy because you simply apply paint with a brush or tube and let it dry. However, it can easily leave uneven brush marks, and over time, the paint layer may peel or fade.
The specialized film used in Glass Art is highly resistant to UV rays and offers remarkably uniform color. Furthermore, thanks to its specialized multi-layer structure, it produces a smooth sheen and clarity that looks like it was made by a professional.
Additionally, because the lead wire used for outlines is made of real metal (such as lead or brass), it provides a three-dimensional depth and solid weight that paint lines can never replicate.
Glass Art can be applied not only to flat glass and acrylic, but with a little technique, also to curved glass objects. Here are representative projects you can try as you step up your skills!
The absolute foundation of Glass Art and the best starting project for beginners is a photo frame or framed panel.
You apply floral or geometric designs onto a transparent glass or acrylic plate. Placing it near a window allows sunlight to scatter colorful shadows across your room, instantly elevating your interior decor. A postcard- to A4-sized piece can be completed perfectly in just 2 to 3 hours, even for a beginner.
Suncatchers and window charms made with small acrylic plates are also incredibly popular.
Hanging them by a window catches the light and makes them sparkle. If you choose lightweight acrylic as a base instead of glass, you don't have to worry about breakage if it drops, making them fantastic gifts.
For those who want to make practical everyday items, glass tableware, trays, and coasters are highly recommended.
By applying film and lead wire to the underside of a glass tray, the top surface remains smooth glass while displaying beautiful decoration beneath. Using it as an accessory holder or key tray by your entrance brightens up your day instantly.
Once you get used to the technique, you can challenge three-dimensional items like cylindrical candle glasses, lanterns, glass wall clocks, or decorative mirror borders!
Lanterns and candle holders, in particular, reveal a completely different, dreamy mood when an LED light is placed inside, casting luminous colors into the dark. It is one of the most rewarding ways to experience the magic of Glass Art.
You might wonder, "If it's just film and tape stuck on glass, won't it peel off or fade quickly?" To give you a straightforward answer: if made correctly and handled normally, it will maintain its beauty for many years! However, there are a few essential rules you must follow.
Specialized Glass Art color films feature exceptional weatherability and UV resistance. The materials are durable enough to be used on exterior window glass, so displaying your piece near a sunny window inside will not cause rapid fading.
Since the lead wire is real metal, you can also enjoy how it gradually develops a charming, subtle antique patina over time.
The absolute rule for Glass Art is no washing in water or submerging! While there is special adhesive on the back of the lead wire and film, soaking the piece in water allows moisture to seep in from the edges, weakening the adhesive and causing peeling.
Therefore, Glass Art is not suitable for daily tableware washed with sponges or placed in dishwashers. If decorating glasses or plates, be sure to place decorations on the outside or areas that won't touch mouth or water during washing.
Daily maintenance is extremely simple. If dust accumulates, simply wipe it gently with a dry, soft microfiber cloth (like an eyeglasses cleaning cloth).
If you notice fingerprints or oils, wipe gently with a tightly wrung damp cloth, then immediately dry it with a dry cloth. This easy routine keeps its glossy transparency intact for a long time.
Among handmade crafts, the difficulty level of Glass Art is low to medium. Since the main process involves cutting film along pattern lines and sticking lead wire onto the base, you don't need artistic drawing skills—just follow the template for guaranteed success!
However, there are three common hurdles beginners face. Knowing these practical tips in advance will help you achieve professional results right from your first try!
The most common frustration is that lead lines turn out rigid or bent instead of forming smooth, elegant curves.
Lead wire is soft and bends easily by hand, but trying to bend it abruptly with force causes sharp kinks.
[How to Fix It]The secret rule is to rest the pad of your thumb along the lead wire and gently curve it using the natural roundness of your finger before applying it to the base! Apply gentle pressure with the pad of your finger—never your fingernails—to create strikingly smooth curves.
When applying the film to the base, trapped air bubbles can become noticeably visible when held up to the light.
[How to Fix It]Instead of sticking the entire film down at once, peel back the backing paper gradually from one edge while smoothing out air bubbles with a specialized squeegee or bone folder.
If air bubbles do get trapped, gently peel the film back to that spot and reapply it. Alternatively, if the bubble is located where a lead wire will cover it, you can prick a tiny hole with a fine needle to release the air and flatten it completely.
In Glass Art, lead lines cross over each other frequently. If these intersections aren't pressed down properly, the ends can lift up over time.
[How to Fix It]At intersections, flatten the underside of the top overlapping lead wire slightly, then press down firmly with your squeegee tool. Pressing forcefully bonds the lead wires together into a seamless joint, preventing any peeling.
If you're worried that you don't have enough room in a small apartment, don't worry! Glass Art is one of the best space-saving crafts available.
All you need for Glass Art is enough desk space to place an A3-sized cutting mat.
It generates no dust or debris, creates no harsh odors, and makes no noise. You can enjoy it in an apartment late at night without worrying about family or neighbors. If you need to take a break, simply put the mat away on a shelf in seconds.
The tools required to start Glass Art are simple and compact:
Most tools take up very little space. However, I strongly recommend getting a proper Glass Art pressing tool (bone folder style) rather than a makeshift substitute. It makes a dramatic difference in both durability and aesthetic finish!
When picking up a new hobby, initial setup cost and ongoing expenses are key factors. Glass Art offers incredible cost performance!
If starting completely from scratch, your initial setup cost will likely fall between 3,000 and 8,000 Japanese yen (around $20 to $55 USD).
The smartest and most economical choice is purchasing a Starter Kit that includes basic tools, materials, templates, and a frame. High-quality starter kits are available online for around 3,000 to 5,000 yen.
Even if you prefer picking out tools individually, using basic stationery like utility knives and scissors you already own keeps total costs under 8,000 yen for a complete workspace setup.
Material costs per piece depend on size:
One roll of lead wire lasts across multiple projects, and leftover film scraps can be reused for smaller accent pieces. The more you make, the less material goes to waste, reducing the cost per item!
If I were starting Glass Art for the very first time today, I would follow these exact steps to ensure 100% success without frustration!
Avoid starting with 3D glass objects or curved surfaces! It increases difficulty dramatically.
Instead, choose a simple, flat acrylic photo frame (A5 or postcard size). Acrylic won't shatter if dropped, is lightweight, and lets you focus entirely on learning the technique.
Selecting the right template is key to early success. Avoid intricate geometric patterns or continuous sharp curves at first.
Select designs featuring straight lines reminiscent of classic stained-glass grids, or simple motifs like large leaves or tulips. You will enjoy a smooth crafting flow and the thrill of completing your piece cleanly.
The biggest secret to making Glass Art look like authentic stained glass is double-sided application!
After finishing the front side with film and lead wire, flip the base plate over and apply lead wire to the exact same lines on the back. Sandwiches the glass between metallic lead lines on both sides gives your work a realistic, three-dimensional stained-glass structure from any angle.
Don't skip applying lead wire on the back—and press it down firmly with your squeegee. This extra step is the golden rule for achieving store-quality results!
Glass Art is a wonderful craft that frees you from the hazards of cutting glass or heat from soldering irons, allowing anyone to safely enjoy the beauty of light art.
With just a single table in your living room, you can start today. Starter kits make it affordable to gather professional-quality materials, and your finished pieces will dramatically brighten up your living space.
There is an indescribable feeling of pride and achievement when sunlight shines through a piece you created with your own hands, spreading vibrant stained-glass shadows across the room!
If you want to fill your home with beautiful light or craft stylish interior decor safely, jump into the world of Glass Art! I guarantee that your handmade light creations will make your daily life richer and more delightful.
If you enjoyed this article, sharing it with friends on social media or messaging apps would mean the world to me!
Until next time, happy crafting! This was Yassy from Crafters!


For example, if you are looking for articles about mizuhiki, try searching for "mizuhiki"; if you are interested in tools, try keywords like "nippers" or "pliers."
