A Complete Guide to Japanese UV & LED Resin Crafting: Projects, Difficulty, Workspace & Costs
yassy
Crafters!

Hello everyone, it's Yassy from Crafters! (・∀・)
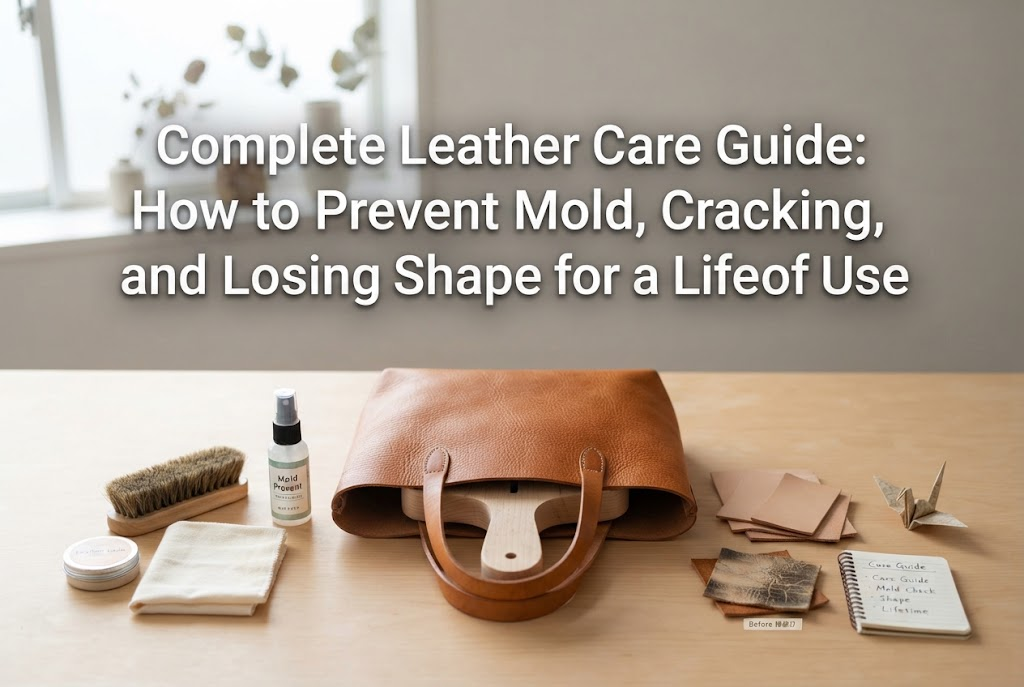
Whether you make your own leather goods, shop from talented indie artisans, or simply love buying and using quality leather items, there is something truly special about this material. The greatest charm of genuine leather is how it softens to your hands over time, developing a unique, personal character as it ages. In my daily life, I am surrounded by leather pieces—ranging from handmade small leather goods I crafted myself to wonderful bags I picked up at craft markets.
However, no matter how much you love your leather pieces, they can deteriorate in the blink of an eye if you don't know how to care for them properly. Have you ever experienced leather drying out and cracking, finding sudden mold growth, or ending up with nasty water stains after a rainy day? With the right care, genuine leather is a magnificent material that can easily last 10, 20 years, or even a lifetime.
In this guide, I will walk you through the essential rules of leather maintenance, covering everything from fundamental basics and common beginner pitfalls to emergency troubleshooting and my own personal routine. Master these habits to protect your cherished pieces from mold and dryness, nurturing them into lifelong companions!
To understand leather care, remember one key fact: genuine leather was once the skin of a living creature. When an animal is alive, its skin naturally receives regular moisture and oils from within the body. Once processed into finished leather goods, however, it receives no internal nourishment whatsoever. Without regular, conscious replenishment from us, leather is destined to dry out and degrade.
Neglecting leather leads to four major problems:
Many beginners jump into maintenance with good intentions, only to use incorrect techniques that damage the leather even faster than neglect. Let's clear up three common misconceptions:
This is the single most common mistake. People eager to add shine or extend durability often slather on thick coatings of oil or cream. But over-conditioning is poison to leather.
Excess oil over-softens the fibers, causing the leather to lose its firmness and structure until it turns floppy and deformed. Furthermore, trapped oil serves as direct fuel for mold spores, drastically increasing the likelihood of an infestation. Never apply so much product that the surface feels greasy or sticky.
Never clean leather with soaking towels or commercial wet wipes. Standard disinfectant or wet wipes containing alcohol will dissolve both the natural oils and the leather dyes, causing stark water spots, discoloration, and rapid drying. Even when using plain water, wiping in a way that leaves standing moisture creates water stains.
When you acquire a new piece, it's tempting to take it out straight away. However, skipping "pre-care" (conditioning before first use) is risky. Products sitting on store shelves or in warehouses for months are often already depleted of moisture and oils.
Taking unprotected leather outside exposes it immediately to exhaust fumes, dust, and rain. When you bring home a new leather item, start by brushing away surface dust and applying a light protective layer before your first outing.
Leather care doesn't require an overwhelming collection of specialized tools. With just these five essentials, you can care for everything from small wallets to large bags and footwear:
A horsehair brush is the single most vital tool. Horsehair bristles are soft, supple, and dense. They sweep away dust and debris caught along seams and folds without scratching delicate leather surfaces. In fact, horsehair brushing covers roughly 90% of your daily maintenance needs. Choosing a brush with a sturdy, comfortable wooden handle makes routine use effortless.
In addition to horsehair, keep a boar bristle brush on hand. Boar bristles are stiffer and firmer than horsehair. Briskly brushing with boar bristles after applying cream or conditioner generates light friction heat, helping the product melt and distribute evenly deep into the fibers. It flicks away excess cream and produces a clean, natural luster. Keep your horsehair brush strictly for dusting and your boar brush for buffing cream—do not mix them up.
While leather conditioners and oils come in endless varieties, beginners should start with a dedicated delicate cream. Heavy conditioners like mink oil pack an intense oil punch that easily causes dark stains if over-applied. Delicate creams, by contrast, are primarily water-based with a gentle balance of oils.
They replenish essential moisture to keep leather supple, carrying minimal risk of spotting or greasy residue. The finish feels light, clean, and smooth, making it safe for nearly all smooth leathers.
You need soft cloths for applying cream and buffing. Synthetic fabrics can scratch smooth leather surfaces, so stick strictly to soft, 100% cotton material. Specialized polishing cloths are fine, but clean scraps cut from an old 100% cotton t-shirt or soft fleece work wonderfully. Avoid terry cloth bath towels, as loose loops and lint stick to the leather surface.
To guard against rain and accidental spills, a protective spray is indispensable. Always choose a fluororesin-based spray. Avoid silicone-based waterproofing sprays, as silicone forms an airtight film across the grain, sealing off breathability. Fluororesin coats individual leather fibers without clogging pores, preserving breathability while delivering powerful water repellency.
Once you have your tools assembled, follow this standard sequence: dusting, hydrating, blending, and protecting.
Never apply cream directly over dust. Spreading conditioner over a dusty surface traps fine grit and acts like an abrasive polish, scratching the grain.
Hold your horsehair brush and flick your wrist briskly in light, rhythmic strokes across the entire surface. Pay close attention to zipper tape edges, stitched seams, and creased folds where fine dust accumulates. Use the tips of the bristles to lift out trapped debris.
Once clean, replenish moisture with delicate cream. The cardinal rule here is: never apply too much at once. Wrap a cotton cloth around your index finger and dab an amount no larger than one or two grains of rice.
Do not touch the cream directly to the leather yet. Rub the cloth against an unused section of fabric or the back of your hand to distribute the cream evenly across the cloth fibers. Test a small dab on an inconspicuous spot (such as the base or inner seam) to ensure it doesn't cause discoloration. If clear, quickly spread the cream across the surface in small, light circular motions. Spreading it rapidly prevents localized saturation and uneven tone.
After coating the leather, let it sit for a couple of minutes so the moisture can begin penetrating. Next, pick up your boar bristle brush and brush firmly over the whole piece. The stiff bristles and friction heat drive the conditioner deep into the leather fibers while dislodging any excess surface paste. You will immediately notice a refined, gentle luster emerging.
To finish, take a clean, dry cotton cloth and gently buff the entire surface. Removing lingering surface moisture and oils eliminates tackiness and produces a smooth, silky touch. The more you buff, the more depth and natural gleam the leather reveals.
Finally, apply your fluororesin waterproofing spray. Step outdoors or into a well-ventilated area, hold the can approximately 30 cm (about 12 inches) away, and mist the piece evenly until the surface looks lightly damp. Spraying too close causes runs and spot stains. Once sprayed, leave the piece undisturbed to dry completely for at least 30 minutes.
How often should you perform these steps? Too much care weakens leather, while too little causes dryness. Divide your maintenance clearly between daily and periodic care:
Taking 10 to 20 seconds at the end of the day or over the weekend resets oils transferred from hands, outdoor dust, and daily wear. This small habit alone prevents the vast majority of mold and deterioration issues.
Thorough conditioning with creams is only needed every month or two, during seasonal changes, or whenever the surface feels dry and sounds papery to the touch. You definitely do not need to apply cream every day.
Even with careful use, accidents happen. Rushing into the wrong fix can ruin leather permanently. Here is how to handle common emergencies safely:
Never dry wet leather with a hot hairdryer or leave it in direct sunlight. Sudden heat and accelerated drying harden leather proteins, causing severe shrinkage and brittle cracks.
Finding white mold after pulling an item out of storage is disheartening, but early-stage surface mold can be cleaned up at home.
Take the item outdoors and stand upwind before touching it, preventing spores from scattering indoors. Wipe away visible mold using a tightly wrung damp cloth (or one lightly dampened with diluted rubbing alcohol). Always test alcohol on a hidden corner first, as it can lift dyes on some leathers. Once clean, dry the item thoroughly in a shaded, airy area. Follow up with delicate cream, and consider a leather-safe anti-mold spray to prevent recurrence.
If neglected leather turns chalky, stiff, and dry, apply delicate cream in several thin layers over multiple days. Saturating desiccated leather with heavy cream all at once causes uneven spotting. Apply one sheer coat, let it rest for a full day to absorb, and repeat the next day. Repeating this two to three times revives surprising softness and restores rich color depth.
How leather is stored during off-seasons matters just as much as how it is handled while in use. Poor storage leads to warped silhouettes and mold colonies.
Never leave leather items sealed inside plastic bags or dry-cleaning packaging. Plastic traps humidity inside, creating an ideal incubator for mold. Store items inside breathable non-woven fabric bags or plain 100% cotton dust bags to block dust while allowing air circulation.
Storing an empty leather bag upright causes it to collapse under its own weight, creating deep structural creases and permanent distortions. Pack the interior with filler (anko) to preserve its shape.
Crumpled newspaper wrapped in clean white paper or breathable fabric works best; newspaper ink offers light moisture-absorbing properties, but wrapping it prevents ink transfer to interior linings. Fill the bag until it holds its natural shape comfortably without bulging.
Sunlight shining through windows bleaches and discolors leather in a matter of months. Direct airflow from air conditioners causes sharp, localized dehydration. The bottom of humid closets is equally hazardous. The ideal spot is an elevated, well-ventilated shelf out of direct sunlight. If keeping items in a wardrobe, air out the space regularly and place moisture absorbers nearby without letting them touch the leather.
Genuine leather behaves differently depending on tanning and finishing processes. Tailor your approach to the specific leather type:
Unfinished vegetable-tanned leather (often called nume leather in Japanese craft circles) features an un-dyed, un-coated surface. It shows the most dramatic patina over time, but it absorbs liquids instantly. Pre-care before first use is crucial. Exposing the piece to mild indirect sunlight for a short period encourages natural oils to rise to the surface, creating a protective foundation before misting with fluororesin spray.
Saturated with heavy oils and waxes during manufacturing, oiled leather is supple and hard-wearing. Because it already retains abundant oils, it requires delicate cream or oils far less frequently. Routine care consists primarily of dry horsehair brushing and buffing with a clean cloth.
Suede and nubuck feature velvety raised fibers created by sanding. Never apply standard creams, waxes, or oils to napped leathers; conditioners flatten the nap into greasy matted patches that cannot be restored. Care for napped leather solely with specialized brass or rubber nap brushes to sweep dirt free, followed by a dedicated suede water repellent spray.
Reading through all these guidelines might make leather maintenance sound intimidating, but there is no need to overcomplicate things. I don't spend hours every single day pampering my leather gear. Instead, I rely on a simple, low-effort routine that is easy to sustain.
When I return home, I pick up my horsehair brush at the entryway and give my wallet or bag a brisk 10-second sweep. That's all! Just ten seconds clears away the day's accumulated grime and reset surface dust before it embeds into the grain.
Then, once a month or on a quiet weekend, I put on some favorite music, line up my leather goods on the table, and treat them to delicate cream. Buffing them with a boar brush and seeing the rich glow return makes maintenance feel like a calming, meditative ritual rather than a chore. It is pure joy for any craft lover.
Taking care of genuine leather is an ongoing partnership. To recap the most vital points:
Handmade leather creations and carefully chosen leather items are more than ordinary objects—they share life's journeys alongside you. Every scratch, bend, and gentle patina mark turns into a warm memory. With mindful, simple care, your leather pieces will grow richer, softer, and more handsome with every passing decade.



For example, if you are looking for articles about mizuhiki, try searching for "mizuhiki"; if you are interested in tools, try keywords like "nippers" or "pliers."
