How to Use and Choose a Wire Bender: A Practical Guide to Creating Uniform, Beautiful Wire Findings
yassy
Crafters!

Hello, crafters! It is Yassy from Crafters! (・∀・)
Have you ever struggled with an uneven, bumpy surface on your clay work, or had layered materials peel apart shortly after gluing? Relying solely on your hands and fingertips to flatten materials or press them together has its limits. No matter how carefully you press, the natural contours of your fingers and slight inconsistencies in pressure inevitably show up on your finished piece.
This is where smoothing and pressing tools—such as craft rollers, brayers, and rolling pins—make all the difference. In my own work, whether creating miniatures with resin clay, stitching small leather pouches, or crafting boxes with cartonnage (a European paper and fabric craft popular in Japan), incorporating the right roller transformed the quality of my work immediately.
However, "rollers" encompass a huge variety: crystal-clear acrylic rollers for flattening clay, heavy-duty pressure rollers for bonding leather or paper, traditional wooden rolling pins, and more. Grabbing whatever looks closest can lead to sticky messes, torn clay, or scratched surfaces. In this guide, I will walk you through the distinct characteristics of each roller type, how to pick the right one for your medium, and professional techniques to elevate your crafting finish.
Beginners often ask: "Can't I just press clay flat with my palms?" or "Isn't pressing leather or fabric firmly with my hands enough?" There is a noticeable difference between hand-pressed and roller-pressed work. Here is why rollers are a must-have tool in any craft workspace.
1. Absolute Uniformity in ThicknessIn clay sculpting and paper arts, uneven thickness is the leading cause of warping during drying or cracking during baking. Finger pressure leaves subtle depressions, creating an undulating surface. Rolling a straight, flat cylinder across your material produces a smooth, perfectly consistent sheet in seconds.
2. Complete Air Bubble Removal and Superior Bond StrengthWhen bonding materials with glue—whether in leathercraft, cartonnage, or decoupage—trapped air pockets weaken the bond over time. Even if layers seem attached initially, those bubbles cause edges to lift days later. Applying even, concentrated force with a pressure roller drives out air and excess adhesive, bringing layers into intimate contact for a permanent bond that hand pressure simply cannot match.
3. Greater Efficiency and SpeedA roller covers a broad surface quickly and evenly. This speed allows you to shape clay before it dries out, or secure bonds before the glue sets, keeping your workflow clean and stress-free.
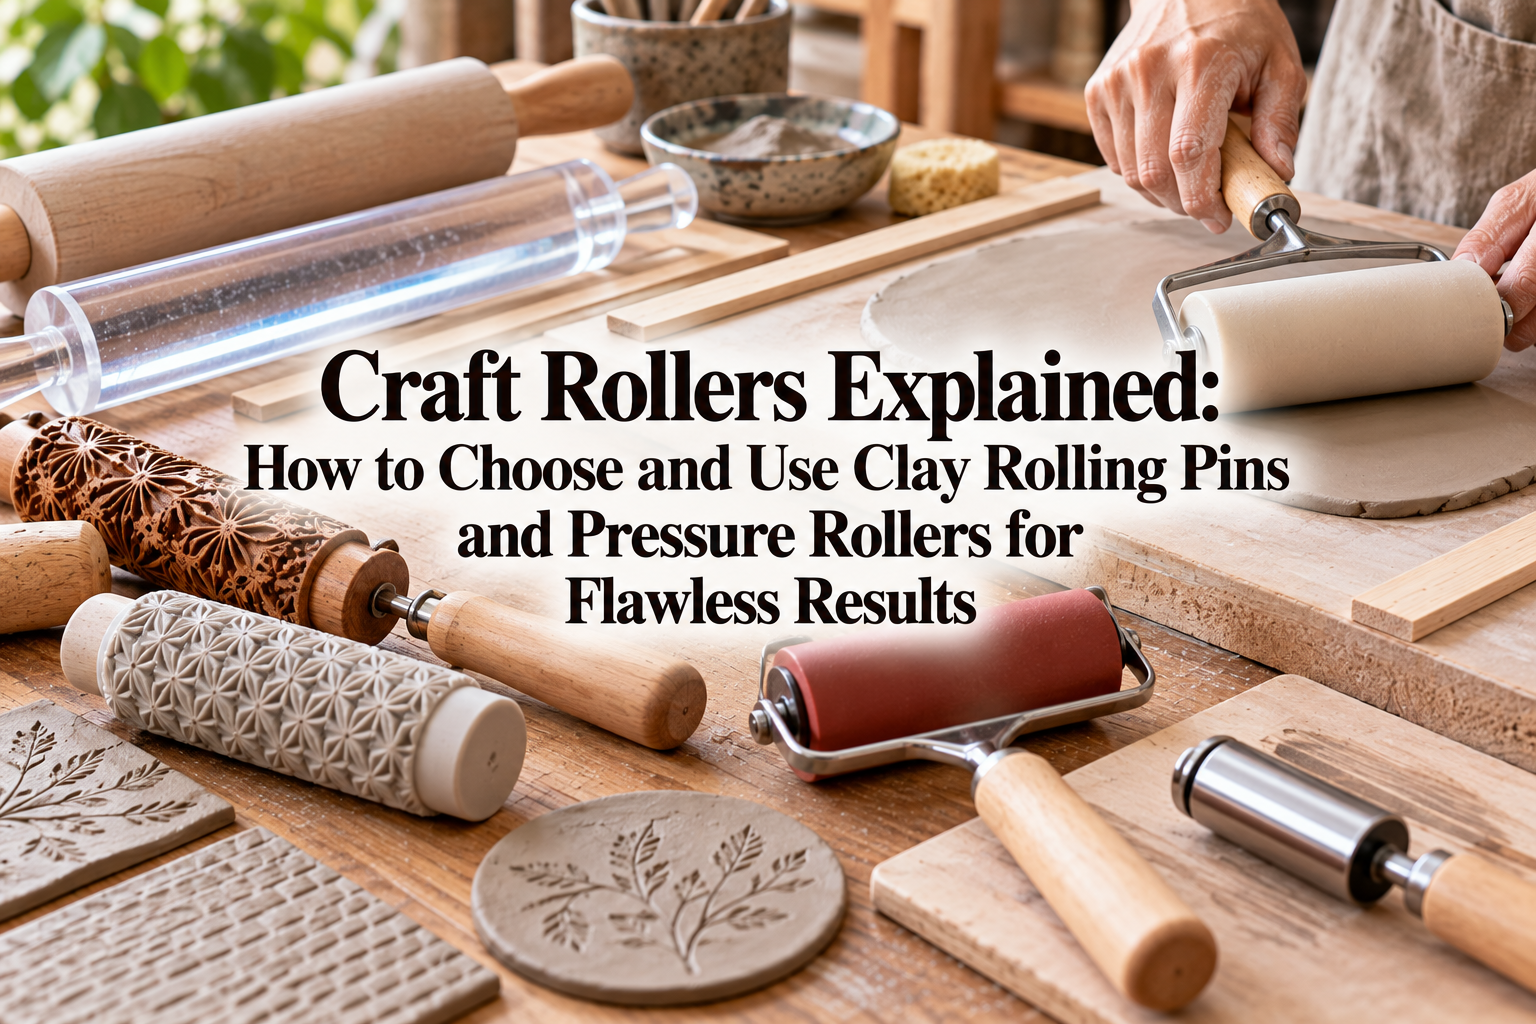
Let us begin with rollers designed for flattening clay and soft sculpting materials. The material and surface finish dictate how cleanly they release your clay.
Standard wooden rolling pins are familiar from baking and readily available. They have a comfortable, natural weight and feel nice in the hand. However, I generally advise against using wooden rolling pins for polymer clay or Japanese resin clay (a popular air-dry clay known for its elasticity and fine finish).
Wood contains subtle grain lines and natural pores. When rolling moist or oil-based clays, the wood grain transfers directly onto the clay surface. Even worse, the clay fibers cling tenaciously to the wood, causing thin sheets to tear. Wooden pins are best reserved for natural air-dry stone-powder clays (sekiso nendo) where a slightly rustic, rough texture is desired, or specialized crafts where grain texture is welcome. Never use them when you want a glass-smooth finish.
For modern clay modeling, solid acrylic rollers are the top recommendation. These smooth, clear plastic cylinders are widely available at craft supply stores.
Their biggest advantage is a high-gloss, mirror-smooth finish. Clay glides right under them without snagging, producing clean, flat sheets. Because acrylic is completely transparent, you can clearly see the clay underneath as you work, spotting trapped bubbles or checking the placement of embedded elements in real time.
Acrylic rollers work wonderfully with resin clay, lightweight air-dry clay, and polymer clay (oven-bake clay). They rinse clean easily with water, and dried clay residues wipe away effortlessly, making maintenance a breeze.
Plastic rolling pins generally fall into two categories: smooth and embossed.
Next up are pressure rollers, designed to bond layers securely and create crisp fold lines. Structurally, these feature a rotating cylinder attached to a handle, allowing you to focus strong, directional pressure onto a specific area.
Featuring a firm yet elastic rubber cylinder, these rollers are versatile workhorses. Because the rubber yields slightly, it conforms to minor surface variations without gouging or marring your material, distributing even pressure across the surface.
Hard rubber rollers are indispensable for cartonnage (gluing paper or fabric onto heavy bookbinding board), decoupage, paper crafting, and applying large adhesive labels. They gently yet firmly press out trapped air without creasing delicate paper.
These rollers feature solid steel or brass cylinders, making them notably heavy. The combination of your physical pressure and the tool's built-in heft allows you to apply intense downward force.
This tool is essential in leathercraft. After applying cement to join two leather pieces, rolling with a heavy metal roller fuses the cross-sections (the edges or "koba") into a solid unit. This dramatically improves seam strength and creates a cleaner edge for burnishing. Metal rollers are also unmatched for flattening sharp folds in thick leather.
These tools feature soft foam or sponge cylinders. Rather than applying heavy pressure, they are intended for delicate smoothing or applying thin, uniform layers of ink and paint, similar to printmaking brayers.
When laminating delicate materials like fine Japanese washi paper or sheer lace, switching from a firm rubber roller to a soft urethane roller eliminates the danger of tearing or stretching fragile fibers.
It is natural to wonder whether common household items can do the job before buying dedicated tools. Here is why common DIY substitutes fall short.
I strongly recommend avoiding both cardboard cores (like plastic wrap tubes) and glass bottles.
While heavy cardboard cores feel rigid, they flex slightly in the middle under rolling pressure. This produces a clay sheet that is thick in the center and thin along the edges. Furthermore, dry paper fibers absorb moisture from the clay, causing it to stick firmly.
Glass bottles (such as small beverage bottles) appear smooth, but most molded glass features a faint vertical seam line from the manufacturing mold. Rolling a bottle across clay imprints that seam line directly onto your work, ruining the smooth surface. The dimensional precision of a bottle cannot compete with a dedicated craft acrylic roller.
Standard household painting rollers from hardware stores are also unsuitable for precision craft bonding. Paint rollers are built with textured naps for holding paint, and their central axles often have noticeable wobble. When you try to apply focused, precise pressure, the axle shifts, dispersing force unevenly and risking slip marks across your material.
Investing in tools built specifically for crafting and leatherwork is the fastest way to avoid frustrating mistakes.
To help you pick the best tool for your workbench, here are my straightforward recommendations based on your primary craft:
Your pick: Solid Acrylic Roller (approx. 15–20 mm diameter, 15–20 cm length).Choose a solid acrylic rod rather than a hollow acrylic tube. The solid core provides enough natural weight to flatten clay smoothly without forcing you to press down with excessive hand strain.
Your pick: Metal Pressure Roller (approx. 35–60 mm roller width).A compact width between 35 mm and 60 mm gives you great maneuverability, letting you apply strong, localized pressure along curved seamlines as well as straight edges.
Your pick: Hard Rubber Roller / Brayer (approx. 100 mm roller width).A wider rubber roller allows you to smooth broad fabric and paper surfaces efficiently, sweeping air bubbles toward the outer edges without damaging the texture.
Even the best tool needs proper technique. Here are three methods that will immediately improve your finished work.
When rolling clay with an acrylic roller alone, uneven pressure between your left and right hands will leave one side thinner than the other. You can eliminate this issue completely by using thickness guide rulers (acrylic or wooden spacer bars of uniform thickness, such as 1 mm, 2 mm, 3 mm, or 5 mm).
The roller cannot dip below the height of the rulers, guaranteeing a sheet of clay with 100% uniform thickness across its entire area. This technique is invaluable for miniature cookies, cake bases, and delicate clay petals. Whenever you buy an acrylic roller, always grab a matching pair of thickness guides to go with it.
Although acrylic has an exceptionally smooth surface, sticky resin clays can occasionally adhere and lift. To prevent this, apply a microscopic coat of baby oil or petroleum jelly to the roller. Dab a drop onto a tissue and lightly wipe down the roller surface. The oil creates a fine barrier that releases clay cleanly. Remember to wipe off any excess with a dry tissue, as too much oil can alter clay texture or interfere with water-based coloring.
When laminating paper, fabric, or leather, never roll back and forth randomly across the surface. Rolling aimlessly traps air bubbles in the middle with no way out.
Always work outward from the center in a radial pattern. Place the roller firmly in the center of the glued piece, then roll outward toward the top, bottom, left, and right edges. Guiding the air toward the perimeter ensures complete bubble evacuation and a tight, permanent bond.
Take good care of your rollers so they stay in prime condition for years to come.
While acrylic is durable, it scratches easily when it touches metal blades or scissors. A single groove on your roller will transfer a raised line onto every piece of clay you roll. Never toss an acrylic roller loose into a toolbox alongside craft knives or metal files. Wrap it in a soft microfiber cloth or store it in its original packaging. When cleaning off clay residue, wash it gently with water or a soft wet wipe—never scrub it with abrasive sponges.
Metal and rubber pressure rollers feature internal bearings or steel shafts inside their handles. If adhesive or glue seeps into the axle gap and dries, the roller can seize up, causing it to drag and tear your materials instead of spinning smoothly. Wipe away stray glue immediately with a damp cloth, and apply a single drop of light machine oil (such as sewing machine oil) to the axle joints periodically to keep the rotation effortless.
Rollers and brayers are often viewed as simple, basic tools, but understanding their differences elevates the precision and durability of your handmade work. By pairing an acrylic roller with thickness guides for clay, or using dedicated rubber and metal pressure rollers for paper and leather, you will achieve clean, professional results with far less effort.
Select the ideal roller for your favorite medium, add these techniques to your daily crafting routine, and enjoy making your next project better than ever!
If you found this guide helpful, please share it with your fellow makers. Happy crafting, and see you in the next post! — Yassy




For example, if you are looking for articles about mizuhiki, try searching for "mizuhiki"; if you are interested in tools, try keywords like "nippers" or "pliers."
