Craft Knives & Cutters Guide: Types, Materials, and Pro Techniques to Transform Your Cuts
yassy
Crafters!

Hello, this is Yassy from Crafters! (・∀・)
Have you ever wanted to lay your favorite rug in your room, only to find that off-the-shelf products just don't have the design or size you're looking for? For handmade craft enthusiasts and interior design lovers alike, "tufting" is a craft that is currently generating incredible enthusiasm!
Once you experience the satisfaction of freely creating plush, 3D rugs and interior items with your own hands, it becomes truly addictive. I have enjoyed many different crafts myself, but I feel a deeply genuine charm in tufting due to its extraordinary level of expression and the dynamic fun of making things.
In this article, I will address common questions like "I'm interested in tufting, but does it look too difficult?", "Can I do it in a small room?", and "How much does it cost to get all the tools?" From a creator's perspective, I'll provide a thorough guide covering what you can make, the actual difficulty level, the required environment, and the budget you'll need.
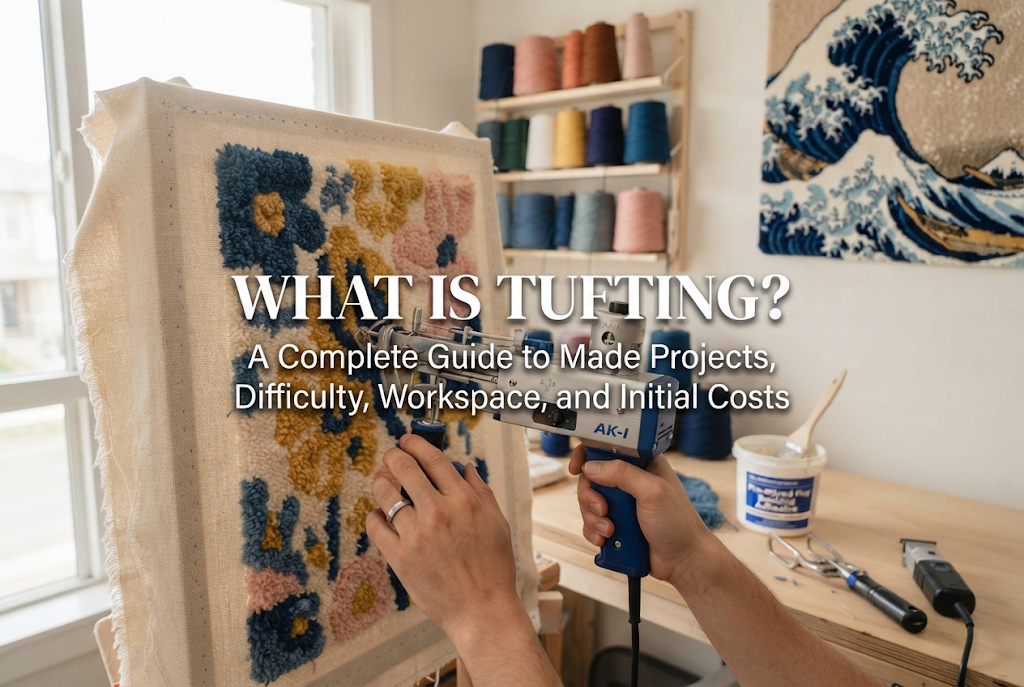
Tufting is a textile craft technique where yarn is shot into a specialized primary backing cloth using an electric tool called a "tufting gun." Originally a technology used in the industrial manufacturing of carpets and large rugs, the arrival of compact tufting guns designed for individuals has turned it into a massively popular handmade genre worldwide.
The mechanism is surprisingly simple. Using the gun from behind a specialized cloth stretched tightly on a wooden frame, yarn is repeatedly punched through like a piston. The inserted yarn forms loops or cut strands on the front side, which gather together to create a soft, fluffy carpet surface.
If you are familiar with punch needle crafts, it is very easy to picture: think of tufting as an automated, large-scale electrical version of punch needle. Because yarn can be inserted dozens of times faster than doing it by hand, its biggest strength is allowing you to create large rugs in a short amount of time.
The reason tufting enjoys such passionate support lies in its overwhelming freedom of design and high level of finish. Whether it's your favorite illustration, geometric patterns, beloved characters, or uniquely shaped rugs, you can bring the exact design in your mind to life. Its charm is the ability to create items with a distinct presence and luxurious feel that you can never buy in stores.
Large floor rugs aren't the only things you can make with tufting. Depending on your ideas, you can create a wide variety of interior items and fashion accessories. Here are some representative examples of what you can create:
Many people worry, "Isn't it too difficult to use an electric tool like a tufting gun?" To give you a straightforward answer, the difficulty of the tufting technique itself is not high at all. Even without an artistic background or specialized dexterity, anyone can make a beautiful rug once they grasp the basic techniques.
This is because in tufting, you can project a design onto the canvas with a projector, trace the sketch, and simply tuft along those lines. The key to success relies more on handling the equipment correctly than on manual drawing skill.
However, diving in without understanding how it works can lead to classic beginner mistakes. Let's look at the three major frustration points beginners encounter and the absolute rules to prevent them.
The most common failure in tufting is tearing a hole in the fabric. Ninety percent of the time, this is caused by slack in the fabric stretched across the wooden frame.
If you press the gun against soft, sagging fabric, the needle will snag and snap the cloth, causing it to tear. The ironclad rule is to stretch the cloth as tight as a drumhead, so it makes a clear "pock-pock" sound when you tap it with your hand. Because the fabric stretches during the process, you must not neglect re-tightening it multiple times as you work.
The tufting gun must be pressed firmly against the cloth at a completely perpendicular (90-degree) angle. If your pressure is too weak, the needle won't penetrate cleanly through to the back of the cloth, causing the yarn to fall out without being secured.
Additionally, the movement direction of the gun should generally be from bottom to top. Moving the gun upward from your feet toward your head allows its mechanical feeder to push yarn smoothly. Forcing it to move top-to-bottom or sideways can tear the fabric.
The tufting gun pulls in and shoots yarn at high speeds. If there is any snagging or resistance between the yarn cake and the gun, yarn won't feed properly, resulting in dry fires that damage the backing cloth.
To ensure smooth feeding from the yarn source, it is essential to use a yarn holder or prepare your yarn cakes in advance so the strand pulls effortlessly from the center.
A tufting gun is a very powerful electric tool. The main challenges in handling it come down to its weight, safety management, and regular maintenance.
Tufting guns mainly come in two types: "Cut Pile" and "Loop Pile," as well as 2-in-1 models that can switch between both.
If you are a beginner buying your first gun, a Cut Pile gun (or a 2-in-1 set to cut pile) is definitely the right choice. With a cut pile gun, an internal mechanism automatically snips the yarn as it's inserted, allowing you to tuft continuously and speedily. The resulting texture is soft and fluffy, making it much easier to trim and shape with clippers later.
The body of a tufting gun alone weighs about 1.4 kg to 1.5 kg (around 3 to 3.3 lbs). Holding this with both hands while pressing firmly against the cloth puts considerable strain on your arms and shoulders over extended periods.
Working in an awkward posture causes your lines to become shaky. The basic posture is to keep your elbows close to your body, supporting the weight with your core. Be sure to take frequent breaks while working.
The tip of a cut pile gun houses sharp, fast-moving scissors and needles. Never touch the area around the front opening while the unit is plugged in or operating.
Furthermore, when threading yarn or clearing jams, always turn off the power switch and unplug the machine from the outlet. This prevents accidental injuries caused by accidentally stepping on the foot pedal or triggering the switch. Working on the gun while it remains powered on is strictly prohibited.
The gun contains precision mechanical parts moving at high speeds. Before and after use, it is mandatory to apply machine oil (such as sewing machine oil) to its moving components. After finishing work, use a brush or canned air to thoroughly remove yarn dust and lint from inside the machinery. Neglecting this maintenance shortens the gun's lifespan and noticeably reduces punching precision.
When starting tufting at home, the biggest hurdles are securing workspace and dealing with noise and debris. Setting up a solid environment in advance will save you trouble later.
Depending on the rug size, setting up a 70 cm x 70 cm (approx. 27.5 x 27.5 inches) frame—a manageable size for beginners—requires a dedicated space of at least 2 meters x 2 meters (roughly 6.5 ft x 6.5 ft).
This is because, in addition to the thickness and depth of the frame itself, you need room to stand while working and extra distance to step back and check the overall design. The frame must be clamped securely to a sturdy workbench or table. Trying to tuft on a wobbly table prevents accurate line work.
One unavoidable aspect of tufting is operational noise. A tufting gun produces a continuous rapid sound—resembling a heavy-duty sewing machine or small power tool—along with the sound of electric clippers during finishing.
When working in shared housing like apartments, taking precautions against sound and vibrations traveling through walls and floors is essential. In addition to covering the floor with soundproof mats or thick rugs, limit your work strictly to daytime hours and avoid late nights. Placing sound-dampening rubber pads between your clamps and table can also drastically reduce vibration noise passed to the furniture.
During tufting, an unbelievable amount of yarn scraps and micro-fiber dust flies around. To prevent fluff from spreading throughout your living space, take these precautions:
A helpful tip I recommend is ensuring good room ventilation and wearing a smooth apron that yarn doesn't easily cling to.
If you assemble a personal tufting setup completely from scratch, the initial cost typically ranges from ¥40,000 to ¥80,000 (roughly $270 to $550 USD). While this is on the higher side for a craft, once you have the tools, future projects only require purchasing yarn and backing fabric.
Here is a detailed breakdown of the required tools, budget estimates, and selection points:
If spending over ¥50,000 right out of the gate feels like a high barrier, joining a local tufting workshop is the absolute best alternative. For around ¥10,000 to ¥20,000, you can try out the professional tools under an instructor's guidance to see if you genuinely love it before purchasing a full set.
Here is a step-by-step walkthrough of all 6 stages of creating a finished tufting piece. Understanding the workflow gives you a clear mental picture before starting.
Hook your primary backing cloth onto the frame's tack strips, pulling it as tight as possible from all four sides. The trick to a clean finish is keeping the grid lines straight and perfectly horizontal/vertical without warping.
Dim the room lights and use a projector to project your design onto the back of the stretched cloth. Trace the outline with a permanent marker. Because yarn is shot from the back and appears on the front side, always mirror (flip horizontally) any letters or asymmetrical designs!
Thread yarn into the gun and begin punching along your traced lines. The standard order is to outline the design shapes first, then fill in the interior areas. Aim for an ideal density—neither packing lines too tightly nor leaving visible gaps.
Once all tufting is complete, use a spatula to spread latex adhesive evenly across the entire back surface. This permanently locks the yarn loops in place. Before the glue dries completely, apply your secondary felt backing cloth and allow it to dry thoroughly.
After the glue has dried completely, cut the backing fabric off the wooden frame using scissors. Fold the excess border fabric inward, glue it to the back using hot melt glue or contact adhesive, and cover the edges neatly with binding tape.
Flip the rug over to the front and trim any stray long threads. Use carpet clippers to level the surface height (shearing), then tilt the clipper blades at an angle along color borders to carve deep grooves (carving). This carving step creates crisp definition and 3D depth, transforming your piece into a professional, store-quality work of art!
Compared to crafts you can start with simple stationery, tufting requires a bit more preparation in terms of securing space, managing noise, and handling initial setup costs. However, the immense satisfaction and breathtaking quality of the finished pieces make it more than worth the effort.
The exhilaration of watching your own design turn into a dimensional rug right before your eyes at high speed is something you simply cannot experience in any other craft. As long as you never compromise on stretching your cloth tight, strictly follow gun safety rules, and take care with the final carving stage, you can create surprisingly high-quality rugs right from your first try.
Whether you begin by taking a workshop or starting with a small frame kit at home, I hope you experience the joy of making your very own luxurious, plush rug. Living with a favorite handmade rug in your room is truly the best!
If you enjoyed this guide, sharing it with your friends on social media or messaging apps would make me super happy and encouraged!
Until next time, see you in the next article! This was Yassy from Crafters!





For example, if you are looking for articles about mizuhiki, try searching for "mizuhiki"; if you are interested in tools, try keywords like "nippers" or "pliers."
