A Beginner’s Guide to Clay Sculpting Tools: How to Choose and Use Modeling Tools and Shaping Sticks
yassy
Crafters!
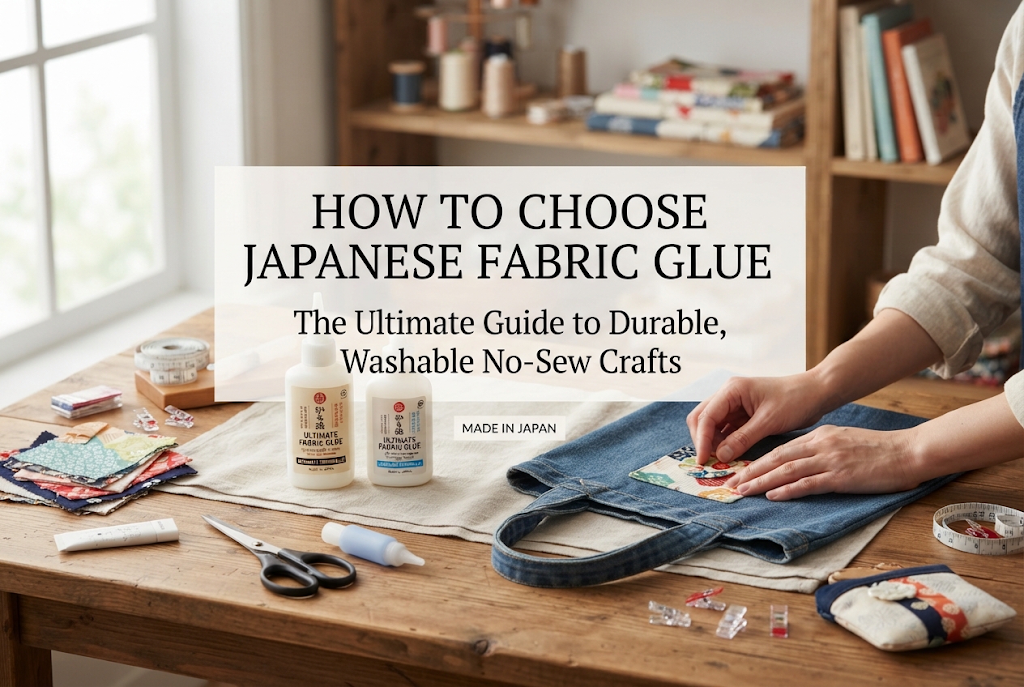

Hello, everyone! It’s Yassy from Crafters! (・∀・)
When making handmade fabric accessories, I'm sure you've experienced moments where you thought, "I want to make something easily without thread and needles," "Setting up the sewing machine is too much hassle," or "I want to attach tiny embellishments neatly."
That is when fabric glue (fabric bond) plays a massive role.
Fabric glues available in Japan today have advanced dramatically. You can completely toss away old stereotypes like "it peels off right away" or "it turns rock hard."
If you choose the right product and apply it correctly, it can provide durability that rivals or even exceeds sewing machine stitches, remaining intact even on everyday items subjected to repeated washings.
Personally, I love sewing, looking at, and buying fabric crafts, but I rely heavily on fabric glue in my daily work to attach accent parts and refine delicate details beautifully.
However, with countless fabric glues lining the shelves of craft stores, online shops, and 100-yen shops, I frequently receive questions like, "Which one should I buy?" or "I bought one blindly, but it bled through the fabric and ruined my project!"
Choosing the wrong fabric glue can fatally ruin both the appearance and the durability of your craft.
In this article, I will explain everything from how beginners can select the perfect glue without confusion, a fabric compatibility matrix, to professional pressing techniques to prevent failure!
Reading this will dramatically speed up your fabric crafting and raise your work's quality to the next level. Read through to the end and use these techniques in your next project!
First, let's look at the absolute advantages of using fabric glue over hand-sewing or using a sewing machine.
Understanding these benefits will give you clear criteria for deciding which parts of a project to glue and which to sew.
In my experience, the three biggest reasons to use fabric glue are overwhelming work speed, reaching places where needles cannot go, and achieving a completely flat finish.
With hand sewing or machine stitching, thread lines will always show on the surface, no matter how carefully you sew.
Fabric glue leaves no thread marks at all, resulting in a clean, flat finish. It makes folded edges, attached ribbons, lace, or patches look far more polished.
Sewing tiny fabric pieces or narrow folded hems that don't fit neatly under a presser foot is extremely difficult. Forcing it often causes fabric to pucker and distort.
Fabric glue allows pinpoint application with dots or lines, enabling even beginners to hold delicate pieces perfectly in place in seconds.
There is no need for preparation like winding bobbins or threading needles. You simply apply and press, cutting production time by more than half. It serves as a powerful ally when creating large quantities of items for craft fairs or gifts.
Fabric glues differ greatly in usability and suitable applications depending on their physical form.
Many crafters fail by searching for a single "all-purpose" glue, but understanding the traits of each shape is the first step to success. Here is an overview of the four main types found in Japanese craft supply shops.
This is the most common liquid craft glue supplied in squeeze tubes. It features a moist paste-like consistency that penetrates deep into fabric fibers to form a strong bond.
If you want to create durable items that can withstand washing or dry cleaning, liquid type is your primary choice. Always use liquid glue on high-stress areas like bag handles, pouch bottoms, or garment hems.
In addition to applying it directly from the nozzle, you can spread it thinly using the included spatula. Because it takes a short while to dry, beginners have time to adjust alignment.
This shape resembles stationery glue sticks. It does not spread messily upon application, allowing you to coat surfaces evenly without dirtying your hands.
Because it contains less water than liquid glue, its main feature is that it rarely bleeds through to the front side of the fabric. It excels at temporary basting, joining thin fabrics, and cartonnage (attaching fabric to paperboard).
Its easy coverage control makes it ideal for delicate work. However, because it lacks deep liquid penetration, it is not suited for bonding heavy fabrics tightly.
This category includes cobweb-like fusible sheets and double-sided adhesive tapes on rolls. Placed between fabric layers, the adhesive melts and sets when ironed.
Unlike liquids, there is no unevenness in application. The uniform thickness prevents wrinkles and bumps. It is perfect for long hem adjustments or attaching large patches completely flat.
Furthermore, because it cures as soon as you iron it, there is no waiting time for drying, allowing you to move to the next production step immediately.
This type dispenses a fine mist of adhesive. When you need an even coat over a wide fabric surface, spray glue is the only choice.
It is used for bonding quilt batting to face fabrics, securing linings entirely, or temporarily fixing fabrics into embroidery hoops.
It coats far more thinly and evenly than hand-applied glue without forming clumps. However, overspray will scatter, making proper work area protection (such as laying down newspaper) essential.
Have you ever checked the ingredients list on the back of glue packaging? The chemical components dictate water resistance and flexibility after drying.
Instead of relying solely on the front label that says "For Fabric," always check the ingredient details on the back to pick the perfect glue for your project's purpose.
For crafts subjected to frequent washing or repeated bending, glues based on urethane resin or silicone are the absolute right choice.
After drying, they retain rubber-like elasticity and flexibility, preserving the natural drape of the fabric. They are highly water-resistant, staying firm even through machine washings. Use liquid urethane glues for lunch bags, school gear, and daily clothing repairs.
These user-friendly glues can be thinned or cleaned up with water. They feature low odor and wash off hands easily, making them ideal for beginners and children.
While easy to wipe away with water before drying, they are somewhat susceptible to prolonged soaking or heavy washing after curing. They suit decorative home accessories or small pouches that do not need frequent laundering. Most formulas dry clear and remain inconspicuous.
These glues melt and cross-link when subjected to heat and pressure from an iron, setting with high strength. Adhesion increases significantly compared to room-temperature drying alone.
If you want to prevent peeling during washing or are making bags that carry heavy items, always choose iron-compatible urethane liquid glues or heat-bonding sheets. That extra step of applying heat raises your durability to a professional level.
Fabrics vary by fiber content and weave, including cotton, polyester, denim, and lace. Ignoring fabric traits can lead to disasters like bleed-through stains or adhesive peeling off easily.
Compatibility: ExcellentNatural fibers absorb glue deep into their structure, making them the easiest to bond. Liquid, stick, and tape glues all work well. However, on extremely thin cotton lawn, excess liquid glue can seep through. For thin natural fabrics, use a stick glue or spread liquid glue extremely thin using a spatula.
Compatibility: Very Strong (With Conditions)Heavy, coarse-weave fabrics absorb a large amount of glue. Applying a small amount will only harden on the surface, leaving the core bond weak. Apply liquid glue generously (without spilling over edges) and press firmly with a spatula. Using an iron-activated urethane glue applied with heat and body weight provides strength that exceeds stitching. Avoid stick glues or thin applications, as they lack sufficient hold.
Compatibility: High Difficulty (Requires Dedicated Formulas)Synthetic and water-repellent fabrics naturally repel moisture and adhesives. Standard water-based glues will peel off like stickers once dry. Always select urethane or silicone adhesives specifically labeled for synthetics (e.g., "For Polyester/Nylon"). Check fabric heat tolerance when ironing, using a low-to-medium heat setting with a pressing cloth.
Compatibility: High Difficulty (Risk of Bleed-Through)Applying liquid glue to open-weave or ultra-sheer fabrics causes 100% bleed-through, dirtying the surface and leaving stiff spots. Use stick glues that dry clear or narrow heat-bonding tapes. Apply in small dots rather than broad strokes to keep the finish neat.
Compatibility: Requires Multi-Purpose AdhesiveWhen attaching metal zippers, ribbons, plastic parts, or leather to fabric, standard fabric glues won't stick well because they rely on gripping fabric fibers. Use multi-purpose adhesives labeled for "Fabric, Metal, Leather." Formulas that retain slight elasticity after curing prevent parts from popping off upon impact.
Most fabric glue issues stem from improper usage rather than tool quality. Here are five common mistakes and techniques to avoid them.
Squeezing a large bead directly onto fabric causes adhesive to ooze out onto the surface when pressed, leaving permanent stains.
Fix: Use about one-third of the amount you think you need. Dispense glue onto scrap paper or a tray first, then apply a thin layer using a spatula or bamboo skewer. Keep application 2 to 3 mm away from edges to prevent squeeze-out.
Using iron-cured glues with excessive heat can scorch fabric, while insufficient heat fails to melt the adhesive properly. Skipping a pressing cloth can get glue on your iron soleplate, ruining subsequent projects.
Fix: Always place parchment paper or a thin 100% cotton cloth (like a handkerchief) over the area. Parchment paper prevents stray glue from sticking to the iron. Set iron temperature to medium (140–160°C / 284–320°F) with steam OFF, and press firmly down with your body weight for 15 to 20 seconds without moving the iron.
Peeling up a corner early to check if it stuck damages the internal adhesive layer, reducing strength significantly.
Fix: Do not move the fabric after joining. Allow room-temperature formulas to cure undisturbed for at least 24 hours. For heat-set glues, leave the item untouched until it cools completely, as the bond sets during the cooling process.
Applying thick coats of glue on garment hems or pouch openings can turn the fabric stiff like a board.
Fix: Apply glue as thinly as possible and choose flexible formulas containing urethane resin or silicone. Avoid heavy layers of water-based glues that dry rigid.
Washing a handmade bag or pouch can cause seams to fail if the wrong glue or technique was used.
Fix: Use glues explicitly labeled "Water Resistant" or "Washable." Heat-setting with an iron is essential for washable durability. Even for glues labeled "No Iron Required," applying light iron heat boosts water resistance. Always wash finished crafts inside out in a laundry net using a gentle cycle.
Here are professional tips I use in my daily crafting to achieve clean, store-bought quality results.
When joining long edges, liquid glue alone can cause fabric layers to slip. Apply stick glue first at key points to position the fabric securely, then spread a thin layer of liquid glue inside and heat-set with an iron. This prevents shifting and wrinkles completely.
Adhesive strength relies heavily on pressing force. Pressing with fingers alone can cause uneven pressure. Roll a leathercraft roller or mini wallpaper roller over the seam from the center outward to push out trapped air. While room-temperature glues dry, place heavy books or cans on top as weights to ensure a tight bond.
If glue squeezes out accidentally, rubbing it immediately with fingers will spread the stain deep into fibers. For water-based glues before drying, dab gently with a damp, tightly wrung cloth. For urethane or solvent-based glues, dab lightly using a cotton swab moistened with rubbing alcohol or acetone nail polish remover. If glue has already dried, cover with a pressing cloth, reheat with an iron to soften, and pick off carefully with tweezers.
Recommended Type: Liquid (Tube) Urethane Resin Glue (Iron-Heat Compatible)Reason: Bags experience tension when loaded. Applying a thin coat of urethane liquid glue and setting firmly with an iron provides strong pull resistance across bottoms, handles, and zipper ends.
Recommended Type: Heat-Activated Fusible Tape (Double-Sided Tape/Sheet)Reason: Applying liquid glue evenly along long straight lines manually can be difficult. Placing 1.5 cm to 2 cm wide fusible tape inside the fold and ironing over it yields clean, professional hem lines in minutes.
Recommended Type: Stick Glue + Pinpoint Liquid GlueReason: Liquid glues squeeze out easily from narrow trims. Use stick glue across the full strip for initial placement, then apply tiny dots of liquid glue with a bamboo skewer at high-stress ends for combined neatness and hold.
Recommended Type: Water-Based Acrylic Craft Glue (Spread Thin)Reason: Non-washable interior decor items do not require expensive urethane glues. Spreading water-based acrylic glue thinly over cardstock with a brush or sponge creates smooth, wrinkle-free fabric surfaces that dry clear.
To prevent fabric glue from hardening inside the tube between uses, clean the nozzle tip thoroughly with a tissue or wet wipe after every use. Caked glue around the threads can seal the cap permanently or allow air inside to ruin the contents.
Tighten the cap securely and store the tube in a cool, dark place away from direct sunlight. Avoid extreme high temperatures or freezing winter environments, as extreme temperatures cause ingredients to separate.
Fabric glue is not merely a shortcut for skipping sewing; it is a versatile tool that enables flat, clean finishes and delicate embellishments impossible with needles and thread alone.
Key takeaways to remember:
Select the right glue for your material and enjoy expanding your creative fabric projects!
If you found this guide helpful, please share it with your fellow craft friends on social media! See you in the next article—this was Yassy from Crafters!




For example, if you are looking for articles about mizuhiki, try searching for "mizuhiki"; if you are interested in tools, try keywords like "nippers" or "pliers."
