Sashiko for Beginners: What Project to Start With and How to Choose Easy Motifs
yassy
Crafters!

Hello, everyone! I'm Yassy from Crafters! (・∀・)
Whether making my own handmade pieces, admiring exquisite creations at craft shops and exhibitions, or purchasing unique jewelry findings from my favorite artisans, I absolutely love the world of craft making. Wire craft, ranging from delicate wire-wrapped jewelry to striking home decor, never fails to captivate us with its versatile beauty.
However, when beginners attempt wirework, the very first major hurdle they encounter is how to bend the wire properly. Common frustrations include wire not taking the intended shape, curves turning out jagged and uneven, or deep scratches marring the metal surface.
Bending wire successfully requires more than just applying brute force with tools. It is essential to understand the physical properties of metal and combine proper tool handling with the right pressure from your fingers. In this article, I will explain the physical mechanics behind smooth wire bending and share accurate techniques to help you achieve professional-quality finishes every time.
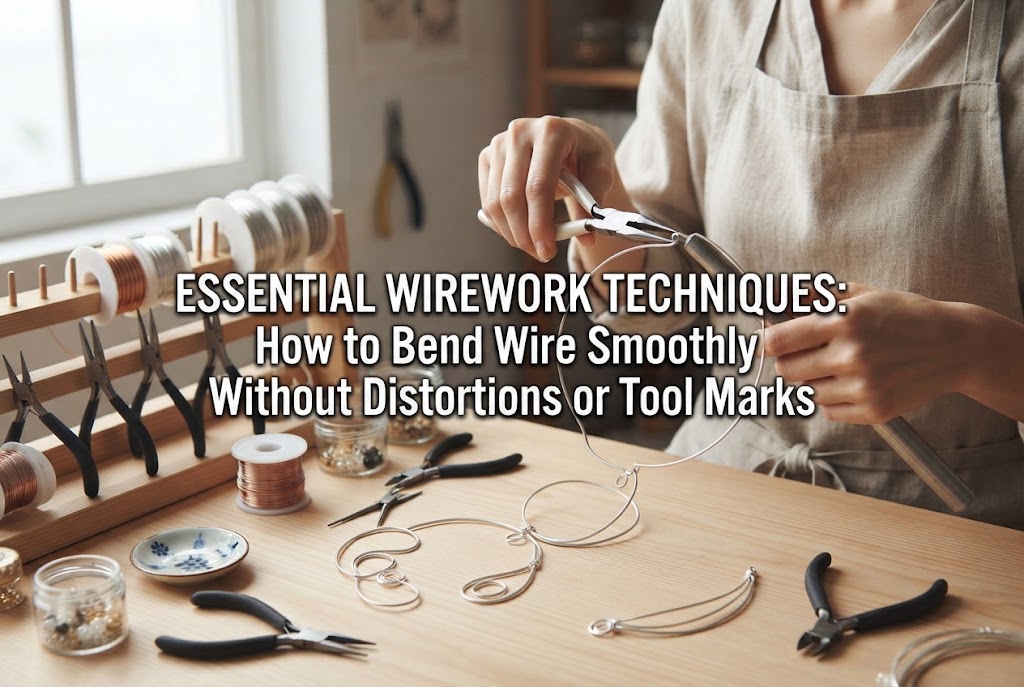
The biggest reason wire fails to form the desired shape is that crafters try to force the metal using only their tools. Pliers—such as flat-nose pliers, commonly known in Japan as yattoko—are designed to act as a stationary fulcrum to hold the wire in place, not as the main force that bends it.
A common mistake among beginners is gripping the pliers tightly and twisting the tool itself to force the bend. Doing this causes the hard metal jaws to dig deeply into the wire, leaving unsightly nicks and scratches. Furthermore, because the fulcrum shifts during the motion, curves become distorted and corners turn out rounded or wobbly.
In addition, metal possesses a physical characteristic known as elastic recovery, or springback—a tendency to bounce back slightly after being bent. If you bend the wire only to your target angle without accounting for this effect, the angle will open up as soon as you release it. To achieve clean, accurate bends, controlling both the bounce-back of the metal and the precise fulcrum of your force is an absolute necessity.
The first step toward successful wirework is establishing clear roles for both hands. The hand holding the pliers serves as a solid foundation, gripping the wire so it cannot shift. The pad of your thumb or finger on the opposite hand acts as the actual bending tool, guiding the wire in the intended direction.
It is crucial to relax the hand holding the pliers. If you squeeze too hard with your entire palm, you lose fine motor control in your wrist and fingers. Hold the pliers lightly using the pads of your fingers, similar to holding a pen, and apply squeezing force only at the moment it is needed.
Specifically, clamp the flat-nose pliers securely just before the spot where you want to make the bend. Place the pad of your opposite thumb directly on the wire, just a few millimeters away from the tip of the pliers. Rather than moving the pliers, slowly push the wire using your thumb. Concentrating the force at the exact fulcrum yields a sharp, clean bend without any unwanted distortion.
Your line of sight during the process is also vital. If you view your work from an angle or from the side, your spatial perception becomes skewed, causing the bend to tilt off-center. Make it a strict rule to position your line of sight directly above the bending point, constantly checking that the wire remains perfectly aligned.
Creating sharp, accurate 90-degree right angles is a fundamental skill for all wire shaping. A rounded or bulged corner gives the entire piece an unrefined look and prevents components from fitting together smoothly.
To create a crisp right angle, use the sharp edge of flat-nose pliers as your guide. Align the edge of the plier tips precisely with your bending mark and clamp the wire. If the placement strays even 0.5 mm from the mark, the final dimensions of your piece will be altered, so focus closely during positioning.
Once aligned, place your opposite thumb as close to the edge of the pliers as possible. Then, in one continuous motion, push the wire firmly against the side of the pliers using the pad of your thumb. Instead of bending little by little while checking the progress, apply steady pressure at a consistent speed to fold the wire along the flat side of the tool.
After bending, remove the pliers and inspect the inside corner. If the corner appears slightly rounded, re-grip the inside of the bend lightly with the tips of your flat-nose pliers and give it a gentle squeeze. This simple readjustment tightens the metal at the bend, producing a razor-sharp, flawless right angle.
When making circles, S-curves, or soft arcs, the worst mistake is repeatedly clamping and bending the wire step-by-step with pliers. This method leaves numerous visible kink marks, resulting in a clunky, polygonal shape rather than a smooth curve.
To draw a seamless, beautiful curve, you must apply continuous, uniform pressure along the length of the wire. The best technique for this is stroking and shaping the wire with your fingertips.
Hold one end of the wire securely with pliers in your dominant hand, and grip the wire gently between the thumb and index finger of your opposite hand. Applying gentle pressure with the pad of your thumb, glide your fingers along the wire while rotating your wrist. Keeping the finger pressure consistent relative to the hardness of the wire creates a smooth, flawless arc without any flat spots or kinks.
If you need to make many circles of identical radius, rely on cylindrical mandrels rather than hand shaping alone. Wrap the wire snugly around round objects such as pens, metal rods, or empty bead vials, pressing the wire firmly with the pad of your thumb as you wind it around. Using a round guide allows you to achieve perfectly uniform curves effortlessly.
Have you ever bent a wire to precisely 90 degrees, only to watch it open up to around 95 degrees as soon as you release the pliers? This physical phenomenon is known as springback (elastic recovery). Before metal undergoes permanent plastic deformation, it generates internal tension that pushes it back toward its original shape.
To overcome springback, you need to calculate ahead of time and over-bend the wire beyond your target angle. For example, if you want a true 90-degree right angle, temporarily bend the wire to approximately 85 degrees. When you release your thumb pressure, the wire will naturally spring back and settle right at 90 degrees.
The amount of springback varies depending on the gauge (thickness) and temper (hardness) of the wire. Keep the following general rules in mind:
Make it a habit to test scrap pieces of wire beforehand to determine how much over-bending is needed for the specific material you are using. Mastering this intuition dramatically reduces corrective work and speeds up your crafting process.
When executing complex or continuous bends, you may notice that parts of the wire lift off the work surface when laid flat. This occurs because subtle, invisible twisting forces are applied along the axis of the wire during bending.
Never attempt to force a twisted component flat with your bare hands. Instead, lay the distorted piece on a flat work surface and press down gently with a finger to identify where it lifts. Clamp the base of the lifted section with flat-nose pliers and apply a micro-twist in the opposite direction—just a fraction of a millimeter—to cancel out the distortion.
To eliminate minor wobbles across the entire piece and achieve a perfectly level profile, using an acrylic plate or plastic mallet is highly effective. Place the finished wire shape on a hard, flat surface (such as a steel block or heavy rubber bench block), lay an acrylic plate on top, and press down firmly using your body weight. This levels the entire structure instantly without damaging delicate wirework.
If a straight section becomes wavy, clamp it using nylon-jaw pliers and pull the pliers smoothly along the wire. The combination of uniform pressure and subtle friction heat smoothes out waves, restoring a crisp, perfectly straight line.
Nothing lowers the perceived quality of wire craft like gouges, scratches, or pinch marks left by pliers. On coated art wire or gold-plated wire, damaged outer layers expose the raw copper core underneath, reducing the beauty and value of your creation.
The fundamental rule for preventing marks is avoiding direct metal-to-metal contact between your tools and the wire. The simplest and most reliable method I use daily is wrapping 2 to 3 layers of masking tape around the tips of flat-nose pliers. The paper texture and adhesive layer cushion the tool, absorbing heavy impacts and preventing scratches completely.
If rewrapping tape feels tedious, investing in dedicated nylon-jaw pliers is the ideal solution. Since the nylon tips are softer than the wire, they will not scratch or nick the wire surface no matter how firmly you grip.
Tool control goes beyond protective covers; pressure control is equally vital. As a rule, hold the wire with the minimum force required to keep it from slipping. Apply firm pressure only at the exact moment of bending, and release your grip immediately afterward. This rhythmic control drastically reduces tool marks.
Through making countless wire pieces and studying the work of incredible artisans, I have summarized three essential mindsets that elevate wirework precision to the next level:
We have covered the physical mechanics and practical techniques required to bend wire cleanly and accurately without distortion.
Success in wirework begins by setting aside brute force, understanding fulcrums and springback, and handling your tools with care. Once you master holding the wire securely with pliers and shaping it fluidly with the pad of your opposite thumb, you will be able to create even complex shapes with ease.
Crisp right angles, smooth curves, and pristine, mark-free surfaces elevate handmade pieces to a truly professional standard. Keep these techniques in mind, practice them step by step, and enjoy creating your own wonderful wire projects!
If you enjoyed this article, sharing it with your crafting friends on social media would mean the world to me and keep me inspired!
Until next time, happy crafting! This was Yassy from Crafters!





For example, if you are looking for articles about mizuhiki, try searching for "mizuhiki"; if you are interested in tools, try keywords like "nippers" or "pliers."
