Secrets to Store-Quality Bath Bombs: Crafting Techniques for a Flawless Finish and Texture
yassy
Crafters!

Hello everyone, Yassy from Crafters here! (・∀・)
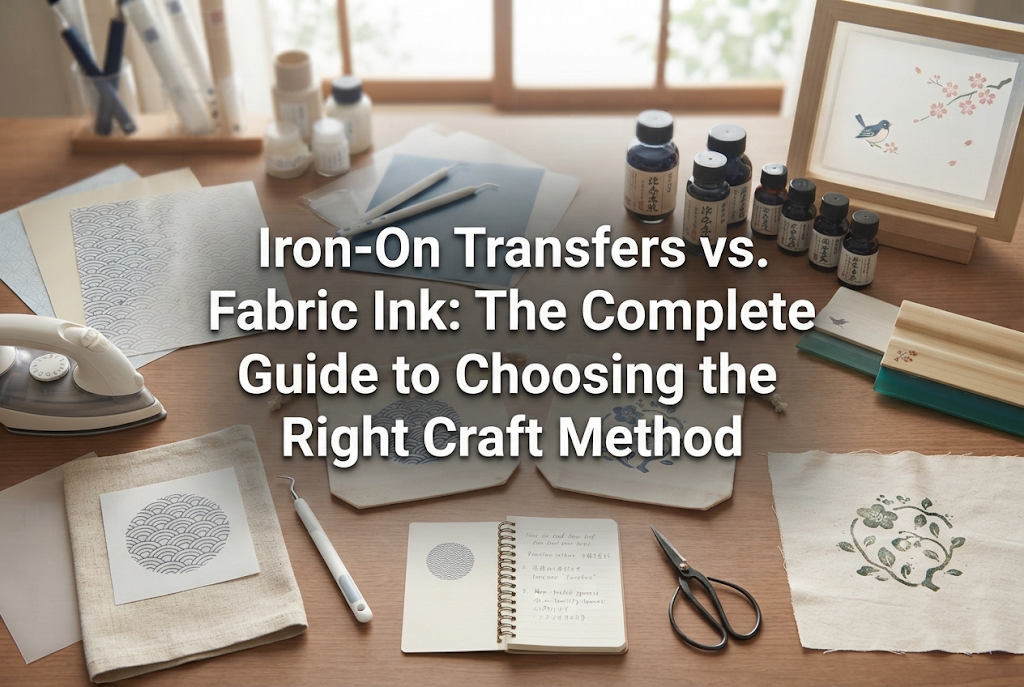
When you want to add original designs, patterns, or lettering to fabric items like tote bags, T-shirts, or pouches, you almost always run into a common dilemma: "Should I use iron-on transfers or fabric ink?"
When I first started crafting, I remember spending what felt like hours standing in the craft store aisle, completely undecided on which one to buy. As someone who loves making, viewing, and shopping for craft supplies, I can tell you with confidence that making the wrong choice here can cause a project you poured hours into to be ruined after just a single wash!
Iron-on transfers and fabric inks differ completely—not only in their visual finish and tactile texture, but also in their durability, fabric compatibility, and creation process. It is not a matter of one being inherently superior to the other; rather, the "right answer" depends entirely on your design vision and how the item will be used.
In this guide, I will break down the fundamental structural differences between iron-on transfers and fabric inks, their pros and cons, wash durability, and pro tricks to ensure zero mistakes. By the end of this article, you will clearly know which method fits your project best and how to craft professional-quality fabric items without fail!
The first thing to understand is how each method fixes designs onto fabric. Grasping this mechanism is the essential first step to avoiding crafting mishaps.
An iron-on transfer is a technique where a thin resin film containing a printed or cut design is bonded to the surface of the fabric using heat and pressure. The back of the sheet features a heat-activated adhesive (hot melt).
Applying heat with a household iron melts this adhesive, forcing it into the tiny gaps on the fabric surface to create a strong bond. In short, you are placing a new, thin resin film on top of the fabric.
Whether you print onto special transfer paper with a home printer and iron it on, or cut out pre-colored heat transfer vinyl (HTV) with a cutting machine, the underlying principle of adhesive film bonding remains identical.
Fabric ink, on the other hand, involves liquid ink soaking directly into the fabric fibers themselves. Fabric stamp pads, fabric markers, stencil inks, and fabric paints all belong to this category.
Microscopic color particles (pigments) sink into the gaps between the fibers. When you apply heat with an iron as a finishing step, the thermosetting resin (binder) inside the ink cures, locking the pigments tightly around the fibers.
Instead of placing a film on top, fabric ink integrates directly with the fibers. This structural difference between "layering a film" and "soaking into fibers" creates a massive distinction in texture and durability.
Texture and color payoff are the two biggest factors influencing the final quality of your work. Your choice depends on whether you aim for a crisp, store-bought look or a soft, warm handmade feel.
The greatest advantage of iron-on transfers is their unmatched color vibrancy and sharp outlines. When you want to reproduce photo prints, complex illustrations, or delicate color gradients, nothing beats heat transfers.
If you use transfer sheets with an opaque white base layer, the background color of the fabric will not bleed through, even on black or dark-colored textiles. Intense reds, vivid yellows, and pure white text come out completely opaque and true to color.
However, the texture leaves a distinct vinyl or rubbery feel. The printed area feels slightly stiff to the touch. Because the film creates tension when folded, applying transfers over large areas will reduce the natural drape and flexibility of the fabric.
The main charm of fabric ink is that it preserves the soft, gentle texture of the original fabric. Because the ink absorbs into the threads, there is virtually no stiffness when touched.
The fabric weave and texture remain visible through the print, making fabric ink an amazing match for natural, vintage, or traditional Japanese-style craft aesthetics. It is ideal for rubber stamp work or stencil painting where handcrafted character shines.
On the flip side, fabric ink cannot achieve the ultra-sharp edge definition of an iron-on transfer. Minor ink bleeding occurs along the fibers, making it unsuitable for high-precision photographic images. Yet, this unique soft warmth is a value that only fabric ink can deliver.
If you plan to sell or gift your handmade creations, understanding how they stand up to laundering is crucial. Knowing how each material changes over time is an essential responsibility for any crafter.
The main enemies of iron-on transfers are fabric stretching during wash cycles and heat from clothes dryers. While fabric stretches and flexes, the surface resin film cannot stretch as easily.
As a result, repeated washing or excessive pulling can cause fine cracks across the design. Furthermore, if the edge adhesion is weak, water can seep underneath, causing the film to peel off like skin.
Degradation in heat transfers appears visibly as peeling or cracking. That said, high-quality transfer sheets pressed correctly demonstrate impressive durability, withstanding dozens of machine washes.
Because fabric ink resides inside the fibers, peeling or cracking is physically impossible. This is a major structural advantage for ink.
Instead, ink wears down the same way regular dyed clothing does: through gradual fading over repeated washes. As the color lightens slightly, it blends further into the fabric.
This aging process creates a desirable vintage look similar to well-worn denim, so even the wear-and-tear becomes part of the charm. As long as the ink has been properly heat-set, it will not wash away completely in everyday laundering.
The fabric fiber type heavily dictates which method will succeed. Choosing the wrong combination can lead to immediate project failure.
Natural fibers like cotton and linen are the absolute best match for both iron-on transfers and fabric ink.
Natural fibers handle high heat (150°C to 180°C / 300°F to 350°F) safely. Their high absorbency also allows fabric ink to penetrate deeply, maximizing color fixation.
When working with cotton or linen, you can freely choose either method based purely on your desired look and feel.
Synthetic fibers require extreme care. They are sensitive to high temperatures and can melt or develop shiny heat marks if exposed to a hot iron directly.
Fabric inks also struggle to absorb into synthetics, often repelling off the slick fibers. Avoid using general fabric inks on 100% polyester, as the ink will wash out in the laundry.
If you want to print on synthetic fabrics, your best option is to use special low-temperature iron-on sheets designed to adhere at lower heat (120°C to 130°C / 250°F to 265°F) in a short time frame.
Fabric color is another critical factor.
When printing on dark fabrics like black or navy, standard fabric ink gets swallowed by the background color and barely shows up. It is like stamping black or red ink onto black paper.
To put bright designs on dark fabrics, choose iron-on transfer sheets specifically formatted for dark textiles.
On light fabrics like white or natural unbleached cotton, both iron-on transfers and fabric inks work beautifully. If you want a soft, organic handmade look on light fabric, fabric ink is the standout winner.
Both techniques have subtle pitfalls that trap beginners. Here are the foolproof solutions based on my own past trial and error!
99% of iron-on transfer failures stem from three causes: insufficient heat, lack of pressure, or using a soft ironing surface.
Many beginners attempt to iron transfers on a cushioned ironing board, sliding the iron back and forth as if ironing clothes. This is the ultimate recipe for failure!
Follow these pro rules for a permanent iron-on bond:
The most common fabric ink issues are colors washing away in the laundry or ink bleeding outwards due to over-application.
Follow these essential rules to get 100% performance from fabric ink:
Here is a quick summary comparing features, feel, durability, and suitable materials:
Now you have a complete understanding of how iron-on heat transfers and fabric inks work!
Iron-on transfers represent modern precision with crisp color clarity, while fabric inks offer a gentle, handmade aesthetic that honors the natural texture of cloth. Neither method is better than the other; choosing the right tool for your specific fabric, design, and intended feel is the true secret to enjoyable crafting.
Start by experimenting on smaller items like cotton handkerchiefs or simple zipper pouches. Once you master the basic pressing and heat-setting techniques, the quality of your handmade fabric creations will soar. Seeing your original design clean and fixed onto fabric is an addictive joy!
Use these pro tips and failure-proof rules to create your next wonderful textile project. If you found this article helpful, feel free to share it with your fellow crafter friends! Happy crafting, and see you in the next article—Yassy out!



For example, if you are looking for articles about mizuhiki, try searching for "mizuhiki"; if you are interested in tools, try keywords like "nippers" or "pliers."
