Level Up Your Japanese Parts Deco Craft: The Golden Tool Upgrade Order for Beginner Crafters
yassy
Crafters!

Hello craft lovers, it's Yassy from Crafters! (・∀・)
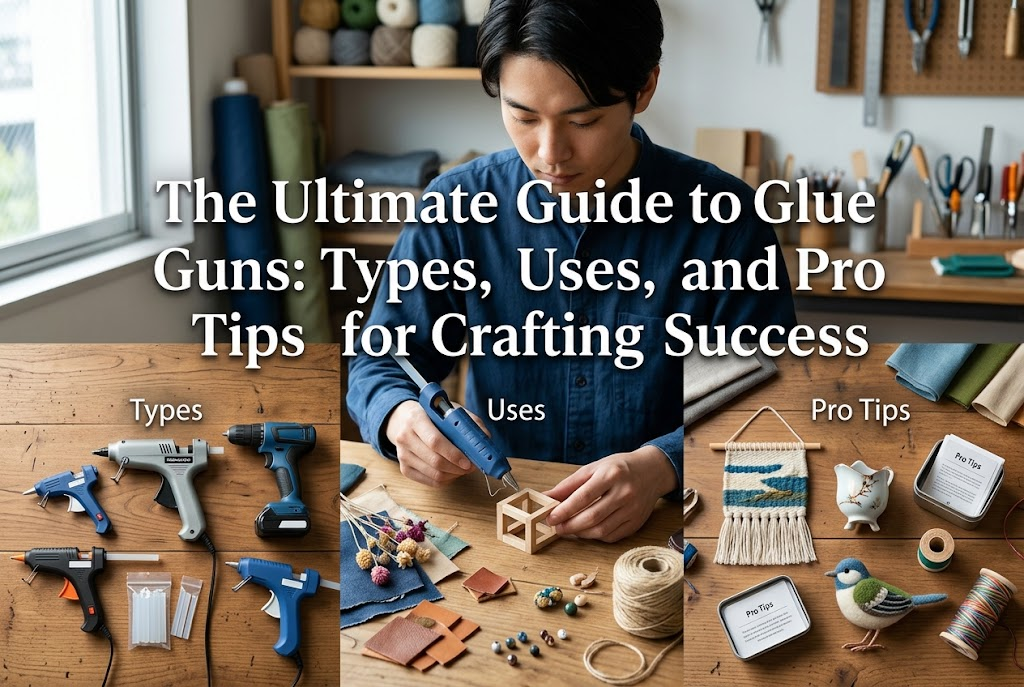
As someone who loves making various handmade items, admiring cute creations, and buying favorite craft pieces, there is one tool that is always within arm's reach on my work desk: the glue gun, which I am excited to share with you in detail today.
From making hair accessories with ribbons and creating dried flower wreaths to assembling wooden home decor, glue guns are in high demand across almost every genre of handmade crafting.
However, I often hear concerns from crafting beginners like, "I'm scared of getting burned," "How is it different from liquid glue or super glue?" or "There are so many types, I don't know which one to buy."
Once you understand how glue guns work, how they differ from other adhesives, and how to choose the right gun and sticks for your needs, both your crafting speed and the quality of your finished pieces will improve dramatically.
To ensure handmade beginners never get lost when choosing or using a glue gun, I will explain everything from basic knowledge to selection criteria and secrets for foolproof handling, all based on my experience.
A glue gun is a craft tool that melts solid cylindrical resin sticks (glue sticks) using electric heat. Pulling the trigger pushes the melted glue out through the nozzle to join objects together. It gets its name from its pistol-like shape.
The biggest appeal of a glue gun lies in its overwhelming bonding speed and strong initial hold.
Standard wood glues and fabric adhesives harden over time as the water or solvent in them evaporates. Because of this, you often have to hold parts together by hand or clamp them with tape or clips for hours so they don't shift.
In contrast, a glue gun bonds objects as the heat-melted resin cools and solidifies. The time it takes for melted glue to cool is only a few seconds to a couple of minutes. Since it sets while you hold the parts together for just a moment, there is practically zero waiting time before you can move on to the next step of your project.
Unlike liquid glues, glue resin hardens into whatever 3D shape it takes while soft. This makes it ideal for filling gaps between uneven materials or fixing components in an upright, dimensional structure.
In the handmade world, dramatically shortening working time and enabling 3D bonding are huge benefits. Once you experience how convenient it is, it becomes an indispensable tool you can't live without.
To use a glue gun, you insert a dedicated glue stick into the back of the tool. There are several types of sticks available, and you should choose one based on your project's purpose and design.
Here are the representative types of glue sticks and their features:
This is the most common and frequently used type in crafting. Because the glued area is not noticeable, you can use it with confidence on flower arrangements, ribbon securing, or attachment of decorative charms.
For beginners, clear or semi-transparent sticks are definitely the first ones you should buy. They blend well with any material without compromising the beauty of your work.
These sticks feature colored resin, such as black, white, red, blue, or brown. Rather than just joining materials, they are used when you want to show off the glue itself as part of the artwork's design. For instance, you can use brown glue to replicate chocolate syrup on faux-sweets crafts, or black glue to create an antique texture.
They are also fantastic for making faux wax seals: simply extrude colored glue onto a surface and press a stamp into it while warm to create a sealed pattern.
This type mixes sparkling glitter into colored or clear glue. It is perfect for projects where you want to add glam, such as embellishing hair ornaments, decorating holiday items, or adding accents to craft parts. Applying it on top of clear glue adds a dimensional, glossy shine.
Glue guns and glue sticks come in two main temperature ranges: high-temperature (high-temp) and low-temperature (low-temp). Selecting the wrong one can cause delicate materials to melt or result in weak bonds that peel off easily. Keep these differences and criteria in mind when choosing.
High-temp glue guns heat up to approximately 160°C to 200°C (320°F to 390°F).
If you are making pieces that require high durability or are fixing larger parts securely, high-temp is clearly the right choice.
Low-temp glue guns operate at a lower heating range of around 120°C to 130°C (250°F to 270°F). Many starter glue guns sold online or at craft budget shops are low-temp models.
Materials like Styrofoam or thin plastic films can melt and form holes if hit with high-temp glue. Always use a low-temp glue gun when working with heat-sensitive materials.
If you work with various materials or want a versatile tool for long-term use, choosing a high-function glue gun with a high/low temperature toggle switch is the smartest option. Switching temperatures with a single flip lets you handle woodworking at high temperatures and Styrofoam bases at low temperatures using just one unit.
In crafting, many adhesives are used, including wood glue, super glue, epoxy, UV resin, and fabric glue. Here is a quick comparison of how glue guns differ from these tools.
Wood glue hardens as water evaporates, drying clear. While it offers a very strong bond, it requires several hours to overnight to dry completely. A glue gun sets in seconds, eliminating wait times. Additionally, wood glue shrinks as it dries, while glue gun resin retains its dimensional volume and thickness.
Super glue reacts with moisture in the air to bond instantly in seconds. However, because it is a thin liquid, it lacks gap-filling capability and only works well on tight, flush-fitting surfaces. It can also turn plastics or fabrics white (blooming). Glue guns fill uneven gaps effectively and do not cause white discoloration.
Fabric glue seeps into textiles to bond while maintaining flexibility, making it durable against washing. While glue guns bond fabrics strongly, the cured resin becomes rigid like hard plastic, making it unsuitable for folding parts or stretchable garments. Use fabric glue for washable clothing, and use a glue gun for non-washable items like hair bows and ribbon ornaments.
UV resin hardens under UV light and is used for clear, decorative molding rather than just bonding. Glue guns simply melt and cool resin, requiring no specialized lighting equipment. Sealing wax uses traditional wax melted over flame or heat to stamp envelopes. While colored glue can mimic wax seals, glue resin remains slightly flexible and is far less brittle than traditional wax.
Here are specific examples of how glue guns excel in handmade crafting:
The floral craft field is where glue guns shine brightest. They are perfect for securing dried flowers, preserved blooms, artificial flowers, pinecones, and nuts onto grapevine wreath bases or arrangements. The natural stems are uneven, but melted glue fills the gaps instantly to lock them in place, speeding up your workflow significantly.
For making kids' hair ties, headbands, hair clips, or ribbon tassels, glue guns are a staple. Securing the center of a folded ribbon or attaching metal hair clips to fabric takes only a few seconds of pressing by hand. Bonding different materials like metal and fabric together is a glue gun's specialty.
Glue guns are also useful for assembling small wooden boxes, securing furniture parts in miniature houses, or attaching accents to faux-sweets projects. Even tiny wooden parts that cannot take nails or screws can be built into 3D structures quickly.
When browsing craft stores or online shops, you'll see many glue guns. Check these 5 key points before purchasing:
Traditional glue guns plug into wall outlets. Corded models offer stable power and maintain constant temperature during long sessions, but the power cord can get in the way or pull the tool over. Cordless USB-rechargeable models have become very popular because they allow 360-degree maneuverability without cord hassle—great for large wreaths or working at craft fairs. Choose corded for long table sessions at home, or cordless for ease of movement.
Inexpensive glue guns often heat up as soon as they are plugged in and lack an ON/OFF switch. Unplugging the cord every time you step away is inconvenient. I strongly recommend choosing a model with a built-in power switch on the handle for safety and convenience.
Glue guns rest on an integrated stand pointing downward while heating up. Some guns drip melted glue constantly from the nozzle, wasting sticks and messing up work surfaces. Look for a model with a sturdy, wide base and a "drip-free" valve design that prevents unwanted leakage.
Glue sticks come primarily in two standard sizes: 7mm–7.5mm (mini/small) and 11mm (full/large). Mini 7mm sticks are standard for most craft projects. Match your stick size to your glue gun model to avoid jams.
Industrial-sized glue guns can be heavy with stiff triggers that tire your hands during long craft sessions. Select a lightweight craft-oriented model that fits comfortably in your hand with a smooth trigger pull.
Follow these standard steps to use your glue gun safely and cleanly:
Place a heat-resistant silicone mat, parchment paper, or thick cardboard on your worktable. This essential prep protects your workspace from accidental drips.
Insert a glue stick into the rear port until it rests securely against the internal mechanism. Plug in the cord, switch it ON, and let it pre-heat for about 3 to 5 minutes. Wait until it reaches full operating temperature before pressing the trigger.
Once heated, gently squeeze the trigger to extrude softened glue. Apply a modest amount to the back of your item or base. Work quickly, as melted glue cools and sets fast.
Press the components together immediately after applying glue. Hold them firmly in place for 10 to 20 seconds. Once the temperature drops, the bond is set. Allow a few minutes for maximum strength to develop.
Turn off the switch and unplug the gun when finished. Important: Never pull a partially used glue stick out from the back of the gun. Pulling it out can draw molten resin back into the mechanism, causing internal damage or electrical hazards. Leave the stick inside to cool; simply heat it up again for your next project. Allow the tool to cool down completely before storing it.
Here are solutions to common frustration points, along with insider techniques for professional results:
When pulling the nozzle away, melted glue can leave fine, cobweb-like strings across your project.
If too much glue squeezes out around the edges, pulling it forcefully can damage your materials. Wait for it to harden fully, then slice it neatly at the base using a craft knife.
Additionally, cured glue weakens when exposed to rubbing alcohol (isopropyl alcohol). Dab a cotton swab dipped in alcohol along the edge of the glue overflow; it breaks the bond, allowing you to peel the excess off smoothly.
If parts pop off after gluing, consider these three main causes:
Although handy, glue guns are thermal electrical tools. Always follow these safety rules to prevent injury:
We've covered everything from glue gun fundamentals and stick types to temperature selection, step-by-step usage, and expert finishing tricks.
While heating tools might seem intimidating at first, understanding how they work makes a glue gun one of the most reliable partners in your craft room.
Freeing yourself from long drying times and mastering dimensional assembly will open up countless new possibilities for your handmade projects.
Find a safe, user-friendly glue gun that fits your hand, and enjoy making your daily craft sessions faster and more fun!
If you found this guide helpful, please share it with your craft friends on social media! See you in the next article—this was Yassy from Crafters!

For example, if you are looking for articles about mizuhiki, try searching for "mizuhiki"; if you are interested in tools, try keywords like "nippers" or "pliers."
