Japanese Leathercraft Guide: The Science of Leather Patina & Care Secrets for Crafters
yassy
Crafters!

Hello, everyone! This is Yassy from Crafters! (・∀・)
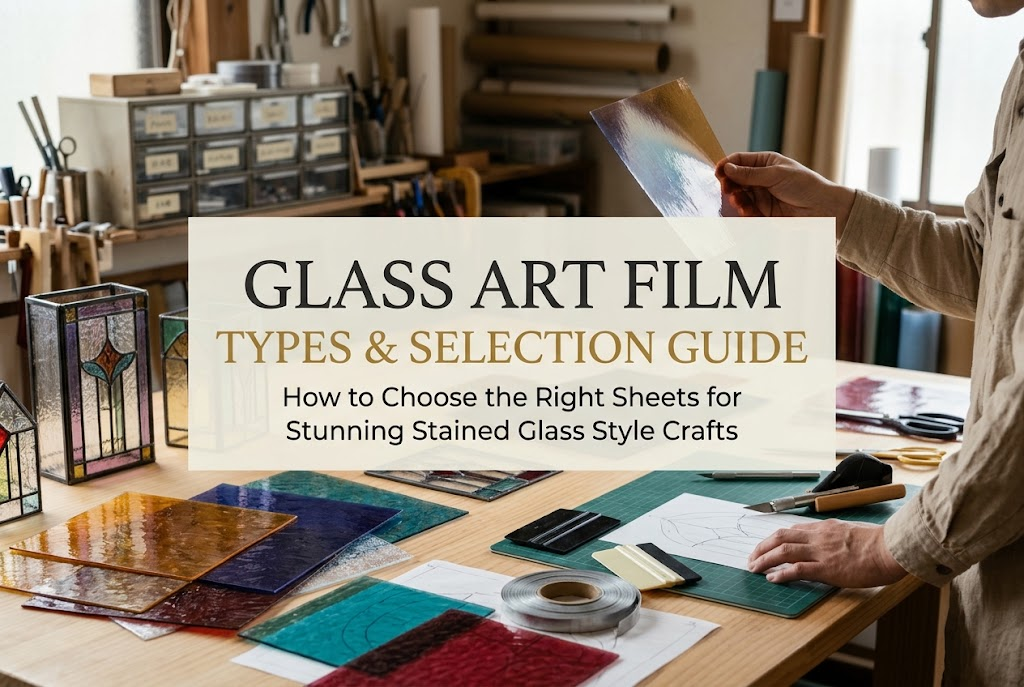
Glass art—a craft where you apply vibrant colored films onto glass or acrylic sheets and frame them with genuine lead lines—is an immensely popular handmade technique in Japan for creating genuine-looking stained glass home decor easily. Personally, I love making glass art pieces, admiring the work of other artists, and collecting beautiful films. Every time light pours through a finished piece displayed on a windowsill, I am deeply moved by the magic of this craft.
However, when crafters take their first step and look for supplies, almost everyone runs straight into the same wall: choosing the right film.
Looking at online shops and specialty craft stores, you are greeted by countless colors, patterns, and surface textures. It is completely natural to feel overwhelmed: “Which one will bring my idea to life?” “Can’t I just use cheap craft sheets from a 100-yen store or dollar shop?” “What is the difference between transparent and milky sheets?”
The choice of glass art film is the single most critical factor determining the quality of your finished project. If you select sheets based purely on surface color without understanding their behavior, holding your finished piece up to the light can result in tragic surprises—colors might look completely washed out, or delicate patterns might vanish entirely.
In this guide, I will thoroughly explain the various types and characteristics of glass art films and share clear criteria for selecting them without mistakes. From common beginner pitfalls to the essential starter combination I swear by, here is everything you need to know to choose the perfect film for your creations.
Glass art film is a specialized synthetic resin sheet engineered specifically for faux stained glass crafting. While it may look like a thin, colorful vinyl sticker at first glance, its structure is fundamentally different from standard stationery vinyl or DIY decorative window cling film.
The greatest feature of dedicated glass art film is its exceptional resistance to fading (weather and light resistance), achieved through a specialized multi-layer structure.
A typical professional glass art film consists of a high-quality base film layer (such as polyester), a weather-resistant color layer, a UV-blocking barrier, a specialized adhesive layer, and a release backing paper. Because the UV-blocking layer is extremely effective, the colors will barely fade or discolor even when displayed in direct sunlight on a windowsill for years.
Furthermore, specialized dyeing techniques are used to allow light to transmit cleanly, producing vivid, uniform illumination when bonded to glass. The adhesive is formulated to adhere tightly to glass or acrylic without air pockets and will not dry out, become brittle, or peel off over time.
Beginners often ask: “Can I substitute this with colored cellophane, cheap craft sheets from the dollar store, or standard sign vinyl?”
The short answer is no. Standard colored craft sheets or cellophane can never serve as a substitute for authentic glass art film, for three critical reasons:
If you want your piece to maintain its beauty for years as a striking interior display, using film produced specifically for glass art is the only true option.
Glass art films are categorized not just by color, but by texture and light transmission. Understanding these categories is the first step toward crafting successful designs.
Solid clear films have no surface patterns; they feature uniform coloration and high transparency, allowing you to see through the glass clearly.
They come in a vast range of shades, from primary reds, blues, and yellows to delicate pastels and muted, dusky tones. Because they transmit light directly, they cast gorgeous, jewel-toned colored shadows onto floors and walls when placed by a sunlit window. These sheets are essential for classic stained glass line designs and should form the foundation of any beginner’s toolset.
These films feature fine embossed textures on their surfaces or within the sheet. Patterns like ripples, waves, or rhythmic dots mimic the artisan textures of real architectural canopy or rolled glass.
Applying a textured film over a flat glass sheet instantly refracts light in complex ways, elevating your work with high-end dimension. Because it gently blurs what lies behind it, textured film is exceptionally effective for privacy-style home decor accents and lampshades.
Marble and gradient films feature multiple colors swirled together or subtle transitions between light and dark shades across a single sheet, evoking the feel of hand-dyed art glass.
Traditional stained glass naturally features organic striations formed when raw molten glass is mixed. Marble film replicates this rich aesthetic perfectly. When depicting organic subjects—flower petals, leaves, ocean ripples, or skies—marble and gradient sheets are indispensable. Depending on which section of the sheet you cut from, the color pattern changes entirely, allowing you to create truly one-of-a-kind expressions.
Opaque films allow almost no light to pass through. They include matte solid tones and reflective metallic finishes.
You might wonder why a craft focused on light transmission would require opaque sheets, but they serve an indispensable role. For instance, when designing a framed piece with a solid wooden backing or a piece hung directly against a wallpapered wall, no backlighting passes through. If you use fully clear film in such settings, the wood grain or wall color bleeds through, dulling your design. When you want colors to pop without light behind them, or when you need bold graphic contrast, opaque or semi-opaque films are the golden rule.
Certain glass art films feature unique Japanese aesthetics, such as textures resembling Japanese washi paper with visible paper mulberry fibers embedded within, or holographic surfaces that shift color depending on the viewing angle.
Washi-style films lend an exquisite, warm atmosphere when crafting Japanese-style lanterns (andon) or traditional Japanese motifs like cherry blossoms, camellias, and kimono patterns. When illuminated, they emit a soft, diffused glow that gives your piece an elegant, refined mood distinct from Western stained glass.
The most common trap for beginners is mistaking the appearance of a film lying flat on a work table for how it will look when illuminated. The color you see on your desk and the color that emerges when sun or electric light shines through the glass are entirely different. Mastering this balance is key to achieving your artistic vision.
Films generally fall into three levels of light transmission:
Where your finished craft will live dictates the film type you should choose:
One of the most enjoyable techniques in glass art is layering (overlaying) films over one another to create fresh custom shades or add dimensional shading, much like blending paints.
When practicing overlays, keep these three rules in mind:
Here are three typical pitfalls crafters encounter when choosing films, along with direct solutions to avoid wasting expensive materials.
The Issue: You buy a gorgeous marble-patterned sheet, cut it into tiny one-centimeter petals for a small floral motif, and discover that the pieces look completely flat, losing the marble pattern entirely.
Solution: Marble and gradient films need space to breathe. Their beauty only becomes apparent across larger surface areas (at least several square centimeters). When working on tiny, intricate pieces, use solid clear films or fine textured films instead. Reserve dramatic marble sheets for wide backgrounds, broad leaves, or large focal elements.
The Issue: You craft a framed glass art piece meant to hang against a wall using rich, clear blue and red films. Once hung, the lack of backlighting leaves the design looking dark, murky, and hard to decipher from a distance.
Solution: As mentioned, transparent films rely on through-light to reveal their true chroma. For wall decor, select high-chroma semi-transparent sheets that pop in ambient room light, or back your frame with white mounting board or a mirrored surface to bounce ambient light back through the film.
The Issue: Attempting to create contrast, you layer a soft, thin clear film over a stiff, thick specialty sheet, resulting in stubborn wrinkles and trapped air bubbles that refuse to smooth out.
Solution: Different film types vary slightly in flexibility and thickness. Layering over stiff sheets or rough textures creates gaps along the adhesive surface. For seamless overlays, stick to uniform clear sheets from the same product series.
Because there are hundreds of glass art films on the market, buying everything at once is impractical. Based on my hands-on experience, here is the foolproof base set I recommend assembling first.
Start with these five versatile, solid clear films:
Once you are comfortable with the core palette, add these two sheets to take your work to an artisan level:
Glass art films are typically sold in sheets roughly around A4 size (approx. 20 cm × 30 cm) or larger. When purchasing online, buying an assorted “starter pack” or “sampler set” from recognized glass art manufacturers is often more economical than buying individual sheets blindly. These samplers let you inspect the tactile thickness and light transmission of various finishes firsthand.
When your package arrives, make it a rule to peel a tiny corner and hold the sheet up directly to a light source, rather than judging the color while it is still stuck to its white paper backing.
To preserve the shelf life of your films, proper storage is essential. Improper storage will cause adhesives to degrade, dry out, or curl, rendering expensive sheets unusable.
Although the film includes UV-resistant layers, storing unused sheets with their backing paper exposed to direct sunlight or warm, humid air will ruin the adhesive backing, causing it to become either gooey or brittle.
Always follow these storage basics:
Every project generates odd cut-offs. Crafters often struggle with messy piles of scraps, but these remnants are precious resources for tiny accents and overlay tests.
I recommend sorting your scraps into clear zippered craft pouches or trading card binder sleeves by color family (“Reds,” “Blues,” “Greens,” “Textures/Specialty”). Flatten the cut-offs inside folders so they do not crease, allowing you to instantly pull the exact accent piece you need without cutting into a fresh full sheet.
Glass art film is far more than a decorative vinyl sheet; it is the vital medium through which you harness, shape, and celebrate light.
Keep these fundamental rules close at hand:
Once you understand how different films interact with light, the creative satisfaction of glass art expands exponentially. Seeing your chosen colors come alive in the morning sun is an experience every crafter deserves to enjoy.
If you found this guide helpful, please share it with your fellow makers! Until next time, happy crafting—this is Yassy from Crafters!

For example, if you are looking for articles about mizuhiki, try searching for "mizuhiki"; if you are interested in tools, try keywords like "nippers" or "pliers."
