How to Sand and Polish Jesmonite for a Flawless Gloss and Vibrant Terrazzo Finish
yassy
Crafters!

Hello, this is Yassy from Crafters! (・∀・)
I absolutely love making cute handmade items myself, and I also love admiring and purchasing wonderful pieces created by other artisans. I am a true craft enthusiast at heart!
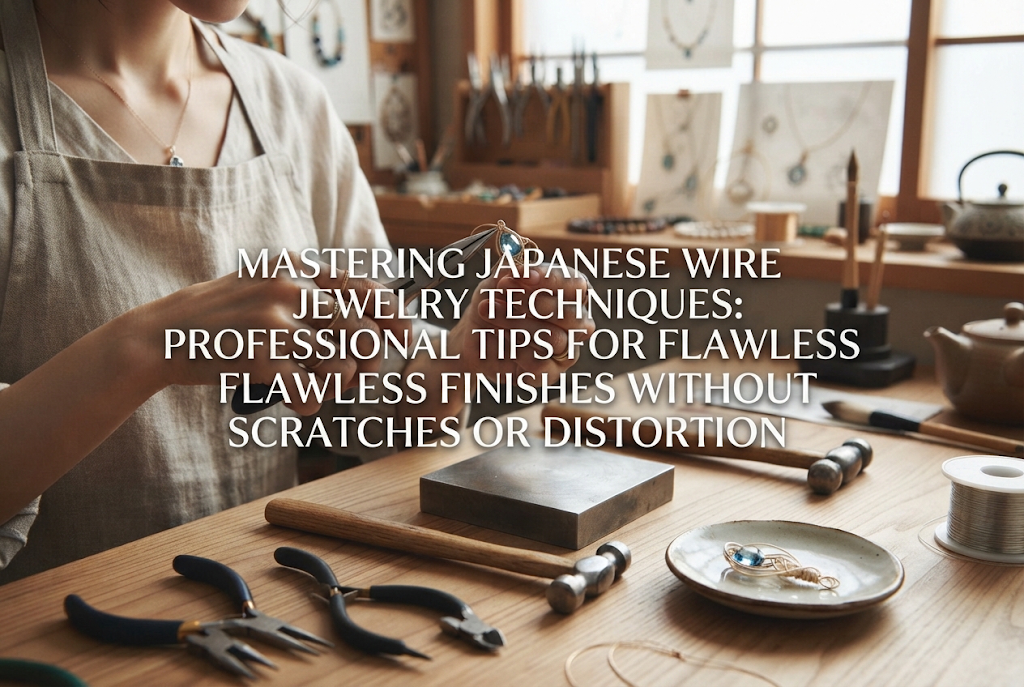
Wire jewelry is a truly charming craft that allows you to shape free-flowing curves and wrap natural gemstones. However, when you actually try making it, many crafters hit a wall: the lines end up bumpy and uneven, the metal surface gets covered in plier scratches, or the overall piece looks somewhat amateurish.
If you've spent time crafting a piece, you naturally want it to have the beauty and polish of a professional, store-bought item. What dramatically elevates the finish of wire jewelry isn't a special innate talent. It comes down to subtle hand movements, proper tool handling, and correctly understanding the physical properties of wire as a material.
In this guide, I will explain practical techniques to finish your wire jewelry with clean, scratch-free, and distortion-free silhouettes. Let's master the key points where beginners often stumble and take your craft quality to the next level!
If you've ever felt that your wire lines don't look smooth or that an unnatural wave remains in your work, there is a clear cause. It usually happens because the wire is being handled too much, and the roles between your fingers and your tools aren't properly divided.
To create clean lines, you need to understand the physical characteristics of wire and learn how to apply force correctly. First, let's look at the basic rules for producing beautiful curves and straight lines.
Metal wire has a specific physical property: the more you touch and bend it, the harder it becomes. In metalworking, this is known as work hardening.
The biggest mistake beginners tend to make is bending a wire, thinking "Oh, that's a bit too far," bending it back, and repeating this process over and over. Once wire is bent, the metal structure at that specific spot hardens. Even if you try to pull it straight again, it will never fully return to its original smooth state.
Instead, the softer metal right next to the hardened spot bends, resulting in an uneven, wavy line.
To achieve a clean finish, the golden rule is: decide your bend in a single action. If the shape breaks down significantly and fails, cutting a new piece of wire and starting fresh will yield an infinitely more beautiful piece than trying to manipulate and fix a damaged wire repeatedly.
Right after pulling wire off a spool, it always retains a gentle curve known as coil memory. If you begin crafting while this curve remains, it becomes difficult to achieve crisp lines anywhere on your piece.
Before starting your project, always perform the straightening process, known in Japanese craft technique as shigoki (smoothing/straightening the wire).
Shigoki is the process of pinching the wire between the pads of your fingers, a scrap piece of leather, or nylon-jaw pliers, and sliding smoothly along its length. By applying just enough friction to transfer subtle warmth to the wire, the coil memory disappears, leaving a crisp, straight line.
The key to shigoki is pulling with a consistent speed and even pressure. If you pause mid-motion, you will create a new kink. Preparing a perfectly straight starting wire is the fastest shortcut to creating stunning lines in your final piece.
When bending wire into smooth curves, many crafters try to do all the work using only their jewelry pliers (yattoko). However, pliers are not meant to force-bend the wire; their true role is to act as a support tool to hold the pivot point.
The actual bending should be done by the pads of your fingers on the hand not holding the pliers.
Secure the pivot point firmly with your pliers, then use the pad of your finger to apply even force across the wire, wrapping it into a curve. Pressing with the surface area of your finger pad rather than a pinpoint tip prevents harsh angles and produces swoon-worthy, fluid curves.
Instead of focusing force solely in your fingertips, imagine moving your entire wrist smoothly to form effortless, professional lines.
When you hold your finished piece up to the light, numerous tiny scratches or dents on the wire surface instantly make it look cheap. Plier marks are the enemy of high-end wire craftsmanship.
To handle wire without leaving marks, you need to adjust your choice of tools and your mindset regarding hand pressure.
Ninety percent of plier scratches are caused by gripping the wire too tightly with excessive force.
When you apply too much grip strength, the metal of the pliers crashes into the metal of the wire, carving the shape of the plier jaw directly into the wire as an indentation. Shift your mindset from "squeezing" to "gently securing so the wire doesn't slip."
Additionally, grabbing the wire at the extreme tip of your pliers concentrates force onto a tiny surface area, causing deep marks. By gripping slightly further back where the jaws are wider, you increase the contact surface area and distribute the pressure evenly.
What you need is not a powerful grip, but stable positioning. Practice maintaining minimal hand tension while working.
No matter how careful you are, placing metal round-nose or flat-nose pliers directly onto wire can leave subtle friction marks. There is a simple, highly effective technique to physically prevent this.
That trick is wrapping the tips of your pliers with masking tape.
Wrapping two to three layers of masking tape around the beak of your pliers creates a protective cushion that absorbs metal-on-metal impact. When the tape gets dirty or worn, simply replace it—it is effortless and cost-effective.
For an even more professional setup, I recommend using nylon-jaw pliers (pliers with tips covered in resin or nylon). They provide strong holding power without scratching metal surfaces at all, making them an essential asset in wirework.
If your pliers slip while holding wire, they leave behind harsh scratch marks on the surface. This slipping happens when pliers are applied at an oblique angle relative to the wire.
As a rule, always grip the wire at a perpendicular (90-degree) angle relative to the wire axis.
Holding pliers at an angle creates an unstable contact point, causing the jaws to slide sideways the moment bending force is applied. Always visually verify that your plier tips cross the wire at a right angle before slowly applying force.
This simple extra check completely eliminates annoying slip scratches.
Basic wire jewelry techniques—such as wrapped loops (megane-dome) and coiling used in wire-wrapping—rely heavily on uniformity. Irregular loop sizes or visible gaps in wrapped coiling give an untidy impression.
Here are precise technique steps to keep your components neatly aligned without gaps.
Many crafters struggle with wrapped loops (known as megane-dome in Japanese crafting) becoming distorted or oval. To form consistent, crisp circles, you must position your round-nose pliers identically every single time.
Round-nose pliers are conical, tapering toward the tip. A shift of even a few millimeters in where you grasp the wire changes the resulting loop diameter.
To guarantee success, draw a guide line on the plier tip using a permanent marker. By setting your wire at that exact line mark every time, anyone can achieve 100% consistent, beautifully round loops.
Also, when rounding the wire, focus on wrapping the wire around the pliers rather than twisting the pliers themselves. This creates clean, undistorted circles right from the base.
When wrapping wire around a core stem—such as the neck of a wrapped loop or for structural reinforcement—gaps between wraps can make the work look crooked.
When coiling, do not simply move your hand forward in the wrapping direction.
The secret is to apply continuous pulling tension back toward the existing wraps while moving forward. Keep the wire taut at all times, and after every single wrap, use your fingernail or flat-nose pliers to gently push the coil flush against the previous turn.
If you try to close gaps after finishing all wraps, work hardening will have already set in, making the wire unmovable. Always enforce a strict routine of "wrap once, compress once." This creates tight, machine-like uniform coils.
In wire framing (such as wrapping cabochons or stones), thinner wrapping wire is coiled around thicker structural frame wire. The tight adhesion between these wires dictates the final quality.
If thin wire lifts away from thick wire, the whole structure loses stability and looks unrefined.
When coiling, guide the thin wire so it strictly follows the curve of the thick frame wire.
In my process, after passing the wrapping wire around the frame wire once or twice, I always insert a step: gently pressing the connection point from top and bottom using flat-nose pliers. This light press flattens any slight lift, fusing the thick and thin wires into a single cohesive unit. The presence of this pressing step heavily influences whether the finished piece looks professional.
No matter how gorgeous a design is, a piece of jewelry that pokes the skin or snags clothing fibers is incomplete.
Wire end treatment is a crucial step that determines not only safety, but also the refinement and luxury feel of your work.
When cutting wire, do you pay attention to the orientation of your wire cutters (flush cutters)? Cutters actually have a flat side and a beveled side.
When you cut, the wire end facing the flat side of the cutter blade will have a flat, flush cut, while the wire end facing the beveled side will have a pointed, V-shaped cut.
Therefore, always position the flat side of the cutter blade facing toward the finished piece you are keeping.
A flat cut minimizes sharpness at the tip, making post-processing significantly easier. Conversely, leaving a pointed cut creates a needle-like edge that catches on clothing. Get into the habit of checking which way the flat blade surface is facing every time you hold your cutters.
Cut wire ends should never be left pointing outward. They must be tucked inward or hidden into inconspicuous gaps.
For example, at the end of a wrapped loop, use fine-tipped needle-nose pliers to curve the wire tip inward along the contour of the main body.
After tucking, run your finger over the area from all directions to check for sharp pokes. If it catches even slightly, gently squeeze the wire end with the tip of your flat-nose pliers, pressing it flush against the core stem.
Tucking the wire tip neatly inside a metal curve guarantees complete safety and a smooth feel against the skin.
If a design leaves a wire end exposed—such as on ear wires or open frame terminals—you must file away any burs (burr removal).
Use a fine-cut metal file (smooth file) or a wire rounder tool (cup burr tool designed for jewelry making).
Gently apply the file from various angles against the cut end to round off sharp edges.
Finally, rub the tip firmly with the pad of your finger to verify that it feels smooth as silk. This devotion to small details—rounding off every wire end—is the true secret that elevates handmade craft to boutique brand quality.
When you finish crafting a piece, does it wobble when placed on a table, or look twisted in three dimensions? If a flat design becomes warped, all your hard wirework goes to waste.
By incorporating surface alignment and reinforcement processes right before completion, your work's appearance and durability will improve dramatically.
While focusing on intricate wrapping, the pressure from your hands often twists the overall structure out of alignment. Once you finish crafting, observe your piece from directly above, from the side, and at an angle.
If you spot distortion, use two pairs of flat-nose pliers to make corrections.
Hold flat-nose pliers in each hand, gripping the sections directly before and after the twisted area. Apply micro-adjustments in opposite directions—like turning a doorknob—to bring the surfaces back into parallel alignment.
Avoid applying heavy force; feel the wire's natural flex and make delicate millimeter-level adjustments. When the piece rests flat like a single uniform plate, light reflects off it beautifully, giving a refined look.
As crafted, wire jewelry can remain soft and susceptible to losing its shape under minor impact. A fantastic technique to increase strength while perfectly flattening overall distortion is the process of tapping to work-harden the wire.
Prepare a non-marring plastic or nylon hammer and a steel bench block (or a hard, flat board).
Place your wire piece flat on the working block, and gently tap it evenly with the nylon hammer.
Tapping metal tightens its grain structure, increasing its hardness. Tapping hardens the wire structure so it resists deforming, while pressing it against the flat block aligns the entire height for a perfectly flat plane.
Important note: Never tap sections containing glass beads or natural gemstones, as they will shatter. Focus your gentle hammer taps strictly on wire-only frame sections.
Let's review the key takeaways to move your wire jewelry away from an amateur look toward store-quality perfection:
None of these techniques require magic. They rely on carefulness—executing each step attentively—which translates directly into the beauty of your finished piece.
Don't worry if you don't achieve perfection right away. The more you touch wire, the more refined your sense of touch becomes. Try incorporating these professional techniques into your next crafting session, and create stunning wire jewelry that you can be truly proud of!
If you enjoyed this guide, I'd be so grateful if you shared it with your crafting friends on social media or messaging apps!
Until next time, happy crafting! This was Yassy from Crafters!





For example, if you are looking for articles about mizuhiki, try searching for "mizuhiki"; if you are interested in tools, try keywords like "nippers" or "pliers."
