Level Up Your Needle Felting: The Essential Tool Upgrade Order for Flawless Results
yassy
Crafters!

Hello, everyone! I'm Yassy from Crafters! (・∀・)
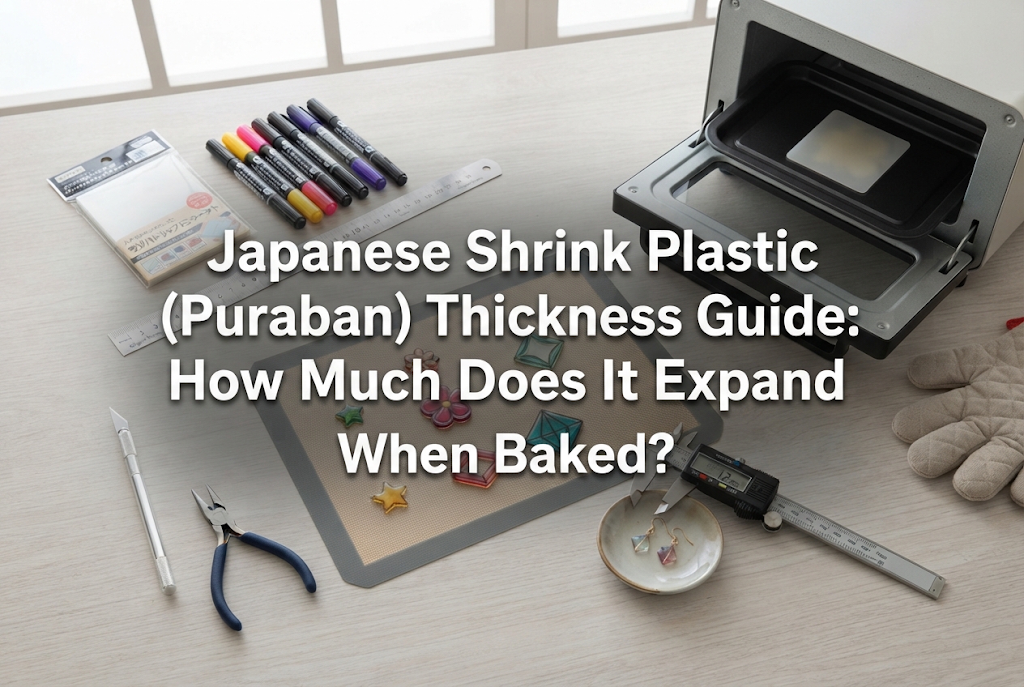
Shrink plastic—known as puraban in Japan—is a fascinating craft material. You start with a thin, flimsy sheet of plastic, but once you heat it in a toaster oven, it shrinks down tightly into a firm, solid piece. Whenever I see beautiful shrink plastic creations at handmade markets or craft events, I'm always captivated by their plump textures and glass-like elegance.
I personally love making shrink plastic items, admiring the intricate works of artisan makers, and buying handcrafted accessories for myself. However, beginners who are just starting out frequently run into the exact same obstacle: "I have no idea what the size or thickness will be after baking!"
To prevent these mishaps, it is essential to understand in advance how shrink plastic shrinks and changes in thickness when heated. While shrink plastic shrinks significantly in length and width during baking, its thickness tends to increase. However, because these changes vary depending on the specific product and heating conditions, there is no single fixed ratio that applies to all shrink plastic sheets.
In this guide, I'll explain the mechanics behind shrink plastic shrinkage, how thickness and dimensions change, and how baking affects coloring and hole punching. Let's move beyond guesswork so you can design your pieces with confidence!
First, let's look at why shrink plastic thickens when heated. The main raw material used in shrink plastic is polystyrene (PS) resin. During manufacturing, the plastic resin is heated, stretched thin, and cooled into sheets. When you reheat it in an oven, the plastic memory triggers, causing the resin to contract back toward its original state, shrinking in length and width.
Because the volume redistributes as the surface area shrinks, the sheet expands in thickness. However, the exact horizontal and vertical shrinkage rates—as well as the final thickness—depend on the specific brand of plastic and your baking environment. Therefore, you cannot calculate post-bake thickness using a simple mathematical formula like "If the length shrinks to 1/N, the thickness always becomes N times thicker."
When crafting, always check the recommended baking conditions on your shrink plastic packaging. If you are using a new brand or product for the first time, it is best to test a small scrap piece first to measure its post-bake size and thickness.
Shrink plastic sheets available at craft stores and online shops come in various standard thicknesses. Below is a breakdown of what to expect from common sheet gauges. Keep in mind that post-bake results vary by brand and heating conditions, so treat these as general guidelines rather than fixed formulas.
Thin and easy to handle, this gauge is perfect for tracing detailed line drawings and making precise cuts with scissors. After baking, it contracts in length and width while increasing in thickness. It is ideal for lightweight accessories, delicate floral designs, or layered multi-part assemblies. Because final strength varies by product, test a sample piece before making your final project.
This gauge offers a great balance between thinness and workability, making it the most versatile choice for accessories, charms, and general crafting. It feels slightly firmer to cut than 0.2 mm plastic. Because post-bake rigidity and thickness vary by brand, inspect your test piece before starting your main build.
Cutting 0.4 mm plastic requires a bit more hand strength compared to 0.2 mm or 0.3 mm sheets, but it is excellent for pieces that demand a sturdy, substantial feel. It works wonderfully for keychains, bag charms, and brooches. Keep in mind that cutting intricate, complex shapes may require specialized tools or extra care.
This is a heavy-duty option when you want maximum thickness. Cutting intricate shapes out of 0.5 mm sheet plastic takes considerable effort, so plan your tools and cutting methods accordingly. It bakes into thick, robust charms and bold statement elements. Do not assume automatic dimensions like "0.5 mm will always turn into 2.0 mm." Always review the product's individual characteristics when planning your design.
When shrink plastic contracts during baking, it doesn't just reduce the overall outer dimensions. Holes, colors, and overall shape also undergo significant transformations.
If you punch a hole before baking to insert a jump ring or headpin later, that hole will shrink right along with the body of the plastic. For example, a 6 mm hole punched before baking will not remain 6 mm after heating. The exact final diameter depends on the shrinkage rate of the plastic. Furthermore, because the plastic sheet thickens as it shrinks, you must consider both the post-bake hole diameter and the post-bake thickness when selecting hardware. For projects requiring small jump rings, make a test charm first to ensure your hardware fits comfortably.
Because the surface area shrinks dramatically, pigment applied to the unbaked surface becomes concentrated. Colors painted or drawn before baking will look much darker and more saturated after shrinking. If you color your piece to match your ideal final shade before baking, it may end up far darker than anticipated. When using pastels, colored pencils, or acrylic paints, apply the color lighter than your target shade and conduct a test bake to verify the final hue.
When heated, shrink plastic softens, curls up, and then flattens out as it contracts. Depending on the shape, size, and plastic type, some warping or minor distortion may occur. While thin plastic is easy to cut, it moves and curls rapidly in the oven. Thicker plastic can also warp depending on temperature and shape. Preheating your toaster oven according to package instructions is key. If you want a perfectly flat finish, gently press the piece while it is still warm between sheets of parchment paper under a heavy, flat object. Note: Baked plastic is extremely hot right out of the oven, so exercise extreme caution to avoid burns!
Here are three common misconceptions beginners often have regarding sheet thickness, along with practical tips to avoid them.
It is easy to think that picking the thickest plastic is always safer. However, sheet thickness alone does not guarantee a successful piece. Thicker plastic requires much more force to cut, which can make fine details jagged or difficult to execute. Furthermore, extra thickness doesn't automatically mean better suitability for every design. Choose your sheet gauge based on the size, design, and intended use of the finished piece, testing small samples whenever trying a new product.
Relying solely on ease of cutting can lead to issues. While 0.2 mm plastic is light and easy to trim, large flat pieces made from thin stock can flex or bend easily once baked. For items like keychains and bag charms that experience constant movement and impact, thin pieces may lack long-term durability. Choose a gauge that matches the overall size and utility of the item rather than relying on a rigid rule.
Coating shrink plastic with UV resin is a wonderful way to add shine, protection, and a domed effect, but it cannot completely replace structural integrity. Applying a thick layer of resin over a flimsy base can cause uneven stress or warping as the resin cures. Rather than relying on resin to fix structural issues, balance your choice of base sheet thickness, piece size, and resin volume together right from the start.
Here is how I personally choose plastic sheet thickness based on the item I am making:
The thickness of baked shrink plastic isn't just about strength—you can also use it to enhance your design!
After baking, the sides (edges) of your shrink plastic piece may show cut marks or rough texture. On thicker pieces, these edges are clearly visible. Once the piece has completely cooled, lightly sand the edges using a fine-grit sponge sander. Applying a thin coat of clear topcoat or resin to the smooth edge creates a polished, crystal-clear finish.
With clear shrink plastic, separating your line art and coloring onto opposite sides adds stunning depth. Draw your outlines on the front surface and apply your colors to the back surface. After baking, coat the front with clear UV resin. The clear plastic layer creates a dimensional glass-cabochon effect that makes flat illustrations pop!
Try painting only the exposed edge profile of your baked piece. For instance, adding a gold metallic edge to a black motif creates an elegant framed effect. On clear motifs, colored edges reflect light inside the piece, creating captivating visual angles.
Understanding how thickness changes during heating is one of the most rewarding steps in mastering shrink plastic crafts. Let's recap what we covered:
Instead of randomly cutting and baking, planning your design with sheet characteristics in mind will help you achieve the exact size, feel, and quality you envision!
If you enjoyed this article, please share it with your craft friends on social media or messaging apps—it means the world to me and keeps me motivated!
Until next time, happy crafting! This was Yassy from Crafters!


For example, if you are looking for articles about mizuhiki, try searching for "mizuhiki"; if you are interested in tools, try keywords like "nippers" or "pliers."
