Level Up Your Leathercraft: How to Choose and Use Rubber Boards and Setting Anvils
yassy
Crafters!
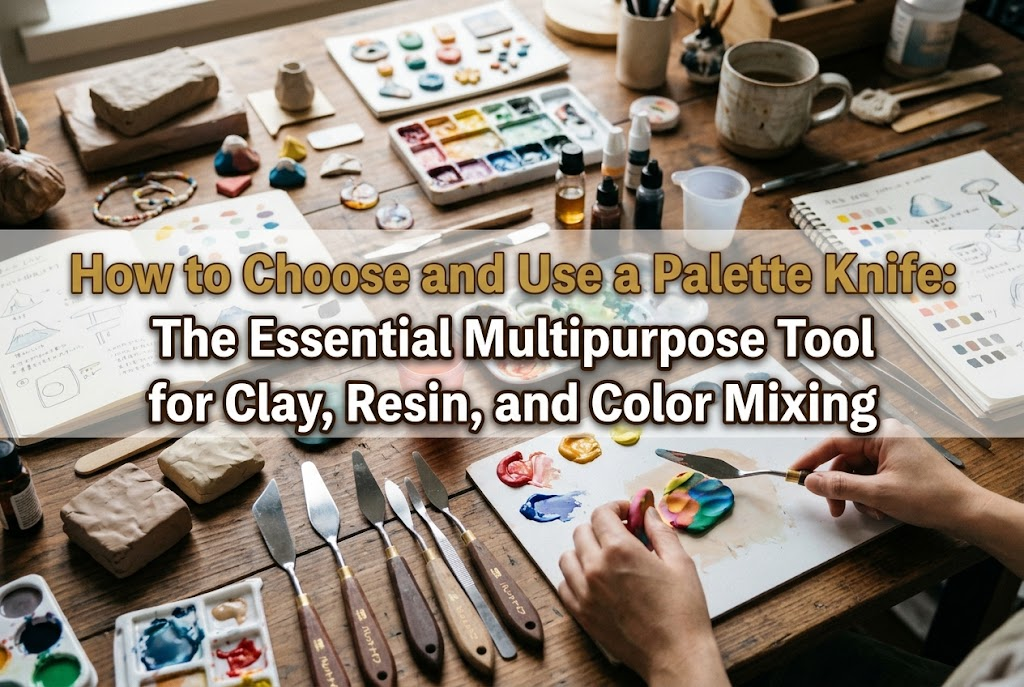

Hello, everyone! It's Yassy from Crafters! (・∀・)
Have you ever struggled during a crafting session with questions like, "How can I mix my paints or resin without streaking?", "How do I roll clay into an even, thin sheet?", or "How can I create clean, beautiful textures with paste materials?"
If you have, there is one single tool that can dramatically elevate both your work efficiency and the quality of your finished pieces: the palette knife.
I personally create a wide variety of handmade items, and I also love viewing and purchasing amazing works from other artisans. Drawing from my hands-on experience handling countless craft pieces and studio tools, I can say with confidence that a palette knife is a hidden essential that raises the bar for all kinds of handicrafts.
Yet, beginners often tell me: "I see them in art supply stores, but what are they actually used for?", "How are they different from spatulas or clay modeling tools?", or "I have no clue which one to buy first."
In this guide, I will break down everything a beginner needs to know—from practical craft uses and blade styles to key differences from similar tools and tips for choosing the right one without mistakes.
Originally designed for fine arts such as oil and acrylic painting, a palette knife is a spatula-like metal or plastic tool used to mix paint on a palette or apply paint directly to a canvas. It consists of a flexible blade that tapers toward the tip and an easy-to-grip handle.
While many associate it strictly with painting, it has established itself as an indispensable, all-purpose tool across countless handmade genres today.
The greatest strengths of a palette knife in crafting lie in its unique flexibility (springiness) and its smooth, flat surface.
With a palette knife, you can easily perform delicate tasks that are impossible with fingertips or rigid spoons—such as distributing pressure evenly while smoothing, blending materials without trapping air bubbles, and lifting thin cut edges without gouging your piece.
Because it works with the viscosity and softness of your materials rather than fighting against them, allowing you to sculpt and apply paste exactly as intended, you will never want to let it go once you try it.
Let's look at specific crafting situations where a palette knife truly shines. Check these against the types of projects you want to make.
When mixing paints, pigments, or liquid dyes with a brush, color easily gets trapped deep in the bristles. This wastes precious material and makes cleaning difficult.
With a palette knife, you can use the flat blade against a smooth mixing board or palette to tap and smooth out pigments, grinding and blending them cleanly.
This is especially true when adding colorants to epoxy or UV resin. Using a toothpick or stirring rod often introduces unwanted micro-bubbles. By holding the back of the palette knife flat and gliding it smoothly while crushing air pockets, you can prepare gorgeous, streak-free colored resin without sacrificing clarity.
Palette knives are equally valuable for clay crafts, whether you work with polymer clay, air-dry resin clay, lightweight clay, or stone clay.
When cutting a clay sheet to a precise thickness, standard craft knives tend to drag and stick to the clay. A flexible palette knife glides smoothly through the material, leaving a crisp, uncrushed cross-section.
It is also ideal for blending seams between clay parts, spreading simulated frosting on miniature food cakes, or pressing lifelike textures onto miniature baked goods like cookies.
In trending mediums like texture art, Jesmonite casting, and scented candle wax formulation, the palette knife takes center stage.
When spreading modeling paste onto a canvas to create dimensional wave patterns or sculptural reliefs, you cannot achieve crisp ridges or defined volume without the flexible bounce of a palette knife blade. When it comes to spreading thick paste materials to a controlled thickness or pulling sharp peaks, nothing compares to this tool.
A palette knife is also remarkably handy for freeing delicate clay impressions from silicone molds or lifting thin clay parts and stickers off your craft mat without warping them.
Because the tip is engineered to be extremely thin, it slides effortlessly into the narrow seam between your work surface and the craft piece. You completely avoid the risk of bending fragile edges or leaving unsightly fingerprints from pinching them with your fingers, resulting in a noticeably cleaner finish.
When browsing online or in craft stores, you will encounter a wide variety of blade shapes and materials. Understanding their specific characteristics is the first step toward making a smart purchase.
The overall silhouette of the blade determines the specific tasks it handles best:
Blades generally fall into two categories: metal (usually stainless steel) and plastic.
Blade tension and flexibility are critical factors. A blade with soft flexibility yields gently to pressure, making it ideal for spreading thin pastes evenly and creating flowing, curved textures. On the other hand, a blade with medium firmness and controlled flex excels when blending stiffer clay mixes or scooping heavier materials with precision.
Beginners often find themselves confused by the subtle differences between palette knives, modeling spatulas, clay scrapers, and glue spreaders. Here is how they differ:
Spatulas are typically compact tools built for precision three-dimensional clay sculpting or scooping minute pinches of pigment and resin. Their blades are thicker, smaller, and relatively rigid, making them great for carving with firm pressure. In contrast, a palette knife has a wider, thinner, flexible blade built specifically for spreading materials flat over surface areas and blending pigments across a wide plane.
Standard clay tools, like the bamboo or thick plastic spatulas used in basic sculpture, are thick and have virtually no flex. They are meant for carving deep grooves or sectioning heavy blocks of clay. A palette knife features an incomparably thinner blade edge, entering the clay cleanly without squishing fine shapes.
Glue spreaders are designed for adhesive application; they often feature serrated edges and lack blade elasticity. Meanwhile, painting knives fall into the same broad family as palette knives, but are tailored specifically for expressive paint strokes with ultra-thin, delicate blades. For handmade crafts, choosing a stainless steel offset "palette knife" gives you the perfect balance for both blending and surface application.
Here are several frequent mistakes craft beginners make with palette knives, along with advice on how to prevent wasted money and damaged projects:
The most common misstep is relying solely on cheap plastic palette knives because of the low price tag. Plastic models have thicker edges that squash clay during cuts rather than slicing through cleanly. Furthermore, their stiff flex leaves unsightly ridges and streaks when smoothing paste. Investing in a proper metal knife from the start avoids these frustrations entirely.
Stainless steel palette knives can have crisp, sharp edges. If you aggressively scrape against a silicone mold or a soft plastic craft mat, you risk cutting into them. The correct technique is to keep the blade angle low, using the flat face and gentle spring of the metal rather than digging in with the pointed corners.
When mixing paint or resin, moving the knife rapidly like a culinary whisk introduces countless micro-bubbles. Always keep the blade flat and glide it slowly, pressing the material down against the palette in a grinding, spreading motion. Additionally, make sure to wipe away residue where the blade meets the handle; dried material left there can flake off into future projects and cause color contamination.
If you are wondering what exact knife to purchase first, here is my direct recommendation:
Your first purchase should ideally be a stainless steel, offset-handle palette knife with a small to medium blade (roughly 5 cm to 7 cm / 2 to 2.8 inches long) in a diamond or rounded-spatula shape.
This configuration keeps your hand comfortably clear of your workspace while providing full visibility. It handles over 80% of typical crafting tasks—from pigment blending and clay slicing to dimensional paste application. Large knives are clumsy when working on small craft pieces, so start with a compact metal offset model.
Once you are comfortable with your compact offset knife, consider adding either a narrow, straight blade or a wide offset blade:
Budget utility knives from 100-yen or dollar shops do have their place for rough tests or disposable tasks. They work well for stirring large batches of two-part epoxy resin or mixing heavy-duty adhesives that might permanently ruin a good blade. However, for detailed main projects and tools you plan to keep for years, spending a little more on a well-crafted stainless steel knife from an art or craft supplier makes a world of difference in flexibility and precision.
To get the most out of your palette knife and keep it in top condition, follow these practical handling and care tips:
Never hold the knife upright when mixing resin or paint. Lower the blade to a shallow angle of about 15 to 30 degrees against the palette. Gently press down on the material and move the blade in a figure-eight motion rather than circular stirs. Periodically sweep the spreading material back into the center using the edge of the blade. This keeps your colors streak-free without trapping air.
When smoothing clay or paste, keep the blade flex steady. If you shift your wrist angle mid-stroke, the blade's edge will dig in and leave uneven ridges. Lock your wrist gently and move your entire forearm parallel to the surface. Always wipe away excess material from the back of the blade with a cloth or paper towel between passes to maintain a clean sweep.
Even stainless steel can degrade or bend out of true if neglected:
While it might look like a simple metal spatula, using the right palette knife correctly eliminates bubble problems when mixing colors and gives your clay edges and textured surfaces a clean, professional finish.
Tool quality translates directly into the quality of your finished craft.
If you have been relying on toothpicks or makeshift plastic sticks, treat yourself to a quality stainless steel offset palette knife. Tasks that used to feel tricky will suddenly become effortless, making your craft sessions even more enjoyable.
Find the perfect partner tool for your workshop and keep creating wonderful things!
If you found this guide helpful, please share it with your craft friends on social media—it means the world to me and keeps me motivated! See you in the next article! This was Yassy from Crafters!




For example, if you are looking for articles about mizuhiki, try searching for "mizuhiki"; if you are interested in tools, try keywords like "nippers" or "pliers."
