A Beginner’s Guide to Clay Sculpting Tools: How to Choose and Use Modeling Tools and Shaping Sticks
yassy
Crafters!

Hello, craft enthusiasts! This is Yassy from Crafters! (・∀・)
When you're crafting handmade leather goods or adding snap buttons and grommets to fabric bags, do you ever struggle with messy punched holes or crushed, crooked hardware? Many crafters assume poor hammering technique is to blame, but in reality, the culprit is almost always the base you are working on.
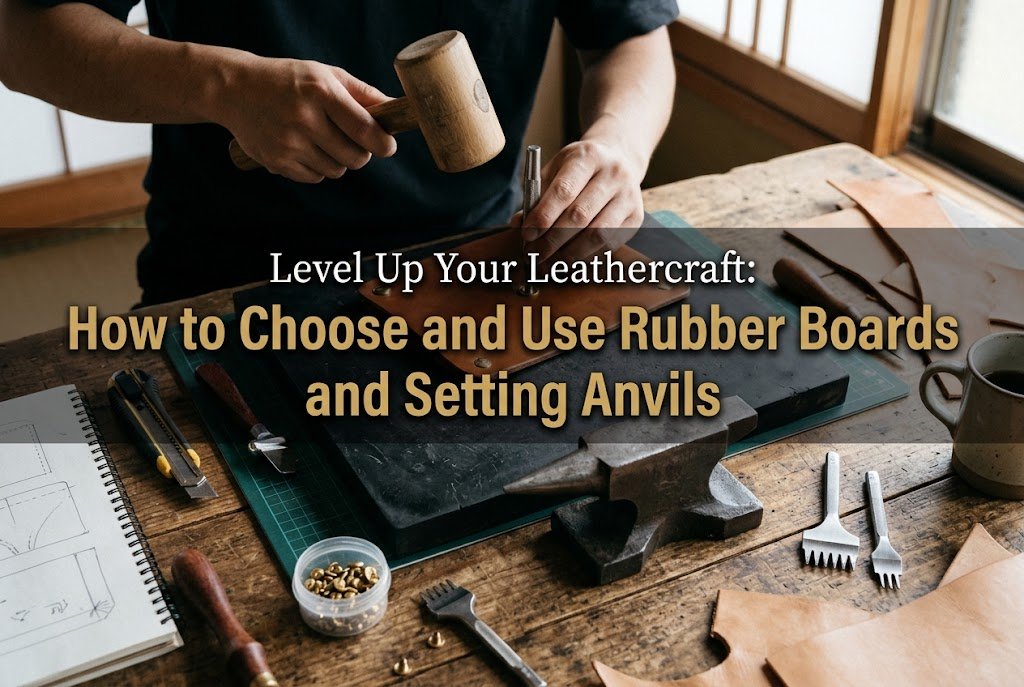
When it comes to punching holes and setting fasteners, the rubber board and the setting anvil are the two foundational tools that determine the finished quality of your project.
Over the years, I have created countless handmade pieces, examined thousands of crafted works, and collected tools extensively. Through all that experience, one thing has become abundantly clear: truly understanding what your tools do and preparing the proper foundation beneath your work is the fastest shortcut to mastering your craft.
In this guide, I will break down everything beginners need to know about setting anvils and rubber boards—including their distinct roles, how they differ from common substitutes, how to pick the right ones, and even how to soundproof your hammering station at home.
Whether you work with leather or heavy fabric, tasks like punching holes with drive punches and setting rivets or snaps happen constantly. Naturally, no one hammers directly onto a bare tabletop; everyone places something underneath.
However, grabbing a random wooden plank, an old magazine, or a self-healing cutting mat will lead to failure nearly every single time.
Rubber boards and metal setting anvils are specialized tools engineered specifically to control and redirect the powerful impact of a mallet blow:
Using the right base for each task dramatically improves the aesthetic finish of your work and protects your tools from premature wear. Compromising on your base leads to chipped blades on expensive cutting tools, torn leather, and wasted materials. Your foundation is literally the bedrock of your craft.
Let's look first at the rubber pounding board (known as a gomu-ita in Japan), an indispensable accessory for punching stitching holes and stamping designs.
A rubber board is far more than a protective mat to save your desk from scratches. It is a precision tool that protects the sharp edges of cutting blades and transfers striking energy efficiently.
The foremost job of a rubber board is protecting the delicate cutting edges of round punches and stitching chisels (such as Japanese hishime-uchi diamond pricking irons). When a hardened steel blade collides directly with hard metal or dense wood, the tip dulls or chips instantly, ruining the tool.
When you strike over a rubber board, the blade tip punches cleanly through the leather and sinks slightly into the dense rubber below, cutting a crisp hole without harming the blade. Furthermore, the natural resilience of rubber absorbs the mallet's bounce, significantly reducing strain on your wrist. When using leather stamps to emboss letters or patterns, a solid rubber board also provides a firm, stable base that produces deep, wobble-free impressions.
Rubber boards for crafting come in various thicknesses and density levels. To put it simply: always choose a thick, high-density rubber board.
Craft rubber boards generally fall into two categories: thin versions around 1 cm (approx. 0.4 inches) and thick versions of 2 cm to 3 cm (0.8 to 1.2 inches) or more. Thin boards are lightweight and portable, but they cannot fully absorb heavy hammer blows; the vibration passes right through to the table below. Because the impact energy dissipates, you cannot punch through cleanly in a single strike and end up having to hammer repeatedly.
In contrast, a thick board of 2 cm or more absorbs and anchors the blow completely. Every ounce of force transfers directly into the cutting edge, allowing you to punch clean holes effortlessly in one or two hits. As for hardness, avoid soft, spongy rubber. If the rubber is too soft, the blade sinks too deep and distorts the surrounding leather. A high-density, rigid rubber board that does not bend when you hold it is the absolute best choice.
Next, let's explore setting anvils (uchidai), which are used when setting rivets (kashime), spring snaps, heavy-duty snap fasteners, and eyelets.
If you have ever had a snap button's decorative cap flatten out or end up crooked and loose, the reason is simple: you were either not using a setting anvil or using an incorrectly sized one.
Metal fasteners like rivets and snap caps feature smooth, domed profiles. If you place a domed fastener onto a flat surface and strike it from above, that rounded cap flattens and deforms completely.
A setting anvil features concave circular recesses carved into its surface, shaped to match standard fastener heads. By resting the rounded cap into this recess before hammering, you preserve the smooth, pristine curve of the cap while firmly flaring the post on the back.
Setting anvils come in two styles: single-purpose round anvils designed for a specific hardware size, and universal multi-size anvils.
For beginners, a universal multi-anvil is by far the smartest first purchase. These tools are thick metal discs or rectangular blocks machined with multiple concave hollows and through-holes in various diameters—typically covering standard sizes like 6 mm, 7 mm, 8 mm, 9 mm, 10 mm, 12 mm, and 15 mm.
A single multi-anvil eliminates the need to buy a separate base every time you switch hardware sizes, saving both money and workspace. Made of solid steel or cast metal, their heavy weight prevents slipping during strikes, giving beginners a stable, confident setup.
One of the most frequent beginner mistakes is attempting to substitute a rubber board with an ordinary self-healing cutting mat or scrap wood. Despite looking somewhat similar at a glance, their internal structure and intended purposes are entirely different. Substituting them should be avoided completely.
Self-healing cutting mats are designed strictly for rotary cutters and craft knives slicing through paper and fabric. Their surfaces consist of relatively soft PVC or composite layers that cannot withstand blunt vertical impacts. If you hammer a punch or stitching chisel into a cutting mat, the blade punches straight through the mat, cracking the internal core and damaging the table underneath. Worse yet, hitting the tough inner layer of the mat will chip your sharp leatherworking blades. Keep cutting mats strictly for cutting, and use rubber boards exclusively for punching and pounding.
Placing wood underneath is also problematic. Wood grain varies in hardness across its fibers. When a punch hits, the wood can split along the grain, or the blade can deflect into a softer pocket, punching at an angle. Wood also dents easily, absorbing energy that should have cut your hole cleanly.
What about a flat metal block? That fails as well: striking a sharpened cutting punch directly against a flat metal surface will crush the edge immediately. A dense, high-grade rubber board is the only surface capable of securely backing the strike while safely yielding to the blade tip.
Once you understand what each tool does, following proper technique ensures clean, professional-level outcomes every time.
The single most important rule is keeping the punch completely vertical. If it tilts even slightly, the tool pierces the rubber at an angle, causing the hole on the backside of your leather to wander out of alignment. Furthermore, aim to punch through with one or two deliberate, solid strikes rather than tapping timidly multiple times. Repeated light tapping causes the blade tip to shift slightly, widening or distorting the hole. A thick rubber board gives you the solid backing needed to pierce cleanly in minimal hits.
Always verify your groove sizing beforehand. If the groove is too large for the cap, the piece will shift sideways upon impact and deform. If the groove is too small, the curved cap will press against the rim of the recess, leaving an unsightly circular ring mark. Ensure a snug, proper fit before swinging your mallet.
For home crafters—particularly those living in apartments or shared spaces—hammering noise and vibration pose the biggest operational hurdle. Hammer strikes easily reverberate through floors and walls to neighboring rooms. Fortunately, layering your base correctly reduces both noise and vibration dramatically.
Here is my go-to sound-dampening layered setup, built from the bottom up:
The secret weapon here is the dense stone slab in the middle. The sheer weight and density of marble or granite absorb the kinetic shock instantly, preventing impact energy from transferring into your desk and floorboards. The sound transforms from a sharp, ringing metallic crack into a muted, dull thud. This lets you focus on crafting without stressing over noise disturbances.
To avoid spending money on the wrong items, look for the following specifications when purchasing your initial toolkit:
Steer clear of ultra-thin plastic setting plates or flimsy vinyl pads often found in budget starter sets or bargain bins. They crack within a few strikes and deform delicate hardware. When dealing with impact tools, mass and rigidity equal quality. Invest in tools made by reputable leathercraft toolmakers or established haberdashery suppliers.
Treated properly, a quality setting anvil and rubber board will last for years, if not decades. A few basic maintenance habits keep them performing at their best.
After prolonged punching with chisels and drive punches, a rubber board's surface accumulates countless cuts and uneven divots. Working on a heavily scarred surface can transfer texture onto delicate leather and make punch placement unstable.
When this happens, you can resurface it. Wrap 240- to 400-grit wet-or-dry sandpaper around a flat wooden block, and sand the top surface of the rubber board in smooth, circular motions. Wipe away the fine rubber dust, and your board will be smooth, flat, and like new again. This resurfacing capability is another huge advantage of choosing a board that is at least 2 cm thick.
Rust is the primary enemy of metal anvils. Finger oils and ambient humidity can cause red surface rust inside the polished concave depressions. If rust forms inside those hollows, it transfers rough textures and brown stains onto your hardware caps.
Always wipe down your anvil with a dry, soft cloth after use. For long-term storage, apply a light coat of sewing machine oil or craft tool oil, wrap it in cloth or store it in a zip-top plastic bag, and keep it in a low-humidity space. If surface rust does appear inside a groove, apply a small dab of metal polishing paste (such as Pikal) onto a cotton swab and polish the hollow until smooth and clean.
Pay close attention to your striking mallet. Never strike setting tools or anvils directly with a carpenter's steel claw hammer. Hard metal clashing directly against hard metal mushrooms the tops of your setting tools, ruins your anvil, and risks sending metal chips flying. Always use a wooden mallet or a polyurethane/plastic dead-blow mallet. Striking with a softer material cushions the blow, preserves your tools, and softens the sound of every strike.
Having a dependable foundation completely transforms your punching and hardware setting:
When your base is properly prepared, tasks that once felt finicky or inconsistent become smooth and satisfying. There is nothing quite like the feeling of a rivet setting perfectly flush or seeing a line of stitching holes punched in crisp, flawless alignment.
Equip your bench with the right rubber board and setting anvil, and enjoy taking your handmade creations to the next level!



For example, if you are looking for articles about mizuhiki, try searching for "mizuhiki"; if you are interested in tools, try keywords like "nippers" or "pliers."
