UV vs. UV-LED Lamps for Japanese Resin Craft: How to Choose the Perfect Curing Lamp
yassy
Crafters!

Hello, this is Yassy from Crafters! (・∀・)
"Parts deco"—the Japanese craft of adorning everyday items with glittering rhinestones, cabochons, and cute resin charms—is immensely popular. When you spot dazzling decorated pieces in shops or on social media, it is completely natural to want to create one yourself. I love making, admiring, and buying handmade crafts, and I can say with confidence that parts deco offers one of the greatest feelings of accomplishment and satisfaction among all crafting genres.
"I have no idea what tools I need to buy first.""I'm not particularly handy, so I'm afraid of messing up."Hesitating over worries like these is truly a missed opportunity.
The knowledge required to get started with parts deco is actually very simple. There is no need to overcomplicate it. The fastest route for a beginner to create professional-grade, adorable items is to pick up a starter kit and materials from online shops like Amazon and simply start crafting. In this guide, I share all my experience and knowledge—from fundamental basics and smart tool selection to a practical step-by-step process. By the time you finish reading, you will know exactly what to do today!
Handmade crafts span resin, clay, knitting, and much more, but parts deco is the ultimate craft for beginners to tackle first. The reason is simple: it requires zero specialized techniques or expensive, heavy equipment.
The core process of parts deco is merely adhering charms and stones onto a base. Unlike clay, you do not have to shape objects from scratch, nor do you need to handle complex needlework like sewing. By arranging existing charms and gluing them firmly in place, anyone can craft a polished, high-quality piece.
Additionally, parts deco holds the unique appeal of dramatically transforming everyday objects. Notebooks, phone cases, compact mirrors, mint tins, and hair clips can be reborn through your own hands into one-of-a-kind treasures. The joy of carrying a sparkling item you customized yourself is truly addictive once experienced.
If you are worried that lacking artistic talent will prevent you from arranging charms tastefully, rest assured. Parts deco follows clear placement rules that guarantee a balanced, beautiful look. Rather than relying on guesswork, adhering to these fundamental layout guidelines ensures a gorgeous result. There is no need to hold back just because you are a beginner—dive right into the world of parts deco!
Getting started requires four main categories of tools and materials. Understanding their roles and choosing correctly is the biggest key to avoiding mistakes.
This is the foundation where your charms will go. For beginners, a rigid item with a flat surface is essential. Hard plastics, acrylics, and metals work best.
Ideal items include flat bangs clips, compact mirrors, pill cases, hard plastic phone cases (avoid soft silicone), and rigid trading card cases (toploaders). Avoid spherical or heavily textured surfaces, as well as flexible faux leather and silicone, because charms peel away easily from them on your first attempt.
These decorative elements are the stars of your project. They fall into two main categories: flatback resin charms and rhinestones/pearls.
Resin charms are three-dimensional, larger focal pieces shaped like characters, sweets, or flowers. Always choose charms with a completely flat back. If the back is curved or uneven, the surface contact area with the base is too small, and the charm will pop off quickly.
Rhinestones and flatback pearls serve to fill gaps between large charms and add sparkle across the entire surface. Rhinestones are available in flatback Preciosa, glass, and acrylic. If you care about brilliance and a luxurious finish, glass stones are the clear winner. Acrylic stones are inexpensive, but their shine is noticeably duller, and glue fumes can cause their surface to cloud over. If you want truly stunning results, invest in glass rhinestones.
Glue selection is the single most critical factor in parts deco. Choosing the wrong adhesive will cause charms to slide around during assembly or flake off constantly once dry.
The must-have properties for parts deco glue are high clarity, moderate viscosity, and zero blooming (no white chalky haze left behind). Standard instant superglue is completely out of the question. Instant glue cures too quickly to allow placement adjustments, and as it dries, it produces white vapor that irreparably fogs up rhinestones and charms.
Recommended choices for beginners include solvent-free, single-part craft adhesives or two-part epoxy glues. Specialty craft glues like Cemedine High Grade Model Glue or single-part epoxy deco glues are fantastic because they minimize stringing and dry crystal clear, making them very forgiving for beginners.
Attempting to pick up tiny rhinestones with bare fingers is nearly impossible. To craft efficiently and neatly, prepare these three dedicated tools:
While parts deco is accessible, beginners often stumble into the same classic pitfalls. Knowing these causes beforehand allows you to bypass them entirely.
The most frequent issue is finished charms falling off easily. Ninety percent of the time, this stems from choosing the wrong glue or applying too little of it.
Wood glue or standard all-purpose household craft glue lacks sufficient adhesion on plastic, metal, and glass, so avoid them. Furthermore, applying an overly thin layer leaves dry pockets under the charm, causing it to snap off upon impact. The secret to unbreakable durability is coating the entire underside of the charm so that a tiny bead of glue squeezes out around the edge when pressed onto the base. If you use glue that dries transparent, any excess remains completely invisible.
Brand-new phone cases or mirrors often carry invisible manufacturing oils, and their surfaces are frequently too smooth for adhesive to grab hold securely. Gluing straight onto them causes the entire adhesive sheet to peel off like a sticker.
The remedy is thorough cleaning and priming. Before starting, wipe down the surface thoroughly with rubbing alcohol or nail polish remover to strip away all oils. Additionally, lightly sanding the surface with fine sandpaper (around 400 to 600 grit) creates micro-grooves that dramatically enhance adhesive grip and multiply durability.
Conceiving a design purely in your head and gluing pieces down immediately is a recipe for disaster. Realizing midway through that a charm doesn't fit, the overall balance is off, or awkward gaps remain leaves you stranded, as the glue begins setting right away.
Always conduct a dry layout before touching any glue. Arrange your charms on the dry base to evaluate composition, color balance, and spacing. Once you are satisfied, snap a quick photo with your smartphone. Using that photo as your roadmap during the actual gluing process is the golden rule of clean crafting.
When starting a new hobby, many people first consider picking up everything from budget dollar or 100-yen stores. While budget stores are convenient, parts deco has items that are perfectly fine to buy cheaply and others that you should strictly order from specialized online retailers. Conflating the two results in cheap-looking, fragile work.
Items perfectly suitable for budget purchasing include practice bases and utility accessories:
These utility supplies perform well enough at budget tier. Make full use of them for your initial trials and practice bases.
In contrast, the following three items should always be sourced from Amazon or dedicated craft suppliers:
If you aim to create beautiful, long-lasting work, sourcing your core materials and main pickup tool online is undeniably the right choice.
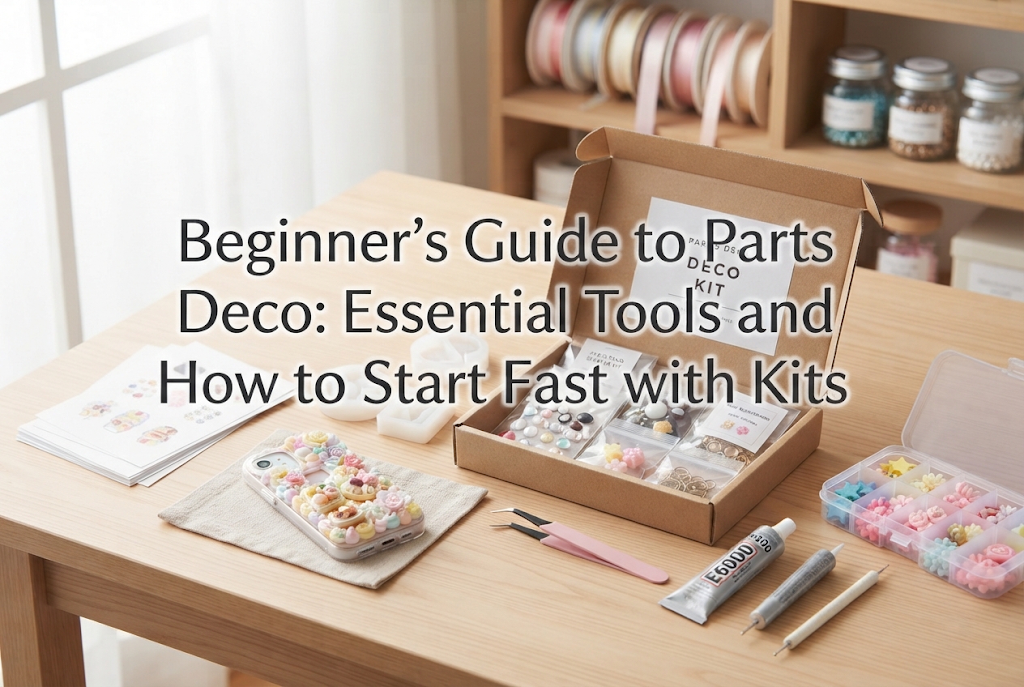
If you find yourself paralyzed by what to buy, the definitive answer is clear: grab a comprehensive parts deco starter kit on Amazon right away. It is the smartest, most budget-conscious, and most dependable path forward.
Buying materials piecemeal as a beginner almost always leads to missteps: ordering mismatched stone sizes, finding that chosen charms do not fit your base, forgetting pickup tools, or picking the wrong glue type. These errors waste time and money.
Beginner starter kits online assemble all necessary essentials in one package:
A kit delivers an all-in-one environment, letting you start the very day it arrives. It offers much higher cost performance than hunting down individual items, and because the components are curated to work together, you never have to fret over tool compatibility.
Endlessly researching supplies delays your crafting journey. Ordering a well-reviewed starter kit and diving in hands-on is by far the most enjoyable and rapid route to improvement.
Here is the practical, step-by-step assembly process to follow once your supplies arrive. Sticking to these five steps will ensure even a first-timer achieves a clean, boutique-worthy finish.
Lay down scrap paper or a protective mat across your workspace. Next, thoroughly wipe the base item (such as a bangs clip or mirror) with an alcohol wipe, completely clearing away fingerprints, oils, and dust.
For slick plastic bases, gently rub the surface with fine sandpaper to create a light, frosted texture (sanding). Wipe away any sanding dust, and your surface prep is complete.
Decide the placement of your charms on the bare surface. The golden rule of parts deco design is: always position the largest focal charms first.
If you have a large character or floral cabochon, center it or place it slightly off-center at the visual sweet spot. Next, arrange medium-sized charms around it, and reserve the tiny rhinestones and pearls to fill in remaining gaps later. Once your dry layout is finalized, take a clear overhead photo with your smartphone.
Move your dry-placed charms onto a tray. When applying adhesive to the base, do not coat the entire surface at once. To keep the glue from skinning over before you reach it, work in manageable sections of a few square centimeters at a time.
For large resin pieces, apply a generous dab of glue directly to the back of the charm using a toothpick. For rhinestone areas, spread a thin, even coat of glue onto the base itself.
Referencing your layout photo, place charms back onto the base in order. Set down your large focal pieces first, then proceed to the rhinestone fill.
Lightly touch the top of a rhinestone with your pickup pencil, lift it, and gently set it into the glue. Once positioned, press down lightly with tweezers or the pad of your finger to seat the stone's base fully into the adhesive. Mix larger stones (SS12–SS16) across open areas and slot smaller stones (SS3–SS6) into awkward gaps. This dense packing creates seamless, professional sparkle.
Once everything is placed, resist the urge to handle the piece and let it cure undisturbed. While the glue surface skins over in dozens of minutes, achieving full interior cure requires a solid 24 hours.
After 24 hours, gently nudge the edges of charms with your fingertip to ensure nothing wobbles. If you detect any loose edges, dab a tiny bit of glue onto a toothpick, slip it into the seam, and let it dry. Your durable, flawless deco item is complete!
If you are wondering what base item to customize first, here are three hand-picked recommendations that offer low difficulty, high practicality, and immense fun.
Flat hair clips are my top recommendation. Because the surface area is small, they require few charms and minimal time. You can finish one without losing focus, making it the perfect first project. They also make wonderful handmade gifts for friends.
Next on the list is a folding pocket mirror. The lid provides a broad, flat canvas, allowing you to showcase larger focal cabochons or neat stone gradients. They are extremely practical, and pulling a sparkling mirror from your bag always brings a smile.
Decorating rigid toploader cases for idol or character photocards—a major trend in Japanese oshikatsu (fan culture)—is wildly popular. Crafters often pipe decorative faux-whipped cream gel around the frame and embed charms and stones into it. Using charms matched to your favorite character's image color creates a heartfelt, custom piece of fan memorabilia.
Parts deco requires no intimidating technical training. As long as you select the proper tools and follow the fundamental process, anyone can create stunning pieces right away.
Spending weeks wondering if you can do it is unnecessary. Skip the overthinking, search for a quality parts deco starter kit on your favorite online storefront, and place your order. The moment that package of glittering rhinestones and cute charms lands on your doorstep, your excitement to craft will take over!
Once your tools are at hand, revisit the 5-step process outlined here and start with a simple clip or compact mirror. Enjoy the pure thrill and pride that comes from holding your own handcrafted, sparkling creation!
If you found this guide helpful, please share it with your fellow crafting friends on social media. See you in the next post—this was Yassy from Crafters!

For example, if you are looking for articles about mizuhiki, try searching for "mizuhiki"; if you are interested in tools, try keywords like "nippers" or "pliers."
