The Ultimate Guide to Glue Guns: Types, Uses, and Pro Tips for Crafting Success
yassy
Crafters!

Hello, everyone! It’s Yassy from Crafters! (・∀・)
Once you’ve been crafting with resin for a little while and have mastered the basics, creating new pieces becomes incredibly fun. Personally, I love spending time making various handmade items every day, browsing wonderful creations in handmade shops, and collecting new supplies.
However, as you make more and more pieces, there comes a point where almost every crafter runs into the exact same frustration:
At this stage, many beginners start blaming themselves, thinking, "Maybe I just don't have enough skill…" But let me be completely clear: about 80% of the time, it isn't a lack of technique at all. You've simply hit the limit of the introductory tools that came with your starter kit!
Starter kits are fantastic for taking your first steps into resin craft easily and affordably. But if you want to achieve shop-quality clarity or create polished pieces ready for sale, it is time to graduate from those basic tools.
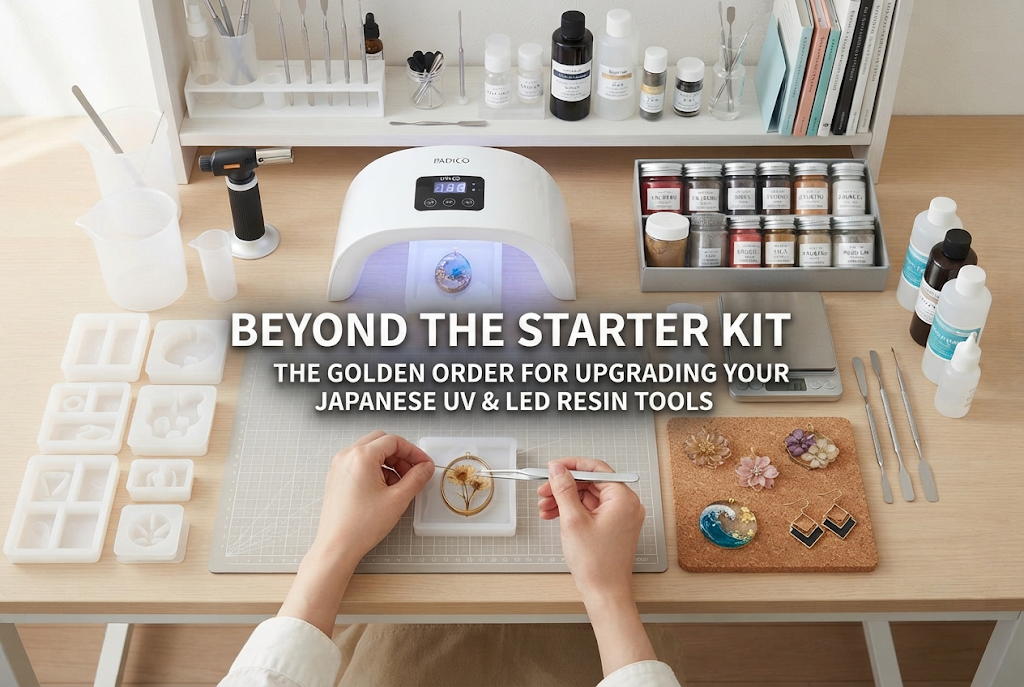
In this guide, I will walk you through the "Golden Order of Tool Upgrades"—a strategic roadmap to get the maximum jump in quality with minimal investment, without wasting money. Read on to discover how upgrading just a few key items can transform your work!
First, let’s talk about why staying with starter kit tools holds back your craft quality. Starter kits are designed with one primary goal in mind: gathering all necessary tools in one box at the lowest possible price point.
The silicone molds, curing lights, and mixing sticks included in beginner kits are basic, low-cost versions. They serve their purpose well while you learn the step-by-step process, but when it comes to fine surface finishes and work efficiency, they impose major limitations.
For example, basic silicone molds often have a slightly rough inner surface finish. When resin cures inside them and is removed, the piece comes out looking cloudy and frosted. Furthermore, starter curing lights usually have low wattage, taking much longer to cure resin while causing sticky surfaces or uneven curing.
Once you move beyond the beginner phase, your goal is to achieve instant, striking clarity right out of the mold, along with a smooth, stress-free workspace. To make that happen, you need to systematically replace your tools with specialized, high-quality alternatives, starting with the ones that directly affect the final appearance.
The biggest mistake you can make when buying new equipment is picking tools completely at random. To upgrade your work efficiently on a budget, the sequence in which you replace your items matters immensely.
Based on my own experience testing and replacing countless tools over time, here is the foolproof upgrade sequence:
By upgrading along this exact path, you will notice a dramatic improvement in your finished pieces with every single tool you replace. Let’s break down why each item is placed in this order and how to choose the right one!
The absolute number one item you should replace first is your silicone mold! Surprisingly, the primary factor determining the gloss, shine, and clarity of a resin piece isn't the liquid resin itself, but the interior smoothness of the mold.
Inexpensive molds included in starter kits lack a perfectly smooth inner surface, featuring microscopic roughness instead. As a result, no matter how clear or high-grade your liquid resin is, the cured piece comes out with a dull, frosted surface.
When shopping for replacements, look specifically for molds labeled "mirror-finish" or "high-transparency silicone." Premium molds available at craft supply stores or online specialty shops have interior walls polished as smooth as a mirror.
When you cure resin inside a high-quality mold and pop it out, you get an immediate jewel-like gloss and crystal clarity. Because this dramatically reduces the need for tedious sanding or recoating, upgrading your mold yields the single biggest improvement in quality.
In addition, premium silicone offers superior flexibility and durability, preventing tearing, warping, or loss of shape when demolding. Switch to high-quality molds first—especially for your favorite, most-used designs.
The second tool you should upgrade is your UV-LED curing light. A capable lamp is essential to prevent tacky surfaces from incomplete curing, heat distortion during curing, and yellowing over time.
Many lights included in starter kits are compact, foldable units outputting a modest 6 watts or so. These lack sufficient power to drive light deep into the center of thicker resin pieces.
When choosing a replacement lamp, aim for two key specifications: an output between 24W and 48W, and dual-wavelength support (combining 365nm UV light and 405nm LED light).
Switching to a high-power lamp reduces curing times from several minutes down to just tens of seconds. Curing the resin quickly and firmly maintains sharp edges and prevents warping or shrinking during the process.
Additionally, selecting a dome-style lamp with an internal reflective surface ensures light reaches your creation evenly from all angles, eliminating the frustration of uncured, sticky undersides.
Coming in at number three is a set of mixing tools, which might seem simple at first glance. However, if you regularly struggle with tiny trapped bubbles in your cured resin, upgrading these tools can solve your problem instantly.
Starter kits typically include disposable small plastic cups and wooden toothpicks or skewers. However, wood has fine natural grain on its surface, which traps air and introduces countless micro-bubbles into the resin as you stir.
Upgrade to deep, flexible silicone mixing cups and flat metal or silicone mixing spatulas. Silicone cups are flexible, allowing cured resin leftovers to peel right off so they can be cleaned and reused indefinitely.
Using a flat, spatula-type stick allows you to slice smoothly through the resin liquid while mixing, drastically suppressing air bubble formation. It also makes blending color powders and pigments far more thorough and uniform.
Creating crystal-clear pieces free of bubbles depends heavily on using the right tools during the mixing stage before any pouring takes place.
The fourth item on the list covers tools for removing burrs (rough edge overflow) and applying final surface finishes. Leaving rough edges untouched or leaving cut surfaces uneven immediately gives a piece an unrefined, amateur look.
Most beginner kits include only one small metal file, which isn't enough to achieve a polished edge. Instead, invest in waterproof sandpaper and sponge abrasives across a variety of grit sizes, along with a brush-on, high-clarity resin coating liquid.
Work through the sandpaper grits systematically: starting with #400 (for removing burrs and heavy shaping), moving to #800 (for smoothing surfaces), and finishing with #1500 to #3000 (for fine polishing). This creates clean, sharp edges and smooth curves.
To restore brilliance to dull, sanded surfaces, simply brush on a thin layer of high-transparency coating resin and cure it under your lamp. The sanding marks disappear completely, leaving a flawless, glass-like shine.
Refining the tactile feel of smooth corners elevates your creations straight to a retail-ready standard.
At number five, we have precision tweezers and workspace organizers designed to push your accuracy and crafting comfort to the limit.
When placing delicate inclusions like dried flowers, tiny beads, gold leaf, or metal charms into liquid resin, standard stationery tweezers lack the accuracy required. A slip of the hand can drop parts into the resin prematurely, creating unwanted air bubbles.
Look for ultra-fine, alignment-precise tweezers engineered for electronics or medical use. Bent-nose (tsurukubi) tweezers are particularly useful because they keep your hand from blocking your view, allowing you to place components with millimeter precision.
Pairing these with a thick silicone work mat to protect your table, as well as an emboss heater (heat gun) to pop surface bubbles with quick heat, removes crafting stress completely.
When upgrading equipment, beginners frequently fall into a few common trap patterns. Crafters often ask me why their work isn't improving after buying new items, and it almost always comes down to misunderstanding upgrade priorities.
To save you from unnecessary spending and regret, keep these common missteps in mind:
This is the most common mistake. Beginners often think, "I want higher quality, so I'll buy the most expensive resin liquid available!" and purchase a large bottle of premium resin.
While high-grade resin offers excellent clarity and yellowing resistance, using it inside a rough, low-quality mold or under a weak lamp will still produce cloudy or tacky results. Before upgrading your resin liquid, make sure you have proper molds and a strong lamp. High-end resin can only show its true worth when supported by quality foundational tools.
When motivation strikes, it's tempting to spend a lot of money purchasing every professional tool on the market all at once! While that enthusiasm is understandable, introducing too many new items at once leads to confusion and a cluttered workspace.
The ideal approach is to upgrade step-by-step according to your specific crafting challenges. If your surfaces lack shine, start by upgrading one silicone mold. If air bubbles are your main issue, swap your mixing stick for a silicone spatula first.
Let me share a quick personal story from when I made the switch from my starter kit to professional-grade tools!
When I first started resin crafting, I used a thin UV light and a small sphere mold from a kit to create galaxy-themed keychains. But every time I demolded a piece, the surface was slightly hazy, and it felt faintly tacky when touched. I felt a bit disappointed, wondering if this was simply the limit of home resin crafting.
That was when I decided to invest in a mirror-finish sphere mold and a 48W UV-LED lamp from a craft supply specialist. The result was genuinely shocking!
After curing for just a few dozen seconds, I slipped the rock-hard sphere out of the mold. It had an intense, glassy shine so smooth my fingers slid right over it. Without any sanding or polishing, it sparkled like a high-end glass marble.
I was deeply moved realizing how much a tool change could transform a piece's expression. That exciting moment drove me to dive deeper into resin crafting, and I've been creating ever since. Great tools are truly the best partners for bringing out a maker's full potential.
If you're wondering how much budget to plan for your tool upgrades, here is a practical three-step roadmap tailored to different goals and spending comfort levels:
To achieve the biggest visual impact on a modest budget, focus on just two items:
This simple combination dramatically improves surface clarity while reducing air bubbles. It’s the perfect first step if you want to keep using your current kit lamp while boosting surface beauty.
If you plan to gift your work to friends or start listing items on handmade sales platforms, add these core tools:
At this stage, problems with tackiness or improper curing disappear completely. Adding proper sanding and coating techniques allows you to consistently produce clean, warp-free items from any angle.
For those actively selling as handmade artists or looking to build a brand, add high-precision gear to refine fine details:
Outfitting your studio to this level removes virtually all physical barriers in resin crafting, enabling you to bring your exact design visions to life with complete accuracy.
By mastering your starter kit, you've already built a solid foundation in resin crafting techniques. Now is the ideal time to let better tools support your skills and lift your creative expression to a higher level.
To recap, here is the Golden Order for upgrading your resin tools:
With every single tool you upgrade, you'll feel the thrill of pulling a bright, flawless piece out of its mold. Loving your own creations and sharing them proudly with others is the true joy of handmade crafting. Pick your next partner tool and enjoy making wonderful new resin pieces! I'm cheering you on!
If you found this guide helpful, please share it with your fellow crafter friends on social media! See you in the next article! This was Yassy from Crafters!


For example, if you are looking for articles about mizuhiki, try searching for "mizuhiki"; if you are interested in tools, try keywords like "nippers" or "pliers."
