Where to Sell Handmade Goods in Japan: A Complete Guide to Japanese Craft Marketplaces and Online Shops
yassy
Crafters!

Hello, I'm Yassy from Crafters! (・∀・)
I regularly make various handmade items myself, and I also love admiring other makers' wonderful creations and shopping at online stores and craft fairs! As someone deeply immersed in the world of handmade crafts as both a buyer and a maker, the thing I struggle with most when buying items online is understanding their actual size.
Have you ever seen something online, thought "That's so cute!" and bought it, only to feel disappointed when it arrived because it was far too small to use, or much larger and heavier than expected? Actually, a great many people have had this exact experience.
This gap between the imagined size and the actual product leads to a major sense of disappointment for buyers. For makers, it is the biggest cause of low review ratings, returns, and exchange complaints.
You might think writing numerical dimensions like "5 cm H × 3 cm W" on the product page is enough. However, humans cannot instantly and intuitively picture a 3D object's size from raw numbers alone.
The skill to help customers instantly grasp a product's size at a single glance through a photo is a crucial technique that heavily influences sales in online retail!
In this article, I, Yassy, will thoroughly explain the secrets of taking stylish size-comparison photos without making them look cluttered or unrefined. By reading this guide, you will be able to take photos that completely eliminate customer complaints about size misunderstandings and give buyers the confidence to make a purchase!
Let's start with the bottom line: in online shop management, photos that clearly show scale at a glance serve as the ultimate deciding factor for a purchase.
When customers buy handmade items online, they cannot touch them or hold them up to themselves. Therefore, they are constantly simulating in their minds how the item will fit into their daily lives.
For instance, with a pouch, they think, "Will my everyday makeup fit inside?" With earrings, they ponder, "Will these look too flashy on my earlobes?"
When a single photo allows them to finish this mental simulation instantly, they feel safe hitting the "Buy" button. Conversely, photos where scale is hard to gauge cause hesitation, which is the leading reason potential buyers leave without purchasing.
Numerical measurements have clear limits. When told something has a "width of 15 cm," very few people can instantly translate that in their minds to compare it with a paperback book or a smartphone.
That is why styling that intuitively communicates size in a single visual shot—rather than relying solely on text—is absolutely essential.
In an attempt to convey size, makers often unintentionally ruin the charm of their work and their brand's worldview. Here are three fatal mistakes beginners frequently make. Take a moment to check if you fall into any of these traps!
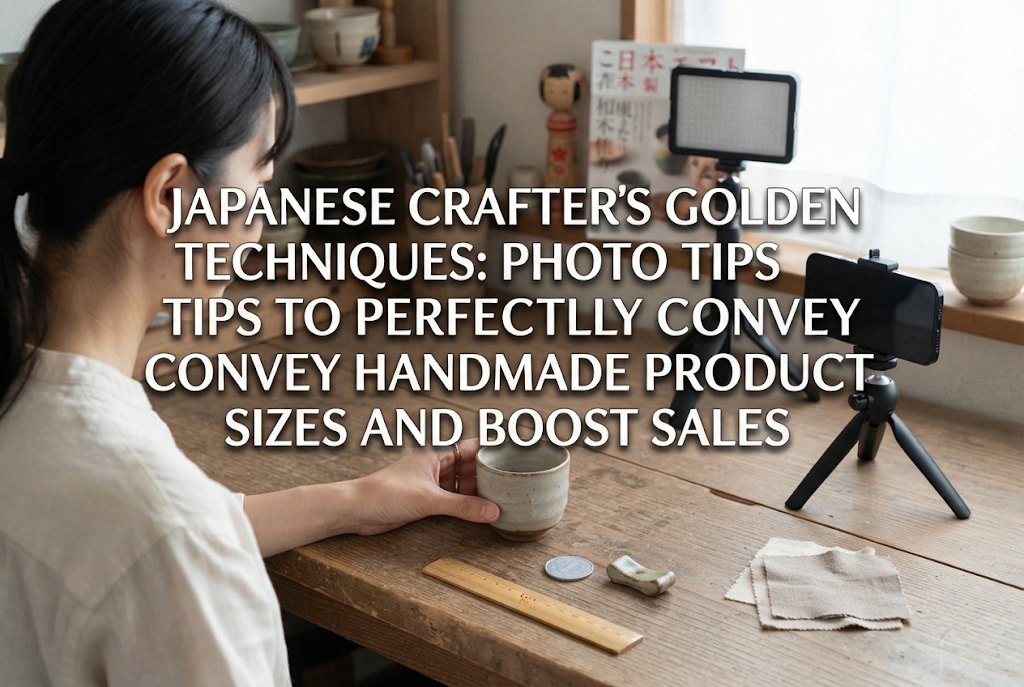
A standard technique for size comparison is placing a 10-yen coin or a plastic ruler right beside the item. While this is accurate for dimensional measurement, it is a complete misstep for handmade product photography.
Coins like a 10-yen piece or plastic office rulers instantly bring a mundane, office-like feel into the photo. When a coin sits next to a beautifully crafted piece of jewelry or leather goods that you spent hours making, it breaks the atmosphere and gives off a cheap impression.
A professional golden rule is to choose refined props that convey scale without ruining your shop's aesthetic.
Placing an item on white background paper to show details and colors clearly is an important basic practice. However, running a shop where every single photo features an isolated item sitting alone in space is risky.
A photo with no surrounding reference points looks as if the item is floating in deep space. When zoomed in to fill the frame, a tiny dollhouse miniature can end up looking the exact same size as a large piece of home decor.
To convey size effectively, you must provide photos that include reference objects alongside your clean, standalone product shots.
When you move very close to a product using a smartphone's default camera, the lens characteristics cause the front of the item to look unusually large while the back shrinks away. This is known as perspective distortion.
Photos taken under these conditions distort the actual 3D volume and proportions. Size misunderstandings caused by perspective distortion directly lead to post-purchase complaints, so this must be avoided at all costs.
How can you convey size with great taste without adding unwanted clutter? The answer is to style your shot alongside props whose sizes everyone recognizes and that fit your brand's atmosphere!
Be sure to select comparison props that satisfy the following conditions:
Here is a breakdown of recommended comparison props organized by product category:
For jewelry and accessories, the sense of scale when worn on the body or held in the hand is most important.
Placing an accessory neatly on the palm of your hand is a powerful method to convey smallness and delicacy in an instant. Because everyone intuitively understands human hand sizes, simply resting an item on a hand communicates its scale perfectly.
When showing your hands, ensure you shoot in natural light with clean, well-cared-for skin.
With bags and pouches, buyers care less about external dimensions and more about capacity: what can actually fit inside?
Try placing a smartphone or lipstick neatly beside a pouch, or style the pouch with its zipper slightly open so cosmetics peek out. When a customer realizes, "My phone and lipstick will fit perfectly in there!" their desire to buy jumps dramatically.
For desk accessories and room decor, showing their presence within a space is key.
Placing a mug next to your item on a desk instantly shows how much desk space it will occupy. Integrating your work into a cafe-style arrangement delivers both scale and a stylish vision of everyday use.
For miniature food, ultra-fine embroidery, or dollhouse items, their surprising smallness is their main attraction.
Intentionally adding tiny reference items highlights the delicate craftsmanship unique to handmade creations. A close-up shot of an item resting on a fingertip serves as convincing proof of both intricate detail and tiny scale.
Once you have chosen your styling props, the next step is setting up camera angles and compositions. There are golden rules for each genre that guarantee success. Follow these tips!
The single best way to convey the size of accessories is undoubtedly a worn shot.
For earrings, including just one photo of the item worn on an earlobe allows buyers to understand the hoop diameter or drop length in a split second. If modeling the items yourself is difficult, utilize realistic acrylic ear displays or paper display sheets.
When preparing worn shots, keep these points in mind:
Worn shots that clearly show where the pendant rests or how many centimeters an earring hangs below the ear prevent size misunderstandings completely.
For fabric goods like bags and pouches, a flat-lay photo of an empty item fails to communicate actual capacity.
To convey size perfectly, take two patterns of photos: one showing the item packed with contents, and another showing those contents laid out neatly beside it.
Specifically, capture these cuts:
Including a photo proving "all these items fit comfortably inside" instantly removes the customer's doubt about whether their own belongings will fit.
For larger wooden furniture, vases, tapestries, and interior goods, wider room-setting photography is crucial.
Shooting the item alone against a plain backdrop fails to convey how much visual presence or space it takes up in a home.
Placing your work inside a human living space accurately communicates its scale in a way the buyer's brain can process instantly.
No matter how stylish your props are, using incorrect camera settings or angles will distort the product's true size in photos. Here are the golden rules for camera lens and composition settings when shooting with a smartphone.
A smartphone's standard camera setting (1x) uses a wide-angle lens to capture a broad field of view. Moving close to a product with a wide-angle lens creates perspective distortion, making the front look unnaturally large while the back shrinks away.
This distortion alters the aspect ratio of your work and gives a completely wrong impression of its true scale.
The technique to eliminate this distortion is simple:
By stepping back and zooming in, perspective distortion disappears, accurately rendering the true shape, aspect ratio, and relative scale to surrounding props. This is a rule professional photographers follow religiously, so start practicing it today!
Switching camera angles is also vital to prevent size misinterpretation.
A top-down shot (flat lay) is ideal for showing flat dimensions like height and width. However, top-down shots completely hide height, thickness, or gussets.
Be sure to pair a flat lay with a side-view or 45-degree angle shot.
When both angles are provided, customers can build an accurate 3D mental model of your product.
Most handmade marketplaces and personal e-commerce platforms allow you to upload multiple photos per item. Which photo slot is most effective for displaying size comparison images?
There is a clear golden structure for photo order!
A common mistake is cluttering the very first thumbnail image with coins or comparison props. Avoid doing this.
Coins and excessive props make it difficult for buyers to instantly tell what is actually for sale. Your primary thumbnail photo should focus entirely on a clean, single-item shot (or simple styling) that captures 100% of the item's beauty and brand concept.
The sole purpose of the first photo is to grab attention, make buyers think "That's beautiful!" and prompt them to click the listing.
Once a customer is drawn in by your main photo and clicks into the listing, their mindset progresses through these steps:
Place your size comparison photos right in slots 3 through 5, exactly when buyers naturally start wondering about dimensions and practical use.
When a buyer who loves your design thinks, "I wonder how big it is?" and immediately sees a photo of it in a hand or next to a phone, they can proceed seamlessly toward purchasing without friction.
Successful makers often go one step further by adding text overlays with dimensions directly onto the image.
For example, in a worn shot or a prop comparison shot, add simple, neat text in a corner reading "H: approx. 4 cm × W: approx. 2.5 cm."
For smartphone users who prefer not to scroll down into long text descriptions, seeing visual comparisons and precise numbers in a single glance is extremely helpful.
When adding text, place it in empty background spaces using a clean, readable font in black or white so it does not obscure the product itself.
To show you how I approach photo composition in actual practice, let's walk through two specific product examples! Imagine you are setting up your own photography space while reading.
For delicate accessories like this, shooting the item alone carries a high risk of making it look like a large statement earring.
Here is how I would shoot it:
With this setup, buyers instantly understand: "Ah, it's a lovely, delicate size that isn't overly dramatic!"
Drawstring bags are convenient, but flat fabric items are among the hardest for buyers to gauge in size.
Here is how I would shoot it:
With these four photos, buyers can perfectly visualize carrying the bag out on an errand. Questions and complaints regarding size will disappear completely!
We have covered professional secrets for clearly communicating handmade product sizes through photos. Let's do a quick recap of the key points!
When the size of your work is clearly conveyed through photos, customers can click the "Buy" button with excitement instead of hesitation. When they open the package upon arrival, they will be thrilled that it looks exactly as imagined, leading to repeat business and glowing reviews.
Clear size photography is the highest form of consideration you can offer your customers, and it is your strongest tool for delivering the true value of your work.
Try incorporating these photography techniques today to deliver your lovely creations to more people with confidence! As a fellow handmade enthusiast, I am cheering you on and hoping your wonderful creations find all the love they deserve!
If you found this article helpful, sharing it with friends on social media or messaging apps would make my day! Until next time, this was Yassy from Crafters!


For example, if you are looking for articles about mizuhiki, try searching for "mizuhiki"; if you are interested in tools, try keywords like "nippers" or "pliers."
