Essential Shot List for Japanese Handmade Product Photography: angles and shot counts that boost sales
yassy
Crafters!

Hello! It's Yassy from Crafters! (・∀・)
When you take photos of your handmade creations to post on online shops or social media, are you satisfied with how they turn out? So many crafters struggle with a common problem: their items look incredibly cute in real life, but in photos, they appear dull, losing half of their original charm.
I love making my own crafts, but I also love browsing and buying work from other makers. Looking at craft photos from a buyer's perspective, I can tell you one absolute truth: no matter how fantastic a piece is, if the lighting in the photo is poor, buyers simply won't purchase it.
The ultimate key to conveying 100% of your item's charm lies in natural light. You don't need to purchase expensive professional studio lights. As long as you master how to use sunlight, you can consistently capture pro-grade, high-selling photos using just a single smartphone.
In this guide, I'm going to share the absolute rules of natural light photography that craft beginners can put into practice starting today. From understanding light qualities, window orientations, and peak time slots to controlling shadows like a pro, I'm sharing all my practical secrets!
Why is natural light so heavily emphasized in product photography? The reason is clear: sunlight is the most perfect light source on Earth for accurately reproducing the true colors and textures of objects.
When you shoot under standard ceiling lights or LED lamps in a room, your craft items take on an unnatural yellow or green cast. In photography, this is known as a color cast. If the color in your photo doesn't match the actual item, it becomes the leading cause of customer complaints, such as "the item looks different from the picture."
Furthermore, natural light produces extremely smooth gradients. It excels at bringing out delicate surface textures, soft fabric qualities, resin transparency, and metallic sheen in the most captivating way.
When prospective buyers browse an online shop, they cannot touch your work physically, so they examine the photos intently. Photos taken in natural light convey a clean, high-quality impression that creates a strong desire to buy the moment they look at them.
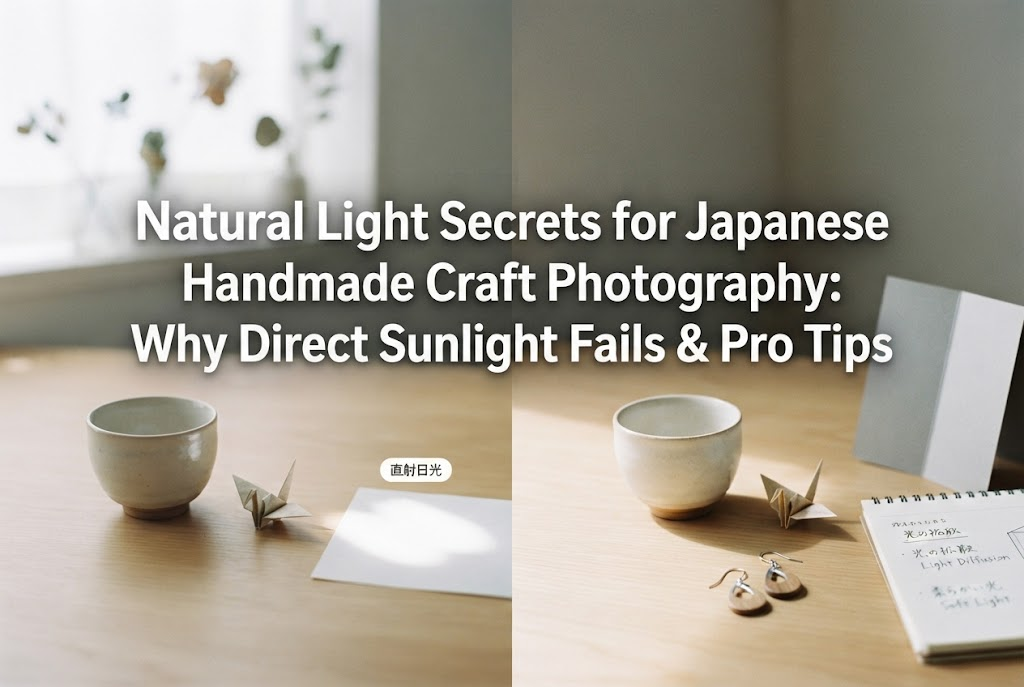
Even though natural light is king, you must never place your product where sunlight hits it directly. Shooting in direct sunlight is the single biggest mistake you can make in handmade craft photography.
Direct sunlight causes two devastating problems:
First is blown-out highlights (known in Japanese photography as shirotobi). Because the light is overly intense, the bright areas on the surface of your product turn completely pure white, erasing fine patterns and delicate details.
Second is harsh, dark shadows. The extreme contrast between light and shadow causes the shadowed areas of your product to drop into pitch black. As a result, the shape of your craft appears distorted, giving the image a gloomy, uninviting feel.
The natural light you should use for craft photography is never direct sunlight. You want soft, diffused light created by filtering sunlight—such as light passing through a sheer lace curtain or light in the shade. By using soft, diffused light, you prevent blown-out highlights and create soft, gently blurred shadows for a beautiful photograph.
Sunlight shifts every minute throughout the day. Depending on which window in your home you use to bring in light, the resulting photo will look completely different. Understanding the best window directions and time frames is essential.
The nature of light varies depending on the direction your window faces:
The golden time window for shooting is the four-hour period between 10:00 AM and 2:00 PM. During these hours, the sun is high in the sky, and the color temperature of the light is at its most stable, allowing you to capture natural, crisp tones.
Shooting too early in the morning or late in the afternoon introduces unwanted red or blue tints into your lighting. Schedule your shoots concentrated within this golden window.
Simply placing your item near a window isn't quite enough for a perfect photo. You need tools and techniques to control incoming light and bounce it around the entire product. Everything needed can be found at a 100-yen shop (dollar store) or around your house!
A diffuser transforms direct sunlight into gentle, soft illumination. The simplest diffuser is a plain white lace curtain on your window. A simple, patternless lace curtain works best.
If you don't have a lace curtain, taping tracing paper or a thin white piece of craft fabric over the window functions as a flawless diffuser.
When you shoot using only window light (side lighting), the side facing the window stays bright, while the opposite side falls into dark shadow. A reflector bounces light back into those dark areas to brighten them up.
The presence of a reflector changes photo quality night and day. You can easily make a DIY reflector using white foam boards (styrene boards) or thick white poster board from a dollar store.
Prepare two A3 or A4 sized white foam boards and tape their edges together to form a folding "V-flat" reflector that stands up like a book. Place this on the shadowed side of your craft item; light will bounce back cleanly, making dark shadows vanish in an instant.
The angle from which light hits your item determines the entire mood of the photo. The two essential lighting directions for handmade products are side light and semi-backlight.
Avoid shooting with the window directly behind you (front light / direct overhead light). Front lighting flattens the dimensional feel of your work and causes your own body or phone shadow to fall directly onto your piece.
Different handmade materials react to light in distinct ways. Here is how to tailor your natural light approach depending on what your piece is made of:
For materials where clarity and sheen are key, mastering semi-backlight is everything. Letting light shine diagonally through the back of the piece emphasizes internal sparkle and transparency.
Since the front of the item can easily look dark in this setup, tilt a white reflector board right below the camera lens to fill the front with light. Position the product so light casts a beautiful glowing shadow behind it (like a suncatcher effect) to capture breathtaking photos.
For matte materials that don't reflect light, texture is life. Use side light to gently illuminate the piece, bringing out the softness of fibers or the warm grain of wood.
If the light is too harsh, fine textile details will wash out. Use double-layered lace curtains if necessary to create the softest possible light. Move the reflector slightly further away on the opposite side to leave a tiny, natural shadow—this elevates 3D depth.
Metallic fittings and ceramics reflect their surroundings like a mirror, making them the trickiest items to shoot in natural light. Room background reflections or your dark reflection holding a phone can easily show up on the glossy surface.
To prevent this, build a diffused lighting enclosure around your product using white boards. Surround the left, right, and top of the item with white poster board or foam boards, allowing only diffused light inside. This creates clean, elegant white highlight streaks on metallic surfaces while preventing unwanted dark reflections.
Even when attempting natural light photography, beginners often fall into hidden traps that degrade photo quality. Keep these common mistakes and solutions in mind:
Do you leave ceiling lights on thinking it's fine as long as window light is coming in? This creates a terrible situation called mixed lighting.
When white sunlight mixes with yellow or greenish room lighting, your smartphone camera gets confused, leading to strange color blotches. The golden rule when shooting in natural light is to turn off all interior room lights. Even if the room seems a bit dim to your eyes, relying solely on window light yields far cleaner photos.
When you lean in close to take a picture, your body or smartphone shadow might fall over your work. This happens when you block the incoming light path.
The solution is simple: instead of physically stepping closer, use your smartphone's 2x optical zoom and stand a bit further back. Stepping back prevents your shadow from covering the item, and as a bonus, it eliminates lens distortion common in close-up smartphone shots.
A common headache is having inconsistent shop photos: "Yesterday was sunny so photos looked bright, but today is cloudy so they look dark."
In reality, the absolute best weather for craft photography is a slightly overcast / cloudy day. Cloud cover filters direct sunlight, turning the entire sky into a giant softbox diffuser for smooth, seamless lighting.
Cloudy days near a window are far easier to shoot in than harsh, direct sunlight on clear days. Unless it is extremely dark or pouring rain, treat cloudy days as your best photography opportunity!
When tapping your smartphone screen to focus, the overall image might suddenly get super dark or bright. This happens because the phone automatically tries to recalculate exposure (brightness).
When taking photos, press and hold the screen on your item to set AE/AF Lock (Auto Exposure / Auto Focus Lock). Once locked, slide the small sun icon (exposure adjustment slider) up or down to manually dial in the exact brightness where your craft looks best. Controlling brightness manually rather than leaving it to auto mode is a shortcut to success.
Placing your setup too close to a window can cast sharp shadows of window frames or blinds across your backdrop or product. Visible shadow patterns ruin the professional mood by adding messy household vibes.
Keep a distance of at least 50 cm to 1 meter between the window and your product setup. This distance completely blurs out sharp shadow outlines, giving you a clean, seamless background.
If I were to build a home shooting setup today, here is exactly how I would set it up. You don't need a massive studio space at all! This high-performing setup takes under $5 (500 yen) and under 3 minutes to prepare.
With just this setup, soft window light wraps gently around your handmade item, while your DIY reflector washes away unwanted dark shadows. You can effortlessly capture bright, crystal-clear photos that look like they were lit in a professional studio.
When shooting, always switch off room lights, use 2x zoom from a slight distance, apply AE/AF lock, brighten the exposure just a tiny bit, and press the shutter. Once you learn this process, you will produce consistently gorgeous photos every single time!
When it comes to bringing out the true beauty of handmade creations, no artificial light source beats natural sunlight. Before investing in expensive lighting gear, take time to observe how sunlight enters your room and learn how to shape it.
Avoid direct sunlight, filter light through sheer curtains, stick to the golden time window (10:00 AM to 2:00 PM), and lift dark shadows using dollar-store foam board reflectors. Simply following these fundamental rules will dramatically transform your product photos.
When your photos change, the reaction from viewers changes noticeably. You'll hear more "So cute!" and "Lovely!" comments, and you'll get to experience that exciting moment when page views and shop sales take off!
I sincerely hope that the wonderful crafts you poured your heart into reach as many people as possible through amazing photos.
If you found this guide helpful, I'd be so grateful if you shared it with your craft friends on social media! See you in the next article—this was Yassy from Crafters!




For example, if you are looking for articles about mizuhiki, try searching for "mizuhiki"; if you are interested in tools, try keywords like "nippers" or "pliers."
