Craft Rollers Explained: How to Choose and Use Clay Rolling Pins and Pressure Rollers for Flawless Results
yassy
Crafters!
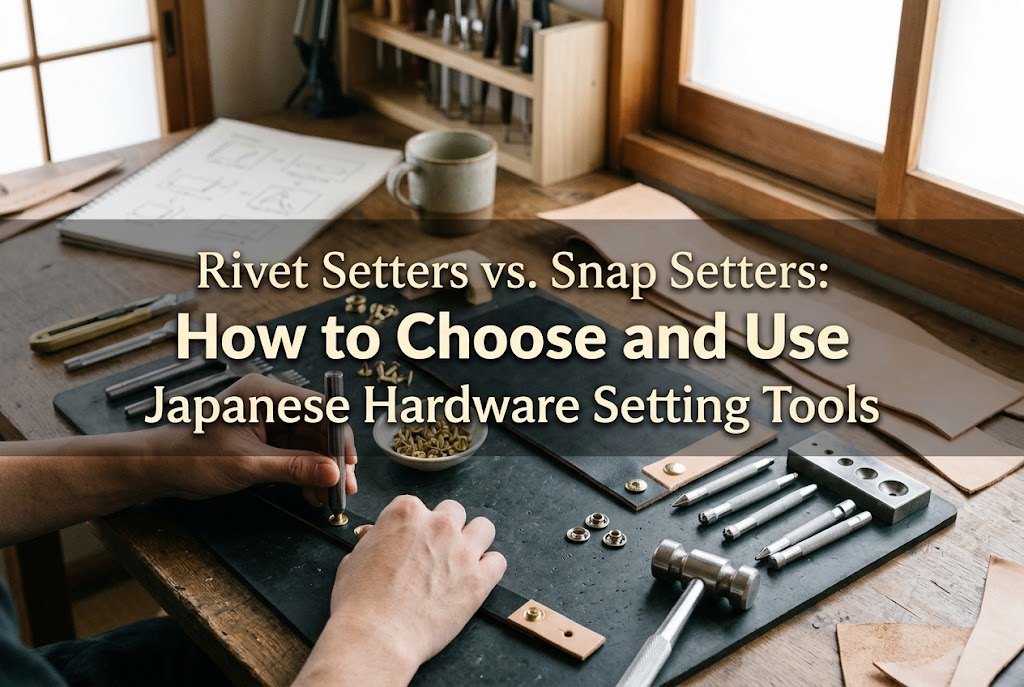

Hello, fellow crafters! It’s Yassy from Crafters! (・∀・)
Whenever you handcraft leather goods, fabric bags, or pouches, adding clean metal hardware instantly gives the entire project a refined, professional look.
Rivets (known as kashime in Japan) securely join layers of fabric or leather, while snap fasteners (hook) let you open and close flaps with a satisfying click. Both are essential components that elevate the durability and design of any handmade item.
However, you cannot secure this hardware simply by pressing it in by hand. To install metal fasteners cleanly without damaging or crushing their shape, dedicated setting tools—specifically rivet setters and snap setters—are an absolute must.
If you try to crush them down with random workshop tools or pliers, the metal will warp, scratch, and end up looking unfit for sale. Using the proper setter distributes force evenly across the fitting, giving you the clean, sturdy finish of a commercial product.
In my daily life, I make and collect a wide variety of bags and small leather goods. Projects made with properly sized setting tools stand out immediately because the area around the hardware is flawless and remarkably durable.
In this guide, I will walk you through everything you need to know: the fundamental roles of rivet setters and snap setters, how to identify different types, and how to choose and use them without making mistakes.
Before choosing setting tools, it is essential to understand the difference between rivets and snap fasteners. While their caps may look similar on the surface, their structural purposes are completely different.
If you pick a tool that does not match your project’s goal, the hardware will fail to function. Keep these distinct purposes in mind:
A rivet consists of a rounded, umbrella-shaped cap (the head) and a post (the stem). You sandwich your material between them and hammer the post down so it expands and locks tightly inside the cap.
Once installed, a rivet cannot be removed. It is designed specifically for places that need to stay permanently joined.
Common uses include attaching bag handles, reinforcing the base of straps, strengthening pocket corners, and securing key fobs. Rivets disperse stress away from stitch lines and firmly bind thick materials that are difficult to sew, multiplying your finished product’s structural strength.
Snap fasteners provide functional opening and closing. In Japanese leathercraft, standard snaps consist of four parts: the cap (atama), the spring socket (bane), the stud (hoso), and the post/eyelet (taka).
Snaps are essential for items that are opened and closed daily, such as wallet flaps, pouch closures, and notebook covers. Installing a snap keeps bag contents from falling out and secures pocket flaps safely.
Unlike permanent rivets, a snap fastener must retain a smooth, reliable snap action even after installation. This makes setting tool precision critical.
Rivet setters are specifically tailored to the shape and diameter of the rivet cap. If the concave cup on the tip of the setter does not match the curve of the rivet head, the metal dome will crush flat the instant you strike it.
Japanese rivets come in two main varieties: single-cap (katamen kashime) and double-cap (ryomen kashime). The setters and anvils required for each differ:
If you place a double-cap rivet on a flat metal plate and hammer it, the dome on the underside will be crushed flat. Whenever you want both sides of your work to look neat and rounded, always use a setting anvil with matching concave indentations.
Rivets in Japanese craft terminology are categorized by cap diameter. The sizes most commonly used in handmade projects are:
Rivet setters are manufactured to match these precise diameters. For a 6 mm small rivet, you must use a dedicated 6 mm rivet setter. If the sizes do not match, the striking force disperses unevenly, bending the stem sideways or gouging the metal cap. Always measure your rivet cap in millimeters and prepare a setter of the exact matching size.
Snap setters have a more complex structure than rivet setters. Different snap styles require entirely different setting tools.
In Japanese craft, the two most common types are spring snaps (bane-hook) and ring spring snaps (jumper hook).
A spring snap contains two thin parallel wire springs inside the female socket. It opens and closes smoothly with light pressure, making it standard for garments, small pouches, and wallets.
Installing a spring snap requires a setter set containing two distinct rods:
Using the correct rod for each component is an absolute requirement when installing spring snaps.
A jumper hook features a sturdy split-ring spring inside the socket, providing a strong, heavy-duty closure. It is commonly used for heavy leather jackets, sturdy bag flaps, and key cases.
The setter tips for jumper hooks look completely different from spring snap tools. The tool for the female socket has a thick, flared head designed to spread the internal tube outward. If you try to install a jumper hook with a spring snap setter, the hardware will not flare properly and will fail to secure. Always verify whether your hardware packaging specifies "Jumper Hook" or "Bane-Hook."
Leathercraft toolboxes often contain tools that look remarkably similar. Here is how to distinguish them to avoid buying or using the wrong tool:
An eyelet (hatome) is a metal ring with an open center hole designed for threading cords. Eyelet setters feature a tapered, cone-shaped tip with a stepped shoulder designed to roll the hollow shank outward. Rivets and snaps do not have the same open structure, so eyelet tools cannot be substituted for rivet or snap setters.
A hole punch (often called hatome-nuki in Japan) is a hollow, cylindrical cutting punch used solely to pierce holes in leather or fabric prior to installing hardware. It has no mechanism for crimping or flaring metal. Hole punches and setters work together as a two-step pair: you punch the hole first, then install the hardware using the setter.
Hand setters come in traditional striking rod styles (driven with a mallet) and press styles (using hand presses or setter pliers):
For beginners or hobbyists who install hardware occasionally, starting with affordable hand strike rods is the most practical choice.
When shopping online or browsing craft supply shops, the huge array of setters can be overwhelming. Follow these rules to pick the right tool the first time:
The golden rule is to buy setting tools labeled with the exact same standard as your hardware. Japanese hardware packages clearly state sizes like "For Small Kashime," "For Bane-Hook No. 1 (12 mm)," or "For Jumper Hook 7050 (Large)." Buy the tool that matches that description word-for-word. In metal hardware, a larger tool cannot substitute for a smaller one; mismatched sizes inevitably distort the metal.
If you purchase a striking rod alone, you will still need a base (anvil) to place underneath. For beginners, buying a starter set that includes basic setting rods along with a universal round anvil (banno-uchidai) with multiple concave sizes is ideal. A solid base ensures striking energy transfers cleanly into the metal.
Setting tools are forged from iron or steel. Low-quality tools often have rough plating that leaves metal shavings or black stains on your hardware when struck. Tools from established craft manufacturers and specialized leathercraft stores feature cleanly polished tips and rust-resistant finishes, keeping your hardware pristine.
Once you have your tools ready, follow these steps to achieve a clean, professional finish without warping your fittings:
Mark your placement accurately using an awl. Place your leather or fabric on a rubber cutting block, hold your hole punch perpendicular to the surface, and strike it firmly with a wooden mallet.
Make sure the hole diameter matches the post of your hardware (or is just a fraction of a millimeter larger). If the hole is too small, the material will bunch up; if it is too large, the hardware will sit loose and shift over time.
Insert the hardware post through the punched hole and inspect how far it protrudes on the other side. The ideal post extension is roughly 1.5 mm to 2.5 mm.
If the material is too thin and the post sticks out excessively, the post will bend sideways inside the cap when struck, leaving the fitting crooked. In this case, add a small scrap of leather as a spacer or switch to short-post hardware. Conversely, if less than 1 mm of post protrudes through thick material, the flared metal will not have enough bite and will pull out during use.
Place your hardware onto the setting anvil. Feel with your fingertips to confirm that the domed cap sits securely inside the matching concave recess on the anvil.
Next, place the tip of the setter rod onto the hardware. Holding the setter rod completely perpendicular (vertical) is the most critical technique. If the rod tilts even slightly, the cap will crush unevenly.
Strike the top of the setter using a wooden mallet or rubber mallet. Avoid using a metal hammer, as metal-on-metal impact will mushroom the head of your setter rod.
Do not attempt to crush the fastener in one single heavy blow. Instead, tap it lightly several times (ton-ton). The first light strike seats the post, and subsequent strikes expand it firmly. Check visually between taps to ensure the hardware stays centered. Once the gap between the material and the fitting is gone and the hardware does not spin freely by hand, installation is complete.
This happens if you use a flat setter intended for single-cap rivets on a double-cap rivet, use a setter cup larger than the cap, or strike too hard with a metal hammer. Always use a concave setter that matches the curve of the cap and tap gently with a wooden mallet.
A crooked setting means the setter was held at a slant or the hardware post was too long for the material. Keep your wrist locked and look straight down from above when striking. If your fabric is thin, reinforce the reverse side with iron-on interfacing or a leather scrap spacer to support the post.
This usually occurs when the female socket of a spring snap is struck too forcefully or with the wrong setter, deforming the delicate internal wire spring. Always use the proper concave socket setter rod and tap with controlled force.
An overlooked factor in setting hardware cleanly is what sits underneath your anvil. If you place a setting anvil directly onto an ordinary desk, the tabletop will bounce, dissipating the strike energy and preventing the hardware from flaring properly.
To support your setting tools, assemble this foundation:
Place the rubber board on your table, put the stone slab on top, and place your metal anvil on the stone. A rigid, shock-absorbing base ensures 100% of your mallet strike transfers directly into the hardware, making clean installation effortless.
If you are just beginning, there is no need to purchase every size right away. I recommend starting with two workhorse setups:
These two sets will cover the vast majority of small everyday projects: pouches, cardholders, key rings, and compact wallets. As your projects expand, you can pick up small rivet setters for delicate details or heavy-duty jumper hook setters for large tote bags.
Rivet and snap setters are essential tools for giving handcrafted pieces exceptional durability and clean lines. Remember the three core principles:
With the right tools and proper technique, your handmade goods will look polished and built to last. Give these setting techniques a try on your next build!
If you found this guide helpful, please share it with your fellow makers on social media. See you in the next article! This was Yassy from Crafters!


For example, if you are looking for articles about mizuhiki, try searching for "mizuhiki"; if you are interested in tools, try keywords like "nippers" or "pliers."
